Table of Contents
Advertisement
Quick Links
Use & Care Guide
Guía de uso y cuidado
English / Español
Model / Modelo: 2671532
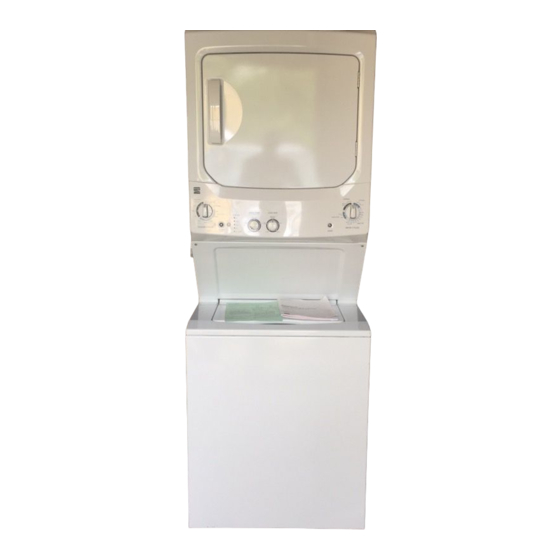
Gas Laundry Center
Centro de lavado a gas
P/N 134779000B (0807)
Sears Brands Management Corporation
Hoffman Estates, IL 60179 U.S.A.
www.kenmore.com
www.sears.com
Sears Canada Inc.
Toronto, Ontario, Canada M5B 2C3
www.sears.ca
233D1549P001 49-90423-0 08-11
TM
1
Advertisement
Table of Contents
Troubleshooting

Related Manuals for Kenmore 2671532


Summary of Contents for Kenmore 2671532
- Page 1 Use & Care Guide Guía de uso y cuidado English / Español Model / Modelo: 2671532 Gas Laundry Center Centro de lavado a gas P/N 134779000B (0807) Sears Brands Management Corporation Hoffman Estates, IL 60179 U.S.A. www.kenmore.com www.sears.com Sears Canada Inc.
-
Page 2: Table Of Contents
TABLE OF CONTENTS KENMORE APPLIANCE WARRANTY Kenmore Appliance Warranty ............ 2 PROTECTION AGREEMENTS ............3 Kenmore Limited Warranty Safety Instructions ................4 When installed, operated and maintained according to all supplied instructions, if this appliance fails due to a defect in... -
Page 3: Protection Agreements
Congratulations on making a smart purchase. Your new Once you purchase the Agreement, a simple phone call is all Kenmore® product is designed and manufactured for years that it takes for you to schedule service. You can call anytime of dependable operation. But like all products, it may require day or night, or schedule a service appointment online. -
Page 4: Safety Instructions
WASHER/DRYER SAFETY Your safety and the safety of others are very important. We have provided many important safety messages in this Use & Care Guide and your appliance. Always read and obey all safety messages. This is the safety alert symbol. This symbol alerts you to potential hazards that can kill or hurt you and others. - Page 5 IMPORTANT SAFETY INFORMATION READ ALL INSTRUCTIONS BEFORE USING. PROPER INSTALLATION WHEN USING YOUR APPLIANCE This appliance must be properly installed and located in ac- • Use this appliance only for its intended purpose as de- cordance with the Installation Instructions before it is used. scribed in this Use &...
- Page 6 • Garments labeled Dry Away from Heat or Do Not Tumble Dry (such as life jackets containing Kapok) must not be put WHEN NOT IN USE in your dryer. Do not dry fiberglass articles in your dryer. • Grasp the plug firmly when disconnecting this appliance to Skin irritation could result from the remaining particles that avoid damage to the cord while pulling.
-
Page 7: Control Panel Washer
ABOUT THE WASHER CONTROL PANEL Quick Start Guide Fabric Softner Detergent Liquid Bleach Step 1 Step 2 Step 3 Step 4 • Add detergent • Add clothes • Select load size and other • Close lid wash options • Add fabric softener (optional) •... - Page 8 STATUS lights START The STATUS lights show the stage the washer is in. When the Press START to begin the cycle. With the lid closed pressing selector knob is set to a new cycle, the STATUS lights will START again will PAUSE the cycle and STATUS lights will blink.
-
Page 9: Features Washer
ABOUT THE WASHER FEATURES 3. To clean the dispenser, soak both the dispenser cup and The Fabric Softener Dispenser the dispenser cover in the following solution: • 1 US gallon (3.8 liters) warm water • 1/4 cup (60 ml) heavy-duty liquid detergent •... -
Page 10: Loading And Using The Washer
LOADING AND USING THE WASHER Always follow fabric manufacturer’s care label when laundering. Sorting Wash Loads Loading the Washer Sort by color (whites, lights, colors), soil level, fabric type Load dry items loosely, no higher than the top row of holes in (sturdy cottons, easy care, delicates) and whether the fabric the washer basket. -
Page 11: Control Panel Dryer
ABOUT THE DRYER CONTROL PANEL Rinse & Spin Fluff Touch Up IMPORTANT: Clean the lint filter each time you use the dryer Fabric Care/Temperature Auto Cycle / Timed Cycle NORMAL For regular to heavy cottons. AUTO CYCLE For automatic sensored drying. The timer does not rotate during the cycle CASUAL For synthetics, blends, delicates... -
Page 12: Care And Cleaning Of The Dryer
CARE AND CLEANING OF THE DRYER The Exterior The Exhaust Duct Wipe or dust any spills or washing compounds with a damp Inspect and clean the exhaust ducting at least once a year to cloth. Dryer control panel and finishes may be damaged by prevent clogging. -
Page 13: Loading And Using The Dryer
LOADING AND USING THE DRYER Venting the Dryer For the best drying performance, the dryer needs to be prop- erly vented. The dryer will use more energy and run longer if it is not vented to the specifications below. Carefully follow the details on Exhausting in the Installation Instructions. -
Page 14: Troubleshooting Washer
BEFORE YOU CALL FOR SERVICE... Troubleshooting Tips Save time and money! Review the charts on the following pages. You may not need to call for service. Water Possible Causes What to do Too many suds Too much detergent Measure your detergent carefully. Use less soap if you have soft water, a smaller load or a lightly soiled load. - Page 15 Washer Operation Possible Causes What to do Washer won’t oper- Washer is unplugged Make sure cord is plugged securely into a working outlet. Water supply is turned off Turn both hot and cold faucets fully on. Controls are not set properly Check controls. Lid is open—safety feature Close lid and reset cycle, to the beginning if necessary.
- Page 16 Washer Performance Possible Causes What to do Pilling Result of normal wear on poly-cot- While this is not caused by the washer, you can slow the pilling ton blends and fuzzy fabrics process by washing garments inside out. Snags, holes, tears, Pins, snaps, hooks, sharp buttons, Fasten snaps, hooks, buttons and zippers.
-
Page 17: Troubleshooting Dryer
Dryer Problem Possible Causes What to do Dryer doesn’t start Dryer is unplugged Make sure the dryer plug is pushed completely into the outlet. Fuse is blown/circuit breaker is Check the house fuse/circuit breaker box and replace fuse or re- tripped set breaker. - Page 18 Dryer Problem Possible Causes What to do Clothes take too Improper sorting Separate heavy items from lightweight items (generally, a well- long to dry sorted washer load is a well-sorted dryer load). Large loads of heavy fabrics (like Large, heavy fabrics contain more moisture and take longer to beach towels) dry.
-
Page 19: Installation Instructions
INSTALLATION INSTRUCTIONS BEFORE YOU BEGIN Read these instructions completely and carefully. Exposure to these substances can be minimized further by prop- • IMPORTANT- Save these instructions for local inspector’s erly venting the dryer to the outdoors. use. • This appliance must be exhausted to the outdoors. •... -
Page 20: Installation Sequence
Installation requirements location Electrical requirements This appliance must be installed on firm flooring to minimize CAUTION: Before plugging in washer, read the following vibration during spin cycle. Concrete flooring is best, but electrical requirements. wood base is sufficient, provided floor support meets FHA CAUTION: For personal safety, do not use an extension cord standards.