Table of Contents
Advertisement
Quick Links
Advertisement
Table of Contents

Related Manuals for Unic AURA 2GR


Summary of Contents for Unic AURA 2GR
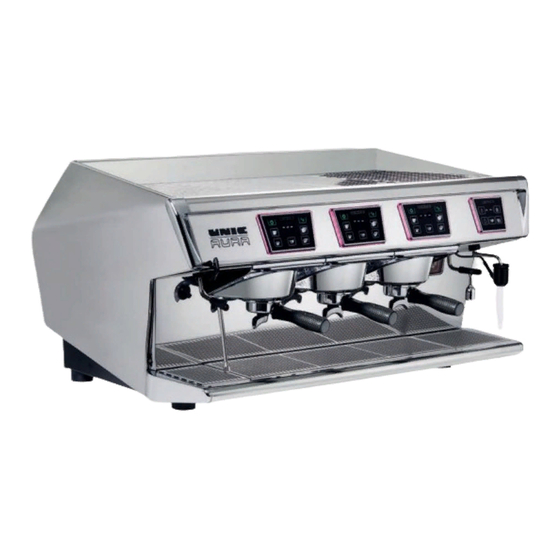
- Page 1 Thank you for choosing UNIC, the first French manufacturer of professional espresso machines since 1919 The manufacturer reserves the right to modify the appliance presented in this publication without notice. Read carefully the safety instructions before use. AU9060 03/2018 AU9061 07/2019...
-
Page 3: Table Of Contents
Table des matières ► Safety advice ............................5 1- INSTALLATION & MAINTENANCE ..................6 ► Preparing the machine ........................6 ♦ Unpacking the machine ............................ 6 ♦ Preparing the site and installing the machine ....................6 ♦ Fitting high feet (optional) ............................ 6 ►... - Page 4 2- USE & PROGRAMMING ......................22 ► Presentation of the various keyboards .................... 22 ♦ 4 doses keyboard ............................22 ♦ Dosamat keyboard ............................22 ♦ Hot water & steam keyboard .......................... 23 ♦S team ir keyboard ............................23 ♦ Key operation ..............................24 ♦...
-
Page 5: Safety Advice
►Safety advice This device is intended to be used only for its specific use. The manufacturer disclaims any liability for damage caused by abnormal use or abuse. Children 8 years of age or older and persons with reduced physical, mental or sensory abilities, or lack of experience and skill may use this device, if supervised by a qualified person, or they have received the instructions for use and security necessary to understand the risks involved. -
Page 6: 1- Installation & Maintenance
♦ Fitting high feet (optional) Reference UNIC feet NSF: NM-176 Reference UNIC M8 x 16 bolts: 50402 For fitting the aluminium feet, once the machine is installed in its location: Screw the 50402 bolts to the aluminium feet, tip the machine onto the front two feet to screw in the aluminium feet at the base of the rubber feet at the back, and then do the same operation for bolting the feet to the front. -
Page 7: Electrical Connection
►Electrical connection - None of the switches on the machine must be on. - Check that the values of the voltage, frequency and power shown on the technical information plate of the device match those of the mains.= ♦ Electrical connections Put the switch of the machine on position 0. -
Page 8: Starting Up
► Starting up ♦ Filling the boilers - Open the water shut-off tap. - Connect the mains electric plug. - Turn the power switch onto 1. Do not put on position 2 for as long as the boiler is not filled. ♦... -
Page 9: Adjusting The Pump Pressure
♦ Adjusting the pump pressure In infusion, the pressure must be 9 to 10 bar (0.9MPa et 1MPa) (gauge green scale). The pump is located on the right side of the machine and is adjusted by this same side. SCREW IN to INCREASE the pressure, UNSCREW to DECREASE the pressure, ♦... -
Page 10: Sensibility Of Keyboard
Go into the menu , there are 3 levels of setting, 0 (default) the most responsive, 2 the least responsive. ♦ Softener Two water softener suppliers are available at UNIC SA. BRITA ® BESTMAX ™ Test the water hardness of the network and refer to the technical documentation of the water softener used for optimum adjustment. -
Page 11: Removing The Grille
♦ Removing the grille To remove the grille: Unscrew the 2 pan-head screws and 1 allen key screw (2.5 mm Remove the cup heater glass key). panels from the machine Remove the side panels and cup Pull the grille upwards to get it out heaters. -
Page 12: Maintenance
A. Switch off the machine before any work on the electrical circuits. B. Cool the machine and make the pressures drop before any work on the hydraulic circuit. ♦ Specifications DIMENSIONS AURA 2GR AURA 3GR SETTINGS 118 to 120°C Width 79 cm / 31’’... -
Page 13: Chart Of Led Signals
♦ Chart of LED signals ♦ Dosamat display Normal operation Comments Touchpad Snap the filter holder on the group for Starting machine activate the coffee keys (Touch continu/stop ON) Coffee buttons active to switch dose. Ready (self mode) In This example, large dose shown because the last dose used, is large dose. -
Page 14: Cups Display
♦ 2 Cups Display Normal operation Comments Touchpad All Buttons active. Ready (touch continu/stop ON) Only button continu/stop not active. Ready (touch continu/stop OFF) Coffee buttons active to switch dose. During cycle (1 Small cup shown) And touch continu/stop active to stop cycle. Stop cycle by pushing button again or button Coffee dispensing continu/stop. -
Page 15: Steamair Display
♦ Steamair display Comments Touchpad team ir Box Continu/stop not active. Ready (touch continu/stop ON) We Can stop the cycle manually with small Small hot water cycle hot water & continu/stop buttons. (Security at 105 seconds) We Can stop the cycle manually with large Large hot water cycle hot water &... -
Page 16: Codes Error
♦ Codes Error LED signals Comments Touchpad Code error No dosage but you Can delivering a coffee Flow meter disconnected in self and manual mode. No dosage but you Can delivering a coffee Flow meter in short circuit in self and manual mode. No electrical problem, but no signal, Flow meter no signal propeller is blocked... - Page 17 Heating doesn’t works, Pressure sensor but you Can delivering a coffee disconnected Heating doesn’t works, Pressure sensor but you Can delivering a coffee short circuit Heating doesn’t works, Heating security but you Can delivering a coffee Only manual works. Coffee button not active. hall sensor dosamat Continu/stop button active.
-
Page 18: Procedure For Updating Software
♦ Procedure for updating software ♦ Copy the file into the USB key Use an USB key standard type A Format the key (right click > Format) (option) Copy the received file in the USB key Rename the file (right click > Rename) -
Page 19: Updating The Machine
Rename AMIRA-280.BIN by AMIRA.BIN The USB key is now ready to update the machine. ♦ Updating the machine WARNING: The operation must be performed by a qualified technician. Step 4 requires power to the machine with the covers off. 1. Turn the main power switch to position 0 2. -
Page 20: Wiring Diagrams
► Wiring diagrams Wiring diagram AURA 3GR 230V mono... - Page 21 Wiring diagram AURA 3GR 400V tri...
-
Page 22: 2- Use & Programming
2- USE & PROGRAMMING ► Presentation of the various keyboards ♦ 4 doses keyboard Settings key Cleaning key Display 1 large cup 2 large cups 1 small cup 2 small cups Continu/stop ♦ Dosamat keyboard Settings key Cleaning key Display Manual cycle Automatic cycle SELF... -
Page 23: Hot Water & Steam Keyboard
♦ Hot water & steam keyboard Display Hot water Steam dose small volume small volume Hot water Steam dose large volume large volume Continu/stop ♦ S team ir keyboard Display Hot water Steam dose small volume Hot water team large volume Continu/stop... -
Page 24: Key Operation
♦ Key operation Input key and validation Scroll button level 1 of levels 2, 3 & 4 Disabled key Disabled key key + key - Disabled key ♦ Setting default Coffee box Factory settings 1 small cup = 42 ml 1 large cup = 65 ml Independent on each group coffee doses... -
Page 25: Different Levels Of Menus
♦ Different levels of menus Level 1 Level 2 Level 3 Level 4 Dose adjustments no YES coffee doses no YES Setting Steam pressure 0.5 to 1.5 bar 0.05 to 0.15 MPa Setting 20 to 999 cycles Cleaning Setting 0 to 256 Lighting LED Setting 60 to 100°C / 140°F to 212°F... -
Page 26: Access To Parameter
♦ Access to parameter Double authentication to enter in setting : Nota: Possibility to block the programing by jumper on CPU on P1 jmuper 1st step : press 3 seconds on “prg key” 2nd step : press 3 seconds on “cleaning key”... -
Page 27: The Menu Tree
♦ The menu tree Coffee Pages 30 & 31 doses Press 3s Press 3s Press 1s Increases in steps of 0.1 Steam Press 1s pressure Pressure shows in Bar. Mini = 0.50, Maxi = 1.50. Decreases in steps of 0.1 Increases in steps of 1 Cleaning Press 1s... - Page 28 Increases in steps of 1 Press 3s lighting Press 3s Press 1s Decreases in steps of 1 Increases in steps of 1 Press 1s warmer Temperature display in degrees Celsius Mini = 60°C Maxi = 100°C Decreases in steps of 1 Chronometer Increases in steps of 1 Pre-...
- Page 29 Dosamat Increases in steps of 0.5 Press 3s Press 1s Decreases in steps of 0.5 Press 1s Continu/stop Increases in steps of 1 Rinçage Press 1s Barista Display in seconds Mini = 0s Maxi = 4s Decreases in steps of 1 Press 1s Water dosing...
- Page 30 Press 1s Steamair Press 1s Coins payment Increases in steps of 1 Press 1s Dirty Mini = 0 Maxi = 2 Decreases in steps of 1...
-
Page 31: Programming The Different Volumes Of Coffee
►PROGRAMMING THE DIFFERENT VOLUMES OF COFFEE ♦ Electronic box ♦ Use activates the corresponding flow delivery. An impulse on the key During cycle, the display shows the remaining time in seconds. To stop before the end of the delivery, press again the same key. Note: a safety stops the flow after 105 seconds for the water and after 180 seconds for the steam. -
Page 32: Doses Box
♦ 4 doses box Press 3 seconds on the key to enter in programming mode Menu appears, press on the key The sub-menu appears, press on the key (All keys blinking) The keys are programmable Example with the key Pack the ground coffee in the filter holder Snap the filter holder on the group , to start de coffee cycle (volume shown in millimeter during cycle) Press the key... -
Page 33: Option Team Ir
♦ Option team option allows, particularly when making cappuccino, to foam the milk very easily and team automatically: the supply of air mixed with steam brings milk to a programmed temperature 60° to 70° (140°F to 158°F) and foams it. The stop is done automatically when the temperature is reached which saves milk from boiling. -
Page 34: Cleaning
WARNING: The air must circulate freely around the machine. The ventilation openings on the rear of the machine and on top must not be obstructed. ♦ Reference of cleaning tools: UNIC Reference Puly caff: 92040 UNIC Reference support: RB0100 Note: for more information on cleaning products, refer to the manufacturer’s safety data sheet ♦... -
Page 35: Weekly
♦ Weekly ♦ Filter holder cup Clean the filter holder cups and filters (by taking the filter out of the cup) with washing powder. ♦ Basin Remove the basin - top of basin assembly, and clean each component in your sink. ♦... -
Page 36: Keyboards Cleaning
♦ Keyboards cleaning NEVER CLEAN KEYBOARDS WITH LIQUID WHEN THE MACHINE IS IN NORMAL OPERATION To clean keyboards, there is 2 process : process : 1. Enable the function «keyboards cleaning» press simultaneous on the keys & during 1.5 s on left keyboard (all boxes are inactive) 2. -
Page 37: List Of Color Led
►List of color LED n° 0 n° 61 n° 122 n° 183 n° 244 n° 1 n° 62 n° 123 n° 184 n° 245 n° 2 n° 63 n° 124 n° 185 n° 246 n° 3 n° 64 n° 125 n°...