Buffalo AirStation WLI-CB-G54HP Quick Setup Manual
Buffalo high power wireless notebook adapter quick setup guide
Hide thumbs
Also See for Buffalo AirStation WLI-CB-G54HP:
- User manual (42 pages) ,
- Technical specifications (2 pages) ,
- User manual (39 pages)
Advertisement
Quick Links
Download this manual
See also:
User Manual
Use this guide to quickly and easily install your High Power Wireless Notebook
Adapter. For advanced setup and configuration information, refer to the High
Power Wireless Notebook Adapter Manual, located on the Air Navigator CD.
Contents
•
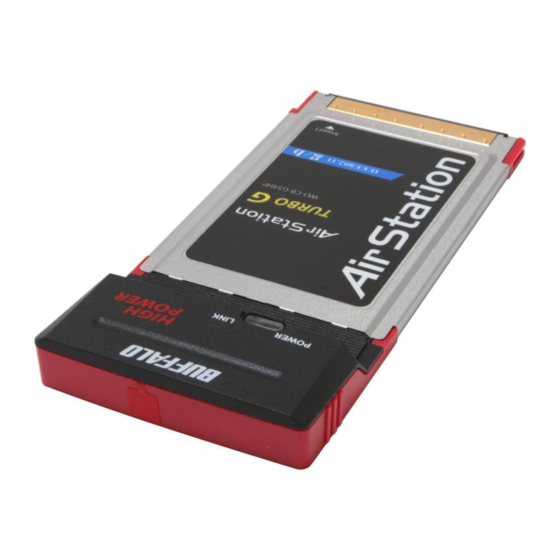
High Power Wireless Notebook Adapter (WLI-CB-G54HP)
•
Air Navigator CD
•
Quick Setup Guides
•
Warranty Card
If any items are missing, please contact the reseller from whom you purchased this
product.
System Requirements
•
PC with an available CardBus Slot.
•
Windows 98 SE, ME, 2000, XP, 2003
•
10 MB of available disk space
•
802.11b or 802.11g access point (Infrastructure Mode) OR a different computer
with an 802.11b or 802.11g wireless adapter (Ad-hoc Mode).
Quick Setup Guide
www.buffalotech.com
High Power Wireless
Notebook Adapter
WLI-CB-G54HP
v2.0
Advertisement

Related Manuals for Buffalo Buffalo AirStation WLI-CB-G54HP


Summary of Contents for Buffalo Buffalo AirStation WLI-CB-G54HP
-
Page 1: Quick Setup Guide
Use this guide to quickly and easily install your High Power Wireless Notebook Adapter. For advanced setup and configuration information, refer to the High Power Wireless Notebook Adapter Manual, located on the Air Navigator CD. Contents • High Power Wireless Notebook Adapter (WLI-CB-G54HP) •... - Page 2 Installing and Configuring the Wireless Adapter: Windows 98/ME/2000/XP Step 1: Installing the Wireless Notebook Adapter Drivers Caution: Complete this step before inserting the Wireless Notebook Adapter. • Insert the Air Navigator CD into the CD-ROM drive of the PC. The Air Navigator drive, your command should reflect that difference.
-
Page 3: Step 2: Installing The Wireless Notebook Adapter
Windows XP Installation & Configuration Step 2: Installing the Wireless Notebook Adapter and restart the notebook. Reinsert the Wireless Notebook Adapter once the notebook has rebooted. Then, the Found New Hardware Wizard will launch automatically. • Insert the Wireless Notebook Adapter, with the Buffalo logo facing up, into an available CardBus slot. - Page 4 • Select the driver you want to install. If multiple drivers are listed, select the most recent driver version. Click the Next button. • If a window opens, stating that your driver has not passed Windows Logo testing, click the Continue Anyway button.
- Page 5 Step 3: Configuring Wireless Zero Configuration Service Note: Skip to Page 9 if you are not using Windows XP or prefer not to use Windows XP's Wireless Zero Configuration Service. If you plan on using AOSS, then please skip to Page 9 and install the Client Manager software. Note: If the Wireless Zero Configuration Service is not functioning, select Start »...
- Page 6 Adapter and Buffalo's Client Manager, refer to the AirStation High Power Wireless Notebook Manual, located on the Air Navigator CD. Note: Buffalo Technology recommends that users of the Wireless Zero Configuration Service upgrade to the latest version freely available at http://www.microsoft.com...
- Page 7 Windows 98/ME/2000 Installation & Configuration Step 2: Installing the High Power Wireless Notebook Adapter book. Reinsert the Wireless Notebook Adapter once the notebook has rebooted. Then, the Found New Hardware Wizard will launch automatically. • Insert the Wireless Notebook Adapter, with the Buffalo logo facing up, into an available CardBus slot.
- Page 8 You have finished installing your Wireless Notebook Adapter. See the Installing Client Manager section to install Client Manager on your PC. • Verify that no Optional search locations are selected. Clear any checkboxes that are selected. Click the Next button to continue to the Driver Files Search Results page.
-
Page 9: Installing Client Manager
Installing Client Manager Note: Client Manager does not function properly if the Windows XP Wireless Zero Configuration Service is enabled. Installing Client Manager will automatically disable this service. • Insert the AirNavigator CD into the CDROM drive. The AirNavigator dialog box will open automatically. - Page 10 • Press I Agree to accept the license agreement and continue the installation process. • Choose the installation path or accept the default path and press the Next button to continue. Setup will begin copying files at this point. • Press the OK button to finish and close the installation program.
- Page 11 For detailed instructions on using Buffalo's Client Manager, please refer to the High Power Wireless Notebook Adapter Manual, located on the Air Navigator CD. To quickly connect to an available access point double click on its icon, select the survey screen, select the proper wireless network and press the 'Connect' button.
- Page 12 Equipment and the mutual recognition of their conformity (R&TTE). Copyright © 2004 Buffalo Technology, Inc. All Rights Reserved. - Buffalo Technology (USA) Inc., is part of Buffalo Inc. (JAPAN), the global manufacturers of IT peripherals, including memory, networking, and multimedia products, inside many of the world’s computers.