D-Link DWL-120 Manual
2.4ghz wireless usb adapter
Hide thumbs
Also See for DWL-120:
- User manual (80 pages) ,
- Manual (50 pages) ,
- Quick installation manual (13 pages)
Table of Contents
Advertisement
Quick Links
Download this manual
See also:
User Manual
Advertisement
Table of Contents

Related Manuals for D-Link DWL-120


Summary of Contents for D-Link DWL-120
- Page 1 D-LINK Air DWL-120 2.4GHz Wireless USB Adapter Manual Building Networks for People...
-
Page 2: Table Of Contents
Contents Package Contents ... 3 Introduction ... 4 Wireless Basics ... 6 Getting Started ... 10 Using the Configuration Utility ... 13 Networking Basics ... 19 Troubleshooting ... 32 Technical Specifications ... 35 Contacting Technical Support ... 36 Warranty and Registration ... 37... -
Page 3: Package Contents
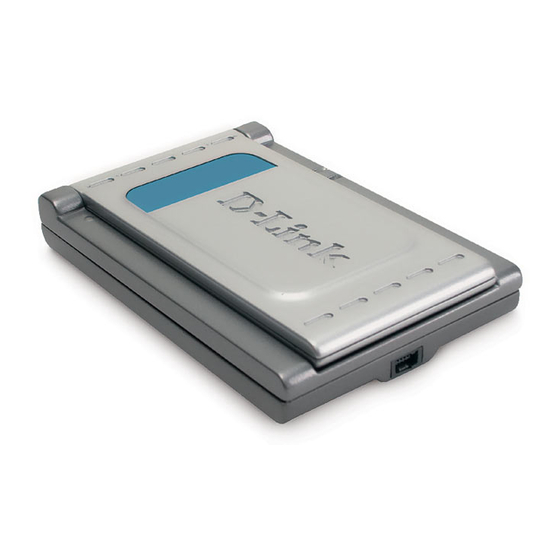
Package Contents D-Link Air DWL-120 2.4 GHz Wireless USB Adapter Manual, Warranty and Drivers on CD Quick Installation Guide If any of the above items are missing, please contact your reseller. A computer with an available USB port ... -
Page 4: Introduction
The D-Link Air DWL-120 2.4GHz Wireless USB Adapter is an ideal way to extend the reach and number of computers connected to your wireless network. After completing the steps outlined in the Quick Installation Guide (included in your package) you will have the ability to share information and resources, such as files and printers, and take full advantage of a “connected”... - Page 5 Features and Benefits Provides high-speed wireless connection at up to 11Mbps* Operates in the 2.4 to 2.4835 GHz Direct Sequence Spread Spectrum Supports wireless data encryption with 64-bit WEP and 128-bit WEP for more secure networking Supports infrastructure networks via an Access Point and peer-to- ...
-
Page 6: Wireless Basics
Strictly adhering to the IEEE standard, the D-Link wireless family of products will allow you to securely access the data you want, when and where you want it. You will be able to enjoy the freedom that wireless networking delivers. - Page 7 Wireless Basics (continued) People use wireless LAN technology for many different purposes: Mobility - Productivity increases when people have access to data in any location within the operating range of the WLAN. Management decisions based on real-time information can significantly improve worker efficiency. Low Implementation Costs –...
- Page 8 Wireless Basics (continued) The DWL-120 is compatible with the D-Link Air 802.11b family of products which include: 2.4GHz Wireless Cardbus Adapters used with laptop computers (DWL-650) 2.4GHz Wireless PCI cards used with desktop computers (DWL-520) Wireless Access Points (DWL-900AP) ...
-
Page 9: Installation Considerations
Installation Considerations The D-Link Air DWL-120 lets you access your network, using a wireless connection, from virtually anywhere. Keep in mind, however, that the number, thickness and location of walls, ceilings, or other objects that the wireless signals must pass through, may limit the range. Typical ranges vary depending on the types of materials and background RF (radio frequency) noise in your home or business. -
Page 10: Getting Started
Getting Started With its default settings, the DWL-120 will connect with other D-Link Air products, right out of the box. There are basically two modes of networking: Infrastructure – using an Access Point, such as the DWL-900AP+. Ad-Hoc – directly connecting to another computer, for peer-to-peer communication, using wireless network adapters on each computer, such as two or more DWL-120 wireless network USB adapters. - Page 11 Connect the Cable or DSL modem to your broadband router (see the Quick Installation Guide included with your router.) Install the D-Link Air DWL-120 wireless USB adapter into an available USB port on your desktop computer. (See the Quick Installation Guide included with the DWL-120.)
- Page 12 Getting Started Setting up a Wireless Ad Hoc Network Install the D-Link Air DWL-120 Wireless USB adapter into the desktop computer. See the Quick Installation Guide included with the product for installation instructions Install a wireless network adapter into the laptop computer. In the example above the DWL-650+ or DWL-650 may be installed into a laptop computer.
-
Page 13: Using The Configuration Utility
With its default settings, the DWL-120 will connect with other D-Link Air products, right out of the box. D-Link Air DWL-120 uses the Configuration Utility as the management software. The utility provides the user an easy interface to change any settings related to the wireless adapter. -
Page 14: Advanced Setting
Default Setting: Reverts the DWL-120 back to its factory default settings WEP Setting: Will allow you to configure the Encryption for your DWL-120. By default WEP is disabled. Advanced Setting: To configure advanced settings for Power, RTS and Fragmentation Threshold. -
Page 15: Fragmentation Threshold
Power Save: Select Enable or Disable; Disable is the default setting RTS Threshold: Request to Send threshold measures the value in bytes. Any packet size exceeding 2432 will trigger the DWL-120 to use RTS/CTS mechanism for transmission. - Page 16 Profiles New: Click New to create a new profile; a pop-up window will appear allowing you to configure the new profile. (See the example on the next page.) Remove: Highlight the profile you wish to remove; click Remove Edit: Highlight the profile you wish to edit; click Edit; a pop-up window will appear allowing you to edit the profile.
- Page 17 Using the Configuration Utility Network Type: Select Infrastructure or Ad-Hoc SSID: All devices on the network must share the same SSID to be able to communicate TxRate: Choose the data rate speed WEP: Choose Enable or Disable. Disable is the default setting. If you enable WEP, you must Enable WEP on all devices on the network, in order to communicate.
- Page 18 Using the Configuration Utility About tab displays the utility (firmware) version.
-
Page 19: Networking Basics
Networking Basics Using the Network Setup Wizard in Windows XP In this section you will learn how to establish a network at home or work, using Microsoft Windows XP. Note: Please refer to websites such as http://www.homenethelp.com http://www.microsoft.com/windows2000 for information about networking computers using Windows 2000, ME or 98SE. - Page 20 Networking Basics Please follow all the instructions in this window: Click Next In the following window, select the best description of your computer. If your computer connects to the internet through a gateway/router, select the second option as shown. Click Next...
- Page 21 Networking Basics Enter a Computer description and a Computer name (optional.) Click Next Enter a Workgroup name. All computers on your network should have the same Workgroup name. Click Next...
- Page 22 Networking Basics Please wait while the Network Setup Wizard applies the changes. When the changes are complete, click Next. Please wait while the Network Setup Wizard configures the computer. This may take a few minutes.
- Page 23 Networking Basics In the window below, select the option that fits your needs. In this example, Create a Network Setup Disk has been selected. You will run this disk on each of the computers on your network. Click Next. Insert a disk into the Floppy Disk Drive, in this case drive A.
- Page 24 Networking Basics Please read the information under Here’s how in the screen below. After you com- plete the Network Setup Wizard you will use the Network Setup Disk to run the Network Setup Wizard once on each of the computers on your network. To continue click Next.
- Page 25 Networking Basics Please read the information on this screen, then click Finish to complete the Network Setup Wizard. The new settings will take effect when you restart the computer. Click Yes to restart the computer. You have completed configuring this computer. Next, you will need to run the Network Setup Disk on all the other computers on your network.
-
Page 26: Naming Your Computer
Naming your Computer To name your computer, please follow these directions:In Windows XP: Click Start (in the lower left corner of the screen) Right-click on My Computer Select Properties and click Select the Computer Name Tab in the System Properties window. -
Page 27: Checking The Ip Address In Windows Xp
Networking Basics Naming your Computer In this window, enter the Computer name Select Workgroup and enter the name of the Workgroup All computers on your network must have the same Workgroup name. Click OK Checking the IP Address in Windows XP The wireless adapter-equipped computers in your network must be in the same IP Address range (see Getting Started in this manual for a definition of IP Address Range.) To check on the IP Address of the adapter, please do the following:... - Page 28 Checking the IP Address in Windows XP This window will appear. Click the Support Click Close Assigning a Static IP Address in Windows XP/2000 Note: Residential Gateways/Broadband Routers will automatically assign IP Addresses to the computers on the network, using DHCP (Dynamic Host Configuration Protocol) technology.
- Page 29 Assigning a Static IP Address in Windows XP/2000 Double-click on Network Connections Right-click on Local Area Connections Double-click on Properties...
-
Page 30: Assigning A Static Ip Address
IP address: e.g.,192.168.0.2 Subnet Mask: 255.255.255.0 Default Gateway: Enter the LAN IP address of the Wireless Router. (D-Link wireless routers have a LAN IP address of 192.168.0.1) Select Use the following DNS server address. Enter the LAN IP address of the Wireless Router. - Page 31 Checking the Wireless Connection by Pinging in Windows XP and 2000 Go to Start > Run > type cmd. A window similar to this one will appear. Type ping xxx.xxx.xxx. xxx, where xxx is the IP Address of the Wireless Router or Access Point.
-
Page 32: Troubleshooting
Troubleshooting This chapter provides solutions to problems that can occur during the installation and operation of the DWL-120. Read the following descriptions if you are having problems. (The examples below are illustrated in Windows XP. If you have another operating system, these solutions will still apply although the appearance on your computer screen may differ.) - Page 33 Look under Device Status to check that the device is working properly Click OK D-Link Air DWL-120 Wireless USB Adapter D-Link Air DWL-120 Wireless USB Adapter D-Link Air DWL-120 Wireless USB Adapter...
- Page 34 RF noise, like microwaves, Monitors, electric motors, etc. 4. Why can’t I get a wireless connection? If you have enabled Encryption on the DWL-120, you must also enable encryption on all wireless devices in the network in order to establish a wireless connection.
-
Page 35: Technical Specifications
Technical Specifications Standard IEEE 802.11b WIFI Certified Diagnostic LED Power Link Status Temperature Operating: 0ºC to 55ºC (32ºF to 131ºF) Storing: -20ºC to 75ºC (-4ºF to 167ºF) Humidity: 95%, non-condensing Antenna Type: Integrated ... -
Page 36: Contacting Technical Support
You can find the most recent software and user documentation on the D-Link website. D-Link provides free technical support for customers within the United States for the duration of the warranty period on this product. U.S. customers can contact D-Link technical support through our web site, or by phone. -
Page 37: Warranty And Registration
Warranty Period from the date of original retail purchase. If a material defect is incapable of correction, or if D-Link determines in its sole discretion that it is not practical to repair or replace the defective Hardware, the price paid by the original purchaser for the defective Hardware will be refunded by D-Link upon return to D-Link of the defective Hardware. - Page 38 FOR WARRANTY SERVICE) RESULTING FROM THE USE OF THE PRODUCT, RELATING TO WARRANTY SERVICE, OR ARISING OUT OF ANY BREACH OF THIS LIMITED WARRANTY, EVEN IF D-LINK HAS BEEN ADVISED OF THE POSSIBILITY OF SUCH DAMAGES. THE SOLE REMEDY FOR A BREACH OF THE FOREGOING LIMITED WARRANTY IS REPAIR, REPLACEMENT OR REFUND OF THE DEFECTIVE OR NON-CONFORMING PRODUCT.
- Page 39 Increase the separation between the equipment and the receiver Connect the equipment into an outlet on a circuit different from that to which the receiver is connected Consult the dealer or an experienced radio/TV technician for help Registration: Register your D-Link Air DWL-120 online at http://support.dlink.com/register...