Table of Contents
Advertisement
Available languages
Available languages
Use & Care Guide
Manual de Uso y Cuidado
English/Español
Kenmore
®
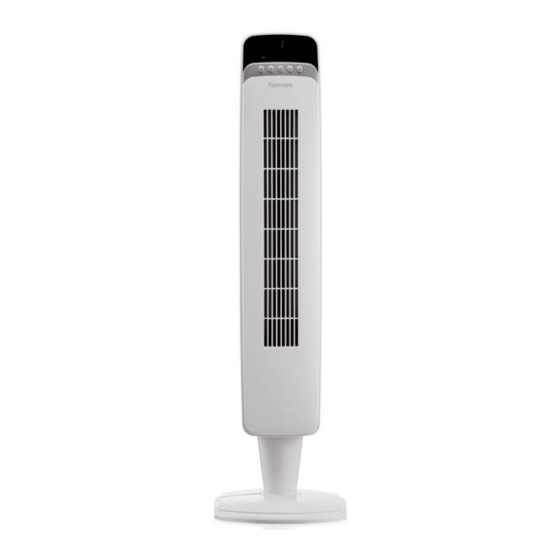
40" Digital Tower Fan
with Remote
3 Speeds, Remote Control, 8 Hour Timer
Ventilador de Torre Digital con
Control Remoto 40"
3 Velocidades, Control Remoto, Temporizador de 8 Horas
Model/Modelo: 405.35040510
Customer Assistance /Asistencia al Cliente
1-866-646-4332
Sears Brands Management Corporation
Hoffman Estates, IL 60179 U.S.A.
www.kenmore.com
www.sears.com
www.kmart.com
®
Advertisement
Table of Contents

Related Manuals for Kenmore 405.35040510


Summary of Contents for Kenmore 405.35040510
- Page 1 3 Speeds, Remote Control, 8 Hour Timer Ventilador de Torre Digital con Control Remoto 40" 3 Velocidades, Control Remoto, Temporizador de 8 Horas Model/Modelo: 405.35040510 Customer Assistance /Asistencia al Cliente 1-866-646-4332 Sears Brands Management Corporation Hoffman Estates, IL 60179 U.S.A.
-
Page 2: Rules For Safe Operation
READ AND SAVE THESE INSTRUCTIONS CAUTION Read and follow all instructions before operating fan. Do not use fan if any part are damaged or missing. WARNING 1. This appliance is not intended for use by young children or infirm persons without supervision. -
Page 3: Part Names
PART NAMES 1. Body 2. Pedestal 3. Base 4. Wing Screws 5. Power cord PARTS ASSEMBLY Fig. 1 A. Pedestal Assembly • Line up the front and rear pedestal assembly pieces and firmly snap together. Fig. 1. The rear piece has a screw hole opening near the top. -
Page 4: Control Panel
E. Securing the Cord to the Base Fig. 6 • With the fan still on its side, locate the cord holding bracket on the bottom of the base. • Gently pull any slack out of the power cord, and carefully work the cord into the bracket slots and out through the exit hole in the base. -
Page 5: Battery Installation
II. REMOTE CONTROL 1. Point the remote control at the control panel display screen and press the desired button. 2. The remote control will work at distances of up to 16 feet and from an angle of 30 degrees to the left or right of the fan control panel. -
Page 6: Maintenance Instructions
MAINTENANCE INSTRUCTIONS The fan requires little maintenance. Do not try to fix it by yourself. Refer it to qualified service personnel if service is needed,or call Customer Assistance at 866-646-4332. 1. Before cleaning fan, always unplug it from the electrical outlet. 2. - Page 7 LEA Y GUARDE ESTAS INSTRUCCIONES PRECAUCIÓN Lea y siga todas las instrucciones antes de operar el ventilador. No lo utilice si alguna pieza está dañada o pérdida. ADVERTENCIA 1. Este aparato no está diseñado para uso por los niños pequeños o personas enfermas sin supervisión.
- Page 8 (2) No opere ningún ventilador con un cable o enchufe dañado. Descarte el ventilador o llame al Servicio de Atención al Cliente al 1-866-646-4332 para hacer arreglos para la posible reparación. (3) No haga funcionar el cable bajo la alfombra. No cubra el cable con alfombrillas, tapetes, o cubiertas similares.
-
Page 9: Nombre De Piezas
NOMBRE DE PIEZAS 1. Cuerpo 2. Pedestal 3. Base 4. Tornillos de mariposas 5. Cable de alimentación MONTAJE DE PIEZAS A. Montaje del Pedestal Fig. 1 • Alinee las piezas frontal y trasera del conjunto de pedestal y encájelas juntas apretadamente. Figura 1. La pieza trasera cuenta con un orificio de tornillo ubicado en la parte superior. -
Page 10: Instrucciones De Operación
E. Sujeción del Cable a la Base Fig. 6 • Con el ventilador todavía en su lado, localice el cable sosteniendo el soporte en la parte inferior de la base. • Tire toda la holgura ligeramente fuera del cable de alimentación, y encaje el cable cuidadosamente en las ranuras del soporte y haga pasarlo a través del orificio de salida en la base. -
Page 11: Control Remoto
-disminuye la velocidad del ventilador. Cuando el ventilador está encendido, pulse este botón para disminuir la velocidad del ventilador. La pantalla de visualización mostrará la disminución de velocidad de 3 (Alta) a 2 (Media) a 1 (Baja). -disminuye las horas del temporizador. Tras pulsar la tecla de temporizador , pulse este botón para disminuir las horas del temporizador. - Page 12 INSTRUCCIONES DE PILAS - No tire las pilas al fuego; las pilas podrían explotarse o fugarse. - No mezcle las pilas viejas y nuevas. Reemplace todas las pilas al mismo tiempo. - No mezcle las pilas alcalinas, estándar, y recargables juntas en el compartimiento de pilas.
-
Page 13: Reemplazo Del Fusible
No utilice ningún detergente abrasivo o disolvente para evitar la rascadura superficial. No utilice ninguna gasolina o diluyente de pintura como limpiador. 4. No se permite que el agua o cualquier otro líquido entre en la carcasa del motor o piezas interiores. REEMPLAZO DEL FUSIBLE 1. - Page 14 WITH PROOF OF SALE, a defective appliance will be replaced free of charge. For warranty coverage details to obtain free replacement, visit the web page: www. kenmore. com/ warranty This warranty is void if this appliance is ever used for other than private household purposes.