Table of Contents
Advertisement
Quick Links
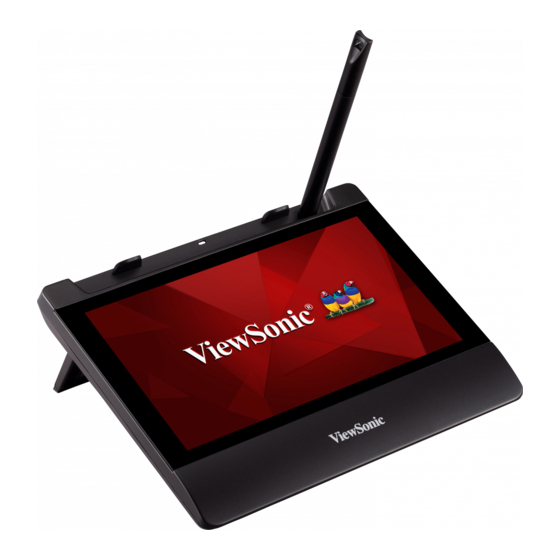
PD0711
Pen Display
User Guide
IMPORTANT: Please read this User Guide to obtain important information
on installing and using your product in a safe manner, as well as
registering your product for future service. Warranty information contained
in this User Guide will describe your limited coverage from ViewSonic
Corporation, which is also found on our web site at http://www.viewsonic.
com in English, or in specific languages using the Regional selection box
in the upper right corner of our website. "Antes de operar su equipo lea cu
idadosamente las instrucciones en este manual"
Model No. VS16287
Advertisement
Table of Contents

Related Manuals for ViewSonic PD0711


Summary of Contents for ViewSonic PD0711
- Page 1 Warranty information contained in this User Guide will describe your limited coverage from ViewSonic Corporation, which is also found on our web site at http://www.viewsonic.
- Page 2 ViewSonic is dedicated to exceeding the world’s expectations for technological evolution, innovation, and simplicity. At ViewSonic, we believe that our products have the potential to make a positive impact in the world, and we are confident that the ViewSonic product you have chosen will serve you well.
- Page 3 Important Safety Instructions 1. DO NOT place objects on top of the device, as objects may scratch the screen. 2. DO NOT expose the device to dirty or dusty environments. 3. DO NOT place the device on an uneven or unstable surface. 4.
-
Page 4: Declaration Of Rohs2 Compliance
Declaration of RoHS2 Compliance This product has been designed and manufactured in compliance with Directive 2011/65/EU of the European Parliament and the Council on restriction of the use of certain hazardous substances in electrical and electronic equipment (RoHS2 Directive) and is deemed to comply with the maximum concentration values issued by the European Technical Adaptation Committee (TAC) as shown below: Proposed Maximum... -
Page 5: Copyright Information
Copyright Information Copyright © ViewSonic ® Corporation, 2016. All rights reserved. ViewSonic and the three birds logo are registered trademarks of ViewSonic Corporation. Disclaimer: ViewSonic Corporation shall not be liable for technical or edito- rial errors or omissions contained herein; nor for incidental or consequential damages resulting from furnishing this material, or the performance or use of this product. -
Page 6: Table Of Contents
Contents Important Safety Instructions ........... 3 Declaration of RoHS2 Compliance .......... 4 Copyright Information .............. 5 Product Registration ..............5 1. Introduction ................1 1.1 Packing list ..................1 1.2 Product overview ................1 2. Installation and Setting ............3 2.1 Install driver .................. -
Page 7: Introduction
1. Introduction 1.1 Packing list After unpacking, please confirm whether the following contents are included: Electromagnetic pen display USB 2.0 cable Electromagnetic pen Pen tip x 3 Pen tip replacement tool Pen rope Quick Start Guide ... - Page 8 1.2.2 Rear view ⑤ Rubber foot pad (x4) ⑥ Stand (×2) ⑦ Nameplate sticker ⑧ Lock hole (×4) Note: please don't open the enclosure, which exists electric shock hazard. Please contact with the service personnel for any problem. 1.2.3 Interactive electromagnetic pen The interactive electromagnetic pen is made with electromagnetic resonance technology and does not require batteries.
-
Page 9: Installation And Setting
2. Installation and Setting 2.1 Install driver Connect the device and PC/NB with attached USB cable and plug in the power adapter, as shown below. - Page 10 [DisplayLink-xx.exe] at Windows. 2) Click [Agree] to start the installation. Then, the installer will be automatically completed. 2.1.2 Install handwriting driver 1) Open the driver disk, click and install [viewsonic-xx.exe] at Windows, Pen Display Manager will appear on the start page immediately.
- Page 11 2) Then, complete all steps as per the setting guide. 3) You must reboot the computer after the installation is completed.
-
Page 12: Set The Display Area
2.2 Set the display area Windows 7 and Windows 8 setting environments Press [Start] icon, open [Control panel], enter into [Display] and select [Adjust resolution], then the setting window will open. 1) When installing Pen Display device, you will see an additional [Multiple Displays] option. -
Page 13: Handwriting Area Correspondence
2.3 Handwriting area correspondence 1) Select the image on the bottom right hand corner to enter the setting. 2) Under “Pen” tab, adjust the tip feel from soft to firm. 3) Under the “Mapping” tab, set the “Orientation” to “Landscape” and “Select the Pen Display”... -
Page 14: More Touch Settings
2.4 More touch settings Windows 7/8 system is equipped with other touch functions. All settings in this chapter are based on this system. 2.4.1 Pen and touch Click [Start] icon → [Control panel] → [Pen and touch]. a. Pen option: when operating the items on the screen with electromagnetic pen, you can adjust the action of each electromagnetic pen and the setting of electromagnetic pen button. - Page 15 2.4.2 Tablet PC setting Click [Start] icon → [Control panel] → [Tablet PC setting] → click [Other] tab → click [Go to input panel setting]. These settings can be used to customize the following input panel functions of tablet PC. Handwriting: setting of stroke thickness and writing line spacing.
-
Page 16: Troubleshooting
3. Troubleshooting 3.1 Screen problems Problems Recommended actions No picture * Check whether USB cables at computer end and screen end are connected properly. * Try to use another USB interface of the computer. * Confirm whether the computer is under sleep mode. Press the keyboard or move the mouse, and reboot the system. -
Page 17: Problems Of Interactive Electromagnetic Pen
3.2 Problems of interactive electromagnetic pen Problems Recommended actions Electromagnetic * Try to confirm by mouse. If the mouse does not work, pen does not please reboot the computer or the application. work * Try to re-install the driver Pen tip is too * Please check whether the pen tip is too short. -
Page 18: Product Specification
4. Product Specification 4.1 Screen Display Model 7 inch TFT LCD, LED backlight Resolution 1024 x 600 Brightness 200 cd/m (Typ.) Angle of visibility Horizontal 120°, vertical 80° Response time Tr+Tf: 25ms Connector USB x1 User control Control key Power supply Input 5V DC Output... -
Page 19: Interactive Electromagnetic Pen
4.2 Interactive electromagnetic pen Model Electromagnetic touch Technique Full screen Action area Technical specifications Resolution 5080 LPI (lines per inch) Tracking velocity 250 PPS (dots per second) Pressure sensing Class 2048 Accuracy rating ± 0.5mm (center), ± 1mm (edges and corners) Readable height 5-15mm Electromagnetic pen... -
Page 20: Appendix
5. Appendix 5.1 Replace the pen tip If the pen tip is too short or exists the sharp edge, it can be replaced to the back-up tip. Please replace according to the following steps: 1) Pull out the pen tip from electromagnetic pen straightly with tool. 2) Insert new pen tip into the handwriting pen and then push in the pen tip untill the tip does not move. -
Page 21: Customer Support
(Mexico) la/soporte/servicio-tecnico Nexus Hightech Solutions, Cincinnati #40 Desp. 1 Col. De los Deportes Mexico D.F. Tel: 55) 6547-6454 55)6547-6484 Other places please refer to http://www.viewsonic.com/la/soporte/servicio-tecnico#mexico C= http://www.viewsonic.com/ Latin America (Peru) www.viewsonic.com/la/ soporte@viewsonic.com la/soporte/servicio-tecnico Macau www.hk.viewsonic.com T= 853 2870 0303 service@hk.viewsonic.com... -
Page 22: Limited Warranty
How long the warranty is effective: ViewSonic Pen Displays are warranted for 1 year for all parts and labor from the date of the first consumer purchase. Who the warranty protects: This warranty is valid only for the first consumer purchaser. - Page 23 Exclusion of damages: ViewSonic's liability is limited to the cost of repair or replacement of the product. ViewSonic shall not be liable for: 1. Damage to other property caused by any defects in the product, damages based upon inconvenience, loss of use of the product, loss of time, loss of...