
Related Manuals for AEG HG755820UM


Summary of Contents for AEG HG755820UM
- Page 1 User Manual HG755820UM Benutzerinformation Kochfeld Istruzioni per l’uso Piano cottura Manual de instrucciones Placa de cocción...
-
Page 2: Table Of Contents
9. TECHNICAL INFORMATION................. 14 FOR PERFECT RESULTS Thank you for choosing this AEG product. We have created it to give you impeccable performance for many years, with innovative technologies that help make life simpler features you might not find on ordinary appliances. Please spend a few minutes reading to get the very best from it. -
Page 3: Safety Information
ENGLISH SAFETY INFORMATION Before the installation and use of the appliance, carefully read the supplied instructions. The manufacturer is not responsible if an incorrect installation and use causes injuries and damages. Always keep the instructions with the appliance for future reference. -
Page 4: Safety Instructions
Do not store items on the cooking surfaces. • Metallic objects such as knives, forks, spoons and lids • should not be placed on the hob surface since they can get hot. Do not use a steam cleaner to clean the appliance. - Page 5 ENGLISH 2.2 Electrical Connection • Use only correct isolation devices: line protecting cut-outs, fuses (screw type WARNING! fuses removed from the holder), earth Risk of fire and electrical leakage trips and contactors. shock. • The electrical installation must have an isolation device which lets you •...
- Page 6 • Do not operate the appliance with moisture. Provide good ventilation in wet hands or when it has contact with the room where the appliance is water. installed. • Do not use the appliance as a work • Prolonged intensive use of the surface or as a storage surface.
-
Page 7: Product Description
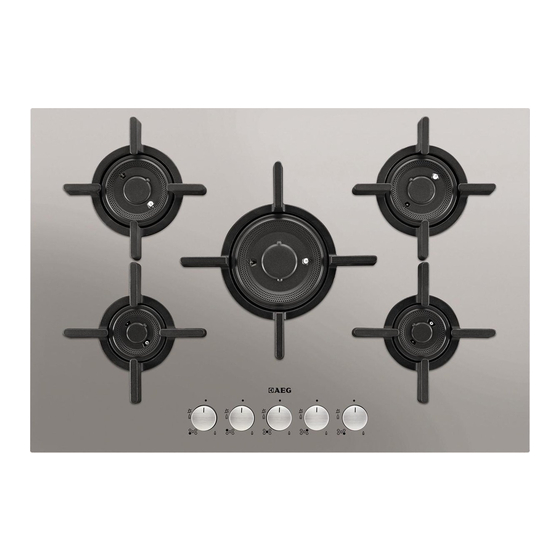
ENGLISH 3. PRODUCT DESCRIPTION 3.1 Cooking surface layout Semi-rapid burner Rapid burner Auxiliary burner Control knobs 3.2 Control knob Symbol Description Symbol Description ignition position / maxi- mum gas supply no gas supply / off posi- tion minimum gas supply 4. -
Page 8: Hints And Tips
If If the burner accidentally not, the gas supply is interrupted. goes out, turn the control 3. Adjust the flame after it is regular. knob to the off position and If after some tries the burner... -
Page 9: Care And Cleaning
ENGLISH 5.3 Diameters of cookware CAUTION! Make sure that the pots are Use cookware with placed centrally on the diameters applicable to the burners in order to get size of burners. maximum stability and to get lower gas consumption. Burner Diameter of 5.2 Energy saving cookware (mm) -
Page 10: Troubleshooting
Light stains: Wash the flame spreader with warm water and soap and dry it with a soft cloth. Medium stains: Use the dishwasher. Place the flame spreader on the bottom rack in a flat position, with the top side up. - Page 11 ENGLISH Problem Possible cause Remedy The fuse is released. Make sure that the fuse is the cause of the malfunction. If the fuse releases again and again, contact a quali- fied electrician. Flame spreader is placed in- Place the flame spreader correctly.
-
Page 12: Installation
8. INSTALLATION the necessary direction and tighten WARNING! everything. Refer to Safety chapters. 8.1 Before the installation Before you install the hob, write down the information bellow from the rating plate. The rating plate is on the bottom of the hob. - Page 13 ENGLISH multiple connection. Make sure that the ground connection agrees with the standards and regulations. • Do not let the power cable to heat up to a temperature higher than 90° C. To prevent contact between the cable and the appliance below the hob use the clamps which are on the side of the cabinet.
-
Page 14: Technical Information
Kitchen unit with door A) Removable panel B) Space for connections C) Drawer 30 mm Kitchen unit with oven The electrical connection of the hob and min 20 mm the oven must be installed separately for (max 150 mm) - Page 15 ENGLISH Electric supply: 230 V ~ 50 Hz Appliance category: Gas connection: G 1/2" Appliance class: 9.4 Gas burners for NATURAL GAS G20 20 mbar BURNER NORMAL POWER kW MINIMUM POWER INJECTOR MARK 1/100 mm Rapid 120B Semi-rapid 0,75 Auxiliary 10.
- Page 16 8. MONTAGE.......................28 9. TECHNISCHE DATEN.................... 30 FÜR PERFEKTE ERGEBNISSE Danke, dass Sie sich für dieses AEG-Produkt entschieden haben. Wir haben es geschaffen, damit Sie viele Jahre von seiner ausgezeichneten Leistung und den innovativen Technologien, die Ihnen das Leben erleichtern, profitieren können.
-
Page 17: Sicherheitsinformationen
DEUTSCH SICHERHEITSINFORMATIONEN Lesen Sie vor der Montage und dem Gebrauch des Geräts zuerst die Gebrauchsanleitung. Der Hersteller übernimmt keine Verantwortung für Verletzungen und Beschädigungen durch unsachgemäße Montage. Bewahren Sie die Gebrauchsanleitung griffbereit auf. 1.1 Sicherheit von Kindern und schutzbedürftigen Personen Das Gerät kann von Kindern ab 8 Jahren und •... -
Page 18: Sicherheitsanweisungen
Kochen mit Fett oder Öl auf einem unbeaufsichtigten • Kochfeld ist gefährlich und kann zu einem Brand führen. Versuchen Sie nicht einen Brand mit Wasser zu • löschen, sondern schalten Sie das Gerät aus und bedecken Sie die Flamme mit einem Deckel oder einer Feuerlöschdecke. - Page 19 DEUTSCH 2.1 Montage • Alle elektrischen Anschlüsse sind von einem geprüften Elektriker WARNUNG! vorzunehmen. Nur eine qualifizierte • Das Gerät muss geerdet sein. Fachkraft darf den • Vor der Durchführung jeglicher elektrischen Anschluss des Arbeiten muss das Gerät von der Geräts vornehmen.
- Page 20 • Falls die Steckdose lose ist, schließen Verpackungsmaterial, die Aufkleber Sie den Netzstecker nicht an. und Schutzfolie (falls vorhanden). • Ziehen Sie nicht am Netzkabel, wenn • Das Gerät ist für die Verwendung im Sie das Gerät von der Haushalt vorgesehen.
- Page 21 DEUTSCH Oberfläche könnte beschädigt • Schalten Sie das Gerät vor dem werden. Reinigen aus und lassen Sie es • Schalten Sie die Kochzonen niemals abkühlen. ein, wenn sich kein Kochgeschirr • Trennen Sie das Gerät vor darauf befindet, oder wenn das Wartungsarbeiten von der Kochgeschirr leer ist.
-
Page 22: Gerätebeschreibung
3. GERÄTEBESCHREIBUNG 3.1 Kochfeldanordnung Normalbrenner Starkbrenner Hilfsbrenner Einstellknöpfe 3.2 Einstellknopf Symbol Beschreibung Symbol Beschreibung Zündstellung / maximale Gaszufuhr Keine Gaszufuhr / ausge- schaltet minimale Gaszufuhr 4. TÄGLICHER GEBRAUCH C) Thermoelement WARNUNG! Siehe Kapitel 4.2 Zünden des Brenners Sicherheitshinweise. Brenner stets vor dem 4.1 Brennerübersicht... - Page 23 DEUTSCH WARNUNG! ACHTUNG! Seien Sie bei der Wenn kein Strom zur Verwendung von offenem Verfügung steht, können Sie Feuer in der Küche den Brenner auch ohne besonders vorsichtig. Der Strom zünden. Bringen Sie Hersteller übernimmt bei eine Flamme in die Nähe Missachtung der des Brenners, drehen Sie Sicherheitsbestimmungen...
-
Page 24: Tipps Und Hinweise
5. TIPPS UND HINWEISE WARNUNG! ACHTUNG! Siehe Kapitel Stellen Sie zur Reduzierung Sicherheitshinweise. des Gasverbrauchs und im Interesse einer größeren Stabilität die Töpfe mittig 5.1 Kochgeschirr auf die Brenner. ACHTUNG! 5.2 Energie sparen Verwenden Sie kein Kochgeschirr aus Gusseisen, •... - Page 25 DEUTSCH • Verwenden Sie einen Spezialreiniger zur Reinigung der Kochfeldoberfläche. • Reinigen Sie Edelstahlteile mit Wasser und wischen Sie sie mit einem weichen Tuch trocken. 6.2 Topfträger Die Topfträger sind nicht spülmaschinenfest. Sie müssen von Hand gereinigt werden. 1. Entfernen Sie die Topfträger, um die Reinigung des Kochfelds zu erleichtern.
-
Page 26: Fehlersuche
6.5 Reinigen der Geschirrspüler. Sind immer noch Flecken zu sehen, reinigen Sie die Oberseite des Flammenverteiler Flammenverteilers mit einem Grillreiniger und dann erneut im Die Flammenverteiler Geschirrspüler. können Sie im Geschirrspüler reinigen. Verwenden Sie zur Reinigung der Löcher im Flammenverteiler einen Zahnstocher. - Page 27 DEUTSCH Problem Mögliche Ursache Abhilfe Die Flamme erlischt gleich Das Thermoelement ist nicht Halten Sie den Knopf nach nach der Zündung wieder. ausreichend erwärmt. dem Entzünden etwa 10 Se- kunden lang gedrückt. Der Flammenring ist un- Die Öffnungen des Flam- Vergewissern Sie sich, dass gleichmäßig.
-
Page 28: Montage
8. MONTAGE Entspricht der gelieferte Druck nicht dem WARNUNG! angegebenen Wert, muss ein geeigneter Siehe Kapitel Druckregler gemäß der Norm UNI EN 88 Sicherheitshinweise. installiert werden. Das verstellbare Anschlussstück wird an dem 8.1 Vor der Montage Gasanschluss mit einer G 1/2"... - Page 29 DEUTSCH 8.5 Montage auf dem Typenschild angegebene Gesamtstromaufnahme ausgelegt ist. Achten Sie darauf, den Stecker in eine passende Steckdose zu stecken. • Schließen Sie das Gerät nur an eine ordnungsgemäß installierte min. min. 650 mm 150 mm Schutzkontaktsteckdose an. min. 55 mm •...
-
Page 30: Technische Daten
8.7 Einbaumöglichkeiten A) Entfernbare Platte B) Raum für Anschlüsse Die unter dem Kochfeld eingebaute Platte muss sich leicht entfernen lassen Unterbaumöbel mit Schublade und einen einfachen Zugang ermöglichen, falls eine Reparatur 30 mm erforderlich wird. Die Brennerflamme kann min 20 mm... - Page 31 DEUTSCH Netzanschluss: 230 V ~, 50 Hz Gerätekategorie: Gasanschluss: G 1/2" Geräteklasse: 9.4 Gasbrenner für ERDGAS G20 20 mbar NORMALLEISTUNG MINDESTLEISTUNG INJEKTORMARKE 1/100 mm Starkbrenner 120B Normalbrenner 0,75 Hilfsbrenner 10. UMWELTTIPPS Recyceln Sie Materialien mit dem Symbol Geräte mit diesem Symbol nicht mit dem Hausmüll.
- Page 32 9. DATI TECNICI......................46 PER RISULTATI PERFETTI Grazie per aver scelto di acquistare questo prodotto AEG. Lo abbiamo creato per fornirvi prestazioni impeccabili per molti anni, grazie a tecnologie innovative che vi semplificheranno la vita - funzioni che non troverete sulle normali apparecchiature.
-
Page 33: Informazioni Per La Sicurezza
ITALIANO INFORMAZIONI PER LA SICUREZZA Leggere attentamente le istruzioni fornite prima di installare e utilizzare l'apparecchiatura. Il produttore non è responsabile se un'installazione ed un uso non corretto dell'apparecchiatura provocano lesioni e danni. Tenere sempre le istruzioni a portata di mano come riferimento futuro. -
Page 34: Istruzioni Di Sicurezza
Non utilizzare un timer esterno o un sistema di • controllo remoto distinto per mettere in funzione l'apparecchiatura. Non lasciare mai il piano di cottura incustodito • durante la preparazione di cibi in quanto olio e grassi potrebbero provocare un incendio. - Page 35 ITALIANO 2.1 Installazione 2.2 Collegamento elettrico ATTENZIONE! ATTENZIONE! L’installazione Rischio di incendio e scossa dell'apparecchiatura deve elettrica. essere eseguita da • Tutti i collegamenti elettrici devono personale qualificato. essere realizzati da un elettricista Prima di procedere con qualificato. l’installazione, verificare che •...
- Page 36 • Nel caso in cui la spina di corrente sia • Rimuovere tutti i materiali di allentata, non collegarla alla presa. imballaggio, le etichette e la pellicola • Non tirare il cavo di alimentazione per protettiva (ove presente) prima del scollegare l’apparecchiatura.
- Page 37 ITALIANO • Fare attenzione a non lasciar cadere potrebbero formare delle macchie oggetti o pentole opache. sull'apparecchiatura. La superficie si 2.5 Pulizia e cura potrebbe danneggiare. • Non mettere in funzione le zone di • Pulire regolarmente l'apparecchiatura cottura in assenza di pentole o con per evitare il deterioramento dei pentole vuote.
-
Page 38: Descrizione Del Prodotto
3. DESCRIZIONE DEL PRODOTTO 3.1 Disposizione della superficie di cottura Bruciatore semirapido Bruciatore rapido Bruciatore ausiliario Manopole di regolazione 3.2 Manopola di regolazione Simbolo Descrizione Simbolo Descrizione alimentazione minima del manca l’alimentazione del gas/posizione di spento posizione di accensione/... -
Page 39: Consigli E Suggerimenti Utili
ITALIANO 4.2 Accensione del bruciatore AVVERTENZA! In assenza di elettricità è Accendere sempre il possibile accendere il bruciatore prima di bruciatore senza utilizzare il posizionare una pentola. dispositivo elettrico; in tal caso sarà sufficiente ATTENZIONE! avvicinarsi al bruciatore con Non accendere il bruciatore una fiamma, premere verso il se è... -
Page 40: Pulizia E Cura
5.1 Pentole AVVERTENZA! Assicurarsi che le pentole AVVERTENZA! siano ben centrate sui Non usare pentole in ghisa, bruciatori per ottenere la teglie in terracotta, grill o massima stabilità e per un piastre tostapane. L’acciaio consumo ridotto di gas. inox può brunire se sottoposto ad eccessivo 5.2 Risparmio energetico... - Page 41 ITALIANO asciugare i supporti pentole a mano. Se necessario, rimuovere le macchie più ostinate servendosi di un apposito prodotto in pasta. 3. Dopo aver pulito i supporti pentole, assicurarsi che siano riposizionati correttamente. 4. Per fare in modo che i bruciatori funzionino correttamente, verificare che le braccia dei supporti delle pentole si trovino al centro del...
-
Page 42: Risoluzione Dei Problemi
Macchie difficili: elettrodo di metallo. Tenere questi Pulire lo spartifiamma con acqua calda componenti ben puliti per evitare saponata, quindi lavarlo in lavastoviglie. difficoltà di accensione e controllare che Se al termine dell'operazione sono i fori spartifiamma non siano ostruiti. -
Page 43: Installazione
ITALIANO 7.3 Etichette fornite con il rivenditore potrà essere effettuato a pagamento anche durante il periodo di sacchetto degli accessori garanzia. Le istruzioni relative al Centro di Assistenza e alle condizioni di garanzia Attaccare le etichette adesive come sono contenute nel libretto della indicato di seguito: garanzia. - Page 44 • L'apparecchiatura è provvista di cavo Ulteriore attenzione è richiesta qualora al di collegamento alla rete. Deve piano di cottura fosse abbinato il forno.
- Page 45 ITALIANO 8.5 Incasso 8.7 Possibilità di inserimento Il pannello installato sotto il piano di cottura deve essere facilmente rimovibile e altrettanto facilmente deve consentire l'accesso in caso di interventi min. min. 650 mm 150 mm dell'assistenza tecnica. min. 55 mm La fiamma del bruciatore 30 mm potrebbe spegnersi in...
-
Page 46: Dati Tecnici
9. DATI TECNICI 9.1 Dimensioni del piano di cottura Larghezza 745 mm Profondità 515 mm 9.2 Diametri bypass BRUCIATORE Ø BYPASS 1/100 mm Rapido... - Page 47 9. INFORMACIÓN TÉCNICA..................61 PARA OBTENER RESULTADOS PERFECTOS Gracias por escoger este producto AEG. Este artículo ha sido creado para ofrecer un rendimiento impecable durante muchos años, con innovadoras tecnologías que facilitarán su vida y prestaciones que probablemente no encuentre en electrodomésticos corrientes.
-
Page 48: Información Sobre Seguridad
INFORMACIÓN SOBRE SEGURIDAD Antes de instalar y utilizar el aparato, lea atentamente las instrucciones facilitadas. El fabricante no se hace responsable de los daños y lesiones causados por una instalación y uso incorrectos. Guarde siempre las instrucciones junto con el aparato para futuras consultas. -
Page 49: Instrucciones De Seguridad
ESPAÑOL Cocinar con grasa o aceite sin estar presente puede • resultar peligroso, ya que podría ocasionarse un incendio. Nunca intente apagar un fuego con agua; apague el • aparato y cubra la llama con una tapa o una manta ignífuga. - Page 50 2.1 Instalación • El aparato debe conectarse a tierra. • Antes de efectuar cualquier tipo de ADVERTENCIA! operación, compruebe que el aparato Solo un electricista esté desenchufado de la corriente cualificado puede instalar eléctrica. este aparato. • Asegúrese de que las Antes de realizar la especificaciones eléctricas de la placa...
- Page 51 ESPAÑOL protección contra los cortocircuitos, • Apague las zonas de cocción después fusibles (tipo tornillo que puedan de cada uso. retirarse del soporte), dispositivos de • No coloque cubiertos ni tapaderas fuga a tierra y contactores. sobre las zonas de cocción. Pueden •...
-
Page 52: Descripción Del Producto
• Asegúrese de que los utensilios de • Apague el aparato y déjelo enfriar cocina están bien centrados sobre los antes de limpiarlo. quemadores. • Desconecte el aparato de la red • Asegúrese de que la llama no se eléctrica antes de realizar el... -
Page 53: Uso Diario
ESPAÑOL 3.2 Mando Símbolo Descripción Símbolo Descripción Posición de encendido / suministro de gas máximo Sin suministro de gas / posición de apagado suministro mínimo de gas 4. USO DIARIO ADVERTENCIA! ADVERTENCIA! Consulte los capítulos sobre Tenga mucho cuidado seguridad. cuando utilice el fuego destapado en el entorno de la cocina. -
Page 54: Consejos
PRECAUCIÓN! Cuando se enciende la Si no hay suministro corriente, tras la instalación eléctrico podrá encender el o después de un corte en el quemador sin necesidad del suministro eléctrico, suele dispositivo eléctrico; en este ser normal que el generador... -
Page 55: Mantenimiento Y Limpieza
ESPAÑOL • Cuando el líquido comience a hervir, reduzca la llama de tal forma que el Quemador Diámetro de líquido siga cociendo. los recipientes (mm) 5.3 Diámetro de los utensilios de cocina Rápido 180 - 260 Semi rápido 140 - 220 Utilice utensilios de cocina con diámetros adecuados Auxiliar... -
Page 56: Solución De Problemas
Manchas leves: Lave el difusor de llama con agua templada y jabón y seque con un paño suave. Manchas medias: Use el lavavajillas. Coloque el difusor de llama en el soporte inferior en posición plana, con la parte superior hacia arriba. - Page 57 ESPAÑOL 7.1 Qué hacer si... Problema Posible causa Solución No hay chispa cuando se in- La placa no está conectada a Compruebe si la placa se ha tenta activar el generador de un suministro eléctrico o es- conectado correctamente a chispas.
-
Page 58: Instalación
7.3 Etiquetas incluidas en la bolsa de accesorios Pegue las etiquetas adhesivas como se muestra a continuación: MOD. MOD. MOD. TYPE PROD.NO. IP20 PROD.NO. PROD.NO. SER.NO. 0049 SER.NO SER.NO 03 IT DATA DATA MADE IN ITALY A) Péguela en la etiqueta de garantía y C) Péguela en el manual de... - Page 59 ESPAÑOL móviles ni estén retorcidos. Preste • Este aparato se suministra con un también atención cuando la placa se cable de alimentación. Debe estar instale junto con un horno. equipado con un enchufe adecuado capaz de soportar la carga indicada Asegúrese de que la presión en la placa de características.
- Page 60 8.5 Empotrado 8.7 Posibilidades de inserción El panel instalado debajo de la placa debe poder retirarse fácilmente y permitir el acceso en caso de que sea necesario realizar una intervención de min. min. 650 mm 150 mm asistencia técnica.
-
Page 61: Información Técnica
ESPAÑOL garantizar la seguridad y poder retirar fácilmente el horno de la unidad. 9. INFORMACIÓN TÉCNICA 9.1 Dimensiones de la placa de cocción Ancho 745 mm Fondo 515 mm 9.2 Diámetros de derivación QUEMADOR Ø DERIVACIÓN 1/100 mm Rápido Semi rápido Auxiliar 9.3 Otros datos técnicos POTENCIA TOTAL:... - Page 62 www.aeg.com...
- Page 63 ESPAÑOL...
- Page 64 www.aeg.com/shop...