Advertisement
Quick Links
Advertisement

Related Manuals for ViewSonic PJ-PEN-003


Summary of Contents for ViewSonic PJ-PEN-003
- Page 1 PJ-PEN-003 IR Interactive Module User Guide Model No. VS15219...
- Page 2 Microsoft, Windows, and the Windows logo are registered trademarks of Microsoft Corporation in the United States and other countries. ViewSonic, the three birds logo, OnView, ViewMatch, and ViewMeter are registered trademarks of ViewSonic Corporation. Disclaimer: ViewSonic Corporation shall not be liable for technical or editorial errors or omissions contained herein;...
- Page 3 ViewSonic's website to register your product online. The ViewSonic CD also provides an opportunity for you to print the product registration form. Upon completion, please mail or fax to a respective ViewSonic office.
-
Page 4: Table Of Contents
Table of contents Optical touch control projector packing list ..........1 Accessories ....................2 Install in Windows OS................. 3 Install in Mac OS ..................22 Install in Linux OS..................30 Troubleshooting ..................32... -
Page 5: Optical Touch Control Projector Packing List
Optical touch control projector packing list Accessory check list Please check this list against accessories included with your optical touch control projector. Please call the dealer where you purchased the product for any missing item. 1. Light pen 2. IR Interactive Module 3. -
Page 6: Accessories
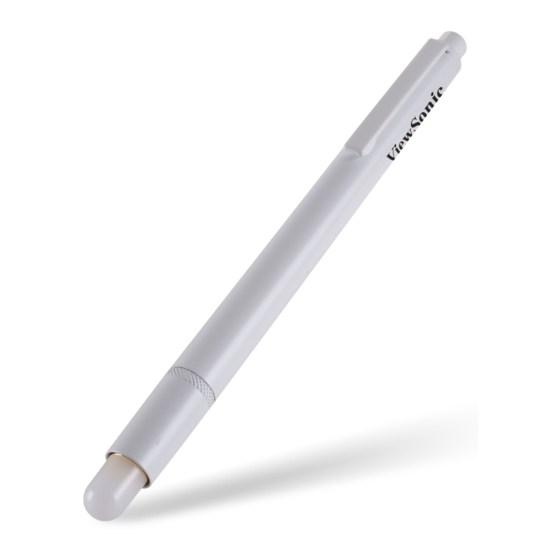
Accessories Keys and buttons for the light pen Touch control pen tip Before using the light pen Make sure it is powered on. How to use (your light pen)? Press the touch control pen tip to the screen, signals transmitted from the tip to validate locations with sensors in projector.The touch control pen tip lights up when sending signals. -
Page 7: Install In Windows Os
Install in Windows OS The LightPen software features an optical touch control function 1. System requirements For normal optical touch control operation, please make sure the following system requirements are met. Install the LightPen software System requirements Operating Microsoft Windows XP(SP2)(32bit)/ system Vista(32bit)/Windows 7 (32bit/64bit) Intel®... - Page 8 Install in Windows OS 2. Software installation 2.1 Driver installation <Install from the USB device> A CD drive is created by connecting the interaction module to a computer through a USB cable (see Figure 1). Enter the windows\ Setup.exe folder of the CD drive to install SPDriver. You may execute the launcher.exe program to start the SPDriver directly.
- Page 9 Install in Windows OS - SPDriver Step 4: (1) Click SPDriver and a pop-up window as shown below will display.Click Next to continue. (2) Select the destination folder for installation (a default folder is provided). Click Next to continue. (3) Please wait until the installation process is completed successfully.
- Page 10 Install in Windows OS - ViewDrawII 2.2 Install the ViewDrawII software Step 1: Insert the Owner's Manual CD into your CD drive. Step 2: Enter the "LightPen Software for Windows" folder found on your CD. Step 3: Double click the Setup.exe file name and a pop-up window as shown below will display.
- Page 11 Install in Windows OS - ViewDrawII (2) Select the destination folder for installation (a default folder is provided). Click Next to continue. (3) Click Install after validating the installation data, continue the installation process. (4) Please wait until the installation process is completed successfully.
- Page 12 Install in Windows OS - ViewDrawII 3. Initialize the optical touch control function 3.1 Once the SPDriver is installed, run it by steps Start/All Programs/ LightPen/SPDriver/SPDriver, then connect your projector and a PC with a USB cable. Your system may look like the Figure shown below. (Windows 7/VISTA) (Win XP) 3.2 Click the...
- Page 13 Install in Windows OS - ViewDrawII (Windows 7) * The Microsoft Windows 7 OS support multi-point touch control. When using your projector with a PC running Microsoft Windows 7 OS, you may select to use the default Mouse mode or the Multi-point Touch Control mode. * Select "About"...
- Page 14 Install in Windows OS - ViewDrawII (2) Auto calibration You may select Auto Calibration to calibrate your product as prompted by the screens shown in Figure 3. DO NOT block images shown in the calibration screen while auto calibration is running. Figure 3 Figure 4 3.4 Calibration completed successfully.
- Page 15 Install in Windows OS - ViewDrawII 3.6 How to execute the driver again You may execute the driver again by running the steps "Start/All Programs/LightPen/SPDriver". 4. Toolbar 4.1 ViewDrawII software toolbar After the ViewDrawII program is installed and "Start/All Programs/LightPen/ViewDrawII" executed, a toolbar will display on the right hand side of your screen (see figure).
- Page 16 Toolbar - ViewDrawII 4.2 Main functions Icons Names Descriptions Mouse Mouse functions. Red brush pen Red brush pen. Green brush pen Green brush pen. Blue brush pen Blue brush pen. Mark pen Translucent brush pen. To draw circles, rectangles, isosceles Drawing tools triangles, and lines.
- Page 17 Install in Windows OS - ViewDrawII 4.3 Sub-functions Drawing tools Click and a popup sub-menu from the main menu is shown as below. Click to select the desired drawing tool for hand drawing. Dual pen tools Click and a popup sub-menu from the main menu is shown as below.
- Page 18 Install in Windows OS - ViewDrawII (2.1) Full Screen Dual Pens Both parties make drawings with the same tool in full screen mode. Divided Screen Dual Pen Both parties make drawings with the same or different tools in equally divided screen mode.
- Page 19 Install in Windows OS - ViewDrawII (2.2) Toolbar Icons Names Descriptions Red brush pen Red brush pen. Green brush pen Green brush pen. Blue brush pen Blue brush pen. White brush pen White brush pen. Thin circular Thin brush pen. stroke Thick circular Thick brush pen.
- Page 20 Install in Windows OS - ViewDrawII Whiteboard mode Click , the screen will change to whiteboard background the two functions on the tool bar would change to Import Background and Import Whiteboard. i. Click and the selection window will display for you to import desired pictures as background.
- Page 21 Install in Windows OS - ViewDrawII Editing tools Click and a popup sub-menu from the main menu is shown as below. Click to select the desired edit function. Icons Descriptions Print current screen. Undo last action. Cancel undoing last action. Simulate spotlight effects.
- Page 22 Install in Windows OS - ViewDrawII 4.5 Change toolbar direction Point the light pen at any place under the projection image and press the pen tip to switch vertical toolbar into horizontal one. Point the light pen to the left or right of the projection image and press the pen tip to switch horizontal toolbar into vertical one.
- Page 23 Install in Windows OS - ViewDrawII 4.6 Change toolbar position Point the light pen to the left or right away from the screen and press the pen tip to change toolbar location for vertical toolbar. Press again to display or hide the toolbar. Point the light pen to the bottom away from the screen and press the pen tip to display or hide the toolbar for horizontal toolbar.
- Page 24 Install in Windows OS - ViewDrawII 5. PowerPoint toolbar ViewDrawII features PowerPoint toolbar supporting Microsoft Office 2003 or later versions. The PowerPoint toolbar will display at the right hand side of your screen if you open the PowerPoint Tool Setup from the toolbar and display the PowerPoint file in PowerPoint's Playback mode.
- Page 25 Install in Windows OS - ViewDrawII 5.1 Function of PowerPoint toolbar Icons Descriptions Change size of toolbar Change position of PowerPoint toolbar Switch to mouse mode Switch to the right key of your mouse Switch to red brush pen Erase Erase all Back to previous page Go to next page.
-
Page 26: Install In Mac Os
Install in Mac OS The ViewDrawII software features an optical touch control function 1. System requirements For normal optical touch control operation, please make sure the following system requirements are met. Install your ViewDrawII software System requirements Operating Mac OS X v10.5 or above system Intel processor Memory... - Page 27 Install in Mac OS - ViewDrawII 3. Initialize the optical touch control function 3.1 Connect your projector and a PC with a USB cable.Your system may look like the Figure shown below. 3.2 Click the icon and the menu as shown below will display. * Select "About..."...
- Page 28 Install in Mac OS - ViewDrawII 4. Toolbar 4.1 ViewDrawII toolbar After the ViewDrawII program is installed and executed, a toolbar displays on the right hand side of your screen. * Select "About ViewDrawII" to show the software version information.
- Page 29 Install in Mac OS - ViewDrawII 4.2 Main functions Icons Names Descriptions Mouse Mouse functions. Red brush pen Red brush pen. Green brush pen Green brush pen. Blue brush pen Blue brush pen. Mark pen Translucent brush pen. To draw circles, rectangles, isosceles Drawing tools triangles, and lines.
- Page 30 Install in Mac OS - ViewDrawII 4.3 Sub-functions Drawing tools Click the main menu and a popup sub-menu from the main menu is shown as below. Click to select the desired drawing tool for hand drawing. Whiteboard mode Click , the main menu will change to white background with the two functions of Import Background and Import Whiteboard.
- Page 31 Install in Mac OS - ViewDrawII ii Click to restore the background to whiteboard mode. Click again to exit the whiteboard mode. Editing tools Click and a popup sub-menu from the main menu is shown as below. Click to select the desired edit function. Icons Descriptions Select what you have drawn as...
- Page 32 Install in Mac OS - ViewDrawII 4.4 Switch the mouse or brush pen mode You can switch between mouse or brush pen modes by pointing the pen tip above or below the projected image and pressing the pen tip. Icons in toolbar change to when switching to mouse mode;...
- Page 33 Install in Mac OS - ViewDrawII 4.5 Change toolbar position There is a quick method to change position visibility of the toolbar. Press the light pen tip at the left or right side beyond the screen, then you can change position visibility of the toolbar.
-
Page 34: Install In Linux Os
Install in Linux OS -SPDriver The SPDriver software features an optical touch control function 1. System requirements For normal optical touch control operation, please make sure the following system requirements are met. Install SPDriver System requirements Operating Linux OS Ubuntu 10.04, Debian 5.05, Suse system 11.3 Intel®... - Page 35 Install in Linux OS -SPDriver 3. Initialize the optical touch control function 3.1 Connect your projector and a PC with a USB cable.Your system may look like the Figure shown below. 3.2 Click the icon and the menu as shown below will display. * Select "About"...
-
Page 36: Troubleshooting
Troubleshooting Q1: Why does the message "The LightPen program is not found" appear? A: It may be caused by the following: (1) Your computer and projector are not properly connected. Please make sure the USB cable is properly inserted in both your computer and projector. - Page 37 Troubleshooting Q2: How come the round calibration target does not execute properly? A: (1) Please check whether the pointer or light pen is working: (1-1) Please make sure the pointer or light pen has a battery of adequate power and has been turned on. (1-2) When using the pointer or light pen, please avoid writing in shadow areaa (see...
- Page 38 Troubleshooting Q3: How come the cursor is not located where the light pen is pointed to? A: It may be caused by the following: (1) Poor system calibration. Please make sure the center of the round target is pointed during calibration. (2) The project location, projection size, or projection distance may be changed.