
Related Manuals for Nasco TERi LF04300


Summary of Contents for Nasco TERi LF04300
- Page 1 INSTRUCTION MANUAL TERi ™ Patient Care Trainer LF04300 Patient Skills Trainer LF04301 Patient Simulator LF04302 Patient Simulator, Export LF04302EX 5 Year Warranty...
-
Page 2: Table Of Contents
Table of Contents About the Simulator ......... . 3 List of Components . -
Page 3: About The Simulator
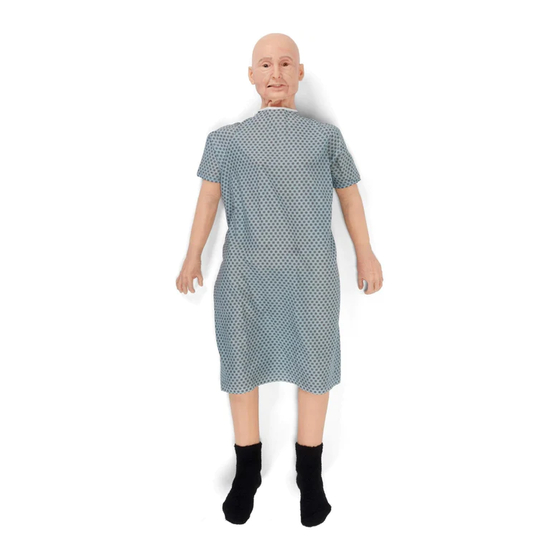
About the Simulator Nasco Healthcare TERi Androgynous Geriatric ™ Trainer is a comprehensive male/female elderly patient care trainer for medical simulation. Evolving from our GERi /KERi full-body manikins, it has a ™ ™ more realistic look and feel accurately representing the human anatomy. - Page 4 About the Simulator LF4300: TERi Geriatric Patient Care Trainer ™ • Normal and Cancerous Moles • Stage 1 Sacral Ulcer • Superior Range of Motion • Reddened Skin Folds • Enhanced Full Body Aesthetics • Bandaging and Would Dressing (Recommended bandages: •...
- Page 5 LF4302: TERi Geriatric Patient Simulator (includes ™ • Pap Smears (female) monitors) • Pelvic Examination (female) – 3 cervix presentations (healthy/ normal, pre-cancerous, cancerous) LF4302EX: TERi Geriatric Patient Simulator ™ • Prostate Examination (male) – 5 prostate presentations (1 Export (excludes monitors) normal/healthy, 4 cancerous in varied sizes) •...
- Page 6 Geriatric Patient Geriatric Patient Geriatric Patient Feature Set Capability Care Trainer Skills Trainer Simulator Superior range of motion ✓ ✓ ✓ Enhanced full body aesthetics ✓ ✓ ✓ Lightweight: 50 lbs. ✓ ✓ ✓ General Pupils ✓ ✓ ✓ Male and female ✓...
-
Page 7: List Of Components
List of Components TERi Geriatric Patient Care Trainer LF4300 TERi Geriatric Patient Simulator LF4302 (includes ™ ™ monitors) • Male Genitalia Foreskins, Pack of 3 (LF000843 G) TERi Geriatric Patient Simulator Export LF4302EX ™ • Pupils, Constricted, Set of 2 (LF04317 B) (excludes monitors) •... -
Page 8: Arms / Joints / Legs / Eyes / Oral Hygiene
Set Up Arms / Joints / Legs / Eyes / Oral Hygiene Note: All Versions of TERi come packaged with Eyes ™ the normal eyes, dentures, and female genitalia installed. Geriatric Patient Skills Trainer and All versions of TERi ™ Simulator (LF04301, LF04302, LF04302EX) come come with 3 sets of with lungs, stomach, and other internal reservoir... -
Page 9: Ear Care / Bath & Washing / Tracheostomy Care
Set Up Ear Care / Bath & Washing / Tracheostomy Care Ear Care Tracheostomy Care Both ears may be Suctioning, dressing changes, tracheostomy tube irrigated. Using water to placement, and cuff inflation may be practiced perform ear irrigation is on the simulator. The tracheostomy canal is not recommended. -
Page 10: Lavage / Gavage / Suctioning / Nasogastric / Carotid Pulse
Set Up Lavage / Gavage / Suctioning / Nasogastric / Carotid Pulse Oral and Nasal Lavage, 2. Gently pull up head Gavage, and Suctioning to expose four tubes with the stomach Access to the stomach reservoir bag is provided through the connected at the end. -
Page 11: Lavage / Gavage / Suctioning / Nasogastric
Pump Spray Lubricant provided (See Figure Note: Use Nasco Healthcare’s Pump Spray 17). NG tubes should Lubricant to lubricate airway devices before use. be well lubricated and force should not... -
Page 12: Intubatable Head
Preferred bag. Each bag will cause visual chest rise in the correct anatomical location to indicate effective Note: Use Nasco Healthcare’s Pump Spray and ineffective intubation styles. Jaw thrust is Lubricant to lubricate airway devices before use. supported. A manual pulse bulb is included to simulate a carotid pulse. -
Page 13: Ostomy Care
Set Up Ostomy Care Ostomy Care Colostomy and ileostomy care can be practiced on all TERI models, including stoma dilation, cleaning, and ™ ostomy bag changing procedures. Irrigation can be practiced. Irrigation tubes should be well lubricated prior to insertion. After completion of the exercises, the stomas can be rinsed with warm water to remove any residual lubricant. -
Page 14: Gastrostomy Care Lavage And Gavage
Set Up Gastrostomy Care Lavage and Gavage Gastrostomy Care Lavage and Gavage To attach the bag: 1. Push the coupler body (with bag attached) A flanged hole onto the coupler insert (part with the black simulating an abdominal O-ring) that is protruding from the underside incision for the insertion of the gastrostomy inside the upper torso of the of a feeding tube is... -
Page 15: Male Catheterization
Note: Special care should be taken when using a Foley catheter. Nasco recommends use of 16 1. The urinary resevoir French Foley catheters. Use of this size will avoid is installed on the the possibility of leakage. -
Page 16: Foreskin Application / Prostate Examination
Set Up Foreskin Application / Prostate Examination Foreskin Application Prostate Examination Place the foreskin over the gland by lubricating the There are five prostates gland with baby powder and placing the foreskin included with your over the gland. The placement of the foreskin can simulator. -
Page 17: Female Catheterization
Female Genitals come installed with the simulator. Note: Special care should be taken when using a Foley catheter. Nasco recommends use of 16 French Foley catheters. use of this size will avoid To prepare for catheterization exercises: the possibility of leakage. -
Page 18: Enema Administration
Set Up Set Up Enema Administration Female Cervical Exam Enema Administration Female Cervical Examination Features included with LF04301, LF04302, and Features included with LF04301, LF04302, and LF04302EX. LF04302EX. Enema Administration can only be practiced on the The female genital insert allows for douching. Only female genital insert. -
Page 19: Suprapubic And Urinary Catheterization
Set Up Suprapubic and Urinary Catheterization Suprapubic Catheterization lower side of the simulator’s torso. (See Figure 49). Features included with LF04301, LF04302, and Note: Use distilled water or follow instructions on LF04302EX. the Simulated Urine. To prepare the simulator for suprapubic 7. -
Page 20: Blood Pressure Arm
Set Up Blood Pressure Arm Blood Pressure Arm 2. Attach this end of the Features included with pressure line to the LF04301, LF04302, and female luer fitting LF04302EX. assembled at the top of the electronic Installing the Batteries control unit marked CUFF. - Page 21 Set Up Blood Pressure Arm Setting the Heart Rate Note: The control box has a battery saving feature that will turn the unit off after approximately 8-10 minutes if no keys are used within that period of 1. Press the Menu Key a third time. time.
- Page 22 Set Up Blood Pressure Arm Setting the Setting the Auscultatory Gap Palpable Pulse This function is included to simulate the gap that is sometimes present between phases 1 and 2 in The palpable pulse which no audible sound is noted. is found at the radial location.
- Page 23 Set Up Blood Pressure Arm Performing a Blood Pressure Calibration Procedures 1. Verify the pressure line tubing from the 1. Follow the setup procedures. sphygmomanometer and the audio line from the arm are properly connected to the electronic 2. Apply the cuff to the simulated arm. control unit.
- Page 24 Set Up Blood Pressure Arm Preparing Your Sphygmomanometer for Use with Blood Pressure Simulator In the event the supplied sphygmomanometer would cease to operate, any standard sphygmomanometer can be adapted for use with the blood pressure simulator. It is recommended that a child size cuff continue to be used.
-
Page 25: Iv And Injection Arm
Set Up IV and Injection Arm IV and Injection Arm 2. Close the clamp on the IV tubing and pour the Features included with LF04301, LF04302, and synthetic blood into one of the provided fluid LF04302EX. supply bags. This will be IV Bag A. Fill to 500 cc maximum. -
Page 26: Injectable Arm
Set Up Injectable Arm Preparing the Arm for Intravenous Infusions 7. To start the IV flow, open the clamps on both IV Bags A and B. 1. Start with an “empty” unpressurized arm. Close the clamp at the end of IV Bag A and then fill Proof of proper procedure will be evidenced by the with distilled water, 500 cc maximum. - Page 27 Stubborn stains may be 4. If a venous system clog is suspected, try using a washed with Nasco cleaner. Dispense Nasco large 50 cc syringe to force distilled water through cleaner on clean, soft, dry cloth and gently wipe the tubing.
- Page 28 Set Up Injectable Arm To prevent causing harm to the Injectable 5. Install the eight screws, being careful not to over Training Arm: tighten the screws. 1. Use distilled water rather than alcohol, Betadine 6. Reattach arm to simulator torso. ®...
- Page 29 Note: Avoid using alcohol or similar substances to prep the injection site. Use distilled water to simulate this procedure. 7. DO NOT use for subcutaneous injection. Nasco’s Intradermal Injection Simulator (LF01008U) is specifically designed for intradermal injection training and practice.
-
Page 30: Auscultation
Set Up Auscultation Auscultation 2 “AAA” batteries into the remote control. The Features included with LF04302, and LF04302EX. compartments are marked as to the positions of the batteries “+” or “-”. The auscultation feature duplicates heart and lung 4. Press the red power button on the remote conditions selected by the instructor via wireless control. - Page 31 2. Adhesive remaining on the manikin from use of the blue and green location stickers can be Fig A. removed using Nasco cleaner. Apply Nasco Cleaner to a clean, soft, dry cloth and wipe residual adhesive. Be cautious not to over-wipe painted areas.
-
Page 32: Anterior Heart Sites
Set Up Anterior Heart Sites Second left intercostal space Second right (pulmonic) intercostal space (aortic) Third left intercostal space (Erb’s point) (lower left Fourth left sternum) intercostal space Apex Erb’s Point Aortic Second Pulmonic Second Fourth Left Third Left Lower Left Right Intercostal Left Intercostal Intercostal... -
Page 33: Anterior / Posterior Lung Sites
Set Up Anterior / Posterior Lung Sites First right intercostal Tracheal Site space First left intercostal Lower space anterior Upper posterior Lower posterior Midaxillary Midaxillary Lower Posterior Lung Sites First Left & Right Upper Posterior Tracheal Site Two Midaxillary Sites Intercostal Sites Lung Sites 2 Lower Anterior Sites... -
Page 34: Pressure Injury Wounds
Set Up Set Up Pressure Injury Wounds Edema Pressure Injury Wounds Edema Features included with LF04301, LF04302, and Features included with LF04301, LF04302, and LF04302EX. LF04302EX. Pressure wound identification and care may be performed by using the included foot wound sleeve. Five wounds are included: Stages 1-4 and a deep Edema identification may be performed by using tissue wound. -
Page 35: Cpr Measuring
Set Up CPR Measuring CPR Measuring Powering on CPR Monitoring Feature Features included with LF04301, LF04302, and LF04302EX. 1. To power on the CPR monitoring feature, access the “ON/OFF” button through the genital Apple or Android device opening in the pelvis (See Figure 85). The CPR Plus application enables accurate and 2. -
Page 36: Consumables
Set Up Consumables 21,Arm 23,Skin Syringe 56,Basic 55,Basic 9 v Battery... - Page 37 Set Up Consumables Consumables 1- 100-2028 Carotid Pulse Bulb 31- LF04312 Lungs 2- HC53411 Release Compound for Urinary Cath 32- LF04313 Stomach Reservoir 3- LF00843 G Male Genitalia Foreskins, Pack of 3, Light 33- LF04314 Enema Reservoir 4- LF00845 Simulated Blood, Quart 34- LF04315 Gastrostomy Reservoir 5- LF00846...
-
Page 38: Care And Maintenance
1. Most cleaning can be done with a soft cloth, mild soap, and warm water. Avoid over washing the painted areas on the manikin. 2. Stubborn stains can be treated by using Nasco Cleaner and a soft cloth. 3. Stains caused by make-up, ink, and newsprint are indelible and cannot be removed. - Page 39 LF04326 LF04327 LF04310 LF04311 LF04325 LF01148 LF04333...
- Page 40 Nasco Healthcare 16 Simulaids Drive Saugerties, NY 12477 1-833-NASCOHC (627-2642) info@nascohealthcare.com www.nascohealthcare.com ©2020 Nasco Healthcare IM - 601006 - 09/20...