Table of Contents
Advertisement
Available languages
Available languages
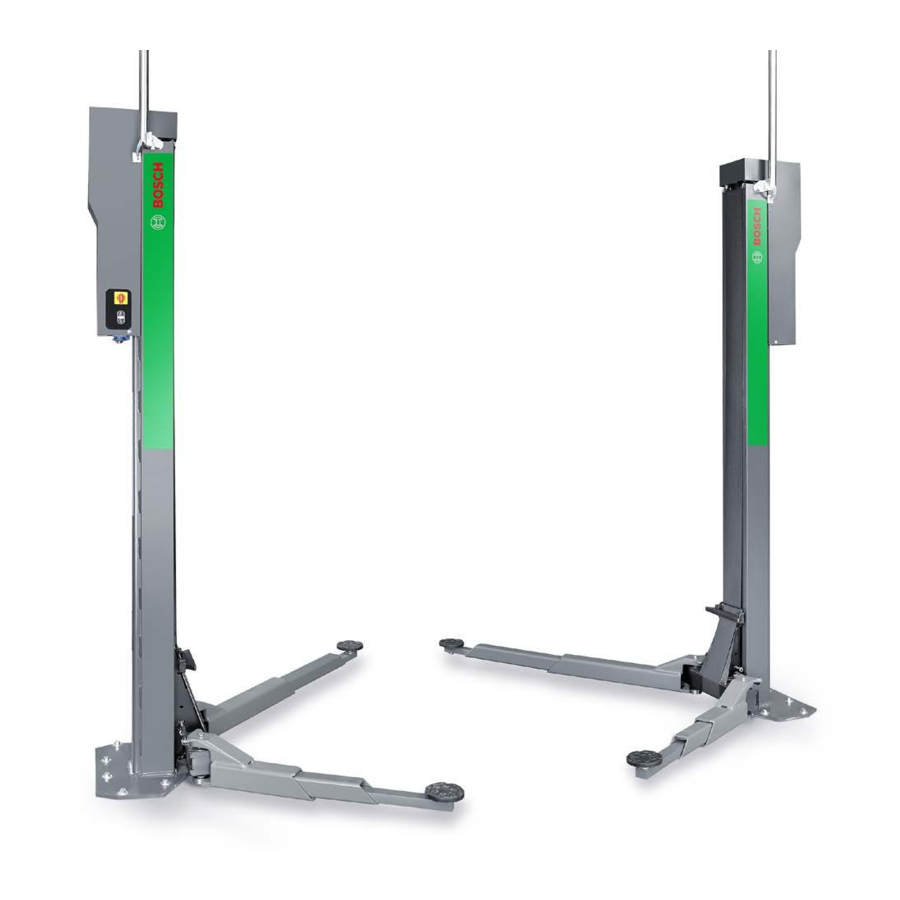
VLE 2130 EL
de Erstinbetriebnahme
2-Säulen-Hebebühne
es Funcionamiento Inicial
Plataforma elevadora de 2 columnas
nl Eerste ingebruikname"
2-koloms hefplatforms
en Initial operation
2-post lifts
it Funzionamento iniziale
Ponte sollevatore a 2 colonne
fr Démarrage seulement
Plates-formes élévatrices à 2 colonnes
sv Driftstart
2-pelarlyftar
Advertisement
Chapters
Table of Contents

Related Manuals for Bosch VLE 2130 EL


Summary of Contents for Bosch VLE 2130 EL
- Page 1 VLE 2130 EL de Erstinbetriebnahme en Initial operation fr Démarrage seulement 2-Säulen-Hebebühne 2-post lifts Plates-formes élévatrices à 2 colonnes es Funcionamiento Inicial it Funzionamento iniziale sv Driftstart Plataforma elevadora de 2 columnas Ponte sollevatore a 2 colonne 2-pelarlyftar nl Eerste ingebruikname“...
- Page 3 | VLE 2130 EL | 3 Inhaltsverzeichnis Deutsch Contents English Table des matières français Índice Español Indice Italiano Innehållsförteckning svenska Inhoud Nederlands Robert Bosch GmbH 1 689 978 552 2017-03-20...
-
Page 4: Table Of Contents
4 | VLE 2130 EL | Verwendete Symbolik Inhaltsverzeichnis Deutsch Verwendete Symbolik In der Dokumentation Verwendete Symbolik In der Dokumentation 1.1.1 Warnhinweise – Aufbau und Bedeutung 1.1.1 Warnhinweise – Aufbau und Bedeutung 4 Warnhinweise warnen Benutzer oder umstehende Perso- 1.1.2 Symbole –... -
Page 5: Auf Dem Produkt
Verwendete Symbolik | VLE 2130 EL | 5 Allgemeine Hinweise Auf dem Produkt Anlieferung Die auf den Produkten dargestellten Warnzeichen beachten und in lesbarem Zustand halten. Es ist kurzfristig ein Gabelstapler bereitzustellen. Gewicht der Hebebühnen ca. 600 kg. GEFAHR – Stromführende Teile beim Öffnen... -
Page 6: Wichtige Hinweise Zur Befestigung Der Säulen
6 | VLE 2130 EL | Wichtige Hinweise zur Befestigung der Säulen Wichtige Hinweise zur Be- Empfohlene Fundamente festigung der Säulen Voraussetzung für eine einwandfreie Aufstellung ist ein ebener, ungerissener, frostsicherer und waagerechter Dem Untergrund und dem Fundament sowie der Betonboden mit einer Festigkeitsklasse von mindes- Sorgfältigkeit der Montage kommen größte Bedeu-... -
Page 7: Streifenfundament
Wichtige Hinweise zur Befestigung der Säulen | VLE 2130 EL | 7 Verbundanker 3.2.3 Streifenfundament Vorgaben Bezeichnung, Wert Die vom Dübelhersteller vorgeschriebenen Montage- Bewehrung, oben und unten BSt 500 M, Q131 vorschriften und Mindesttiefen für die Verankerun- erforderlich asx 2,57 cm²/m... -
Page 8: Montage
8 | VLE 2130 EL | Montage Montage Montage nur durchführen bei erfolgreicher und posi- tiver Probebohrung im Fundament (siehe Kap. 3). Mechanische Montage Beim Aufstellen der Hebebühne auf die Parallelität GEFAHR – Falsche Montage der Säulen! der Motorachse zur Spindelachse achten. -
Page 9: Montage Säulen
Montage | VLE 2130 EL | 9 Montage Säulen 4.2.2 Tragarme montieren 4.2.1 Säulen aufstellen 10. Bei abgesenkten Hubwagen die abgewinkelten Sei- 1. Grundplatten nach Angaben des Dübelherstellers ten der Arretierstangen soweit aus dem Hubwagen verdübeln. herausziehen, bis auf der anderen Seite noch ca. -
Page 10: Elektrischer Anschluss
10 | VLE 2130 EL | Montage Elektrischer Anschluss 4.2.5 Netzleitung anschließen ¶ Netzleitung anschließen Nach der Erstinstallation, nach Reparaturen, nach Aderbezeichnung Bezeichnung Veränderungen an der Installation, sowie nach Vor- Netzleitung X (Fig. 3, Pos1) schrift VDE 0100 vorgeschrieben, sind Schutzleiter- prüfungen durchzuführen! -
Page 11: Einstellung Der Abschaltpunkte
Montage | VLE 2130 EL | 11 Einstellung der Abschaltpunkte 4.4.1 Allgemeine Informationen zur Einstellung Die Abschaltpunkte der VLE 2130 EL wurden im Werk bereits voreingestellt und müssen bei den meisten Erstinbetriebnahmen nicht verändert wer- den. Dennoch sind diese bei der Erstinbetriebnahme zu prüfen. -
Page 12: Untere Abschaltpunkte Und Gleichstellung Der Tragarme Einstellen
12 | VLE 2130 EL | Montage 4.4.2 Untere Abschaltpunkte und Gleichstellung 24. Taster o (Heben) drücken und Tragarme ca. 10 cm der Tragarme einstellen hochfahren. 25. Taster u (Senken) drücken, um die eingestellten Die automatische Abschaltung beim Erreichen der Abschaltpositionen zu prüfen. -
Page 13: Sicherheitsstopp Einstellen
Montage | VLE 2130 EL | 13 4.4.4 Sicherheitsstopp einstellen 20. Tragarme auf eine Höhe ca. 50 cm fahren. 1. Codierschalter auf "0" drehen. 21. Codierschalter auf "8" drehen. Mit <ENTER> bestätigen. 22. Mit <ENTER> bestätigen. Modus Fahrbetrieb ist gewählt. -
Page 14: Schlussprüfung Und Einweisung
14 | VLE 2130 EL | Schlussprüfung und Einweisung Schlussprüfung und Ein- weisung 1. VLE 2130 EL entsprechend den Vorgaben (z. B BGG 945 in Deutschland) auf Funktion und Sicher- heit durch einen Sachkundigen prüfen. Den Betreiber in die Bedienung und die Sicher- heitseinrichtungen einweisen. -
Page 15: Symbols Used
Symbols used | VLE 2130 EL | 15 Contents English Symbols used In the documentation Symbols used In the documentation 1.1.1 Warning notices - 1.1.1 Warning notices - Structure and meaning Structure and meaning Warning notices warn of dangers to the user or people 1.1.2... -
Page 16: General Information
Bosch customer service or a service agent authorized by Bosch will be pleased If the gross weight of a vehicle corresponds to the ma- to submit a quotation for a maintenance agreement. -
Page 17: Important Information For Installation Of Columns
Important information for installation of columns | VLE 2130 EL | 17 Important information for Recommended foundations installation of columns A prerequisite for proper installation is a flat, frost- proof, horizontal concrete floor without any cracks The substrate, the foundation and also careful instal- and with a strength class of at least C20/25. -
Page 18: Continuous Footing
18 | VLE 2130 EL | General information Shear connectors 3.2.3 Continuous footing Specifications Designation, value Attention must be paid to the manufacturer's fitting Reinforcement, top and bottom BSt 500 M, Q131 instructions and the minimum anchoring depths. Required asx 2,57 cm²/m... -
Page 19: Installation
Installation | VLE 2130 EL | 19 Installation Make sure the motor and spindle axes are parallel when erecting the lifting platform. Mechanical installation ¶ Check the erection position and the positioning of the columns. DANGER – Incorrect installation of columns... -
Page 20: Installation Of Columns
20 | VLE 2130 EL | Installation Installation of columns 4.2.4 Fitting tensioning strap 4.2.1 Erecting columns 1. Lubricate the spindles with spindle oil. 1. Connect the base panels as specified by the connec- 2. Fit the tensioning strap. tor manufacturer. -
Page 21: Electrical Connection
Installation | VLE 2130 EL | 21 Electrical connection 4.3.1 Connecting power cord ¶ Power cord connection Protective conductor checks are to be performed Wire designation Designation following initial installation, repair work, installation Power cord X (Fig. 3, Item 1) modifications and as specified by VDE 0100. -
Page 22: Setting Cut-Out Points
22 | VLE 2130 EL | Installation Setting cut-out points 4.4.1 General setting information The cut-out points of the VLE 2130 EL are pre-set at the factory and do not usually need to be altered on initial commissioning. They should however be checked. -
Page 23: Setting Lower Cut-Out Points And Equal Positioning Of The Support Arms
Installation | VLE 2130 EL | 23 4.4.2 Setting lower cut-out points and equal positi- 15. Press the button o (raise) and move the support oning of the support arms arms upwards by approx. 10 cm. 16. Press the button u (lowering) to check the set cut- Automatic cut-out on reaching the cut-out points is out positions. -
Page 24: Setting Safety Stop
24 | VLE 2130 EL | Installation 4.4.4 Setting safety stop 14. Press and hold the button o (raise). LED1 lights (red), LED2 off. 1. Set the encoding switch to "0". LED1 off, LED2 lights (red). 2. Confirm with <ENTER>. -
Page 25: Final Inspection And Instruction
Final inspection and instruction | VLE 2130 EL | 25 Final inspection and instruction 1. Have proper operation and safety of the VLE 2130 EL checked by a qualified person in the specified man- ner (e.g. BGG 945 in Germany). 2. Instruct the user with regard to operation and the safety devices. -
Page 26: Symboles Utilisés
26 | VLE 2130 EL | Symboles utilisés Table des matières français Symboles utilisés Dans la documentation Symboles utilisés Dans la documentation 1.1.1 Avertissements – Conception et signification 1.1.1 Avertissements – Les avertissements mettent en garde contre les dangers Conception et signification pour l’utilisateur et les personnes présentes à... -
Page 27: Tion
(par ex. interrupteur prin- d’utilisation original. Si le montage du pont élévateur cipal, circuits imprimés). n’est pas assuré par le service clients Bosch ou par un ¶ Les travaux sur les installations électriques espace SAV agréé par Bosch, un contrôle de sécurité... -
Page 28: Informations Importantes Sur La Fixation Des Colonnes
28 | VLE 2130 EL | Informations importantes sur la fixation des colonnes Informations importantes Fondations recommandées sur la fixation des colonnes L ’installation dans les règles nécessite un sol en béton plan, non fissuré, hors gel et horizontal, d’une Le support et les fondations de même que le soin... -
Page 29: Semelle Fuyante
Informations importantes sur la fixation des colonnes | VLE 2130 EL | 29 Tiges filetées 3.2.3 Semelle fuyante Prescriptions Désignation, valeur Observer les consignes de montage du fabricant de Armature en haut et en bas BSt 500 M, Q131 chevilles de même que les profondeurs minimales asx nécessaire... -
Page 30: Montage
30 | VLE 2130 EL | Montage Montage Lors de l’installation du pont élévateur, s’assurer que l’axe du moteur et l’axe de la broche sont parallèles. Montage mécanique ¶ Contrôler la position de montage et le positionne- ment des colonnes. -
Page 31: Montage Des Colonnes
Montage | VLE 2130 EL | 31 Montage des colonnes 4.2.3 Protection des bras-support contre le décro- 4.2.1 Disposer les colonnes chage fortuit 1. Cheviller les plaques de base en respectant les con- Fixer les coussinets fermés aux goujons récepteurs à... -
Page 32: Raccordement Électrique
32 | VLE 2130 EL | Montage Raccordement électrique 4.3.1 Raccorder le câble d’alimentation ¶ Raccorder le câble d’alimentation Un contrôle du conducteur de protection doit être Désignation des brins Désignation effectué après la première installation, après des câble d’alimentation X (fig. -
Page 33: Réglage Des Points De Déclenchement
4.4.1 Informations générales sur le réglage ment Les points de déclenchement du VLE 2130 EL ont été préréglés à l’usine et ne nécessitent dans la plupart des cas pas de modification. Il est toutefois nécessaire de les vérifier lors de la mise en service. -
Page 34: Régler Les Points De Déclenchements Inférieurs Et Le Synchronisme Des Bras-Support
34 | VLE 2130 EL | Montage " 4.4.2 Régler les points de déclenchements inféri- Le réglage est terminé. eurs et le synchronisme des bras-support Si les points de déclenchement sont trop hauts, ils Le déclenchement automatique aux points de déclen- peuvent être modifiés vers le bas de respectivement... -
Page 35: Régler L'arrêt De Sécurité
6. Retirer le pont réglages d’origine (voir fig. 4) (le pont la prochaine mise à l’arrêt/en marche ! n’est pas inséré). 7. Mettre le VLE 2130 EL en marche. 8. Tourner le commutateur de codage sur "0". 9. Confirmer avec <ENTER>. -
Page 36: Contrôle Final Et Formation
36 | VLE 2130 EL | Contrôle final et formation Contrôle final et formation 1. Le VLE 2130 EL doit être soumis à un contrôle de sé- curité et de fonctionnement par une personne com- pétente conformément aux prescriptions (par ex. -
Page 37: Símbolos Empleados
Símbolos empleados | VLE 2130 EL | 37 Índice Español Símbolos empleados En la documentación Símbolos empleados En la documentación 1.1.1 Advertencias: estructura y significado 1.1.1 Advertencias: estructura y significado 37 Las indicaciones de advertencia advierten de peligros 1.1.2 Símbolos en esta documentación para el usuario o las personas circundantes. -
Page 38: Indicaciones Generales
¶ Antes de abrir VLE 2130 EL, separarlo de a cargo de un servicio técnico Bosch o de un servicio la red de tensión. técnico autorizado por Bosch. Eliminación como residuo Este procedimiento de recepción de seguridad com-... -
Page 39: Indicaciones Importantes Para La Fijación De Las Columnas
Indicaciones importantes para la fijación de las columnas | VLE 2130 EL | 39 Indicaciones importantes Fundamentos recomendados para la fijación de las co- La condición imprescindible para una instalación lumnas correcta es disponer de un suelo de hormigón llano, sin grietas, a prueba de heladas y horizontal, con El subsuelo y los fundamentos tienen la máxima im-... -
Page 40: Fundamento Corrido
40 | VLE 2130 EL | Indicaciones generales Anclaje de unión 3.2.3 Fundamento corrido Especificaciones Denominación, valor Se han de tener en cuenta las normas de montaje y Armadura, arriba y abajo BSt 500 M, Q131 las profundidades mínimas prescritas por el fabri- se necesita asx 2,57 cm²/m... -
Page 41: Montaje
Montaje | VLE 2130 EL | 41 Montaje Al instalar la plataforma elevadora, prestar atención al paralelismo del eje del motor respecto al eje del Montaje mecánico husillo. ¶ Controlar la posición de montaje y el posicionamien- ¡PELIGRO – montaje incorrecto de las colum- to de las columnas. -
Page 42: Montaje De Las Columnas
42 | VLE 2130 EL | Montaje Montaje de las columnas 4.2.3 Asegurar los brazos portantes para que no se 4.2.1 Colocar las columnas desenganchen involuntariamente 1. Fijar las placas de base con tacos de acuerdo con los Asegurar los soportes de ojo fijándolos con tornillos de datos del fabricante de los tacos y anclajes. -
Page 43: Conexión Eléctrica
Montaje | VLE 2130 EL | 43 Conexión eléctrica 4.3.1 Conectar el cable de red ¶ Conectar el cable de red Tras la primera instalación, tras reparaciones así Denominación de conductores, Denominación como por prescripción de la norma VDE 0100, se cable de red X (Fig. -
Page 44: Ajuste De Los Puntos De Desconexión
Ajuste de los puntos de desconexión 4.4.1 Información general sobre el ajuste Los puntos de desconexión de la VLE 2130 EL se han preajustado ya en fábrica y no es necesario modificarlos en la mayoría de las primeras puestas en servicio. No obstante, se deben controlar a la primera puesta en servicio. -
Page 45: Ajustar Los Puntos De Desconexión Inferiores Y La Igualación De Los Brazos Portantes
Montaje | VLE 2130 EL | 45 4.4.2 ajustar los puntos de desconexión inferiores 14. Confirmar con <ENTER> . y la igualación de los brazos portantes Esta seleccionado el modo Servicio de marcha. 15. Presionar el pulsador o (Elevar) y hacer subir los La desconexión automática al alcanzar los puntos... -
Page 46: Ajustar La Parada De Seguridad
46 | VLE 2130 EL | Montaje 4.4.4 Ajustar la parada de seguridad 13. Confirmar con <ENTER>. Esta seleccionado el modo Activación / Función de 1. Girar el interruptor de codificación a la posición "0". 2. Confirmar con <ENTER> . -
Page 47: Inspección Final E Instrucción Del Personal
Inspección final e instrucción del personal | VLE 2130 EL | 47 Inspección final e instrucción del personal 1. El funcionamiento y la seguridad de la VLE 2130 EL tienen que ser comprobados por un experto de acuerdo con las normas pertinentes (p. ej BGG 945 en Alemania). -
Page 48: Simboli Utilizzati
48 | VLE 2130 EL | Simboli utilizzati Indice Italiano Simboli utilizzati Nella documentazione Simboli utilizzati Nella documentazione 1.1.1 Indicazioni di avvertimento – 1.1.1 Indicazioni di avvertimento – struttura e significato struttura e significato Le indicazioni di avvertimento mettono in guardia dai 1.1.2... -
Page 49: Sul Prodotto
Bosch o un centro di assistenza au- co di una coppia di bracci portanti deve corrispondere al torizzato da Bosch saranno lieti di sottoporvi un’offerta massimo al 60 % della portata massima (con VLE 2130 EL per un contratto di manutenzione. 1800 kg). -
Page 50: Avvertenze Importanti Relative Al Fissaggio Delle Colonne
50 | VLE 2130 EL | Avvertenze importanti relative al fissaggio delle colonne Avvertenze importanti re- Fondazioni consigliate lative al fissaggio delle co- Requisito indispensabile per l’installazione regolare lonne è un pavimento in calcestruzzo orizzontale, perfet- tamente livellato, non fessurato e resistente al gelo Il fondo, le fondazioni e la dovuta diligenza durante con una classe di resistenza di almeno C20/25. -
Page 51: Fondazione Nastriforme
Avvertenze importanti relative al fissaggio delle colonne | VLE 2130 EL | 51 Ancoraggio chimico 3.2.3 Fondazione nastriforme Specifiche Denominazione, valore Le indicazioni di montaggio e le profondità minime Armatura, lato superiore ed in- BSt 500 M, Q131 prescritte dal produttore dei tasselli per l’ancoraggio... -
Page 52: Montaggio
52 | VLE 2130 EL | Montaggio Montaggio Durante la messa in opera del ponte sollevatore prestare attenzione al parallelismo tra asse motore e Montaggio meccanico asse della vite di sollevamento. ¶ Controllo della posizione di installazione e posiziona- PERICOLO – rischio di montaggio non corretto mento delle colonne. -
Page 53: Montaggio Delle Colonne
Montaggio | VLE 2130 EL | 53 Montaggio delle colonne 4.2.3 Bloccaggio dei bracci portanti contro lo sgan- 4.2.1 Posizionamento delle colonne cio involontario 1. Fissare con tasselli le piastre di fondo conformemen- Bloccare il supporto ad occhio con le viti di sicurezza a te alle indicazioni del produttore dei tasselli. -
Page 54: Collegamento Elettrico
54 | VLE 2130 EL | Montaggio Collegamento elettrico 4.3.1 Collegamento del cavo di alimentazione elettrica ¶ Collegare il cavo di alimentazione elettrica. Al termine dell’installazione iniziale, dopo interventi Denominazione fili Denominazione di riparazione o di modifica dell’installazione nonché cavo alimentazione elettrica X (fig. -
Page 55: Impostazione Dei Punti Di Disinserimento
Informazioni generali sulla messa a punto mento delle impostazioni I punti di disinserimento di VLE 2130 EL sono stati preimpostati in fabbrica e nella maggior parte dei casi non è necessario modificarli durante la prima messa in funzione. Tuttavia le impostazioni vanno controllate durante la prima messa in funzione. -
Page 56: Impostazione Dei Punti Di Disinserimento Inferiori E Del Livellamento Dei Bracci Portanti
56 | VLE 2130 EL | Montaggio 4.4.2 Impostazione dei punti di disinserimento infe- 14. Confermare con <ENTER>. riori e del livellamento dei bracci portanti È selezionata la modalità esercizio di marcia. 15. Premere il pulsante o (sollevamento) e spostare i Nelle modalità... -
Page 57: Impostazione Dell'arresto Di Sicurezza
Montaggio | VLE 2130 EL | 57 4.4.4 Impostazione dell’arresto di sicurezza 13. Confermare con <ENTER>. È selezionata la modalità attivazione/funzione di 1. Girare l’interruttore di codifica in posizione "0". 2. Confermare con <ENTER>. diagnosi. È selezionata la modalità esercizio di marcia. -
Page 58: Controllo Finale E Istruzione Iniziale
58 | VLE 2130 EL | Controllo finale e istruzione iniziale Controllo finale e istruzione iniziale 1. Far controllare da un esperto il regolare funziona- mento e le condizioni di sicurezza di VLE 2130 EL in conformità alle norme applicabili (in Germania ad es. -
Page 59: Använda Symboler
Använda symboler | VLE 2130 EL | 59 Innehållsförteckning svenska Använda symboler I dokumentationen Använda symboler I dokumentationen 1.1.1 Varningsanvisningar – Uppbyggnad och bety- 1.1.1 Varningsanvisningar – Uppbyggnad delse och betydelse Varningsanvisnignar varnar för faror för användaren eller 1.1.2 Symboler – Benämning och betydelse 59 personer runt omkring. -
Page 60: Allmänna Anvisningar
60 | VLE 2130 EL | Använda symboler Allmänna anvisningar På produkten Leverans Beakta alla varningstecken på produkterna och se till att de hålls i läsbart tillstånd. En gaffeltruck måste hållas tillhanda kort tid. Billyftarnas vikt ca 600 kg. FARA – Strömförande delar när VLE 2130 EL Montering av annan person öppnas! -
Page 61: Viktiga Anvisningar För Montering Av Pelarna
Viktiga anvisningar för montering av pelarna | VLE 2130 EL | 61 Viktiga anvisningar för Rekommenderade fundament montering av pelarna Förutsättning för en felfri uppställning är ett jämnt, frostsäkert och vågrätt betonggolv utan sprickor med Underlaget och fundamentet liksom noggrannheten en hållfasthet på... -
Page 62: Långsträckt Fundament
62 | VLE 2130 EL | Allmänna anvisningar Kompoundankare 3.2.3 Långsträckt fundament Riktlinjer Beteckning, värde Dybeltillverkarens monteringsföreskrifter och mini- Förstärkning, uppe och nere BSt 500 M, Q131 midjup för förankringarna måste beaktas! nödvändig asx 2,57 cm²/m nödvändig asy 3,77 cm²/m Använd tillräckligt stora mellanläggsbrickor för kom-... -
Page 63: Montering
Montering | VLE 2130 EL | 63 Montering Vid billyftens uppställning måste motor- och spin- delaxeln vara parallella. Mekanisk montering ¶ Kontroll av uppbyggnadsläget och pelarnas positio- nering. FARA – Felmontering av pelarna! Livsfara eller risk för personskada genom att Förutom nedan angivna mått måste ett säkerhets-... -
Page 64: Pelarmontering
64 | VLE 2130 EL | Montering Pelarmontering 4.2.3 Säkring av bärarmarna mot oavsiktlig urhäng- 4.2.1 Pelaruppställning ning 1. Dybla grundplattorna enligt dybeltillverkarens anvis- Säkra ögonlagren med säkerhetssexkantskruvar på ningar. hållarbultarna så, att avståndet mellan ögonlagret och skruvhuvudet ligger mellan 1 och 2 mm. -
Page 65: Elanslutning
Montering | VLE 2130 EL | 65 Elanslutning 4.3.1 Anslutning av nätsladd ¶ Anslutning av nätsladd Efter den första installationen, efter reparationer, Ledarbeteckning Beteckning efter ändringar på installationen liksom enligt föresk- nätsladd X (fig 3, pos1) riften VDE 0100 måste skyddsledarkontroller utföras! Det elektriska kopplingsschemat återfinns i bilaga A. -
Page 66: Inställning Av Frånslagningspunkterna
66 | VLE 2130 EL | Montering Inställning av frånslagningspunkterna 4.4.1 Allmän information rörande inställningen Frånslagningspunkterna för VLE 2130 EL har förin- ställts på fabriken och måste vid de flesta första drifttagningarna inte förändras. Trots det ska de kontrolleras vid första drifttagningen. -
Page 67: Inställning Av De Undre Frånslagnings- Punkterna Och Bärarmarnas Synkrongång
Montering | VLE 2130 EL | 67 4.4.2 Inställning av de undre frånslagningspunkter- 4.4.3 Inställning av övre frånslagningspunkten na och bärarmarnas synkrongång. Vid uppåtändring av frånslagningspunkten måste all- Den automatiska frånslagningen är när frånslagnings- tid potentiometernas (fig 4, pos. 1 och 2) spänning punkterna nås, inte aktiv i funktion "4"... -
Page 68: Inställning Av Säkerhetsstopp
68 | VLE 2130 EL | Montering 4.4.4 Inställning av säkerhetsstopp 14. Tryck på knappen o (lyft) och håll den intryckt. LED1 lyser rött, LED2 från. 1. Ställ kodningsknappen på ”0”. LED1 från, LED2 lyser rött. 2. Bekräfta med <ENTER>. -
Page 69: Slutkontroll Och Instruktion
Slutkontroll och instruktion | VLE 2130 EL | 69 Slutkontroll och instruktion 1. Låt en sakkunig kontrollera VLE 2130 EL enligt föreskrifterna (t ex BGG 9 45 i Tyskland) rörande funktion och säkerhet. 2. Instruera verksamhetsutövaren avseende manövre- ring och säkerhetsanordningar. -
Page 70: Gebruikte Symbolen
70 | VLE 2130 EL | Gebruikte symbolen Inhoud Nederlands Gebruikte symbolen In de documentatie Gebruikte symbolen In de documentatie 1.1.1 Waarschuwingsaanwijzingen – opbouw en be- 1.1.1 Waarschuwingsaanwijzingen tekenis – opbouw en betekenis Waarschuwingsaanwijzingen waarschuwen voor gevaren 1.1.2 Symbolen – Benaming en betekenis voor de gebruiker of omstanders. Bovendien beschri-... -
Page 71: Op Het Product
Bosch-klan- van een elektricien werken. tenservice of een door Bosch geautoriseerde service- ¶ Voor het openen van de VLE 2130 EL deze instanties ondergaan. van het stroomnet loskoppelen. Deze veiligheidsafname bevat volgende prestaties: Afvalverwerking... -
Page 72: Belangrijke Aanwijzingen Voor Het Bevestigen Van De Zuilen
72 | VLE 2130 EL | Belangrijke aanwijzingen voor het bevestigen van de zuilen Belangrijke aanwijzingen Aanbevolen funderingen voor het bevestigen van de Voorwaarde voor een correcte opstelling is een vlak- zuilen ke, ongescheurde, vorstveilige en horizontale beton- bodem met een sterkteklasse van minstens C20/25. -
Page 73: Strookfundering
Belangrijke aanwijzingen voor het bevestigen van de zuilen | VLE 2130 EL | 73 Samengestelde ankers 3.2.3 Strookfundering Instelwaarden Aanduiding, waarde De door de pluggenfabrikant voorgeschreven monta- Bewapening, boven en onder BSt 500 M, Q131 gevoorschriften en minimum dieptes voor de veran- noodzakelijk asx 2,57 cm²/m... -
Page 74: Montage
74 | VLE 2130 EL | Montage Montage Let bij het opstellen van het hefplatform op de paral- lelliteit van de motoras t.o.v. de spilas. Mechanische montage ¶ Controle van de opbouwpositie en de positionering van de zuilen. GEVAAR – verkeerde montage van de zuilen! -
Page 75: Montage Zuilen
Montage | VLE 2130 EL | 75 Montage zuilen 4.2.3 De draagarmen tegen ongewenst uithangen 4.2.1 Zuilen opstellen beveiligen 1. Grondplaten volgens de gegevens van de pluggenfab- Het buitenlager met veiligheids-6-kante schroeven zoda- rikant vastpluggen. nig op de opnamebouten borgen dat tussen het buiten-... -
Page 76: Elektrische Aansluiting
76 | VLE 2130 EL | Montage Elektrische aansluiting 4.3.1 Netleiding aansluiten ¶ Netleiding aansluiten Na de eerste installatie, na reparaties, na verande- Aderaanduiding Aanduiding ringen aan de installatie en volgens voorschrift VDE netleiding X (afb. 3, pos1) 0100 voorgeschreven zijn controles van de veilig-... -
Page 77: Instelling Van De Uitschakelpunten
Instelling van de uitschakelpunten 4.4.1 Algemene informatie over de instelling De uitschakelpunten van de VLE 2130 EL werden in de fabriek al vooringesteld en hoeven bij de meeste eerste inbedrijfstellingen niet te worden veranderd. Niettemin moeten zij bij de eerste inbedrijfstelling worden gecontroleerd. -
Page 78: Onderste Uitschakelpunten En Gelijke Stand Van De Draagarmen Instellen
78 | VLE 2130 EL | Montage 4.4.2 Onderste uitschakelpunten en gelijke stand 16. Toets u (neerlaten) indrukken om de ingestelde van de draagarmen instellen uitschakelposities te controleren. " Instelling voltooid. De automatische uitschakeling bij het bereiken van de uitschakelpunten is in de modus "4" en "5" niet... -
Page 79: Veiligheidsstop Instellen
Montage | VLE 2130 EL | 79 4.4.4 Veiligheidsstop instellen 14. Toets o (heffen) indrukken en ingedrukt houden. LED1 brandt rood, LED2 uit. 1. Draai de codeerschakelaar op "0". LED1 uit, LED2 brandt rood. 2. Met <ENTER> bevestigen. -
Page 80: Eindcontrole En Instructie
80 | VLE 2130 EL | Eindcontrole en instructie Eindcontrole en instructie 1. Laat de VLE 2130 EL volgens de voorschriften (bijv. BGG 945 in Duitsland) op functie en veiligheid controleren door een deskundige. 2. Instrueer de exploitant in de bediening en de veilig- heidsinrichtingen. - Page 81 | VLE 2130 EL | 81 Anhang A: Elektrischer Schaltplan Robert Bosch GmbH 1 689 978 552 2017-03-20...
- Page 84 Robert Bosch GmbH Diagnostics Franz-Oechsle-Straße 4 73207 Plochingen DEUTSCHLAND www.bosch.com bosch.prueftechnik@bosch.com 1 689 978 552 | 2017-03-20...