Advertisement
Quick Links
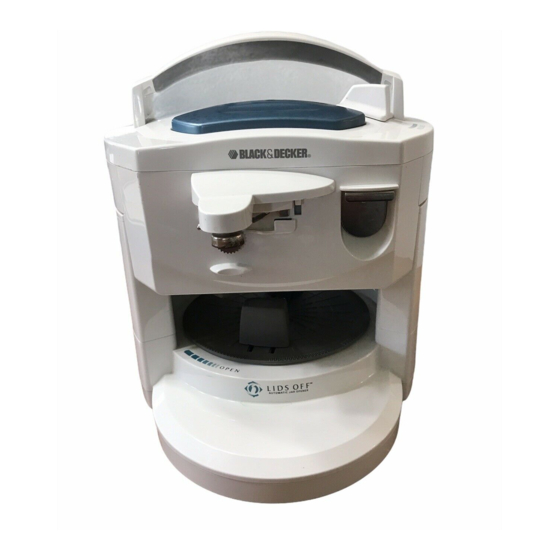
Product may vary slightly from what is illustrated./ Le produit peut différer légèrement de celui illustré.
How to Use
This appliance is for household use only.
This appliance is for use in opening regular and vacuum-style screw-
top jars, cans without pull rings, and bottles with metal caps.
OPENING JARS
Important: You can only use the can opener when the jar opener is
not in use. You cannot use both at the same time.
1. Plug the cord into a standard wall outlet.
Note: The electrical cord is located at the back of the unit. It
should be plugged into a standard wall outlet that is located close
behind where the unit is placed. Do not attempt to plug in by
bringing the electrical cord through the interior of the jar opener.
2. To open a jar, place one or two hands on the jar opener handle,
and with thumb, push back the release button; the upper body of
the opener will release and rise slightly.
3. Gently pull up the upper body of the opener
until it clicks and locks into place in the
raised position (A).
4. Check to see if the lower jar supports are in
the farthest open position. If they are not,
place your hand on the edge of the turntable
A
and turn to the left (B). Place the jar in the
center of the turntable. Note: We recommend
removing the paper or plastic neckbands
from jars before placing on the turntable to
be opened.
5. Hold the handle and push back the release
button to gently lower the upper body until
it rests on the top of the jar.
B
6. Press and hold the On/Off button. A set
of upper jaws will rotate and then move in
to grab the jar lid. At the same time,
the turntable will begin to move the lower
jar supports toward the jar to hold it securely
(C). Note: For vacuum-sealed jars, you will
hear a popping sound, indicating that the jar
is open. For screw-top jars, allow about one
full turn of the jar or about 10 seconds.
C
7. To remove the jar, press the release button
and use the handle to lift the upper body.
The upper jaws will automatically move away to release the jar. Turn
the turntable to the left to release the lower jar supports and remove
the jar with loosened lid.
8. To reopen a jar that has been stored in the refrigerator, wipe the
moisture from the lid and the jar before placing on the turntable.
OPENING CANS
Use the can opener to open any size can. Do not use it for cans with
pull rings.
Important: You can only use the can opener when the jar opener is
not in use. You cannot use both at the same time.
1. Insert blade assembly and plug unit into a standard wall outlet.
2. Lift the lever, tip can so that the rim is under
the locating post then press down the lever,
making sure the blade is inside the rim (D).
Note: Because of the hands-free feature, it is not
necessary to hold the lever down or support the
can during cutting.
3. When the can is opened, the can opener will
stop automatically.
D
1. Handle
2. Release button
3. Upper body
4. Bottle opener
5. Upper jaws
6. Turntable
7. Lower jar supports
† 8. Blade assembly (Part# JW400-01)
9. Magnet
10. Control lever
11. On/Off button (only for jar opener)
† Consumer replaceable
4. To remove the can, hold it with one hand and lift the lever with the
other. The lid stays attached to the magnet.
Caution: Avoid contact with the cut edges of the can, they are sharp.
5. Carefully remove the lid from the magnet and discard.
OPENING BOTTLES
Use the bottle opener to remove metal caps only. Do not use it for
screw-off caps or push in tabs.
1. To open a bottle that has been stored in the
refrigerator, wipe the moisture from the cap
and bottle.
2. Grasp bottle and position the cap under the
metal hook.
Important: Be sure the hook is not under
the bottle neck as the glass may break.
3. Hold the unit with one hand and pull
down bottle to pop off the cap with the
E
other hand (E).
Care and Cleaning
This product contains no user serviceable parts. Refer service to
qualified service personnel.
Before cleaning any area of the unit, unplug from wall outlet.
CLEANING
Jar Opener
• Wipe surfaces with a dampened soft cloth. For spills, use a soft
cloth dampened with warm water and liquid detergent.
• Do not use abrasive cleaners of any kind to clean jar opener.
Can Opener
• Remove the blade assembly by lifting the lever up and pulling the
blade assembly out. Wash the blade assembly in sudsy water or in
the dishwasher.
Caution: Be careful when handling as blade is sharp.
Bottle Opener
Wipe metal hook surface with a soft cloth dampened with warm water
and liquid detergent.
STORAGE
The unit is collapsible for compact storage. Press the release button
and lower the upper body until it locks into place.
Le produit peut différer légèrement de celui illustré.
Utilisation
L'appareil est conçu pour une utilisation domestique seulement.
L'appareil est conçu conçu pour ouvrir des bocaux à couvercle
vissable standard et des bocaux scellés sous vide, des boîtes sans
des bagues et des bouchons métalliques.
OUVERTURE DE BOCAUX
Important : On peut seulement utiliser l'ouvre-boîte lorsque
l'oubre-bocal ne sert pas. On ne peut pas les utiliser simultanément.
1. Brancher le cordon dans une prise électrique standard.
Note : Le cordon électrique se trouve à l'arrière de l'appareil. Il
faut le brancher dans une prise murale standard qui se trouve
près de l'arrière de l'appareil. Ne pas tenter de le brancher après
avoir fait traverser le cordon à l'intérieur de l'appareil.
2. Pour ouvrir un bocal, placer une ou deux mains sur la poignée
de l'ouvre-bocal et, à l'aide du pouce, pousser le bouton de
dégagement vers l'arrière. La partie supérieure du corps se
dégage alors et se soulève légèrement.
3. Soulever doucement la partie supérieure du
corps jusqu'à ce qu'elle s'enclenche en place
(en position soulevée) (A).
4. Vérifier si les dispositifs de soutien du bocal
se trouvent dans la position la plus ouverte.
Lorsque ce n'est pas le cas, placer une main
A
contre le rebord de la table tournante et la
faire tourner vers la gauche (B). Placer le
bocal au centre de la table tournante.
Note : Il est conseillé d'enlever les bandes en
papier ou de plastique des bocaux avant de
les placer sur la table tournante pour les
ouvrir.
5. Tenir la poignée et pousser le bouton de
B
dégagement vers l'arrière afin d'abaisser
doucement la partie supérieure du corps
jusqu'à ce qu'elle repose sur le dessus du
bocal.
6. Enfoncer l'interrupteur et le maintenir
enfoncé. Un jeu de mâchoires tourne et se
déplace pour saisir le couvercle du bocal.
Simultanément, la table tournante dirige les
dispositifs de soutien vers le bocal pour le
C
retenir de manière sûre (C).
Note : Dans le cas des contenants scellés sous vide, on entend un
son indiquant l'ouverture du contenant. Dans le cas des bocaux à
couvercle vissable, ne laisser l'appareil ne l'ouvrir que d'un seul
tour complet ou pendant environ 10 secondes.
7. Pour retirer le bocal, enfoncer le bouton de dégagement et se
servir de la poignée pour soulever la partie supérieure du corps.
Les mâchoires se retirent automatiquement afin de relâcher le
bocal. Faire tourner la table tournante vers la gauche pour
dégager les dispositifs de soutien du bocal et pour retirer le
bocal.
8. Pour rouvrir un bocal qui est resté au réfrigérateur, essuyer
l'humidité du couvercle et du bocal avant de le placer sur la
table tournante.
OUVERTURE DE BOÎTES
Se servir de l'ouvre-boîte pour ouvrir des boîtes de toutes
dimensions. Ne pas s'en servir pour des cannettes avec des bagues.
Important : On peut seulement utiliser l'ouvre-boîte lorsque
l'oubre-bocal ne sert pas. On ne peut pas les utiliser simultanément.
1. Poignée
2. Bouton de dégagement
3. Partie supérieure du corps
4. Ouvre-bouteille
5. Mâchoires supérieures
6. Table tournante
7. Dispositifs inférieurs de soutien du bocal
† 8. Lame (No de pièce JW400-01)
9. L'aimant
10. Interrupteur
11. Levier (ouvre-bocal seulement)
† Remplaçable par le consommateur
1. Insérer le couteau et brancher l'appareil dans une prise standard.
2. Soulever le levier, incliner la boîte de sorte à
en placer le rebord sous la tige de
positionnement puis abaisser le levier en
s'assurant que le couteau se trouve à
l'intérieur du rebord (D).
Note : En raison du mode de fonctionnement
à mains libres, il n'est pas nécessaire de
maintenir le levier abaissé ni de soutenir la
boîte pendant la coupe.
D
3. L'appareil s'arrête automatiquement lorsque la boîte est ouverte.
4. Pour retirer la boîte, la soutenir d'une main et, de l'autre,
soulever le levier. Le couvercle reste fixé à l'aimant.
Mise en garde : Éviter de toucher aux rebords coupés de la boîte,
ils sont tranchants.
5. Retirer avec soin le couvercle de l'aimant et le jeter.
OUVERTURE DE BOUTEILLES
Utiliser l'ouvre-bouteille pour enlever des bouchons métalliques
seulement. Ne pas s'en servir pour des bouchons dévissables, pour
des languettes.
1. Pour ouvrir une bouteille qui est resté au réfrigérateur, essuyer
l'humidité du bouchon et de la bouiteille.
2. Saisir la bouteille et placer le bouchon sous
le crochet métallique.
Important : S'assurer que le crochet ne se
trouve pas sous le goulot de la bouteille au
risque d'en briser le verre.
3. Saisir l'appareil d'une main et, de l'autre,
abaisser la bouteille pour en enlever le
bouchon (E).
E
Entretien et nettoyage
L'appareil ne comporte aucune pièce remplaçable par l'utilisateur.
En confier l'entretien au personnel qualifié d'un centre de service.
Avant de nettoyer l'appareil, le débrancher.
NETTOYAGE
Ouvre-bocal
• Essuyer les surfaces avec un chiffon doux et humide. En cas de
déversements, utiliser un chiffon doux humecté d'eau chaude et
de détergent liquide.
• Ne pas utiliser de produits nettoyants abarasifs pour nettoyer
l'ouvre-bocal.
Ouvre-boîte
• Enlever le couteau en soulevant le levier et en retirant le couteau
de l'appareil. Laver le couteau à l'eau savonneuse et bien le
assécher. On peut également placer le couteau au lave-vaisselle.
Mise en garde : Prendre soin lors de la manipulation du couteau
car celui-ci est tranchant.
Ouvre-bouteille
Essuyer le crochet métallique avec un chiffon doux humecté d'eau
chaude et de détergent liquide.
RANGEMENT
L'appareil se plie pour assurer un rangement compact. Enfoncer le
bouton de dégagement et abaisser la partie supérieure de l'appareil
jusqu'à ce qu'elle se bloque en place.
Advertisement

Related Manuals for Black & Decker Lids-Off OPEN-IT-ALL JW400


Summary of Contents for Black & Decker Lids-Off OPEN-IT-ALL JW400
- Page 1 Do not attempt to plug in by bringing the electrical cord through the interior of the jar opener. 2. To open a jar, place one or two hands on the jar opener handle, and with thumb, push back the release button; the upper body of the opener will release and rise slightly.
- Page 2 Unplug children. near ❑ when necessary supervision Close liquid. other water appliance ❑ shock, electrical against protect ❑ instructions. Read following: including followed, precautions safety basic present, appliances, electrical using When IMPORTANT 1-800-231-9786 1-800-738-0245 Model/Modèle JW400...