Table of Contents

Related Manuals for Black & Decker SPACEMAKER


Summary of Contents for Black & Decker SPACEMAKER
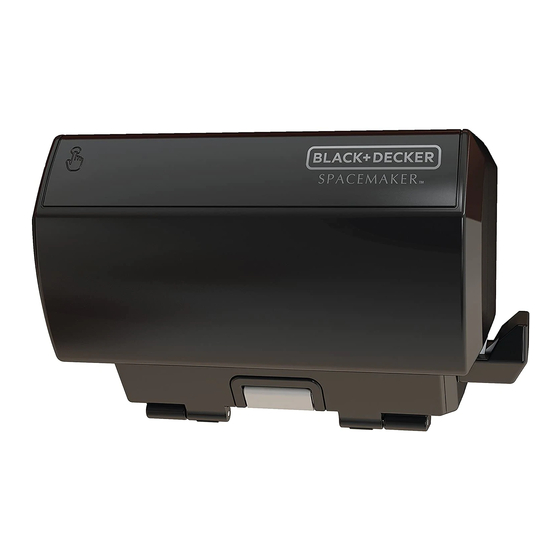
- Page 1 SPACEMAKER UNDER THE CABINET CAN OPENER ABRELATAS PARA INSTALAR DEBAJO DEL GABINETE OUVRE-BOÎTE ACCROCHABLE Use & Care Manual Manual de uso y cuidado Guide d’utilisation et d ’entretien CO100B CO100W...
- Page 2 Thank you for your purchase! Gracias por su compra! Merci de votre achat! Should you have any questions or concerns with your new product, please call our Customer Service Line at 1-800-231-9786 (US and Canada). Please do not return to the store. Si usted tiene alguna inquietud o pregunta con su producto, por favor llame a nuestra línea de servicio al cliente una atención inmediata 1-800-231-9786 (EE.UU/Canadá) 01-800-714-2503...
-
Page 3: Important Safeguards
Please Read and Save this Use and Care Book. IMPORTANT SAFEGUARDS. When using electrical appliances, basic safety precautions should always be followed to reduce the risk of fire, electric shock, and/or injury, including the following: • Read all instructions. • To reduce the risk of fire or electric shock, do •... - Page 4 W E LCO ME ! Congratulations on your purchase of the Spacemaker Can Opener. We have ™ developed this guide to ensure optimal product performance and your complete satisfaction. Save this use and care manual and be sure to register your appliance online at www.prodprotect.com/applica.
- Page 5 4: 2 ⁄ " 4 Washers • Mounting Template (in box) Note: The use of all provided mounting hardware may not be necessar y in the installation of all Spacemaker products. ™ Product may vary slightly from what is illustrated.
-
Page 6: Choose A Location
Important: Spacemaker™ appliances are only recommended to be installed on cabinets without a top lip and with a fl at bottom. It is not recommended to install Spacemaker appliances on cabinets with an overhang. See image below for recommended cabinet types. - Page 7 STA NDAR D IN STALLATI ON (F LAT CABI N ET) Important: Always wear protective glasses or goggles to prevent injury when drilling. Important: Do not align screw holes on the template directly under the partition between cabinets, as this will prevent you from installing the appliance properly.
- Page 8 Important: Always ensure you are drilling straight up or straight down through the marked mounting holes on the template. Drilling at an angle may prevent proper installation and may damage cabinets if the drill bit pierces the partition. Using a 1/32” drill bit, drill from the underside of the cabinet up or the top down, creating pilot holes through the 4 holes marked on the template.
- Page 9 (L) Note: If you are connecting this appliance to the receptacle of another Spacemaker appliance ™ such as the toaster oven or coffeemaker, make sure you can easily unplug the appliance following use.
-
Page 10: How To Use
HOW TO U SE This product is for household use only. OPEN I N G A CA N Lift piercing lever. Tip the can so that the rim is under the locating post, then push down on the piercing lever, making sure the cutter blade is inside the rim of the can (M) Note: Because of the hands-free feature, it is not necessary to hold the lever down or hold the can during cutting. -
Page 11: Care And Cleaning
US IN G T H E B OT TL E OP E N ER 1. Grab the bottle to be opened and position the cap above the lip on the back side of the bottle opener. 2. Tilt bottom of the bottle away from you to catch the cap on the lip and open the bottle. -
Page 12: Wa R R A N T Y An D Customers Erv Ic E I N Formati On
WA R R A N T Y AN D CUSTOMER S ERV IC E I N FORMATI ON For service, repair or any questions regarding your appliance, call the appropriate 800 number listed within this section. Please DO NOT return the product to the place of purchase. -
Page 13: Instrucciones Importantes De Seguridad
Por favor lea este instructivo antes de usar el producto. INSTRUCCIONES IMPORTANTES DE SEGURIDAD Al utilizar cualquier aparato eléctrico siempre deben tomarse precauciones básicas de seguridad, incluyendo las siguientes: • Lea todas las instrucciones antes de utilizar. • No utilice latas (tipo aerosol) a presión. •... - Page 14 ¡ B IE NV E N I D O ! Felicitaciones por su compra del Abrelatas Spacemaker . Hemos desarrollado ™ esta guía para asegurar rendimiento óptimo del producto y su satisfacción completa. Conser ve este manual de uso y cuidado y asegúrese de registrar su aparato en línea, visitando www.prodprotect.com/applica.
-
Page 15: Pi E Zas De Mon Ta J E
• Una segunda persona • Plantilla para el ensamblaje (en caja) Nota: Quizás no sea necesario utilizar todas las piezas de montaje provistas para la instalación de todos los productos SpaceMaker™. El producto puede variar ligeramente del que aparece ilustrado. -
Page 16: Escoja El Lugar Adecuado
Importante: Los aparatos SpadeMaker™ solo deben instalarse en gabinetes sin saliente superior y con inferior plano. No es recomendado instalar aparatos SpaceMaker™ en gabinetes que tengan un borde colgante. Consulte la ilustración de abajo para ver los tipos de gabinetes recomendados. - Page 17 MONTAJE ESTÁNDAR SOLO PARA GABINETES DE INFERIOR PLANO Importante: Siempre utilice lentes o gafas de protección, a fi n de evitar lesiones al perforar. Importante: No alinee los agujeros de los tornillos en la plantilla debajo de la partición entre los gabinetes, ya que esto impide la instalación apropiada del aparato.
- Page 18 Important: Siempre asegúrese de perforar derecho hacia arriba o hacia abajo a través de os agujeros marcados en la plantilla. El perforar en ángulo puede impedir la instalación correcta del aparato y dañar los gabinetes si la broca del taladro llegase a perforar la partición.
- Page 19 Nota: Si va a conectar este aparato al tomacorriente de otro aparato SpaceMaker™, tal como un horno tostador o una cafetera, asegúrese de poder desenchufar el aparato con facilidad después de haberlo utilizado. 14. ¡Su aparato SpaceMaker™ ya está listo para utilizar!
-
Page 20: Consejos Importantes
COM O U SA R Este producto es para uso doméstico solamente. PARA A B R IR U N A L ATA Eleve la palanca. Incline la lata de manera que el borde permanezca debajo de la guía de colocación y después presione la palanca, asegurándose de que la cuchilla se encuentre por dentro del borde de la lata (M) - Page 21 CONSEJOS IMPORTANTES: • Tenga cuidado al lavar y secar los cuchillos después de afilarlos. • No trate de afilar los cuchillos de sierra; el hacerlo desafila los bordes cortantes. • No use el afilador de este aparato para afilar tijeras. COM O USAR E L A B RE B OTELLAS 1.
-
Page 22: In Fo R M Ació N D E G A Ra N Tía Y S Erv Ic I O Al C Lie N Te
IN FO R M ACIÓ N D E G A RA N TÍA Y S ERV IC I O AL C LIE N TE Para servicio, reparaciones o preguntas relacionadas al producto, por favor llame al número del centro de servicio que se indica para el país donde usted compró... -
Page 23: Mises En Garde Importantes
Veuillez lire et conserver ce guide d’entretien et d’utilisation. MISES EN GARDE IMPORTANTES. Lorsqu’on utilise des appareils électriques, il faut toujours respecter certaines règles de sécurité fondamentales, notamment les suivantes : • Lire toutes les instructions avant la première bouteilles sous pression (de type aérosol). utilisation. - Page 24 B I E N VEN UE! Félicitations pour votre achat de l’ouvre-boîte Spacemaker . Nous avons élaboré ™ le présent guide pour assurer le rendement optimal du produit et votre entière satisfaction. Conser vez le présent guide d ’utilisation et d ’entretien, et assurez- vous d ’inscrire votre appareil en ligne au www.prodprotect.com/applica.
- Page 25 QU I NC A I LLER IE D ’I N STA L L AT IO N RONDELLES D’ESPACEMENT RONDELLES • Pièces de fixation Vous aurez également besoin : (Nº de pièce • de ruban gommé; SDC-MOUNTING KIT) • d’une règle 16 rondelles d’espacement ⁄...
- Page 26 D ÉT ER M I N ATI O N D U TY PE D ’A RMO IRE Important : Les appareils SpaceMaker™ sont conçus pour être installés sur des armoires à dessous plat, sans rebord supérieur. Il est déconseillé de les installer sur des armoires à...
- Page 27 INSTALLATION STANDARD POUR LES ARMOIRES À DESSOUS PLAT SEULEMENT Important : Toujours porter des lunettes ou des lunettes de protection pour éviter les blessures lors du perçage. Important : Ne pas aligner les trous de vis du gabarit avec la cloison qui sépare les armoires, puisque cela vous empêcherait d’installer l’appareil correctement.
- Page 28 Tenir le gabarit serré et le fi xer au ruban adhésif pour le maintenir en place. Important : Toujours s’assurer de percer à angle droit, vers le haut ou vers le bas, à travers les trous de fi xation indiqués sur le gabarit. Percer avec une inclinaison peut nuire à...
- Page 29 (L) Remarque : Si vous branchez cet appareil à la même prise qu’un autre appareil SpaceMaker comme le grille-pain four ou une cafetière, assurez-vous de pouvoir le débrancher facilement après usage.
- Page 30 U TIL ISATI ON Cet appareil est conçu pour un usage domestique seulement. OU VR IR U N E CON S ERVE Lever le levier de perçage. Incliner la conserve de sorte que le rebord s’insère sous le guide de position, puis abaisser le levier de perçage, en vous assurant que la lame est à...
-
Page 31: U Til Isati On De
U TIL ISATI ON DE L’OU VR E- B O UTEI L LE 1. Saisir la bouteille à décapsuler et en placer le capuchon au-dessus du rebord à l’arrière de l’ouvre-bouteille. 2. Incliner la bouteille à l’opposé de vous pour recueillir le capuchon sur le rebord et ouvrir la bouteille. - Page 32 RE NS EI G N E MEN TS D E G AR AN T I E E T SE RV ICE À LA C L I EN TÈ LE Pour communiquer avec les services d’entretien ou de réparation, ou pour adresser toute question relative au produit, composer le numéro sans frais approprié...
-
Page 33: Póli Z A De Gar A N Tí A
PÓLI Z A DE GAR A N TÍ A (Válida sólo para México) DURACIÓN Rayovac de México SA de CV garantiza este producto por 2 años a partir de la fecha original de compra. ¿Qué cubre esta garantía? • Esta Garantía cubre cualquier defecto que presenten las piezas, componentes y la mano de obra contenidas en este producto. - Page 34 Por favor llame al número correspondiente que aparece en la lista a continuación para solicitar que se haga efectiva la garantía y donde Ud. puede solicitar servicio, reparaciones o partes en el país donde el producto fué comprado. Argentina México Servicio Técnico Articulo 123 # 95 Local 109 y 112 Monroe 3351...
- Page 35 Sello del Distribuidor: Código de fecha / Date Code / Le code de date: Fecha de compra: Modelo: Comercializado por: Venta de Refacciones y Accesorios Rayovac de México S.A de C.V 01 800 714 2503 Autopista México Querétaro Importado por / Imported by: No 3069-C Oficina 004 RAYOVAC ARGENTINA S.R.L.
- Page 36 www.BlackAndDeckerAppliances.com © 2014 The Black & Decker Corporation and Spectrum Brands, Inc., Middleton, WI 53562 Made in People’s Republic of China Fabricado en la República Popular de China Fabriqué en République populaire de Chine BLACK+DECKER and the BLACK+DECKER logo are trademarks of The Black & Decker Corporation and are used under license.