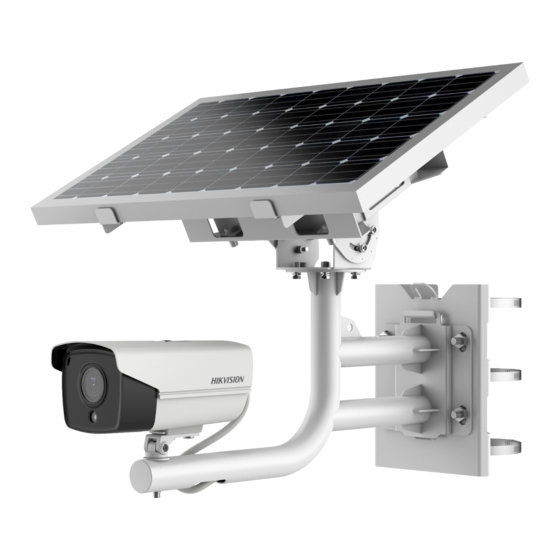
HIKVISION DS-2XS6A25G0-I/CH20S40 Quick Start Manual
Solar network camera
Hide thumbs
Also See for DS-2XS6A25G0-I/CH20S40:
- Quick start manual (9 pages) ,
- How to set up (14 pages) ,
- Quick start manual (60 pages)
Advertisement
Quick Links
Advertisement

Summary of Contents for HIKVISION DS-2XS6A25G0-I/CH20S40
- Page 1 Solar Network Camera Quick Start Guide...
- Page 2 QUALITY, OR FITNESS FOR A PARTICULAR PURPOSE. THE USE OF THE PRODUCT BY YOU IS AT YOUR OWN RISK. IN NO EVENT WILL HIKVISION BE LIABLE TO YOU FOR ANY SPECIAL, CONSEQUENTIAL, INCIDENTAL, OR INDIRECT DAMAGES, INCLUDING, AMONG OTHERS, DAMAGES FOR...
- Page 3 OPERATION, PRIVACY LEAKAGE OR OTHER DAMAGES RESULTING FROM CYBER-ATTACK, HACKER ATTACK, VIRUS INFECTION, OR OTHER INTERNET SECURITY RISKS; HOWEVER, HIKVISION WILL PROVIDE TIMELY TECHNICAL SUPPORT IF REQUIRED. YOU AGREE TO USE THIS PRODUCT IN COMPLIANCE WITH ALL APPLICABLE LAWS, AND YOU ARE SOLELY RESPONSIBLE FOR ENSURING THAT YOUR USE CONFORMS TO THE APPLICABLE LAW.
- Page 4 2012/19/EU (WEEE directive): Products marked with this symbol cannot be disposed of as unsorted municipal waste in the European Union. For proper recycling, return this product to your local supplier upon the purchase of equivalent new equipment, or dispose of it at designated collection points.
-
Page 5: Cautions And Warnings
Cautions&Warnings These instructions are intended to ensure that the user can use the product correctly to avoid danger or property loss. Laws and Regulations The device should be used in compliance with local laws, electrical safety regulations, and fire prevention regulations. Transportation Keep the device in original or similar packaging while transporting it. -
Page 6: Maintenance
Dispose of used batteries according to the instructions + identifies the positive terminal(s) of equipment which is used with, or generates direct current. - identifies the negative terminal(s) of equipment which is used with, or generates direct current. Maintenance If the product does not work properly, please contact your dealer or the nearest service center. -
Page 7: Time Synchronization
DO NOT stare at operating light source. May be harmful to the eyes. Wear appropriate eye protection or DO NOT turn on the white light when you assemble, install or maintain the camera. Emergency If smoke, odor, or noise arises from the device, immediately turn off the power, unplug the power cable, and contact the service center. -
Page 8: Symbols And Marks
CAUTION: Hot parts! Burned fingers when handling the parts. Wait one-half hour after switching off before handling parts. This sticker is to indicate that the marked item can be hot and should not be touched without taking care. For device with this sticker, this device is intended for installation in a restricted access location, access can only be gained by service persons or by users who have been instructed about the reasons for the restrictions... -
Page 9: Interface Introduction
Functional grounding Disposal Purchase separately Other situations Other situations omitted Waterproof Skip this step if not necessary Interface Introduction Memory Card Slot Reset Button SIM Card Slot Network Interface RS-485 Interface Power Interface... - Page 10 Installation...
- Page 11 Installation 1/4-20UNC M6×18...
- Page 12 Installation...
- Page 13 Installation...
- Page 14 Installation 1/4-20UNC...
- Page 15 Installation...
- Page 16 Installation M6×18...
- Page 17 Installation...
- Page 18 Installation...
- Page 19 Installation...
- Page 20 Installation...
- Page 21 Installation...
- Page 22 Installation...
- Page 23 Installation...
- Page 24 Installation -45°~45°...
- Page 25 Installation -15°~-45°...
- Page 26 Installation...
- Page 27 Installation -90°~90°...
- Page 28 Installation -45°~0°...
- Page 29 Installation...
- Page 30 Installation...
- Page 31 Activate and Access Network Camera Scan the QR code to get Activate and Access Camera. Note that mobile data charges may apply if Wi-Fi is unavailable.
- Page 32 Reset and Restore Camera Press Reset button for about 10s when the camera is powering on or rebooting to restore the default settings, including the user name, password, IP address, port No., etc. For the position of the reset button, refer to the indicator 2 in the appearance page.
- Page 33 UD20302B...


