Table of Contents
Advertisement
Quick Links
Download this manual
See also:
Service Manual
Advertisement
Table of Contents

Related Manuals for Kenwood DM-S500


Summary of Contents for Kenwood DM-S500
- Page 1 MINIDISC RECORDER DM-S500 INSTRUCTION MANUAL KENWOOD CORPORATION B60-3554-00 (K, P, T, M ) MC 98/12 11 10 9 8 7 6 5 4 3 2 1 97/12...
-
Page 2: Introduction
BACK). NO USER-SERVICEABLE PARTS INSIDE, REFER SERVICING TO QUALIFIED SERVICE PERSONNEL. REQUIREMENT BY NEDERLAND GAZETTE Batteries are supplied with this product. When they empty, you should not throw away. In- stead, hand them in as small chemical waste. DM-S500 (En) AC 110- AC 220- 120V 240V LINE... -
Page 3: Special Features
: Two tracks can be merged into a single track by deleting a track number. ÷ Erasing tracks : Music tracks or an entire disc you do not want to listen to can be erased, or all titles are erased. Introduction DM-S500 (En) -
Page 4: Table Of Contents
Safety Precautions ... 45 Maintenance ... 46 MD system ... 47 Digital recording and SCMS ... 48 In case of difficulty ... 49 Specifications ... 52 Caution : Read the pages marked Introduction DM-S500 (En) carefully to ensure safe operation. - Page 5 - - - - - - - - - - - - - - - - - - - - - - KENWOOD CORPORATION 2967-3, ISHIKAWA-CHO, HACHIOJI-SHI, TOKYO, JAPAN KENWOOD CORP. CERTIFIES THIS EQUIPMENT CONFORMS TO DHHS REGULATIONS NO. 21 CFR 1040.10, CHAPTER I, SUBCHAPTER J.
-
Page 6: System Connections
“In case of diffi- culty”. AV CONTROL CENTER (sold separately) or receiver (sold separately) REC OUT PLAY IN Connect to TAPE 1/MD or TAPE 2 MONITOR terminal (*1). Digital component (CD player, etc.) DM-S500 (En) TO WALL AC OUTLET (*1) - Page 7 ÷ Never bend or bundle the optical-fiber cable. SYSTEM CONTROL CONNECTIONS After hooking this unit up with the KENWOOD System “SERIES 21,” connect the system control cords for convenient system control operations between the connected devices. When hooking this unit up with the System “SERIES 21,” read the instruction manuals supplied with the AV CONTROL CENTER (sold separately) or the receiver (sold separately).
-
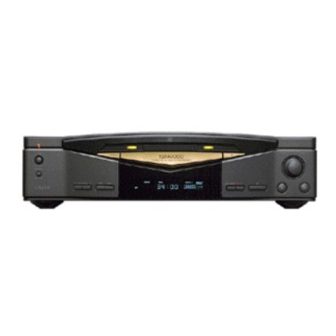
Page 8: Names And Functions Of Parts
SINGLE TOTAL REMAIN TITLE SEARCH Display TIME DISPLAY MINI DISC RECORDER DM-S500 ÷REC LEVEL INPUT 8 9 0 8 REC LEVEL keys This key is used to adjust the recording level. 9 REC INPUT key This key is used to switch the recording input source. -
Page 9: Remote Control Unit
¶ : Record key 7 : Stop key AUTO/MANU. key : This is used for selection of automatic (AUTO) or manual (MANU.) track number assignment at the time of recording. Names and functions of parts DM-S500 (En) ¡ • • ª ‚... -
Page 10: Operation Of Remote Control Unit
In such a case, change the installation position to avoid malfunction. Insert batteries. ÷ Insert two R6 (“AA”-size) batteries following the polarity indications. Remote sensor ) key of the DM-S500 (En) Close the cover. 30° 30° Reference operating range... -
Page 11: Graphical Remote Control Unit(Grc)
If the GRC unit provided with your AV CONTROL CENTER (optional) or receiver (optional) is the “GRC-100” or “GRC- 150”, the DM-S500 unit should be controlled using the remote control unit provided with this unit. Operation of remote control unit... -
Page 12: Setting Up The Grc For Md
Return Setup MD System Control System Control Screen after selection Main Menu Tuner Tuner Confirm Set Up Return System Control Title Search DM-S500 (En) Set Up Tape1 VCR1 Cable VCR2 Reset Set Up Set Up Set Up 10key Mode Edit... - Page 13 Notes on the remote control operating instructions in this text This instruction manual for this model also covers the systems in the KENWOOD System “SERIES 21” lineup. Since the features vary depending on the combined systems, the remote control operation illustrations (icons) are shown for two types of remote control units.
-
Page 14: Playback Of Mini Disc
D I S C 30 10 5 SINGLE 0 0 1 0 : 0 0 30 10 5 SINGLE 0 : 1 2 0 0 1 30 10 5 Elapsed time of track being played DM-S500 (En) ( dB) ( dB) ( dB) -
Page 15: Playback From Desired Track
To select a different title during listening : RC operation Mode Press the ¢ key. ENTER Random GRC operation Return the previous menu and select the ¢ icon. Playback of Mini Disc SINGLE 0 0 1 0 : 0 0 30 10 5 DM-S500 (En) ( dB) - Page 16 ENTER Reverse search To stop playback GRC operation ENTER Playback of Mini Disc RC operation GRC operation E J E C T Mini Disc has been ejected. DM-S500 (En) ENTER D I S C...
-
Page 17: Searching A Desired Track By Its Title (Title Search)
SEARCH 0 0 2 T I T L E 30 10 5 Title SINGLE TITLE SEARCH 0 0 2 T I T L E 30 10 5 Characters flow toward the left. DM-S500 (En) ( dB) ( dB) ( dB) -
Page 18: Programming Tracks In A Desired Order
- 0 : 0 0 - - - Selected track Programmed order 0 1 2 P - 0 1 ” is displayed when the total programmed period has DM-S500 (En) ( dB) 30 10 5 30 10 5 ( dB) - Page 19 ÷ The entire program is cleared. Playback of Mini Disc Programmed order P - 0 3 0 1 4 30 10 5 (Example when P-14 has been cleared) - - - P - 1 4 30 10 5 DM-S500 (En) ( dB) ( dB)
-
Page 20: Repeated Playback
ENTER Mode ENTER To stop repeated playback Repeat ENTER ENTER Playback of Mini Disc “PGM” lights up “REPEAT” lights up REPEAT Press the REPEAT key again. “PGM” goes off “REPEAT” lights up REPEAT Press the REPEAT key again. DM-S500 (En) -
Page 21: Time Display Key
: Total elapsed time at the time of recording. : Remaining recording time of disc. One will light. SINGLE TOTAL REMAIN DIGITAL 1 2 CD TEXT 0 0 1 - 1 : 2 3 30 10 5 Indication of the remaining time DM-S500 (En) ( dB) -
Page 22: Recording
: Track numbers are added manually. Extinguished in “AUTO” mode, lit in “MANUAL” mode. 0 0 1 : - 1 2 d B A T T Level value DM-S500 (En) goes off DIGITAL 1 2 30 10 5 ( dB) £... - Page 23 This position is convenient when recording live sound or classic music containing long pianissimo sections onto disc. MANUAL 30 10 5 ( dB) DM-S500 (En) : Disc is full \Erase undesired tracks. ” : The accidental erasure protect tab is open. \ Close it.
-
Page 24: Digital Recording
\Connect the optical fiber cable correctly. : Digital recording is prohibited by SCMS. \Use analog recording. : The input digital signal is not an audio signal. Recording DM-S500 (En) ¡ ( dB) £ £ MANUAL ( dB) ™... - Page 25 44.1 kHz, or 32 kHz, “UNLOCK” will be displayed and no sound will be heard. ENTER EJECT D I S C Mini Disc has been ejected. GRC operation ENTER “MONITOR” Lights 0 0 1 30 10 5 Recording DM-S500 (En) MONITOR ( dB) fl°...
-
Page 26: Synchro Recording With Cd Player
Synchro recording with CD player By connecting a KENWOOD CD player equipped with a system control jack to this unit via a system control cord and starting recording with the following procedure, the recording (MD) and playback (CD) can be started simultaneously so that there is no sound interruption. -
Page 27: Editing
A B C D E F G H I J K L M N O P fl V W X Y Z Scrolling\ K L M N O P Q R S T U V W X Y Z Q R S T U V W X Y Z Editing DM-S500 (En) ¤ › fl... -
Page 28: Changing Tracks During Playback (Track Move)
0 0 2 ENTER To increase track No. 0 0 2 ENTER Track to be moved ENTER Editing DM-S500 (En) MANUAL > - - - 30 10 5 MANUAL = > 0 0 1 ? > 30 10 5 Destination track No. - Page 29 GRC operation ENTER ok ? Track to be moved during playback Selected destination When moved to a position after current position DM-S500 (En) : Editing : When editing is completed successfully : When editing is impossible EJECT D I S C Mini Disc has been ejected.
-
Page 30: Moving Several Tracks At A Time (Quick Move)
÷ Pressing the CLEAR/DELETE key allows to cancel the last selected ENTER track only. (To erase previously selected tracks, press the EDIT key and restart from the beginning.) Enter ENTER Editing DM-S500 (En) MANUAL ( dB) 30 10 5 MANUAL = > 0 0 1 ? - Page 31 26 27 28 29 Arrangement in the desired sequence (step 2) 1 2 4 3 23 6 24 26 27 28 29 Editing DM-S500 (En) TITLE MANUAL ? / 0 0 5 30 10 5 MANUAL 2 = > - - -...
-
Page 32: Dividing A Track During Playback (Track Divide)
÷ Fine adjustment of the division point is possible from the point where the EDIT key has been pressed in 32 steps of 60 ms (6/100 sec) (a range ENTER of about 2 sec). ENTER Editing DM-S500 (En) MANUAL ( dB) 30 10 5 MANUAL ( dB) - Page 33 Place where the EDIT key has been pressed : Editing : When editing is completed successfully : When editing is impossible EJECT D I S C Mini Disc has been ejected. Fine adjustment range : 32 steps Editing DM-S500 (En) ª...
-
Page 34: Combining Tracks During Playback (Track Combine)
0 0 2 + Present title To increase track No. Connecting tracks 2 and 5. ENTER 0 0 2 + ENTER Editing DM-S500 (En) MANUAL ( dB) 30 10 5 MANUAL 30 10 5 ( dB) Next title MANUAL 0 0 5 ? - Page 35 Mini Disc. Track No. is adjusted. Track No. and title of the second track are cleared. Editing DM-S500 (En) : Editing : When editing is completed successfully : When editing is impossible ª...
-
Page 36: Erasing Several Tracks At A Time (Quick Erase)
÷ Pressing the 1 ¡ keys allow to check the current order of tracks. ÷ When the CLEAR/DELETE key is pressed, the title being displayed will be removed from the group of titles to be erased. Enter ENTER Editing DM-S500 (En) MANUAL 30 10 5 ( dB) MANUAL = >... - Page 37 Note Note and editing is being written to the Mini Disc. Image of erasing several tracks at a time (ALL ERASE) DM-S500 (En) : Editing. : When editing is completed successfully. : When editing is impossible. EJECT D I S C Mini Disc has been ejected.
-
Page 38: Erasing A Single Track During Playback (Track Erase)
While “WRITING” is displayed, do not impact or move the unit because information about recording and editing is being written to the Mini Disc. Track Nos. are adjusted. Editing DM-S500 (En) MANUAL 30 10 5 ( dB) MANUAL 30 10 5... -
Page 39: Erasing A Part Of A Track
Execute TRACK DIVIDE twice. ERASE once. EJECT D I S C Mini Disc has been ejected. Part to be erased Track No. is adjusted. The space left after erasing is filled by subsequent tracks which move along. Editing DM-S500 (En) °... -
Page 40: How To Edit Titles
÷ ÷ ÷ ÷ ÷ 0 0 1 Select the desired preset No. REMAIN TITLE P R E 4 J a z z REMAIN TITLE A L L E R A S E ? Editing DM-S500 (En) MANUAL ( dB) 30 10 5... - Page 41 30 10 5 TOTAL TITLE T I T 30 10 5 The title is scrolled. EJECT D I S C Mini Disc has been ejected. Editing DM-S500 (En) MANUAL ( dB) MANUAL ( dB) MANUAL ( dB) MANUAL ( dB)
-
Page 42: Changing Or Deleting A Title
= > K E N The correct character is selected. TOTAL TITLE = > K E N W The cursor moves. Editing DM-S500 (En) ‚ MANUAL 30 10 5 ( dB) MANUAL 30 10 5 ( dB) MANUAL 30 10 5... - Page 43 P42 step 2-2 P42 step 2-45 P40 step 1- P40 step 1-23 P41 step 2-13 P41 step 2-23 P41 step 3-12 Editing DM-S500 (En) MANUAL 30 10 5 ( dB) MANUAL 30 10 5 ( dB) D I S C...
-
Page 44: Cd Text Editing
Mini Disc has been ejected. While “WRITING” is displayed, do not impact or move the unit because information about recording and editing is being written to the Mini Disc. Editing DM-S500 (En) ¢ MANUAL 30 10 5 ( dB) MANUAL... -
Page 45: Important Items
In such a case, the character information will be displayed on the screen, but it can not be copied. “CD text edition” operation becomes possible for CDs without copy prohibition code. DM-S500 (En) -
Page 46: Maintenance
Caution against contact revitalizer Do not use contact cleaners because it could cause a malfunction. Be specially careful against contact cleaners containing oil, for they may deform the plastic componente. Important items DM-S500 (En) Write protect tab Slide close. (Recording enabled) ( dB) -
Page 47: Md System
(Masking effect) In case of vibration When the readout from disc is inter- rupted momentarily due to vibration or shock, the reproduced sound from the memory will not be interrupted. Reproduced sound Important items DM-S500 (En) -
Page 48: Digital Recording And Scms
Copy using digital input Copy using digital input Copy using analog input Copy using analog input Copy using analog Copy using digital input input Digital copy cannot be re- peated. Copy using digital input Important items DM-S500 (En) -
Page 49: In Case Of Difficulty
÷ This is because the monaural recording and stereo recording use different formats, and not a malfunction. ÷ As the title recording areas are used on a per-7-character basis, the total number of input characters may be less than 1792. DM-S500 (En) - Page 50 ÷ The CD player is not connected via an optical fiber cable. ÷ Title copying may not be possible, depending on the disc. In case of difficulty DM-S500 (En) Action ÷ Use analog recording. ™ ÷ Connect the optical fiber cable correctly.
- Page 51 ÷ A disc in which distorted sound has been re- corded is played. ÷ An external noise is induced. In case of difficulty DM-S500 (En) Remedy ÷ Connect the cords in accordance with “Sys- tem connections”. ÷ Load a disc.
-
Page 52: Specifications
Weight (Net) ... 3.7 kg (8.2 lb) 1. KENWOOD follows a policy of continuous advancements in development. For this reason specifications may be changed without notice. 2. The full performance may not be exhibited in an extremely cold location (under a water-freezing temperature).