Table of Contents
Advertisement
Advertisement
Table of Contents

Related Manuals for JVC AV-11NT510

Summary of Contents for JVC AV-11NT510
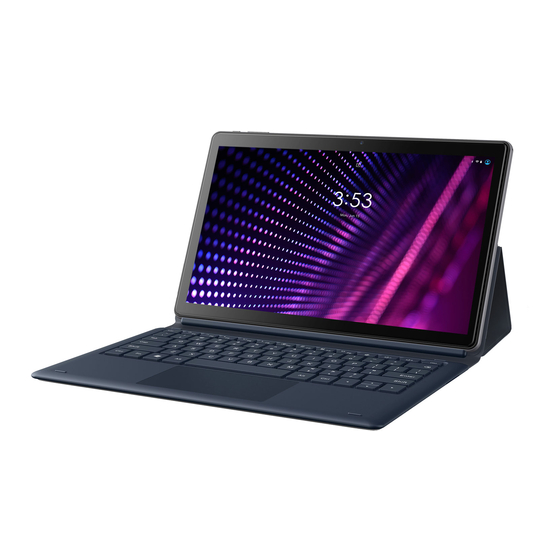
- Page 1 11.6" 4G + WIFI PRO TABLET WITH KEYBOARD CASE AV-11NT510...
-
Page 2: Table Of Contents
CONTENTS 1. Safety..................................2 . Important Information............................3 . Technical Specifications............................3 . Appearance of the Tablet............................4 . Before Use................................5 . Buttons...................................6 . Using the Touch Screen............................8 . Using the Keyboard Case............................8 . Computer Connection............................9 . Applications...............................10 . -
Page 3: Safety
1. Safety Read these guidelines carefully. Not following them may be dangerous or illegal. —DO NOT RISK— All wireless devices may cause interferences, which could affect the performance of other devices. Do not switch on the device when the use of mobile phones is prohibited or if it might cause interference or danger. -
Page 4: Important Information
can cause damage. Installing an incorrect battery type can cause an explosion. Never open the battery. Please dispose of the battery according to the instructions. Disconnect an unused adapter from power supply. If the charging cable is damaged, it should not be repaired but replaced with a new one. Use the original manufacturer’s accessories only. -
Page 5: Appearance Of The Tablet
3.2 Specifications Android 10.0 Octa Core Spreadtrum SC9863, 1.6GHz Display 11.6”, 1920 x 1080 FHD Display RAM Memory 2GB DDR Memory 64 GB (Total built-in) Speaker Web Camera Front: 8MP; Back 13MP Ports Type-C USB (OTG supports up to 32GB), Headphone Jack, SIM Card &... -
Page 6: Before Use
5.Before Use 5.1 Inserting the SIM cards This tablet has dual SIM technology allowing the use of two mobile networks simultaneously. It has two slots - one is a dedicated SIM card slot and the other is a SIM card/microSD card slot. To insert the SIM card(s), first turn off the tablet. -
Page 7: Buttons
If the battery is completely discharged the device cannot be switched on even when the loading process is ongoing. Before the device can be turned on again, the battery has to be charged for at least a few minutes. In case of any problems with the battery contact Customer Service. - Page 8 Back Menu Home Menu • Pressing the Menu button will cause the list of open apps to appear, where you can switch between the apps or turn them off. • If you press the Menu button twice, you will open the previously used application.
-
Page 9: Using The Touch Screen
7.Using the Touch Screen The touch screen of the device lets you easily select items or perform operations. The touch screen can be controlled by the following actions: 7.1. Touch Touch to start options, apps, menu, etc. 7.2 Swipe Quickly swipe up, down, to the left or to the right to scroll through the lists or the screen. -
Page 10: Computer Connection
9.Computer Connection To connect to a PC computer with Microsoft Windows XP/Vista/7/8/10 using the USB cable, plug the Type-C USB end of the provided charging cable into the Type-C USB port on the tablet. Plug the other end of the cable into the socket of your computer. When the device is plugged in, a screen will appear on your tablet with the fingerprint of the computer, here you will choose “Always allow from this computer”... -
Page 11: Applications
10.Applications On the desktop screen, tap the icon [Application menu] to gain access to installed applications. To add a shortcut to an application on the desktop screen, press the application icon in the application menu and hold it, then when you change the view to the desktop view, select the place where you wish to create a shortcut and "drop"... -
Page 12: Adding Contacts
Here you can choose one of the SIM cards as the preferred SIM for mobile data, calls and messages. 12. Adding Contacts Enter the [Phone] application and type the number you wish to add then press "Contact”. A menu will appear containing, among others: Name and surname, Phone number, Second phone number, E-mail. -
Page 13: Setting
14.Setting... - Page 14 14.1 Network & Internet Set up WIFI connection, Mobile network, Data usage, Hotspot & Tethering, SIM cards, VPN and Airplane mode. 14.2 Connected Devices Set up Bluetooth, Printing and connect the tablet to a computer using a USB cable.
- Page 15 14.3 Apps & Notifications Check All APP information, Notifications, APP permissions and Advanced for default and some special app access. 14.4 Battery Provides battery usage data.
- Page 16 Display 14.5 Adjust brightness, change your wallpaper, turn on/off screen rotation, sleep settings and font size. 14.6 Storage Check all storage details.
- Page 17 14.7 Security Set the security of the device and privacy. 14.8 Accounts Tap to add or remove accounts such as Google, Outlook, Hotmail , Yahoo , etc. can be added to the device.
- Page 18 14.9 Accessibility Adjust settings for users with poor vision. 14.10 Google Set Android Auto App, Cast Media Controls, Nearby Location, Restore Contacts, Security, Or set up Nearby Device. You can also set up work profile under this setting.
- Page 19 14.11System 14.11.1 Languages & Input Set language, spelling correction, keyboard and voice settings. 14.11.2 Gesture Set Jump to camera.
- Page 20 14.11.3 Date & Time Set the date, time and time zone. 14.11.4 Backup Backup data.
-
Page 21: About Tablet
14.11.5 Reset options Reset your tablet. Important: Please note that doing a factory reset will delete all your apps and data. 15.About Tablet Model number and general tablet information. -
Page 22: Safe Use Of The Battery
16. Safe Use of the Battery The battery may be charged using the USB port of a computer or laptop. Nevertheless, it is not a recommended form of charging an operating device due to the low charging current offered by the USB. Even though the device is connected to a power source, the battery can still get discharged. -
Page 23: The Use Of The Manual
19.The Use of the Manual 19.1 Consents Without prior written consent of the manufacturer, no part of this manual may be photocopied, reproduced, translated or transmitted in any form or by any means, electronic or mechanical, including photocopying, recording or storing in any systems of storing and sharing information. - Page 24 Register your product at jvctv.com.au/warranty-registration...