
Related Manuals for GDS GASMAX II


Summary of Contents for GDS GASMAX II
- Page 1 Operation and Maintenance Manual GASMAX II Single / Dual Channel Gas Monitor GDS Corp. 1245 Butler Road League City, TX 77573 409-927-2980 409-927-4180 (Fax) ww.gdscorp.com...
- Page 2 GASMAX II Operation & Maintenance Manual, Revision 7.0 CAUTION: FOR SAFETY REASONS THIS EQUIPMENT MUST BE OPERATED AND SERVICED BY QUALIFIED PERSONNEL ONLY. READ AND UNDERSTAND INSTRUCTION MANUAL COMPLETELY BEFORE OPERATING OR SERVICING. ATTENTION: POUR DES RAISONS DE SÉCURITÉ, CET ÉQUIPEMENT DOIT ÊTRE UTILISÉ, ENTRETENU ET RÉPARÉ...
-
Page 3: Table Of Contents
GASMAX II Operation & Maintenance Manual, Revision 7.0 CONTENTS SAFETY INFORMATION _______________________________________________ 6 OVERVIEW _________________________________________________________ 7 INSTALLATION ______________________________________________________ 9 INITIAL SETUP _____________________________________________________ 23 CALIBRATION ______________________________________________________ 29 MAINTENANCE _____________________________________________________ 31 USER MENUS ______________________________________________________ 33 TROUBLESHOOTING ________________________________________________ 44 MODBUS INTERFACE ________________________________________________ 47... - Page 4 GASMAX II Operation & Maintenance Manual, Revision 7.0 TABLE OF FIGURES FIGURE 4-1: GASMAX II POWER & SIGNAL WIRING ..................10 FIGURE 4-2: OPTIONAL RELAY / MODBUS INTERFACE BOARD..............11 FIGURE 4-3: MODBUS WIRING (TYPICAL) ..................... 12 FIGURE 4-4: MODBUS WIRING (MODBUS JUNCTION BOX)................13 FIGURE 4-5: MODBUS JBOX INSTALLATION OPTIONS ..................
- Page 5 FIGURE 9-4: SET GAIN TO UNITY MENU ....................... 42 FIGURE 9-5: PREAMP GAIN SET MENU ......................42 FIGURE 13-1: GASMAX II + LOCAL SENSOR SPARE PARTS ................52 FIGURE 13-2: GASMAX SENSOR HEAD......................52 FIGURE 13-3: GASMAX EXPANSION BOARDS ....................53 FIGURE 13-4: GASMAX SENSOR HEAD SPLASH GUARD &...
-
Page 6: Safety Information
Users should have a detailed understanding of GASMAX II operating and maintenance instructions. Use the GASMAX II only as specified in this manual or detection of gases and the resulting protection provided may be impaired. Read the following WARNINGS prior to use. -
Page 7: Overview
LCD readout. GASMAX II SENSORS The GASMAX II supports a number of different sensors that fall into two categories – “toxic” and “bridge”. Toxic sensors use an electrochemical process to detect gas and are often referred to as “echem” sensors. - Page 8 II, it connects to the “ ” connector on the back of the display. If the GASMAX II is equipped with the optional MODBUS + relay interface board, this board is mounted to the back of the display using three extended length 4-40 screws. The GASMAX II software automatically recognizes the presence of the MODBUS + relay interface board if installed.
-
Page 9: Installation
Factors such as prevailing winds, gas density, potential leak sources, air movement machinery and similar environmental variables are important when selecting a location for the GASMAX II gas monitor or gas sensor. Even though the GASMAX II is designed for rugged service, sensors and electronics should be protected from environmental damage due to water, snow, shock, vibration and dirt. - Page 10 SONT ALIVE INTRINSICALLY SAFE INSTALLATION The GASMAX II is not certified for use as an Intrinsically Safe device. Any GASMAX II that does not include a flame arrestor in the sensor should be used in general purpose areas only. CONNECTING DC POWER & OUTPUT SIGNAL WIRING To access the GASMAX signal and power connections, remove the cover on the GASMAX II explosion- proof enclosure, loosen the 2 thumbscrews holding the display assembly and remove it.
- Page 11 Display Assembly and supplies two level alarm relays “ ” and “ ” , a FAULT relay “ ” and an RS-485 Modbus RTU slave port. If dual isolated 4-20mA outputs are not installed, GASMAX II units may be field upgraded with this option at any time.
- Page 12 MODBUS / RS-485 transmissions use low-voltage differential signaling to achieve reasonable data rates over very long distances, up to 4000 feet without a repeater. For MODBUS data signals, GDS Corp recommends 24GA shielded cable for best results. Power distribution, however may require larger gauge wire since it is critical that the supply voltage for the GASMAX at the far end of the string not fall below 12VDC during power-up and normal operation.
- Page 13 GASMAX II Operation & Maintenance Manual, Revision 7.0 “ ” “B” I Power upply ibbon to isplay “ ” “B” Figure 3-4: MODBUS Wiring (MODBUS Junction Box) The MODBUS wiring junction box is attached to the GASMAX, either on the bottom fitting or one of the side fittings, depending on installation requirements.
- Page 14 24 VDC power source. Each 4-20mA output shares the same common ground and are therefore not isolated from each other. This board is connected “piggyback” to the back of the GASMAX II Display Assembly. GASMAX II units may be field upgraded with this option at any time.
- Page 15 LOCAL SMART TOXIC SENSOR WIRING (CH1) Local toxic sensors are factory installed in a sensor head directly attached to the GASMAX II enclosure. Local toxic sensors are always connected to the Channel 1 Smart Sensor connector “ ” located on the back of the Display Assembly (See Fig.4-5).
- Page 16 Due to the small signal output from toxic sensors, remote direct input toxic sensors should be mounted no more than 15 wire-feet from the GASMAX II display. Further, the cable used should be three-wire stranded with foil shield and should be run inside metallic rigid conduit. GDS Corp recommends Belden B8771.
- Page 17 Figure 3-9: Channel 1 Remote Toxic Sensor Transmitter (10-0233-D4) If the 10-0233-B4 bridge + 4-20ma input I/O power supply board is installed in the GASMAX II then the remote sensor transmitter is connected as shown below (+24V is not available on TB1 pin 1).
- Page 18 GASMAX II Operation & Maintenance Manual, Revision 7.0 LOCAL COMBUSTIBLE SENSOR WIRING (CH2) Local bridge-type sensors, including catalytic bead or infrared sensors for combustibles and photoionization detectors (PID) for volatile organic compounds are factory installed and always connected to the Channel 2 mart ensor connector “ ” on the IO/Power Supply board, located on the back of the explosion proof enclosure (See Fig.
- Page 19 Bridge-type sensors have a more robust output and can be mounted up to 100 feet from the GASMAX II. Cable used should be three-wire stranded with foil shield and should be run inside metallic rigid conduit where possible. GDS Corp recommends Belden B8771. The cable shield must be connected to an earth ground at ONE END ONLY.
- Page 20 REMOTE TOXIC SENSOR TRANSMITTER WIRING (CH 2) GASMAX II monitors with remote-mount toxic sensor transmitters are shipped in two pieces and sensor wiring must be installed by the end user. When used with Channel 2, toxic sensor transmitters connect to the Channel Two 4-20mA input on the right-hand side terminal strip of the I/O power supply board.
- Page 21 CONNECTING AN EXTERNAL 4-20MA INPUT DEVICE (CH 2) The GASMAX II can be factory configured to support a general purpose, non-isolated 4-20mA input on channel 2. Power Supply boards that have been converted to 4-20mA will have TB1 marked to indicate PWR (+24V), 4-20 IN (signal) and COM (ground).
- Page 22 GASMAX DUAL 4-20MA OR 4-20MA + BRIDGE INPUT OPTION The GASMAX II can be factory configured to support two general purpose, non-isolated 4-20mA inputs on channels 1 and 2 (10-0233-D4), or one non-isolated 4-20mA input on Channel 1 and one BRIDGE input on Channel 2 (10-0233-B4).
-
Page 23: Initial Setup
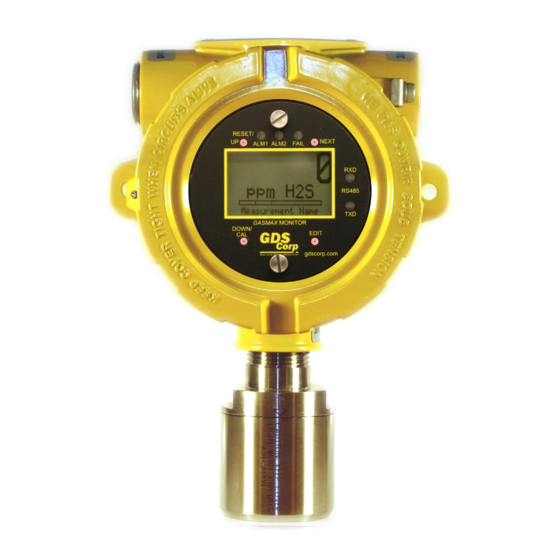
GASMAX USER INTERFACE The GASMAX II display is shown in Figure 5-1. There are four magnetic switches on the face of the GASMAX II, arranged in a quadrant around the LCD display; these are labeled NEXT, EDIT, DOWN/CAL and UP. - Page 24 DOWN to select an item, EDIT to change an item, and NEXT to exit the menu or function and return the GASMAX II to display mode. See Chapter 8 for more information on User Menus. Figure 4-3: User Menu Screen NOTE: TAKE CARE WHEN CHANGING GASMAX MENU SETTINGS –...
- Page 25 GASMAX II Operation & Maintenance Manual, Revision 7.0 Above the LCD display, three LEDs indicate the status of the level and fault alarms. If relays are installed, the LEDs indicate whether the relays are active. Note that if any relay is set for FAILSAFE operation, if LED is ON the relay will be de-energized.
- Page 26 10-pin sensor cable. No user setup is required. Initial field calibration is always required. Remote Direct Toxic Sensors: GASMAX II units with remote direct toxic sensors do not automatically load sensor settings, but when ordered with remote toxic sensors the GASMAX II is pre-configured, calibrated and tested at the factory.
- Page 27 PROGRAMMING ALARM SETTINGS GASMAX II gas monitors have front panel LED indicators for ALARM 1 and ALARM 2. Both alarm indicators can be set to activate above or below a given engineering units set point. Alarm processing will trigger an alarm condition when the input exceeds the programmed value, and includes hysteresis to keep the alarm from rapidly switching ON and OFF if the input remains close to the programmed alarm value.
- Page 28 LEDs only. A NOTE ON WARM UP Allow the GASMAX II to stabilize for at least four hours, preferably overnight if possible. This will allow all sensors to reach stable equilibrium with respect to environmental conditions such as ambient temperature, humidity, and barometric pressure.
-
Page 29: Calibration
During CAL MODE the sensor output is disabled and the GASMAX II transmits a fixed mA value, called the CAL MARKER, to notify the receiving device that a calibration is in progress. During the following CAL PURGE DELAY time, the GASMAX II transmits a fixed 4.0 mA signal to prevent external alarms during... - Page 30 A cylinder of ‘zero air’ is always recommended and may be necessary if the absence of target gas cannot be confirmed. GDS Corp recommends a flow rate of 0.5 liters / minute for standard gases and a flow rate of 1.0 liters / minute for highly reactive gases such as chlorine or chlorine dioxide.
-
Page 31: Maintenance
If a remote direct toxic sensor shows FAULT, does not respond to gas or can no longer be calibrated, before replacing the sensor check the wiring between the sensor and GASMAX II for electrical continuity. In addition, check for signs of moisture or corrosion in any of the cabling or junction boxes. - Page 32 SENSOR REPLACEMENT – LOCAL BRIDGE SENSORS GASMAX II monitors use GDS Corp type 10-95XX- YYYY bridge sensors, where “ ” is the sensor type and “YYYY” is the full scale range. or example, a replacement catalytic bead sensor for -100% LEL methane would be part number “...
-
Page 33: User Menus
7 USER MENUS MAIN MENU GASMAX II setup variables are stored in non-volatile memory and can be modified by the end user to better match a particular application. The GASMAX II Main Menu tree is shown below. To access the Main Menu, swipe the magnetic wand over the EDIT key. - Page 34 GDS Corp temperature compensated sensors are preprogrammed with the necessary table of values and are automatically uploaded to the GASMAX II from the smart sensor. This menu item is not accessible unless a temperature compensated local Smart Sensor is installed.
- Page 35 4-20mA output value that is transmitted during ZERO and SPAN calibration. This setting is limited to between 2ma and 20mA and is a useful way to indicate to a GDS controller that the unit is in CAL MODE.
- Page 36 GASMAX II Operation & Maintenance Manual, Revision 7.0 Alarm 1, 2, 3 menus are identical A L A R M S E T T I N GS A L A R M x S E T U P R E L A Y C ON F I G >...
- Page 37 UP / DOWN keys. INPUT TYPE indicates what kind of input or sensor the GASMAX II is configured to accept and is typically pre-configured at the factory. When installed, Smart Sensors upload sensor type and other data to the GASMAX II and this data may be viewed on the SMART SENSOR information screen.
- Page 38 E X I T Figure 7-8: Contrast Menu HELP SCREEN PAGE The Help screen contains several pages of information describing GASMAX II operation. DIAGNOSTICS PAGE The Diagnostics page provides tools for use during setup or testing. Since relays are not available on the GASMAX II, the Relay Test option is not functional.
- Page 39 OUTPUT SIMULATION allows setting the 4-20mA output to virtually any desired value. This is useful for checking responses of devices receiving the GASMAX II’s -20mA output. RELAY TEST allows the user to manually activate any of alarm relays independent of the presence of gas.
- Page 40 YES enables the LEL / Current channel (Channel 2). OUTPUT ZERO / SPAN TRIM provides a way to precisely set the GASMAX II 4mA and 20mA outputs to compensate for variation in output components. These settings are programmed at the factory and should not be modified.
- Page 41 Remote sensors require manual adjustment. Excitation voltage must be measured at the sensor; therefore, if the sensor is mounted some distance away from the GASMAX II, the excitation voltage may have to be higher to compensate for losses in field wiring.
- Page 42 GASMAX II signal conditioning circuits. Local Smart Sensors include factory- preset preamp gain values and for standard sensors and applications, these values should not be changed.
- Page 43 GASMAX II Operation & Maintenance Manual, Revision 7.0 Coefficient Electrochemical Sensor Type Default EUNITS Negative Hydrogen Sulfide ppm H2S Negative Oxygen % Oxygen Negative Carbon Monoxide ppm CO Negative, Bias Ammonia ppm NH3 Negative, Bias Nitric Oxide ppm NO Negative...
-
Page 44: Troubleshooting
GASMAX II Operation & Maintenance Manual, Revision 7.0 TROUBLESHOOTING LOCAL SMART TOXIC SENSOR NOT RECOGNIZED • If a locally connected toxic sensor is not recognized on power-up or when installed, verify that the sensor cable is plugged in as shown in the section on local toxic sensors and that channel 1 is turned on in the Transmitter config menu. - Page 45 RECEIVING DEVICE AND GASMAX DISPLAYED VALUES DON’T MATCH • Check that zero and full scale range values match between GASMAX and receiving device (controller). Use DIAGNOSTICS menu to force GASMAX II output to 12mA (1/2 scale) and verify appropriate half-scale reading on controller. •...
- Page 46 GASMAX II Operation & Maintenance Manual, Revision 7.0 • 08 – System Data CRC Fail – Error in system data file. Contact factory. • 09 – Custom Data CRC Fail – Error in system data file. Contact factory. • 10- Linearization Data CRC Fail – Error in system data file. Contact factory.
-
Page 47: Modbus Interface
GASMAX II Operation & Maintenance Manual, Revision 7.0 9 MODBUS INTERFACE The GASMAX II features a full complement of user-accessible MODBUS registers that can provide a complete snapshot of each gas detectors configuration. This includes all real-time data, preset zero, span and calibration values and user-programmable text. - Page 48 GASMAX II Operation & Maintenance Manual, Revision 7.0 CH 2 Floating Point 33002 See Channel Floating Point definition Ch 1 Measurement Name 40401 - 40408 16 ASCII characters (2 per register) Ch 2 Measurement Name 40409 – 40416 16 ASCII characters (2 per register) Ch 1 ASCII Reading 40417 –...
- Page 49 GASMAX II Operation & Maintenance Manual, Revision 7.0 Ch 2 Span Real 41027 Ch 2 Span Divisor 41028 Ch 2 Fault Real 41029 Ch 2 Fault Divisor 41030 Ch 2 Alarm 1 Real 41031 Ch 2 Alarm 1 Divisor 41032...
- Page 50 GASMAX II Operation & Maintenance Manual, Revision 7.0 ALARM STATUS WORD BIT DEFINITION Alarm Status Word Bit 0 Ch 1 Alarm 1 (1), no alarm (0) Bit 1 Ch 1 Alarm 2 (1), no alarm (0) Bit 2 Ch 1 Fault (1), no fault (0)
-
Page 51: Specifications
Channel One Microamp-level input for local or remote GDS Corp toxic gas sensors Input Optional 4-20mA input for remote sensor transmitters, GDS-IR, GDS-50 or other 4- 20mA source Channel Two Bridge-type input with adjustable excitation voltage for local or remote Catalytic Bead,... -
Page 52: Spare Parts
Toxic Sensor Transmitter (Type 20-21) 10-0248F Toxic S-T / Reactive Gas (Type 22-23) Note: Does not include sensor Figure 11-1: GASMAX II + Local Sensor Spare Parts Sensor Head Assembly (See list above): Sensor Head Base Sensor: 10-95xx (Toxic, combustible, SmartIR, PID) - Page 53 GASMAX II Operation & Maintenance Manual, Revision 7.0 MODBUS / Relay Board Isolated ual - m utput C ut - 10-0234 MODBUS + Relays C ut 2000-0135 MODBUS only ut - ISOLATED 4-20mA Board elay Isolated - 10-0250 Dual 4-20mA Output...
- Page 54 GASMAX II Operation & Maintenance Manual, Revision 7.0 REMOTE TOXIC OR BRIDGE SENSOR Remote Sensor Head Assembly: 20-0126 Remote Toxic or Bridge Direct (Type 5-6) — —C —C— 20-0127 Remote Toxic / Reactive Gas (Type 7-8) Note: Does not include sensor...
- Page 55 GASMAX II Operation & Maintenance Manual, Revision 7.0 DUAL LOCAL SENSORS Bridge ensor I Power upply Y-Adapter: ibbon to isplay 10-1200 Y-Adapter for dual local sensor heads Sensor Head for Y-Adapter: 10-0247-12 Toxic or Bridge Direct (Type 1-2) Sensor head with extended ”...
-
Page 56: Drawings And Dimensions
GASMAX II Operation & Maintenance Manual, Revision 7.0 12 DRAWINGS AND DIMENSIONS ¾” NPT (2x) Figure 12-1: GASMAX Dimensions ¾” NPT (2x) ~ 12.5” Figure 12-2: GASMAX Dual Local Sensor Dimensions Page 56... - Page 58 GDS Corp. 1245 Butler Road League City, TX 77573 409-927-2980 409-927-4180 (Fax) ww.gdscorp.com...