Table of Contents
Advertisement
Quick Links
Advertisement
Table of Contents

Related Manuals for NETGEAR Nighthawk R6900P


Summary of Contents for NETGEAR Nighthawk R6900P
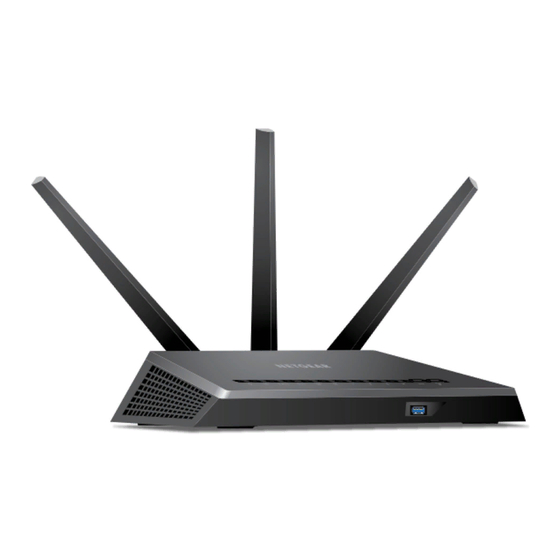
- Page 1 Do More Nighthawk AC1900 Smart WiFi Router Model R6900P...
-
Page 2: Wifi Network Name And Password
WiFi Network Name and Password The preassigned WiFi network name (SSID) and password (network key) are unique to your router, like a serial number. Because the router automatically uses WiFi security, you don’t need to set it up. The WiFi settings are on the router label. -
Page 3: Join The Wifi Network
Join the WiFi Network You can either use Wi-Fi Protected Setup (WPS) or select your router’s WiFi network and type its password. Join the WiFi Network Using WPS For help with the WPS button on your WPS-enabled device, check the instructions or online help that came with that device. Some older equipment cannot use WPS. - Page 4 Join the WiFi Network Using the Router’s WiFi Settings Use the router’s WiFi network name and password to connect your WiFi-enabled computer or mobile device to the router’s network through WiFi. If you did not change the router’s WiFi network name and password, use the router’s preassigned WiFi network name and password, which are on the router label.
-
Page 5: View Or Change The Router Settings
View or Change the Router Settings After you use the NETGEAR installation assistant to set up the router, you can log in to the router to view or change its settings. Log In to the Router ¾ To log in to the router: 1. - Page 6 Change the WiFi Network Name and Password The router’s preset WiFi network name (SSID) and password are on the router label. If you want to change your router’s WiFi network name and password, log in to the router. ¾ To change the router’s WiFi network name and password: 1.
- Page 7 Change the admin Password ¾ To change the admin password: 1. Launch a web browser from a computer or mobile device that is connected to the network and visit www.routerlogin.net. A login window opens. 2. Enter router admin user name and admin password. The admin user name is admin.
- Page 8 Recover a Forgotten admin Password The default password for the admin user name is password. If you changed the password and enabled the password recovery feature, you can retrieve this password. ¾ To retrieve a forgotten admin password: 1. Launch a web browser from a computer or mobile device that is connected to the network and visit www.routerlogin.net.
- Page 9 Enable Dynamic Quality of Service Dynamic Quality of Service (QoS) resolves Internet traffic congestion when Internet bandwidth is limited by using better application and device identification, bandwidth allocation, and traffic prioritization techniques. If you like gaming and streaming videos, then you can benefit from enabling Dynamic QoS.
- Page 10 7. To view bandwidth utilization by device and application, click the Click here to see bandwidth utilization by device and application link at the bottom of the page. For more information, see the user manual, which is available online downloadcenter.netgear.com or through a link in the router’s user interface.
- Page 11 Enable Smart Connect Smart Connect selects the fastest WiFi band for your device. For Smart Connect to work, the 2.4 GHz and 5 GHz bands must use the same WiFi network name (SSID) and network key (password). ¾ To enable Smart Connect: 1.
-
Page 12: Access A Usb Device On The Network
Access a USB Device on the Network ReadySHARE lets you access and share a USB storage device connected to the router’s USB ports. (If your USB device uses special drivers, it is not compatible.) ¾ To access the USB storage device from a Windows computer: 1. - Page 13 For more information about access control, see the user manual, which is available online at downloadcenter.netgear.com or through a link in the router’s user interface. 6. Click the Connect button.
-
Page 14: Remotely Access Your Router Using The Genie App
Remote access with the genie app is supported for Windows computers, iOS mobile devices, and Android mobile devices. For more information about this feature, see the genie app user manual, which is available online at downloadcenter.netgear.com. ¾ To set up remote access using the genie app for Windows computers: 1. - Page 15 ReadyCLOUD allows you to remotely access files on a USB storage device connected to the router. For more information about using ReadyCLOUD, see the ReadyCLOUD user manual for routers, which is available online at downloadcenter.netgear.com. ¾ To set up your ReadyCLOUD account and register your router: 1.
- Page 16 Register button. The router is now registered with your ReadyCLOUD account. 3. After registration, visit readycloud.netgear.com and use your ReadyCLOUD user name and password to sign in to your account. The ReadyCLOUD page displays the router that you registered and the...
-
Page 17: Print Wirelessly With Readyshare Printer
Android devices. For more information about how to set up VPN service, see the user manual, which is available online at downloadcenter.netgear.com through a link in the router’s user interface. Print Wirelessly With ReadySHARE Printer ReadySHARE Printer lets you connect a USB printer to the USB port on the router and print wirelessly. - Page 18 We recommend that you use only official NETGEAR support resources. Trademarks © NETGEAR, Inc., NETGEAR and the NETGEAR Logo are trademarks of NETGEAR, Inc. Any non‑NETGEAR trademarks are used for reference purposes only. Compliance For the current EU Declaration of Conformity, visit http://support.netgear.com/app/answers/detail/a_id/11621/.