Table of Contents
Advertisement
Quick Links
Advertisement
Table of Contents

Related Manuals for Horizon Fitness Saxon

Summary of Contents for Horizon Fitness Saxon
- Page 1 Saxon Owners Manual Horizon Mobility Ltd Mobility House (Block B) Formal Industrial Park Northway Lane Tewkesbury Gloucestershire GL20 8GY Tel: 0870 458 1500 Fax: 0870 458 1501 Service Department: 0870 458 3000 Tel: 0870 458 1500 Fax: 0870 458 1501...
- Page 2 HORIZON MOBILITY WARRANTY If you have any questions about your new scooter, please contact one of the help line numbers below and our staff will be happy to assist you. For Technical Assistance / Service Engineer Callouts Horizon Service Centre 0870 458 3000 Service@horizon-mobility.com WARRANTY EXCEPTIONS...
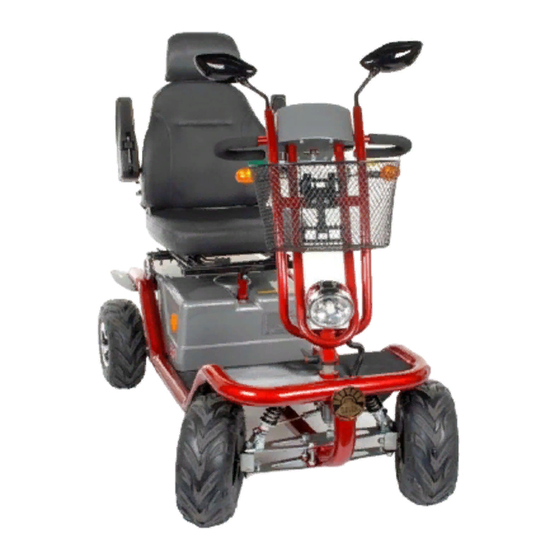
- Page 3 Saxon mobility vehicle. This Owners Manual contains operating instructions, tips on everyday use, battery charging and care instructions, as well as general care and service information to keep your Saxon in the same excellent condition that it left our factory.
-
Page 4: Features And Specification
Fault codes The Horizon Saxon has a fault diagnostic system built into the electronics. The reverse warning buzzer is used to sound a two-digit code to indicate the nature of the fault. The table below lists general faults and their codes. If in doubt tele-... -
Page 5: Wheels And Tyres
Routine Maintenance and service history Safety Warnings and Operating Tips The following table gives an indication as to when routine maintenance checks General Safety should be made. Week Month Quarter Annual Safety is very important with any vehicle, especially a motor driven vehicle. The following warnings are not conclusive and should be read in conjunction with this Charge batteries complete manual, which explains operation, function, care and adjustments for your... -
Page 6: Freewheel Lever
Batteries Once fully charged the yellow light will go out and the green charger light will come on. Charging is now complete but if the vehicle is not required it may be left Before each journey always check that the batteries are sufficiently charged. on, as the charger is fully automatic and will keep the batteries “topped up”... -
Page 7: Charging Instructions
Never sit on your Saxon whilst it is being transported in another vehicle. Never charge your vehicle outside or in an excessively damp room. Never attempt to tow another vehicle with your Saxon or tow the Saxon with an- other vehicle. -
Page 8: Kerb Climbing
If any corrosion is present clean the lead terminal completely with a The Saxon has been tested in accordance with EN 12184:1999 8.4.2 to climb a wire brush or similar lightly abrasive product, ensuring you do not touch both... -
Page 9: Seat Adjustment
To put the seat back on the vehicle grasp the seat on either side then carefully If you are not using your Saxon today leave it connected to the charger until line up the socket in the top of the vehicle seat post with the seat spigot. Raise required. -
Page 10: Battery Type
Battery care sure the seat post is locked into place. The Saxon seat post has been designed so that it may be adjusted 100mm (4”) in The batteries fitted to your Saxon are expensive so prolonging their life is in the increments of 25mm (1”). -
Page 11: Armrest Adjustment
The armrests can be adjusted for height by rotating the thumb wheel B (Fig.5) We advise you to read the Highway Code before using your Saxon on the Public located in the centre of each armrest base panel. - Page 12 To fit the Insulated Shopping Trolley, locate the two lower mounting bracket tongues Note: If you are not going to use your Saxon for an extended period of time (two into the lugs on the seat bracket then lift the curved locating bracket on the trolley over weeks or more) always disconnect at least one battery unless the vehicle is being the round locating bar on the seat back.
-
Page 13: Switching Off
To switch on the Saxon insert the ignition key into the ignition switch and turn the pole firmly near its base pull it out of the mounting tube. -
Page 14: Ignition Switch
To dismount a kerb or obstacle face it a 90 , and select a low speed setting. Move forwards slowly and steadily as the front wheels of your Saxon drop down the kerb, keep going slowly and steady until the rear wheels also descend. -
Page 15: Speed Limiter
The knob set into the right front of the dashboard B (Fig. 9) . In each mode you can limit the maximum speed the vehicle will travel by turning this knob. The further you turn it anti-clockwise the slower your Saxon can travel. Lights Press this rocker switch to turn on the lights. -
Page 16: Flashing Beacon
Battery level indicator regenerative braking system if the vehicle starts to move at more than 3mph. Note: Do not try towing your Saxon. For your safety there is no way of disengaging the safety braking system but this makes the Saxon impossible to tow without causing controller/motor damage.