Table of Contents
Advertisement
Quick Links
Advertisement
Table of Contents

Related Manuals for Bosch CIP5000 Series


Summary of Contents for Bosch CIP5000 Series
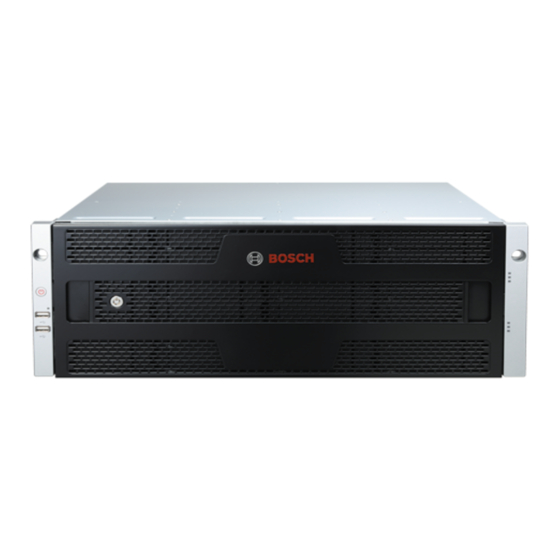
- Page 1 CIP5000 series storage CIP‑5316W‑00N/CIP‑5424W‑00N/CIP‑5316‑JBOD User manual...
-
Page 3: Table Of Contents
CIP5000 series storage Table of contents | en Table of contents Safety RoHS compliance Introduction Specifications Hardware Front panel hardware 4.1.1 Front panel of CIP-5316W/5424W-00N 4.1.2 Front panel of CIP-5316-JBOD 4.1.3 Front panel LEDs Rear panel hardware 4.2.1 Rear panel of CIP-5316W/5424W-00N 4.2.2... - Page 4 | Table of contents CIP5000 series storage 8.1.5 8.1.6 Transition Media patrol Manage activity schedules Add or delete activity schedules View or modify an existing activity schedule Event log Administrative tools 11.1 Restore factory default settings 11.2 Clear statistics User management 12.1...
- Page 5 CIP5000 series storage Table of contents | en 21.1.2 Check HDD status in Management GUI 21.1.3 Prevent HDD problems 21.2 Rebuild a disk array 21.2.1 How to rebuild a disk array 21.3 How to save a service report 21.4 How to diagnose the alarm buzzer 21.4.1...
-
Page 6: Safety
| Safety CIP5000 series storage Safety Warning! This is a Class A product. In a domestic environment this product may cause radio interference in which case the user may be required to take adequate measures. Danger! Consequences The electronic components within the enclosure are sensitive to damage from Electro-Static Discharge (ESD). -
Page 7: Introduction
Introduction | en Introduction CIP5000 series storage devices are subjected to a special design, and suitable for medium and large IP video monitoring projects. CIP5000 series storage are most suited for continuous monitoring in banks, shopping malls, casinos, factories, warehouses, and similar sized commercial buildings, residential areas, governmental or private enterprise. -
Page 8: Specifications
| Specifications CIP5000 series storage Specifications Model CIP-5316W-00N CIP-5424W-00N General Form factor 3U, 19” rack mount 4U, 19” rack mount Function Storage appliance for video surveillance Drives 16 hot-swappable drives 24 hot-swappable drives 3.5” HDD (12Gbs SAS / 6Gbs 3.5”... - Page 9 CIP5000 series storage Specifications | en Model CIP-5316W-00N CIP-5424W-00N Power supply 550W (1+1@550W) in default. Non-swappable Temperature 5° ~ 40°C (-40° ~ 60°C non-operational) Relative humidity Operational: 10% to 80% (Non-Condensing) Non-Operational: 10% to 95% (Non-Condensing) Dimensions (H x W x D)
-
Page 10: Hardware
CIP-5316W-00N, CIP-5424W-00N storage devices, and CIP-5316-JBOD storage expansion. In this document, these products are referred to as CIP5000 enclosures, CIP5000 units, or CIP5000 systems. The contents of this document apply to all models in the CIP5000 series storage. Front panel hardware Without the secure cover, the front panel of the enclosures allows access to drives carriers. -
Page 11: Front Panel Of Cip-5316-Jbod
CIP5000 series storage Hardware | en Drive carriers Power and Status LEDs Figure 4.2: CIP-5424W-00N front view 4.1.2 Front panel of CIP-5316-JBOD The front panel hardware components on the CIP-5316-JBOD is nearly the same as CIP-5316W-00N. However, there is no power button, USB ports and OPAS LED on the left handle of CIP-5316-JBOD enclosure. - Page 12 | Hardware CIP5000 series storage Power System status Global RAID status Global HDD activity (Reserved) System heartbeat Figure 4.4: Front panel LEDs on the right handle Description Power Blue - System is powered on. System status Green - System is normal.
-
Page 13: Rear Panel Hardware
CIP5000 series storage Hardware | en Rear panel hardware The rear panel of the enclosure provides access to the hot-swappable power supplies, local management connection (via USB keyboard and VGA or HDMI monitor port), iSCSI (Ethernet) data ports, and some units also provide I/O connections for audio sensor and alarm systems. -
Page 14: Rear Panel Leds Of Cip-5316W/5424W-00N
| Hardware CIP5000 series storage PSU fan vents Power inserts System fan vents PS/2 mouse/keyboard port VGA port DVI port HDMI port USB 3.0 (4 ports) Optical SPDIF Out port Audio In/Out ports 1000BASE-T RJ-45 (2 ports) 4.2.2 Rear panel LEDs of CIP-5316W/5424W-00N The LEDs on the rear panel include LEDs for Ethernet data ports, and LEDs for each hot- swappable PSU. -
Page 15: Rear Panel Leds Of Cip-5316-Jbod
CIP5000 series storage Hardware | en Function Description D-sub VGA – Video connection for VGA monitors – Management GUI display Display Port – Video connection for Display Port monitors – Management GUI display – Video connection for DVI monitors –... -
Page 16: Rear Panel Connections Of Cip-5316-Jbod
| Hardware CIP5000 series storage Power supply LEDs Fan Status Power switch LED PSU Status LED Description PSU Status Off - Not detected Green steady - Normal Green flash - Power off and in standby mode Red - Failed... - Page 17 CIP5000 series storage Hardware | en Tubular cam lock Figure 4.8: CIP-5316W-00N with secure cover (unlocked) Tubular cam lock Figure 4.9: CIP-5424W-00N with secure cover (locked) Bosch Security Systems B.V. User manual 2019-10 | V01 | F.01U.380.030...
-
Page 18: Hardware Configuration
| Hardware configuration CIP5000 series storage Hardware configuration This section gives the basics on unpacking and hardware installation of CIP5000 units. Hardware installation includes installing units in the rack, connecting power supplies, establishing a network, establishing the data and administrative connections to the units, and installing hard drives. - Page 19 Additional loading on the rails is at the customer’s risk. Caution! Bosch cannot guarantee that the mounting rails will support your CIP enclosure hardware unless you install them as instructed. Install the enclosure to the rack using the optional rails.
-
Page 20: Install The Enclosure
| Hardware configuration CIP5000 series storage 5.2.1 Install the enclosure Front left label Front right label Support flange on the front end of each rail Guide pins on rails align with holes in the rack post Figure 5.1: Installing the rails onto the rack... - Page 21 CIP5000 series storage Hardware configuration | en Brackets 3U 16-bay enclosure hardware Rails installed and tightened Figure 5.3: Placing the enclosure hardware onto the rack rails Screws and flange nuts attach the enclosure hardware to the rack posts Figure 5.4: Secure to rack...
-
Page 22: Install Or Remove The Secure Cover
| Hardware configuration CIP5000 series storage – Use the attaching screws and flange nuts from your rack system. Tighten the screws and nuts according to instructions for your rack system. Place the enclosure hardware onto the rails. Secure the enclosure hardware to the rack. -
Page 23: Drive Slot Numbering
CIP5000 series storage Hardware configuration | en RAID level Number of drives RAID 5 3 to 32 RAID 6 4 to 32 RAID 10 4 or more (must be an even number) RAID 30 6 or more RAID 50 6 or more... -
Page 24: Install 3.5" Disk Drive In The Carrier
| Hardware configuration CIP5000 series storage Caution! The CIP5000 models support hot-swapping disk drives. To avoid hand contact with an electrical hazard, remove only one drive carrier at a time. Pull here to release the carrier handle latch. Then pull the carrier straight out by the handle. -
Page 25: Management Path Connection
CIP5000 series storage Hardware configuration | en Counter-sink screws (two screws on each side) Figure 5.10: SATA disk drive mounted in a drive carrier Management path connection This section describes how to establish a management connection for the CIP5000 subsystems. Through the management GUI - a web browser based GUI, you can finish to configure management path connection. -
Page 26: Connect The Power Supply
| Hardware configuration CIP5000 series storage Single Controller Expansion Connect the SFF-8644 SAS port in the host CIP-5316W-00N or CIP-5424W-00N system to SAS Port 1 on the uppermost CIP-5316-JBOD unit in the rack. Connect SAS Port 2 on the same CIP-5316-JBOD to the SAS Port 1 on the next CIP-5316- JBOD in the stack. -
Page 27: Power On
CIP5000 series storage Hardware configuration | en Warning! Turn off the power and disconnect all power cords before maintaining the CIP5000 units. Power on Notice! If you are using JBOD storage expansion, power on the JBODs first. With the power supplies connected, the system can now be powered on. -
Page 28: Management Gui
6.1.2 Network login Notice! For the CIP5000 series storage running with the Windows operating system, it is necessary to disable the Windows Firewall in order to permit access to the Bosch Management GUI through the network. If the Firewall is running, you can not access the Management GUI from the network. -
Page 29: Login Screen
CIP5000 series storage Management GUI | en https: // 192.168.0.1:443 Notice! If you are logging in locally from the Host PC, you can enter the localhost instead of the IP address. Notice! Whether you choose regular connection or secure connection, you can log into the Management GUI, and your user password is always secure. -
Page 30: Use Management Gui
| Management GUI CIP5000 series storage Use Management GUI The Bosch Management GUI is a browser-based RAID management software. The Management GUI interfaces includes three mains parts: – Header – Tree view – Management view 6.2.1 Use the header The Header contains the following items: –... -
Page 31: Use The Management View
CIP5000 series storage Management GUI | en The Administrative Tools section is different for the Administrator and Super Users than for other users. The remainder of the user tree is the same for all users. 6.2.3 Use the management view Management view displays information and settings menus according to the items you select in the tree view. -
Page 32: Logout
| Management GUI CIP5000 series storage – Time - Time and date of the occurrence – Description - A brief description of the event You can also view events by clicking the Subsystems icon in the tree view, then clicking the Event tab in the management view. -
Page 33: Subsystems Management
CIP5000 series storage Subsystems management | en Subsystems management The menus listed under Subsystems are all the menus used for device management. Click the Subsystems icon to view read-only information for CIP-5316W-00N or CIP-5424W-00N, including the management IP address, Alias, Model and WWN. -
Page 34: Backgroud Activities
| Backgroud activities CIP5000 series storage Backgroud activities Background activities perform a variety of preventive and remedial functions on your physical drives, disk arrays, logical drives, and other components. You can run a background activity immediately or schedule it to run at a later time. -
Page 35: Rebuild The Settings
CIP5000 series storage Backgroud activities | en – Transition Rate: High, Medium, Low – Reassigned Block Threshold – Error Block Threshold – Enable Media Patrol – Enable Auto Rebuild In addition, you can use the scheduler to configure these settings. Use the scheduler according to the following parameters. -
Page 36: Redundancy Check
| Backgroud activities CIP5000 series storage Initialization is usually done after a logical drive is created from a disk array. Initialization sets all data on the logical drive to zero. This operation is useful because the logical drive may have previously configured legacy data. -
Page 37: Transition
CIP5000 series storage Backgroud activities | en Highlight the current value in the Block Threshold field and enter a new value. – Reassigned block threshold ranges from 1 to 512 blocks. – Error block threshold ranges from 1 to 2048 blocks. -
Page 38: Manage Activity Schedules
| Manage activity schedules CIP5000 series storage Manage activity schedules You can create schedules to perform media patrol, redundancy check, and spare drive check at non-rush hours. Add or delete activity schedules To add, enable, or delete an activity schedule: Click the Subsystem in the tree view. -
Page 39: Event Log
CIP5000 series storage Event log | en Event log The event logs are used for troubleshooting, tracking, and monitoring subsystems. To view, save, or clear the subsystem event log: Click the Subsystem in the tree view. Click the Event Menu Expander. -
Page 40: Administrative Tools
| Administrative tools CIP5000 series storage Administrative tools Click the + symbol of the Administrative Tools icon to display the Subsystem Administrative Tools menu links for User Management, View Network Settings, Performance Monitoring, and Software Management. The Administrative Tools menu lists text hyperlinks to these same menus, as well as links to the following menus: Restore Factory Defaults, Clear Statistics, and Save System Service Reports. -
Page 41: User Management
CIP5000 series storage User management | en User management User management deals with viewing and managing user account information. 12.1 View user information To view a list of users, their status, access privileges, display name, and e-mail address: Click the Administrative Tools icon. -
Page 42: User Rights
| User management CIP5000 series storage Click the Create tab in Management View. Enter a user name in the User Name field. Enter the password for this user in the New Password and Retype Password fields. – The password is optional. If you do not assign a password, notify this user to leave the password field blank when he/ she logs into to Management GUI. -
Page 43: Software Management
CIP5000 series storage User management | en 12.5 Software management The Software Management menu is used to manage email settings, SNMP settings, and network services. The email function is used to send event notifications. The network service is used to establish a remote network connection to the Management GUI. -
Page 44: Email Service
| User management CIP5000 series storage Locate the path where you want to save the file on the Host PC, and click the Save button in the pop-up menu. – The report is saved to your Host PC as a compressed HTML file. -
Page 45: Restart Email Service
CIP5000 series storage User management | en Click the Confirm button. 12.6.2 Restart Email service To restart the Email service: Click the Administrative Tools icon. Click the Software Management icon. Click on Email in the Service List of the Service Management menu. -
Page 46: Performance Monitoring
| Performance monitoring CIP5000 series storage Performance monitoring The performance monitor displays real-time performance statistics for logical drives and physical drives. The vertical scale adjusts dynamically to accommodate the statistical data. Because it reports performance in real-time, to view data in the monitor, there must be I/O data activity occurring between the subsystem and the Host. - Page 47 CIP5000 series storage Performance monitoring | en – I/Os per second Read/Write (physical drive) – Read bandwidth – Write bandwidth – Maximum Read latency in ms – Maximum Write latency in ms – Average Read latency in ms – Average Write latency in ms –...
-
Page 48: Controllers
| Controllers CIP5000 series storage Controllers Click on a specific controller in the tree view to view information or statistics for a controller, or to change controller settings. 14.1 View controller information To view controller information: Click the Controllers icon. -
Page 49: Controller Settings
CIP5000 series storage Controllers | en Click the Controllers icon. Click the specific Controller icon of the controller for which you want to view statistics. At the top of the Information display menu, click on the menu expander, which is between the Information and Settings tabs, to display the Statistics link. -
Page 50: Enclosures
| Enclosures CIP5000 series storage Enclosures The Enclosures menu provides information about the individual components of the enclosure and monitors its status. Click on a specific enclosure in the tree view or in the enclosures list to display information or settings menu of this enclosure. -
Page 51: Buzzer Settings
CIP5000 series storage Enclosures | en 15.3 Buzzer settings You can enable or disable the audible enclosure alarm buzzer. To enable or disable the buzzer: Click Enclosures in the tree view. Click the Buzzer menu expander. Scroll to Settings and click the check Enable Buzzer option box. -
Page 52: Physical Drives
| Physical drives CIP5000 series storage Physical drives The Physical Drives menu are used to view information and statistics about the physical hard disks installed in the enclosure and to set the global settings for the hard disks. To view the physical drive list: Expand the individual enclosure icon in the tree view to view the physical drive icon for the enclosure. - Page 53 CIP5000 series storage Physical drives | en – SMART Error Logging – Command Queuing Support – Command Queuing [Enabled/Disabled] – Queue Depth – Maximum Multiple DMA Mode Supported – Maximum Ultra DMA Mode Supported – DMA Mode – Drive Temperature [C°/F°] –...
-
Page 54: Disk Arrays And Logical Drives
| Disk arrays and logical drives CIP5000 series storage Disk arrays and logical drives Use Disk Arrays menu to create and manage disk arrays and logical. Use Array Configuration menu to view the disk array list, and to create or delete disk arrays on the enclosure. -
Page 55: Logical Drive Management
CIP5000 series storage Disk arrays and logical drives | en Disk Array operational status – OK - This is the normal state of the logical drive. When the logical drive is operating properly, it is ready for immediate use. For RAID Levels other than RAID 0, the logical drive has full redundancy. -
Page 56: Spare Drives
| Spare drives CIP5000 series storage Spare drives When a physical drive in a disk array fails, a spare drive with sufficient capacity is available and the disk array begins to rebuild automatically with a spare drive. In the tree view, click on the Spare Drive icon to view the list of spare drives, to create a new spare drive, or to delete an existing spare drive. -
Page 57: Logical Drive Summary
CIP5000 series storage Logical drive summary | en Logical drive summary Logical Drive Summary displays a list of all logical drives in the subsystem. This list does not place logical drives under the disk array, nor under the enclosure in which they are located. -
Page 58: Maintenance
| Maintenance CIP5000 series storage Maintenance This section describes how to replace the power supply units (PSU). The power supply and its fans are replaced as a unit. The CIP-5316W-00N and CIP-5424W-00N systems accommodate two AC power supplies in the bay at the rear of the chassis. -
Page 59: Troubleshooting
CIP5000 series storage Troubleshooting | en Troubleshooting This section focuses on how to solve problems that may occur during the lifetime of the CIP5000 enclosure. Frequently asked questions for customers include hard disk problems, how to know when problems occur on the hard disk, and how to create and send service reports to technical support personnel. -
Page 60: Prevent Hdd Problems
| Troubleshooting CIP5000 series storage View physical drive list View individual physical drive information Notice! In order to diagnose and fix hard disk problems, it is strongly recommended to ensure that media patrol is enabled and running, and Auto Rebuild is enabled if there are unused spare drives. -
Page 61: Rebuild A Disk Array
CIP5000 series storage Troubleshooting | en Enable Media Patrol – To enable Media Patrol, click Background Activities in the Quick Links menu on the Home page; or click the Subsystem in the tree view, and then click the Background Activities menu tab. Click to check the Enable Media Patrol option. - Page 62 | Troubleshooting CIP5000 series storage Logical drive information To start rebuilding the drive, go to the Background Activities of the local host menu and move the cursor to select Start Rebuild. A new menu displays. Background Activities - Start Rebuild 1 The source drive and target drive to be rebuilt are now defined.
-
Page 63: How To Save A Service Report
CIP5000 series storage Troubleshooting | en 21.3 How to save a service report A service report is a detailed report that contains the configuration and status of all components in the RAID system. A support technician or field engineer may request a service report for diagnosis and troubleshooting. -
Page 64: How To Diagnose The Alarm Buzzer
| Troubleshooting CIP5000 series storage – Service Setting - Email – Service Setting - Webserver – Spare Info - Basic spare drive information – Spare Dump Info - Diagnostic information – Spare Verbose Info - Full spare Drive –... - Page 65 CIP5000 series storage Troubleshooting | en Click Enclosures in the tree view. Click the Buzzer menu expander, scroll to Settings, and un-check the Enable Buzzer. Click the Submit button. Bosch Security Systems B.V. User manual 2019-10 | V01 | F.01U.380.030...
- Page 66 | Troubleshooting CIP5000 series storage 2019-10 | V01 | F.01U.380.030 User manual Bosch Security Systems B.V.
- Page 68 Bosch Security Systems B.V. Torenallee 49 5617 BA Eindhoven Netherlands www.boschsecurity.com © Bosch Security Systems B.V., 2019...