
Related Manuals for Philips IntelliVue MP40


Summary of Contents for Philips IntelliVue MP40
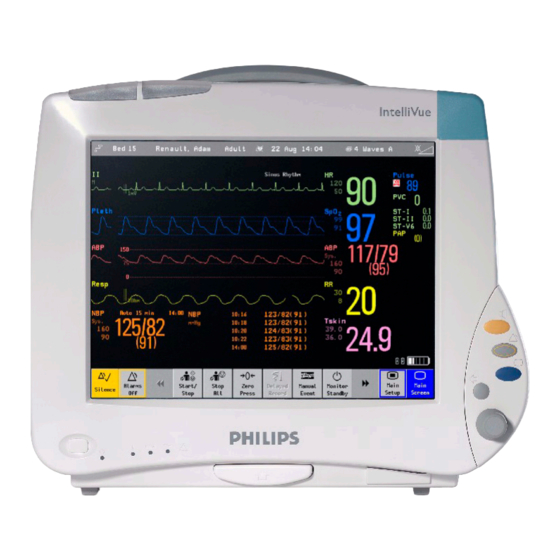
- Page 1 H a rd w ar e U p g ra de In s ta l l a ti o n G u i de IntelliVue Patient Monitor M P4 0 / 50 Pa t i e n t M o n i t o r i n g M8003-9301A *M8003-9301A*...
- Page 2 Part Number M8003-9301A...
-
Page 3: Table Of Contents
1 Introduction 2 Checking your Tools and Kit Hardware 3 Installing J13 - J30 4 Installing J40 5 Installing E12 6 Installing E25 7 Verification of Upgrade... -
Page 5: Introduction
This document contains or refers to proprietary information which is protected by copyright. All rights are reserved. Copying or other reproduction of this document is prohibited without the prior written permission of Philips Medical Systems. The electrical characteristics of anti-static mats should be checked before use, as described in the WARNING manufactuerer’s instructions for continued protection to both you and the equipment. - Page 6 What is in this Installation Note? What is in this Installation Note? This installation note contains procedures on how to install the following upgrade kits for the IntelliVue MP40/50 patient monitors: M8027A Serial Interface / MIB ready (2 ports) #J13...
- Page 7 • 2 Small flat head screwdrivers • Needle Nose Pliars • ESD mat and wrist strap • 1 small Pozi or Philips head screwdriver Hardware List Before beginning, check that your upgrade kit has the hardware listed next to the appropriate option in...
-
Page 8: Checking Your Tools And Kit Hardware
2 Checking your Tools and Kit Hardware Hardware List... -
Page 9: Installing J13 - J30
Installing J13 - J30 This section decribes how to install the following upgrade options: – J13 - Serial Interface / MIB ready – J14 - Parallel Printer Interface – J23 - Remote Speedpoint and Remote Alarm Device – J22 - PS/2 Interface –... - Page 10 3 Installing J13 - J30 Installation Instructions Use the board removal tool located inside the battery compartment door to pull off the blank covers (or other I/O boards, if boards need to be switched). Board Removal Tool Installing the I/O Boards Slot2 Slot 1 Slot 3...
- Page 11 Installation Instructions 3 Installing J13 - J30 I/O Board Possible Configurations Name Possible I/O slots Input Device 02,03 Interface Remote Device 02,03 IInterface Parallel Printer 02,03 Interface Nurse Call Relay 02,03 MIB/RS232 02,03 (2x) 2nd MIB/ 02,03 RS232 (2x) “-” This board is assumed to not be required for this configuration “x”...
- Page 12 3 Installing J13 - J30 Installation Instructions...
-
Page 13: Installing J40
Installing J40 This section decribes how to install the upgrade option J40 (Advanced System Interface board) for the MP40/50 monitors: Installation Instructions CAUTION Make sure to unplug the AC power cord and to remove the batteries before removing blank covers or I/O boards. - Page 14 4 Installing J40 Installation Instructions Remove the two screws securing the standard interface board and then remove the board using the board removal tool located in the battery compartment Board Removal Tool Insert the advanced System Interface board into the slot and secure it with the two screws. Ensure that the board removal tool is snapped properly into place inside the battery compartment door N O TE after each use.
-
Page 15: Installing E12
Installing E12 This section decribes how to install the upgrade option E12 (internal module slots) for the MP40/ MP50 monitors: Installation Instructions CAUTION Make sure to unplug the AC power cord and to remove the batteries before removing blank covers, I/O boards and the System Interface Board. - Page 16 5 Installing E12 Installation Instructions Use the board removal tool located inside the battery compartment door to pull off the I/O boards and the System Interface Board. Board Removal Tool Separating the Front and Back Half of the monitor Remove the four screws at the back of the monitor, the lower ones first. Hold on to the display when loosening the screws so the display does not fall off.
- Page 17 Installation Instructions 5 Installing E12 Pull off the front housing. Do not pull the display off completely, only tilt it to the front, because otherwise the flex panel adapter could be damaged. Reassembly Note: Make sure the metal sheet on the back of the display is inserted into the noses of the monitor rear housing when reassembling the two halves.
- Page 18 5 Installing E12 Installation Instructions Unscrew the screws holding the flex panel adapter cable and pull off the flex cable carefully towards you. Removing the Main Board If a battery board is included always remove it before the main board by removing the four screws on the board.
- Page 19 Installation Instructions 5 Installing E12 Unplug the Navigation Point connector, the MSL cable, the power suppy cable, the speaker cable and the ECG Out/Alarm LED cable from the main board. Power Supply Cable ECG OUT/Alarm LED Cable (not connected in this picture) Speaker Cable Navigation Point Connector...
- Page 20 5 Installing E12 Installation Instructions Removing the Blank Cover Pull the back end of the cover towards you and at the same time release the two snaps on the inside with a screwdriver to release the back end of the cover. Pull here In this direction...
- Page 21 Installation Instructions 5 Installing E12 Release the three remaining snaps with a screwdriver and remove the blank cover completely. Insert the four slot rack into the monitor and secure it with two screws. Reassemble the monitor by performing the above steps in reverse order.
- Page 22 5 Installing E12 Installation Instructions Reassembly Note: Hold the main board with your left hand on the plastic tip and re-insert it, making sure that the board is properly aligned with the protruding noses of the rear chassis and the slit for the internal module rack board and that the board is connected properly to the rack connector.
-
Page 23: Installing E25
Installing E25 This section decribes how to install the upgrade option E25 (Add Battery) for the MP40/MP50 monitors: Installation Instructions Separating the Front and Back Half of the monitor CAUTION Make sure to unplug the AC power cord before removing blank covers or I/O boards. Failure to remove the power cord could cause damage to the CMU as it is still under power. - Page 24 6 Installing E25 Installation Instructions Pull off the front housing. Do not pull the display off completely, only tilt it to the front, because otherwise the flex panel adapter could be damaged. Reassembly Note: Make sure the metal sheet on the back of the display is inserted into the noses of the monitor rear housing when reassembling the two halves.
- Page 25 Installation Instructions 6 Installing E25 Remove the battery barrier by releasing the snaps on each side with a flat-tipped screw driver and pulling the barrier out. Reassemble the monitor by perfroming the above steps in reverse order. Exchanging the battery door The battery door must be exchanged if the symbol is not printed on it.The battery door with the symbol should look like this:...
- Page 26 6 Installing E25 Installation Instructions...
-
Page 27: Verification Of Upgrade
If an upgrade has been performed where the unit has been opened (i.e. front and back half of the monitor have been separated): Perform Power On Test block. Perform Safety Test block. For specific performance tests or documentation requirements see the IntelliVue MP40/MP50 service guide. - Page 28 7 Verification of Upgrade...