
Related Manuals for AEG Fluxpower HE Series


Summary of Contents for AEG Fluxpower HE Series
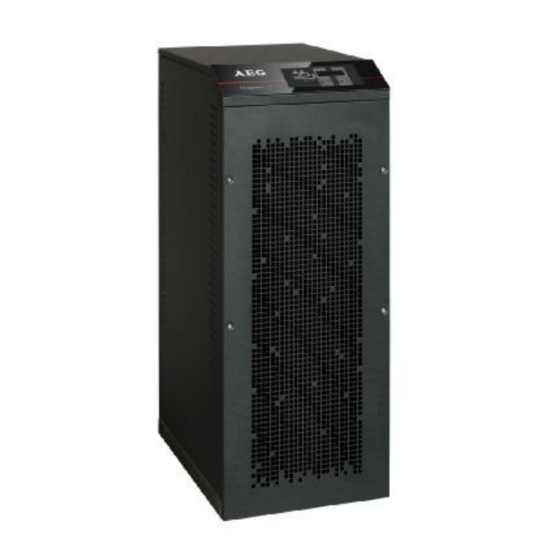
- Page 1 INSTALLATION AND START-UP MANUAL Fluxpower HE Fluxpower HE 10 kVA Fluxpower HE 15 kVA Fluxpower HE 20 kVA Fluxpower HE 30 kVA Fluxpower HE 40 kVA...
- Page 3 WARNING This is a Class A-UPS Product. In a domestic environment, this product may cause radio interference, in which case, the user may be take additional measures.
-
Page 4: Table Of Contents
CONTENT 1. Scope .................. 7 2. Safety rules and warnings ..........8 2.1 UPS use ................8 2.2 Fluxpower HE rating ............. 9 2.3 Special safety warnings ............10 2.3.1 General warnings ............10 2.3.2 Personnel ..............10 2.3.3 Transport and handling ..........10 2.3.4 Installation .............. - Page 5 4. Electrical connection ............25 4.1 Terminal boards ..............27 4.2 Connection of power cables ..........28 4.3 Battery ................28 4.3.1 Battery connection and positioning ......29 4.3.1.1 3.3 Ah 12 V battery connection and positioning Fluxpower HE 10 kVA ....... 30 4.3.1.2 7 Ah / 9 Ah 12 V battery connection and positioning –...
- Page 6 INDEX OF FIGURES Figure 1: Rating plate of Fluxpower HE ............9 Figure 2: Handling of Fluxpower HE .............. 17 Figure 3: Base plan ..................18 Figure 4: Minimum distances from the walls ..........19 Figure 5:Terminal board Fluxpower HE Three phase 10-15-20 kVA ....27 Figure 6: Terminal board Fluxpower HE Three phase 30 –...
-
Page 7: Scope
1. SCOPE The instructions contained in the operating manual are applicable to the whole production range of Fluxpower HE three phase UPS systems, as indicated below. Fluxpower HE 10 kVA • Fluxpower HE 15 kVA • Fluxpower HE 20 kVA •... -
Page 8: Safety Rules And Warnings
2. SAFETY RULES AND WARNINGS UPS USE Congratulations on choosing a product from AEG Power Solutions for the safety of your equipment. To obtain the best performance from your Fluxpower HE UPS system (Uninterruptible Power Supply), we suggest that you take your time to read the following manual. -
Page 9: Fluxpower He Rating
FLUXPOWER HE RATING Fluxpower HE is provided with an identification plate containing the operation ratings. The plate is fixed outside, on the rear of UPS. Figure 1: Rating plate of Fluxpower HE CHECK THE TECHNICAL CHARACTERISTICS Before carrying out any installation or start-up operation on the UPS, make sure its technical characteristics are compatible with the AC supply line and with the output loads. -
Page 10: Special Safety Warnings
SPECIAL SAFETY WARNINGS 2.3.1 GENERAL WARNINGS Fluxpower HE is provided with various stickers with indications regarding specific dangers. These stickers must always be well visible and replaced in cases where they are damaged. The present documentation must always be available in proximity to the device. In case of loss we recommend to request a copy from the manufacturer, whose details are available in the “Contacts”... -
Page 11: Installation
2.3.4 INSTALLATION The product must be installed in strict compliance with the instructions contained in the technical back-up documentation, including the present safety instructions. In particular, the following points must be taken into account: The product must be placed on a base suitable for carrying its weight and •... -
Page 12: Electrical Connection
DO NOT MODIFY THE DEVICE Do not modify the device in any way: this may result in damage to the equipment itself as well as to objects and persons. Maintenance and repair must be carried out by authorized personnel only. Contact the manufacturer for details of the nearest service center. -
Page 13: Operation
INJURY HAZARD DUE TO ELECTRIC SHOCK! The device is subject to high voltages, thus all safety instructions must be scrupulously adhered to before performing any operation on Fluxpower HE: Isolate the battery via DC circuit breakers before connecting it to the UPS •... -
Page 14: Maintenance
2.3.7 MAINTENANCE Service and repairs must be carried out by skilled and authorized personnel. Before carrying out any maintenance operation, Fluxpower HE must be disconnected from AC and DC supply sources. The device is provided with internal isolators which allow it to isolate the internal power circuits. -
Page 15: Storage
• ENVIRONMENTAL PROTECTION 2.4.1 ISO 14001 CERTIFICATION AEG POWER SOLUTIONS is particularly sensitive to the environmental impact of its products. That is why Fluxpower HE has been manufactured with cutting-edge eco-design criteria (ISO 14001 certification). Special care was taken in using fully recyclable materials and in reducing the amounts of raw materials used. -
Page 16: Installation
3. INSTALLATION RECEIPT OF THE UPS Please inspect the device before installing it. In case any damage is noticed from the conditions of the package and/or from the outside appearance of the equipment, contact the shipping company or your dealer immediately. The damage statement must be made within 6 days of receipt of the product and must be notified to the shipping carrier directly. -
Page 17: Positioning And Installation
HANDLING OF THE UPS The Fluxpower HE can be handled by means of the four wheels fixed onto the bottom. 4x Wheels Figure 2: Handling of Fluxpower HE POSITIONING AND INSTALLATION Fluxpower HE must be installed indoors, in a clean and dry room, preferably without dust or humidity incursion. -
Page 18: Base Plan, Static Load And Weights
3.3.1 BASE PLAN, STATIC LOAD AND WEIGHTS Figure 3: Base plan Power (kVA) Three phase L1 (mm) P1 (mm) – L2 (mm) The supporting base of the UPS must be designed to carry the UPS weight and to ensure its steady and safe support. Its carrying capacity must be adequate for the static loads indicated in the table below. -
Page 19: Overall Dimensions, Minimum Distances From The Walls And Ventilation
3.3.2 OVERALL DIMENSIONS, MINIMUM DISTANCES FROM THE WALLS AND VENTILATION The UPS must be so installed as to ensure its serviceability and to allow a correct air flow as much as possible. With regard to the minimum distances from the walls, for all of the UPS sizes the same installation conditions apply as indicated in the table below. - Page 20 Power (kVA) Three phase L - mm P - mm H - mm 1200 X (min.) - mm Y (min.) - mm ADD. CABINET COD. AS553 L1 - mm P1 - mm H1 - mm 1200 The table below shows the air volume required for optimal ventilation and cooling of the UPS.
-
Page 21: Environmental Installation Conditions
3.3.3 ENVIRONMENTAL INSTALLATION CONDITIONS The air is classified by the EN 60721-3-3 standard (Classification of environmental parameters and their severities – Stationary use at weather- protected locations) based on climatic and biological conditions as well as on mechanically and chemically active substances. The place of installation must meet specific requirements to ensure compliance with the conditions for which the UPS was designed. - Page 22 Classification of mechanically active substances (EN 60721-3-3) Class Environmental parameter a) Sand [mg/m 3000 b) Dust (suspension) [mg/m 0.01 c) Dust (sedimentation) [mg/(m ∙h) Places where precautions have been taken to minimize the presence of dust. Places away from dust sources Places without any special precaution to minimize the presence of sand or dust, however not in proximity to sand or dust sources...
- Page 23 Classification of chemically active substances (EN 60721-3-3) Class Environmental parameter 3C1R 3C1L Salt Salt Salt a) Sea salt b) Sulphur dioxide [mg/m 0.01 c) Hydrogen sulphide [mg/m 0.0015 0.01 0.01 d) Chlorine [mg/m 0.001 0.01 e) Hydrochloric acid [mg/m 0.001 0.01 f) Hydrofluoric acid [mg/m 0.001 0.003 0.003 0.03 g) Ammonia [mg/m...
- Page 24 Fluxpower HE is designed to be installed in an environment that meets the following classifications. In accordance with the technical Climatic conditions specification Biological conditions 3B1 (EN 60721-3-3) Chemically active substances 3C2 (EN 60721-3-3) Mechanically active substances 3S2 (EN 60721-3-3) In the event that the environmental conditions of the installation room do not comply with the specified requirements, additional precautions must be taken to reduce excessive values to the specified limits.
-
Page 25: Electrical Connection
4. ELECTRICAL CONNECTION The electrical connection is part of the work which is normally provided by the company that carries out the product installation. For this reason, the UPS manufacturer shall not be held responsible for any damages due to wrong connections. - Page 26 breakers must be selected according to the maximum short-circuit current (max Isc) that is needed to determine the breaking power of automatic circuit breakers, and to the minimum current (min Isc) that is needed to determine the maximum length of the line protected. The protection against short-circuit must operate on the line before any thermal and electro-thermal effects of the over-current may damage the cable and relevant connections.
-
Page 27: Terminal Boards
To protect the output against electrical shock, use the following residual current devices: Fluxpower HE Three phase: DEVICE AS TYPE B (IEC/TR 60755/A2) Electrical connection data Power (kVA) Three phase Rectifier 3x25 3x32 3x32 3x70 3x70 Input Fuses (A) Bypass –... -
Page 28: Connection Of Power Cables
CONNECTION OF POWER CABLES For the electric connection of Fluxpower HE, connect the following cables: DC supply from the battery; • AC supply from the rectifier and bypass supply mains; • AC output to the loads. • INJURY HAZARD DUE TO ELECTRIC SHOCK! Very high voltages are present at the ends of the cables coming from the battery: Isolate the battery via DC circuit breakers before connecting it to the UPS;... -
Page 29: Battery Connection And Positioning
The batteries can be internal or external, however, it is recommended to install them where the UPS is capable of charging them. Please remember that, if the battery is not charged for periods of over 2 – 3 months they can be subject to irreparable damage. -
Page 30: Ah 12 V Battery Connection And Positioning Fluxpower He 10 Kva
4.3.1.1 3.3 AH 12 V BATTERY CONNECTION AND POSITIONING FLUXPOWER HE 10 KVA Remove the four screws to open the front cover and access the battery trays. Remove the cardboard cover protection from the batteries, see Figure 8. Figure 8: Cardboard 3.3 Ah battery protection... -
Page 31: Figure 9: 3.3 Ah Battery Connection
Remove the cardboard cover protection from the batteries, see Figure 8. Figure 9: 3.3 Ah battery connection COLOR CABLES The cable terminations, for the connection to the battery trays, are marked with BLACK PVC-sleeve for the connection to the negative pole and with RED PVC-sleeve for the connection to the positive pole. -
Page 32: Figure 10: 3.3 Ah Battery Connected
After the connection, re-insert the battery trays as shown in Figure 10. Figure 10: 3.3 Ah battery connected Put back and fix the front cover with the four screws. -
Page 33: Ah / 9 Ah 12 V Battery Connection And Positioning - Fluxpower He 10-15-20 Kva
4.3.1.2 7 AH / 9 AH 12 V BATTERY CONNECTION AND POSITIONING – FLUXPOWER HE 10-15-20 KVA Remove the four screws to open the front cover and access the battery trays. Remove the cardboard cover protection from the batteries, see Figure 11. -
Page 34: Figure 12: 7 Ah/9 Ah Battery Connection
Connect the wires as shown in Figure 12. Figure 12: 7 Ah/9 Ah battery connection COLOR CABLES The cable terminations, for the connection to the battery trays, are marked with BLACK PVC-sleeve for the connection to the negative pole and with RED PVC-sleeve for the connection to the positive pole. -
Page 35: Figure 13: 7 Ah/9 Ah Battery Connected
After the connection, re-insert the battery trays as shown in Figure 13. Figure 13: 7 Ah/9 Ah battery connected Put back and fix the front cover with the four screws. -
Page 36: Fuses Positioning Bcb - Fluxpower He 10-15-20 Kva
FUSES POSITIONING BCB – FLUXPOWER HE 10-15-20 KVA After that the batteries are correctly connected, insert the fuses and the auxiliary contact on the fuse holder (BCB), as shown in the Figure 15. Figure 14: Fuses positioning on the fuse holder BCB BATTERY VOLTAGE After battery installation, before closing BCB, check the battery voltage on the BCB circuit breaker. -
Page 37: As553 External Battery
AS553 EXTERNAL BATTERY The battery cabinet can be used to increase the autonomy of the “Fluxpower HE 10-15-20 kVA” line for which the battery is installed internally on the standard configuration. INTERNAL BATTERY With the external battery the internal battery is never present. The battery cabinet is necessary for the 30 –... -
Page 38: Dimensions And Weights
4.5.1 DIMENSIONS AND WEIGHTS The dimensions and weights of the external battery cabinet are indicated here. Figure 15: Base planof the external battery cabinet Figure 16: Dimensions of the external battery cabinet... - Page 39 Cabinet AS553 L (mm) P (mm) H (mm) 1200 L1 (mm) P1 (mm) L2 (mm) 120 x 120 x 120 x 60 x Cabinet AS553 7 Ah 9 Ah 12 Ah 12 Ah Weight without battery (kg) Weight with battery (kg) 1255 1412 1984...
-
Page 40: Ah/9 Ah/12 Ah 12 V Battery Connection And Positioning 120 Elements
4.5.2 7 AH/9 AH/12 AH 12 V BATTERY CONNECTION AND POSITIONING 120 ELEMENTS. Remove the six screws to open the front cover and access the battery trays. Remove the cardboard cover protection from the batteries, see Figure 17. Figure 17: Cardboard 7 Ah/9 Ah/12 Ah battery protection Connect the wires as shown on the Figure 18. -
Page 41: Figure 19: 7 Ah/9 Ah/12 Ah Battery Connection
After connection, re-insert the battery trays as shown in Figure 19. Figure 19: 7 Ah/9 Ah/12 Ah battery connection Put back and fix the front cover with the six screws. BATTERY VOLTAGE After the battery installation, before closing BCB, check the battery voltage on the BCB circuit breaker and connect battery cabinet to the UPS as indicated in paragraph 4.5.3. -
Page 42: Connections
4.5.3 CONNECTIONS The following illustration shows the electrical connection between the UPS and the external battery cabinet. Figure 21: Battery cabinet and UPS connections For the connection mentioned above you can use the cables supplied in the battery cabinet. SERIAL INTERFACES The UPS is provided with serial interfaces for the external communication of the operating status and parameters. -
Page 43: Figure 22: Interfaces Of Fluxpower He
Figure 22: Interfaces of Fluxpower HE... -
Page 44: Relay Card Connection (Optional)
RELAY CARD CONNECTION (OPTIONAL) Fluxpower HE, in its full configuration, is provided with a relay card for repeating alarms and operating statuses remotely. Its electric connection is carried out directly on the terminals located on the card. Figure 23: Relay card... - Page 45 Relay Alarms/Status Status Pins Status Name Status Not energized 2 – 3 Closed Alarm = if alarm is A30 COMMON ALARM 1 – 2 Open present Not energized 5 – 6 Closed Alarm = if alarm is A1 MAINS FAULT 4 –...
-
Page 46: Back-Feed Protection (Optional Only For 30 - 40 Kva)
BACK-FEED PROTECTION (OPTIONAL ONLY FOR 30 – 40 KVA) With the back-feed protection option (only for 30 – 40 kVA), it is mounted on the terminal board. The fuse F12 that protects the power supply cable for contactor back-feed protection / relay RL1 PB244 back-panel board. Figure 24: Fuse F12 back-feed protection 30 –... -
Page 47: Start-Up And Shutdown
5. START-UP AND SHUTDOWN READ THE TECHNICAL DOCUMENTATION Before installing and using the device, make sure you have read and understood all the instructions contained in the present manual and in the technical supporting documentation. FURTHER INFORMATION In the event that the information provided in this manual is not sufficiently exhaustive, please contact the manufacturer of the device, whose details are available in the “Contacts”... - Page 48 No. LCD Display Action Operating checks A few seconds after the closing of input circuit breaker RCB the pre-charging BLANK phase of the capacitive bank will start. Close RCB The control logic will be started and the front panel will be activated. “BOOT”...
-
Page 49: Basic Troubleshooting
The control logic checks that all the output START UP parameters (voltage, current, frequency) are correct. LED #7 is lit green: output PLEASE WAIT voltage present. UPS NAME The default screen is displayed after a NOMINAL short time with the UPS name and the POWER nominal power. -
Page 50: Shut-Down Procedure
SHUT-DOWN PROCEDURE No. LCD Display Action Operating checks A30 GENERAL The supply to the load is interrupted. Open OCB ALARM LED #7 off. A30 GENERAL The battery is disconnected from the Open BCB ALARM rectifier. LED #4 red flashing. A30 GENERAL The bypass supply is disconnected. - Page 51 A30 GENERAL The load remains fed by the manual Open OCB ALARM bypass switch. LED #8 off. A30 GENERAL The bypass line is disconnected. Open SBCB ALARM The display goes out. The load is supplied directly by the mains BLANK through the manual bypass switch.
-
Page 52: Restart From Manual Bypass
RESTART FROM MANUAL BYPASS Before restarting the UPS from manual by-pass, make sure the “Bypass_Sw" selector is in BYPASS position and the MBCB isolator is closed. Only for Fluxpower HE 30-40kVA with back-feed protection option: No. LCD Display Action Operating checks Returning phase R - Power supply contactor back-feed / relay contact RL1 Close F12... - Page 53 START UP The load is fed by the static bypass FROM MBCB switch. Circuit breaker MBCB is still Close OCB CLOSE OCB closed. LED #7 lit green. START UP The load is fed by the static bypass switch FROM MBCB and the inverter can be started.
- Page 54 NOTES...
- Page 55 NOTES...
- Page 56 WARRANTY MODEL: SERIAL NUMBER: PURCHASE DATE: DEALER STAMP/SIGNATURE ERRORS AND TECHNICAL MODIFICATION SUBJECT TO CHANGE. OPERATING INSTRUCTIONS 8000032013_01 BAL, EN Emil-Siepmann-Str. 32 59581 Warstein-Belecke – Germany Tel.: +49 180 523 4787 – Fax: +49 180 523 4789 www.aegps.com...