Table of Contents
Advertisement
Advertisement
Table of Contents

Related Manuals for AEG Protect 2.33 2.0


Summary of Contents for AEG Protect 2.33 2.0
- Page 1 User ManUal Protect 2.33 2.0 Uninterruptible Power supply UPs...
-
Page 2: Table Of Contents
contents 1. Introduction ..................5 1.1. Using this manual .....................5 1.1.1. symbols and conventions used ..............6 1.1.2. For more information and help ..............7 1.1.3. safety and instructions ................7 2. Quality and standard guarantee ............8 2.1. Management declaration ................8 2.2. standards ......................9 2.3. - Page 3 4.3. Connection .....................26 4.3.1. To the mains connection, terminals (X1 to X4) ........26 4.3.2. Connection of the output, terminals (X6 to X9) ........28 4.3.3. UPs connection to each battery pack in cabinet, terminals (X11, X12, X23 and X47, X48, X49) ........29 4.3.4.
- Page 4 6.3.3. ‘‘MeasUres” level (screen menu 2.0) ............48 6.3.4. ‘‘seTTInGs” level (screen menu 3.0) ............ 51 6.3.5. ‘‘alarMs” level (screen menu 4.0) ............56 6.3.6. ‘‘DaTa lOGGer” level (screen menu 5.0) ..........69 7. Maintenance, warranty and service ..........71 7.1. Basic maintenance guide ................71 7.1.1.
-
Page 5: Introduction
We remain completely at your disposal for any further information or any query you should wish to make. Yours sincerely, aeG Power solutions • The equipment here described can cause significant physical damage due to improper handling. This is why the installation, maintenance and/or fixing of the equipment described here must be done by our staff or specifically authorised personnel. -
Page 6: Symbols And Conventions Used
1.1.1. symbols aNd coNvENtioNs UsEd Warning Carefully read the indicated paragraph and take the stated prevention measures. danger of electrical discharge Pay special attention to it, both in the indication on the equipment and in the paragraph referred in this user manual. Main protective earthing terminal Connect the earth cable coming from the installation to this terminal. -
Page 7: For More Information And Help
1.1.2. For morE iNFormatioN aNd hElP For more information and/or help with the version of your specific unit, contact our service and Technical support (s.t.s.). 1.1.3. saFEty aNd iNstrUctioNs Together with the equipment and this “user and installation“ manual, information pertaining to “safety instructions”... -
Page 8: Quality And Standard Guarantee
2. QuAlIty And stAndArd guArAntee 2.1. maNagEmENt dEclaratioN Our goal is the client’s satisfaction, therefore this management has decided to estab lish a quality and environmental policy, by means of installation a quality and environmental management system that becomes us capable to comply the requirements demanded by the standard Iso 9001 and Iso 14001 and by our clients and concerned parts too. -
Page 9: Standards
2.2. staNdards The UPs series product is designed, manufactured and certified in accordance with the standard Iso 9001 of quality management systems. marking shows the conformity to the eeC directive (quoted between brackets) by means of the application of the following standards: •... -
Page 10: Presentation
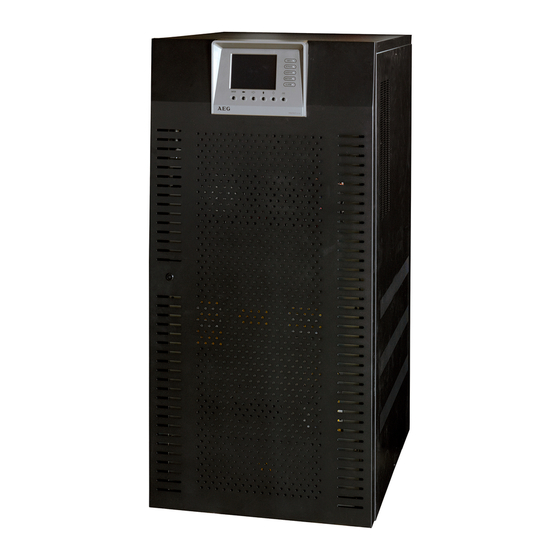
3. PresentAtIon 3.1. viEws 3.1.1. viEws oF thE EqUiPmENt (fig. 4) (RV) (fig. 4) (RV) (RV) (CL) (CL) (PF) (PF) (PB) (PB) (RD) (RD) Fig.2: Cabinet front view for UPS up to Fig.3: Cabinet front view for UPS from 20 kVA with front door closed 30 to 80 kVA with front door closed... - Page 11 Fig.4: Control panel view Fig.5: Communication connectors details *not available for Protect 2.33 2.0 Fig.6: Cabinet front view for UPS up Fig.7: Cabinet front view for UPS up to to 20 kVA with front door opened 30 to 80 kVA with front door opened...
- Page 12 Fig.8: No. 1–3 battery cabinet front view Fig.9: No. 1–3 battery cabinet front view with with front door closed front door opened Fig.10: No. 4 battery cabinet front view with Fig.11: No. 4 battery cabinet front view with front door closed front door opened ...
-
Page 13: Corresponding Legends For The Equipment Views
Output switch (Q2) Battery fuse holder switch with 3 fuses (models up to 40 kVa) or switch (Q3) (for higher models) not available for Protect 2.33 2.0 (Q4) Maintenance bypass switch (Q5) (Q8) Battery fuse holder switch 3 fuses, located in the battery cabinet... - Page 14 Keyboard and optical indications control panel (Pc): (lcd) Graphic lCD (ent) Key “enTer” (esc) Key “esC” () Key up Key down () () Key move to right () Key move to left rectifier input voltage OK leD (green) Output voltage unit from the bypass leD (orange) Inverter is working leD (green) Unit working from batteries - mains failure - leD (red) General alarm.
-
Page 15: Structure
Fig.12: UPS block diagram with operating flows 3.3. oPEratiNg PriNciPlE Protect 2.33 2.0 is a double conversion system aC/DC, DC/aC with a sine wave output that gives safe protection in extreme conditions of power supply (variations in voltage, frequency, electrical noises, blackout and other power disturbances, etc…). -
Page 16: Normal Operation
• The basic double conversion structure is complemented by two new functional blocks, the static bypass commuter switch and the manual bypass commuter switch. • The static bypass commuter switch connects the output load directly to the bypass network in special circumstances such as overloading or overheating and reconnects it to the inverter when normal conditions are restored. -
Page 17: Operation In Manual Bypass
Only identical UPs with the same ratings can be paralleled. Fig.13 shows the single line diagram of a parallel system of Protect 2.33 2.0 showing the power connections and the control bus cables. Two UPs running in parallel always do load-sharing. Parallel operation offers several advantages like higher availability or “modular”... - Page 18 There are two operation modes possible: • redundant system: as long as both UPs do not exceed the level of 50 % load one UPs is able to take over the full load if one of the UPs in the system fails. after the failed UPs was repaired it can be restarted and will recover the redun- dancy condition.
-
Page 19: Installation
4. InstAllAtIon • refer to the safety instructions. • ensure that the data on the rating plate of the UPs match those required for installation. • any incorrect connection or handling may cause damage to the UPs and/or the loads connected to it. read these instructions carefully and follow the steps indicated in the correct order. -
Page 20: Battery Safety Instructions
Once the power supply is connected to the input of the UPs (with static bypass included or with an independent static bypass line), although the inverter is “Off” (shut-down), it does not mean that no output voltage is available at the output terminals. -
Page 21: Cabinet Access
• avoid mechanical exertions and any impacts. • Do not open or damage the battery. released electrolyte can be harmful to the skin and eyes. • Do not dispose of batteries in a fire. The batteries may explode. • In case of contact with the battery acid, wash immediately with plenty water and immediately call the nearest medical facility. - Page 22 ProtEct 2.33 2.0 equipment 3 x 380 V 3 x 400 V...
-
Page 23: Set Up And Installation
If these sections should have to be changed for any reason, this should be implemented with a separate distribution box and the sections indicated should be maintained from the device to the distribution box. In standard equipment up to 40 kVa, batteries are supplied inside the UPs enclosure and for higher power rates they are supplied in a separate cabinet. -
Page 24: Storage
If the surround is made of wood; remove the corner pieces and the plastic sleeve first. The UPs will be unpacked on the pallet, to lower it, suitable means (fork truck, crane, hoist) must be used that can operate within the safety tolerance limits for the approximate weights displayed in tables 5 and 6 (Page 73 –... -
Page 25: Location
Fig.14: Front view UPS location for single unit Fig.15: Top view UPS location for single unit 4.2.4. locatioN The security instructions indicate that it is necessary to leave a minimum of 25 cm around the equipment for ventilation (2 UPs devices in parallel operation should be set 50 cm apart from each other. see Fig.14 and 15.) nevertheless, we recom- mend to leave another 75 cm additional space to facilitate maintenance of the equipment or technical service intervention in event of a breakdown. -
Page 26: Connection
Fig.16: Front view for parallel system Fig.17: Floor view for parallel system 4.3. coNNEctioN 4.3.1. to thE maiNs coNNEctioN, tErmiNals (X1 to X4) as this is a device with class I protection against electric shocks, it is essential to install a protective earth conductor (connect earth ( )). Connect the conductor to the terminal (X5), before connecting the power supply to the UPs input. - Page 27 away from the device to alert electrical maintenance personnel to the presence of a UPs in the circuit. Fig.18: Block diagram for the «feedback protection» application, for the different configurations Fig.19: Single line diagram of parallel system connection(UPS) with protection panel and feedback protection...
-
Page 28: Connection Of The Output, Terminals (X6 To X9)
The label should contain the following or an equivalent text: Before working on this circuit: • Isolate Uninterruptible Power system (UPs). • Then check for Hazardous Voltage between all terminals including the protective earth. risk of voltage feedback To connect the mains cables to the respective terminals according to configuration of the available equipment. -
Page 29: Ups Connection To Each Battery Pack In Cabinet, Terminals (X11, X12, X23 And X47, X48, X49)
corresponding circuit breaker should trigger without affecting the supply of the remaining outlets (selective). 4.3.3. UPs coNNEctioN to Each battEry Pack iN cabiNEt, tErmiNals (X11, X12, X23 aNd X47, X48, X49) as this is a device with class I protection against electric shocks, it is essential to install a protective earth conductor (connect earth ( )). -
Page 30: Connection Main Protective Earthing Terminal ( ) And Protective Earth Bonding Terminal ( )
4.3.4. coNNEctioN maiN ProtEctivE EarthiNg tErmiNal ( ) aNd ProtEctivE Earth boNdiNg tErmiNal ( ) as this is a device with class I protection against electric shocks, it is essential to install a protective earth conductor (connect earth ( )). Connect the conductor to the terminal (X5), before connecting the power supply to the UPs input. -
Page 31: Com-Interface Rs232 And Rs485, Connector (X31)
common ground is connected to pin 5. Furthermore, an input signal can be used to shut down the UPs (5 VDC – 12 VDC.) Fig.21: Connector DB9 (X31) & (X32) PIn-OUT nO. DesCrIPTIOn n.C.-n.O. POsITIOn shutdown signal + shutdown signal – Configurable not connect Discharge - Mains failure n.C. - Page 32 Physical structure of the rs232. • Pin-out - Pin 2. rXD. serial data reception. - Pin 3. TXD. serial data transmission. - Pin 5. GnD. signal mass. • Communication protocol of the rs232. The communication protocol used is of “MasTer/slaVe” type. The computer or computer system (“MasTer”) asks about a certain data, and the UPs (“slaVe”) answers immediately with the required data.
-
Page 33: Epo Terminals (X50)
4.3.7. EPo tErmiNals (X50) The equipment has two terminals ready for external remote (emergency Power Off (ePO)). In case where there is a requirement to install a switch or button (ePO), the cable bridge that closes the circuit has to be removed from terminal strip (X50). The switch or button (ePo) has to open the circuit between the terminal strip (X50) to activate the emergency shutdown. - Page 34 • Fix the BUs cables to the bottom of the UPs using the plastic clips below the communication interfaces. note: always use the original lines to ensure trouble free parallel operation. Fig.23: Parallel BUS Connection...
-
Page 35: Operation
5. oPerAtIon note: The following descriptions relate to operation of the UPs using the keys below the display screen. Operation can also be carried out using the touchscreen capability, juts type in the appropriate files or text. 5.1. start UP 5.1.1. - Page 36 at this point, with no alarm active, green leD indications of input voltage OK, and orange leD indication of Unit on Bypass should light ((a), (b) from Fig.25). Turn the output switch (Q2) to “On”. It is now powered by the built in Thyristor supply voltage start up the inverter.
-
Page 37: Complete Ups Shutdown
start up the loads to be supplied in a progressive way. The system is started up completely, and the loads are protected through the UPs. Fig.25: LED indications control panel (PC) 5.2. comPlEtE UPs shUtdowN • shutdown the loads. • If the system has outgoing distribution protection, switch them “Off”. •... -
Page 38: Emergency Power Off (Epo) Operation
5.3. EmErgENcy PowEr oFF (EPo) oPEratioN emergency Power Off (ePO) is equivalent to a complete unit system halt: • all UPs converters are turned off (rectifier and inverter off). • no output voltage is supplied to the loads. see table below for operation: Terminals (X50). -
Page 39: Transfer To Normal Operation
batteries you will find a 2nd battery switch used for measuring the battery voltage inside the top of the unit (3-pole circuit breaker.) To switch equipment power off completely you will also need to open this switch. Beware of possible residual charge in the capacitors inside the equipment and wait for 5 minutes so that they can discharge. - Page 40 submenu (screen 1.0), and then select “On” and Press (ent) once. You will get to screen 1.1, asking you to start the unit up “yes” or “no”. You can select “Yes” by pressing (ent). The UPs supplies output voltage entirely protected against voltage variations, electric noise, etc.
-
Page 41: Control Panel And Display Description
6. control PAnel And dIsPlAy descrIPtIon 6.1. coNtrol PaNEl Parts (1) (leDs) leD indications: rectifier Input Voltage OK (green) Unit on Bypass (orange) Inverter is working (green) Unit working from batteries -mains failure (red). In case of any alarm of the unit (red) (2) Graphic Display (3) Keyboard ent “enter”... - Page 42 Key (ent), has different purposes depending on the menu we are: • setting values. Press key (ent) to activate the function setting, the Figures in the screen will blink. With keys the character to set is selected and with keys - the value is selected. To confirm press (ent). next field will blink, to continue doing settings proceed in the same way or press (esc) to return to no-setting situation.
-
Page 43: Messages Menus And Classification In Submenus
6.2.1. mEssagEs mENUs aNd classiFicatioN iN sUbmENUs Use ( ) ( ) and ( ) ( ) keys to choose between different menus (1.0, …, 5.0) and Press enT to enter into the subscreen. CNTL (Control & Status of the unit) (Ent) screen 1.0 MEAS (Measures) -
Page 44: Menu Structure
6.2.2. mENU strUctUrE... -
Page 45: Screen Description
6.3. scrEEN dEscriPtioN 6.3.1. maiN lEvEl (scrEEN mENU 0.0) screen 0.0: Main presentation screen, with time and date indication. Initialization: after power on Use (esC) key or enter the Icon home on any screen of any submenu, to go back to main screen (screen 0.0). Fig.28: ... -
Page 46: Ups Status Control (Screen Menu 1.0)
6.3.2. UPs statUs coNtrol (scrEEN mENU 1.0) screens 1.1 and screen 1.2: starting and switching off the equipment. For how to start and switch off see chapter 5.1 and 5.2. screen 1.3: Ordering a battery test. In the second row, information about the battery test is given. Possible messages: •... - Page 47 Screen 1.1 Turn on UPS Screen 1.2 Turn off UPS Screen 1.3 Battery Test...
-
Page 48: Measures" Level (Screen Menu 2.0)
6.3.3. ‘‘mEasUrEs” lEvEl (scrEEN mENU 2.0) screen 2.1: • Input voltages phase to phase (display units 0.1 V) • Three phase input voltages phases to neutral (display units 0.1 V) • Input current per each phase (display units 0.1 a) •... - Page 49 • Charge battery currents positive and negative (display units 0.1 a) • Discharge battery currents positive and negative (display units 0.1 a) screen 2.3: • Input, bypass and output frequencies (display units 0.1 Hz) • rectifier, inverter and battery temperatures (display units1 ºC) •...
- Page 50 screen 2.4: • apparent output power l1 (display units 0.1 kVa) • apparent output power l2 (display units 0.1 kVa) • apparent output power l3 (display units0.1 kVa) • active output power l1 (display units 0.1 kW) • active output power l2 (display units 0.1 kW) •...
-
Page 51: Settings" Level (Screen Menu 3.0)
6.3.4. ‘‘sEttiNgs” lEvEl (scrEEN mENU 3.0) Fig.31: Screen 3.0 “Settings” and its submenus. screen 3.1: “default settings“ The color scheme cannot be modified in the current software version. setting the time and date format The following display languages are available : • “German” • “english” •... - Page 52 If not already entered by your aeG Ps service team: enter your service contact screen 3.2: In this screen you can program the baud rate of communication (port 0 and port 2). The options are the following •...
- Page 53 note: For problem free communication with the snMP adapter and CompuWatch, you should not change the settings. screen 3.3: The screen for programming the frequency of the automatic battery test. The options for the type to be programmed are the following: •...
- Page 54 • “JUl“: The annual battery test will run in July. • “aUG“: The annual battery test will run in august. • “seP“: The annual battery test will run in september. • “OCT“: The annual battery test will run in October. •...
- Page 55 screen 3.5 “Information“ In the screen “Information” you can check the UPs configuration of the unit. Configuration and status of the unit: • “single” single connection. • “Parallel-single” parallel connection. Unit is in “single” state. • “Parallel-Master” parallel connection. Unit is in “master” state. •...
-
Page 56: Alarms" Level (Screen Menu 4.0)
screen 3.6 Information about the set-point values: IP .V and OP .V shows the desired values for the input voltage at the rectifier and the output voltage. In addition, you will see the maximum permissible voltage imbalance at the rectifier and the bypass input, the current at the output and the battery charging current. - Page 57 The illustration shows some examples of messages that may be displayed. Table 4 contains a list of all of the warning messages that can be displayed. rEPrEsENtatioN iN disPlay lcd alarms For rectifier overload rectifier Inverter overload Mains failure, low battery level Inverter voltage out of margins Inverter dc voltage detected at the output.
- Page 58 Inverter stopped due to shutdown Maintenance bypass. Inverter stop Parallel system disconnection. Inverter stop High overload. Inverter stop over temperature. Inverter stop rectifier overload. Inverter stop Inverter stops dsP internal error. Inverter stop output short-circuit. Inverter stop Bypass phase rotation. Inverter stop Inverter failure/overload.
- Page 59 Internal initialization error. uPs block (dsP) Internal execution error. uPs block (dsP) uPs blocked. BlK. Inverter -> BlK. uPs Internal communication. uPs block (dsP) Parallel system discharging. uPs block uPs over temperature. uPs block. UPs blocks rectifier overload. uPs block Inverter desaturations.
- Page 60 or when the total output active power is greater than the following formula: Pact_out-ovl = Pout x 0.8 Where: • Pact_out-ovl is the Overload Output active Power (W) • Pout is rated Output apparent Power (Va) Alarm 3: This alarm appears when the input the unit is under main failure condition and the level of battery is lower than 11.5 V/battery pack Alarm 4: This alarm appears when the inverter output voltage phase to neutral in any phase...
- Page 61 UPs, in a parallel system. Alarm 15: This alarm appears at the estimated end of live of the battery bank. The revision and replacement of some batteries will be necessary to be done via aeG Ps customer service. Alarm 16: The temperature of battery cabinet (in case of separate battery cabinet) or battery place (in case of battery are located inside the UPs) is higher than 40 ºC.
- Page 62 Alarm 20: When the bypass is connected during the start up, a bypass phase rotation error is detected and the start up procedure is inhibited. Alarm 21: This alarm appears when in any phase, the rectifier input voltage phase to neutral is out of the set margins (+15 %/–20 % by default) or the rectifier input frequency is out of the set margins (±5 Hz by default).
- Page 63 Alarm 30: This message appears when a parallel system has a UPs shutdown due to high voltage. Alarm 31: When an over temperature is detected by the PFC or inverter temperature sensors, after 1 minute time the inverter will be turned off automatically. If over temperature condition remains after another 1 minute with the rectifier working, rectifier is also blocked (alarm 60).
- Page 64 Alarm 38: The ePO (emergency Power Off) switch is On. The UPs and the static bypass are switched off and no aC voltage present at the output anymore. Alarm 39: This message appears when, despite the three attempts to start up the UPs, a short circuit is still detected at the output.
- Page 65 Alarm 47: During the start up there is an input contactor test. If this test ends unsuccessfully the rectifier will be blocked. Alarm 48: If the output voltage ramp doesn’t work properly during the inverter start up the inverter will be blocked (see alarm 67). Alarm 49: This alarm appears when there is an offset voltage higher than 8 V, in any phase of the inverter output voltage phase to neutral.
- Page 66 Alarm 58: There is an internal error in the communication channel between microprocessor and DsP . This condition blocks the UPs. Alarm 59: This alarm appears when, in a parallel system, one UPs goes to battery mode. after some period of time, the UPs will shut down. Alarm 60: When an over temperature is detected by the PFC or inverter temperature sensors, first the inverter will be turned off automatically after 1 minute time...
- Page 67 Alarm 66: after several attempts detecting “Inverter Fault/Overload” (see alarm 65), the inverter will be blocked permanently,and output will be transferred to bypass. Alarm 67: The way to start up the inverter is on voltage ramp mode (rms value from sine wave voltage starts at 0 Vrms till reaching its preset nominal value, i.e., 230 Vrms).
- Page 68 Alarm 74: In a parallel system, with n+M configuration, where: n: nr equipment to size the system according to the maximum permissible load. M: nr redundant equipment in the system. It is equivalent to over sizing the UPs’s in the system, in order to continue supplying the maximum permissible load without overloading it.
-
Page 69: Data Logger" Level (Screen Menu 5.0)
(*) DsP internal error can happen for the following reasons: • Watchdog failure. • Wrong aDC measures. • Communication errors between DsP and processor. 6.3.6. ‘‘data loggEr” lEvEl (scrEEN mENU 5.0) Fig.32: Screen 5.0 “Data logger” The first line indicates the inverter runtime from the first unit startup. This counter accumulates the total inverter running time from the beginning;... - Page 70 • ss: seconds of deleted alarm • dd: day of deleted alarm • mm: month of deleted alarm • yy: year of deleted alarm The state for technical service, to understand the condition of the different parts of the UPs at the moment the registered alarm was activated.
-
Page 71: Maintenance, Warranty And Service
7. MAIntenAnce, WArrAnty And serVIce 7.1. basic maiNtENaNcE gUidE Batteries, fans and capacitors must be replaced at the end of their useful lifetime. Inside the UPs there are dangerous voltages and metallic parts at very high temperatures, even though the UPs may be shut down. any direct contact can cause electrocution and burns. -
Page 72: Cooling Fan
Ps reserves the rights to cancel this agreement or that entered into by its dealers at any time and without prior notice if other than original aeG Ps or aeG related spare parts are used for maintenance and repair. -
Page 73: Annexes
8. AnneXes 8.1. gENEral tEchNical sPEciFicatioN tablE 5: TeCHnICal sPeCIFICaTIOn capacity (kVA/kW) 10/8 15/12 20/16 30/24 40/32 60/48 80/64 iNPUt Acceptable voltage range 3 x 400 V (3 Ph + n), +15 % to -20 % Frequency (Hz) 50 / 60 ±5 % nominal input current 13 a 20 a... - Page 74 static byPass Thyristor type Voltage 3 x 400 V (3 Ph + n) 50 / 60 Frequency (Hz) control microprocessor controled uninterrupted transfer time Admissible overload 400 % for 10 s immediate (for overloads >150 %) transfer to bypass retransfer automatic after alarm clear MaInTenanCe BYPass type...
- Page 75 tablE 6: EXtErNal battEry cabiNEt dimENsioNs & wEight EXtErNal battEry cabiNEt capacity (kVA/kW) 10/8 15/12 20/16 30/24 40/32 60/48 80/64 no. 1 no. 3 dimensions approx. 700 x 450 x 1100 805 x 590 x 1320 d x W x H (mm) Integrated battery type 12 V 12 ah 12 V 26 ah...
-
Page 76: Safety Instructions
. Hazardous live parts inside the equipment, do not remove the cover. servicing should only be carried out by qualified service personnel. For maintenance or repair service, please contact your nearest after sales service from aeG Power solutions is compulsory... - Page 77 to connect the protection earth, ensure that this is correctly installed before powering up the input to the equipment. • The installation of UPs equipment should only be carried out by qualified personnel experienced in low voltage installations. • The cross section of the power supply and output cables to the loads should be determined according to the rated current given on the equipment’s specifications plate and complying with the local low voltage electro technical regulations.
- Page 78 • When the equipment will be stored for long periods, it is recommended that the batteries are separated from the UPs so that they can be charged. • When the equipment will be stored for long periods, it is recommended that the batteries be charged monthly in order to maintain the efficiency of the batteries.
- Page 79 NotEs...
- Page 80 warraNty modEl: sErial NUmbEr: PUrchasE datE: dEalEr stamP/sigNatUrE errOrs anD TeCHnICal MODIFICaTIOn sUBJeCT TO CHanGe. OPeraTInG InsTrUCTIOns 8000032013 Bal, en Emil-siepmann-str. 32 59581 warstein-belecke – germany tel.: +49 180 523 4787 – Fax: +49 180 523 4789 www.aegps.com...