Table of Contents
Advertisement
Available languages
Available languages
RCHT8600 Series Z-Wave
Programmable Thermostat
Quick Installation Guide
Included in your box
Screws and
anchors
UWP™
Mounting
System
(UWP)
Tools you will need
Phillips screwdriver
Small flat head screwdriver
Pencil
Level
Tools you may need
Wire stripper
Needle-nose pliers
Quick Install
Guide
RCHT8600
Thermostat
Drill and
drill bit (7/32 in)
Advertisement
Table of Contents

Related Manuals for Honeywell Z-Wave Series


Summary of Contents for Honeywell Z-Wave Series
-
Page 1: Programmable Thermostat
RCHT8600 Series Z-Wave Programmable Thermostat Quick Installation Guide Included in your box Quick Install Guide Screws and anchors RCHT8600 Thermostat UWP™ Mounting System (UWP) Tools you will need Tools you may need Phillips screwdriver Wire stripper Small flat head screwdriver Pencil Needle-nose pliers Drill and... -
Page 2: Removing Your Old Thermostat
Is your thermostat 120V or higher? If you answered yes to either of these questions, you have a line Wire nut voltage system and the thermostat will not work. Thick black wire If you are unsure visit: yourhome.honeywell.com/support... - Page 3 A or L/A W2 or AUX The RCHT8600 thermostat does not support U terminals. If there are wires in terminals that are not listed, you will need additional wiring support. Visit yourhome.honeywell.com/support to find out if the thermostat will work for you.
- Page 4 Quick Installation Guide Disconnect the wires and remove the old wall plate. Use a screwdriver to release wires from terminals. Then, use a wire label to identify each wire as it’s disconnected. The letter on the wire label should match the letter on the terminal.
- Page 5 RCHT8600 Series Insert the wall anchors. It is recommended that you use the wall anchors included in the box to mount your thermostat. You can use the UWP to mark where you want to place the wall anchors. a) Level the wall plate. b) Mark the location of the wall anchors using a pencil.
-
Page 6: Power Options
Quick Installation Guide Power options Insert R and C wires into designated terminals for primary AC power (C terminal is optional if batteries are installed, but it is recommended). Remove wires by Insert 3 AA batteries for primary or depressing the terminal tabs. backup power. - Page 7 RCHT8600 Series Turn your power ON. Turn on the power at the breaker box or switch that controls the heating/ cooling system. Switch Breaker box Return to the thermostat Return to the thermostat. Confirm the screen shows START SETUP. If your thermostat does not show START SETUP, please contact Customer Care at 1-800-468-1502.
-
Page 8: Key Features
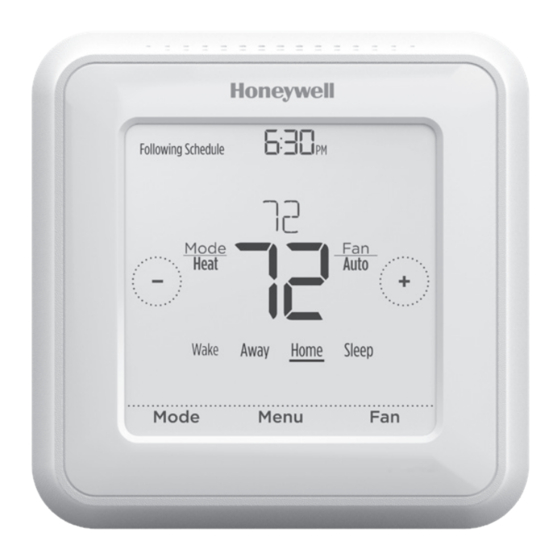
Quick Installation Guide Key features System status Z-Wave connection Time, ISU #, or information status Alert # Cool On, Heat On Shows Z-Wave Emergency Heat On, connection status. Recovery, or Auto Messaging Changeover On. Shows device setup Schedule information options, menu options, Heat On Recovery Following Schedule... -
Page 9: Thermostat Features
RCHT8600 Series Thermostat features The RCHT8600 series Z-Wave Programmable Thermostat is a Z-Wave Plus certified thermostat designed to work with any Z-Wave compliant controller or gateway for easy programming and automation to deliver energy savings and comfort at the same time. The thermostat can be operated in any Z-Wave network together with other Z-Wave certified devices from other manufacturers. -
Page 10: System Setup Options
Quick Installation Guide System Setup options To access all system options in the table below, press and hold MENU for 5 seconds. Touch to scroll through the list. Number Description Options (factory default in bold) 0 = Non-Programmable 1 = 1-Week Programmable 2 = 5-2 Programmable 3 = 5-1-1 Programmable Scheduling Options... - Page 11 RCHT8600 Series Number Description Options (factory default in bold) Electric, Gas/Oil (or Fossil Forced Air) EM Heat Type Note: This ISU is displayed only if ISU 200 is set to Heat Pump AND if ISU 221 Aux/E heat stages = 1 AND if ISU 253 is set to run AUX/E heat separately. Thermostat, External (Fossil Fuel Kit Controls Backup Heat) Fossil Kit Control Note: This ISU is displayed only if ISU 200 is set to Heat Pump AND if ISU 221 Aux/E heat...
- Page 12 Quick Installation Guide Number Description Options (factory default in bold) Cool 2 CPH (Cooling 1 - 6 CPH (3 CPH) cycle rate stage 2) Note: This ISU is only displayed when Cool /Compressor Stages is set to 2. 1 - 12 CPH Note: This ISU is only displayed when Heat Stages is set to 1 stage or more stages.
- Page 13 RCHT8600 Series Number Description Options (factory default in bold) Yes, No Indoor Sensor Note: Set this ISU when you want to wire a remote indoor sensor to the “S” terminals on the UWP. This ISU is only displayed if ISU 130 is set to NO wired outdoor sensor configured. 10k, 20k Sensor type Note: Choose resistance type of wired indoor sensor.
-
Page 14: Z-Wave Configuration Parameters
Quick Installation Guide Z-Wave configuration parameters If your gateway/hub/controller supports configuration function, you may remotely configure or change the default thermostat configuration parameters. For detailed table with all available Z-Wave configuration parameters search for RCHT8600 series Z-Wave Thermostat in the Z-Wave certified products section on http://Z-Wavealliance.org Z-Wave setup To add to include or remove to exclude the thermostat from Z-Wave network, go to... -
Page 15: Z-Wave Connection Status
RCHT8600 Series • If 24 VAC power source is not used or available, the thermostat must be powered by batteries. The thermostat will operate in LSS mode (power-save, sleep mode) to help conserve battery life after it has been included in a Z-Wave network. The Z-Wave radio supports beaming. -
Page 16: Fan Operation Settings
Quick Installation Guide System operation settings Press the Mode button to cycle to the Following Schedule next available System mode. Cycle through the modes until the Mode required System mode is displayed and leave it to activate. Away Home NOTE: Available System modes vary by model and system settings. -
Page 17: Scheduling Options
RCHT8600 Series Scheduling options This thermostat may be configured to be programmable or non programmable. Thermostat schedule is an optional menu item. It will only show up in the thermostat menu if enabled in the Installer setup – advanced menu. It provides setting for local thermostat schedule control. - Page 18 Quick Installation Guide See table below with default 5+2 schedule (Mon-Fri; Sat-Sun), adjustable settings: Thermostat schedule is turned ON, thermostat included in Z-Wave network Period Start Time Heat (Mon-Fri) Cool (Mon-Fri) Heat (Sat-Sun) Cool (Sat-Sun) ° ° ° ° Away N/A* °...
-
Page 19: Program Schedule Overrides
RCHT8600 Series Program schedule overrides If the thermostat is included in Z-Wave network it typically follows the setting on your Z-Wave controller. If you adjust the temperature setting, it overrides the current setting until new state (eg. Home/Away) and/or the new temperature setting is received from Z-Wave controller. - Page 20 Quick Installation Guide Wiring—conventional systems Alternate wiring (conventional systems) If labels do not match terminals, connect wires as shown below (see notes, below). NOTES: 1. If you must connect both R and Rc wires, set the R Slider Tab to the down position (2 wires).
-
Page 21: Wiring-Heat Pump
RCHT8600 Series Wiring—heat pump Connect wires: heat pump Match each labeled wire with same letter on new thermostat. Insert the wires into the matching terminal. NOTE: If you have difficulty inserting wires, you may have to press down the terminal push button next to the corresponding terminal. Labels don’t match? If labels do not match the letters on the thermostat, see “Alternate wiring (for heat pumps only)”... -
Page 22: Smart Response® Technology
Quick Installation Guide Smart Response® Technology This feature allows the thermostat to “learn” how long the furnace and air conditioner take to reach programmed temperature settings, so the temperature is reached at the time you set. For example: Set the Wake time to 6 am, and the temperature to 70°. -
Page 23: Enabling/Disabling Smart Response
RCHT8600 Series Enabling/disabling Smart Response Over time, your RCHT8600 series Z-Wave thermostat will learn how long it takes your system to reach the desired temperature. It can then turn on your heating or cooling equipment at the right time to make sure your home is comfortable by the time you expect. -
Page 24: Cleaning The Thermostat Screen
Quick Installation Guide Cleaning the thermostat screen With the clean screen option, you can lock the thermostat screen so you don’t accidentally change your settings when you clean. Follow the steps below to activate clean screen mode. Touch Menu on the thermostat home screen. Touch the arrows until you see CLEAN SCREEN, then touch Select. -
Page 25: Alerts And Reminders
RCHT8600 Series Alerts and reminders Alerts and reminders are displayed via the alert symbol and alert number in the clock area on the home screen. You can read more information about active alerts, snooze or dismiss non- critical alerts in Menu/Alerts. Number Alert/Reminder Definition... - Page 26 Quick Installation Guide Alerts and reminders Number Alert/Reminder Definition AC Power Lost If batteries used as backup power it would drain batteries quickly so Z-Wave communication needs to be turned off. The working power mode can only be changed when thermostat is NOT included in a Z-Wave network.
- Page 27 RCHT8600 Series Battery replacement Batteries are optional (to provide backup power) Following Schedule Auto Chg. On if your thermostat was wired to run on 24 VAC power when installed. If your thermostat was Mode Heat Auto wired to run on 24 VAC power, then batteries are NOT required.
-
Page 28: Troubleshooting
Quick Installation Guide Troubleshooting If you have difficulty with your thermostat, please try the following suggestions. Most problems can be corrected quickly and easily. Display is blank Make sure fresh AA alkaline batteries are properly installed (see page 6). If powered by common (C-wire), verify circuit breaker and furnace switch are turned on. -
Page 29: Year Limited Warranty
RCHT8600 Series 1-year limited warranty Resideo warrants this product, excluding battery, to be free from defects in workmanship or materials, under normal use and service, for a period of one (1) year from the date of first purchase by the original purchaser. If at any time during the warranty period the product is determined to be defective due to workmanship or materials, Resideo shall repair or replace it (at Resideo’s option). -
Page 30: Customer Assistance
UWP. Resideo Inc., 1985 Douglas Drive North 33-00450ES-03 Golden Valley, MN 55422 www.resideo.com Printed in U.S.A.. ©2019 Resideo Technologies, Inc. All rights reserved. The Honeywell Home trademark is used under license from Honeywell International Inc. 33-00450ES—03 M.S. Rev. 01-19... -
Page 31: Guía De Instalación Rápida
Serie Z-Wave RCHT8600 Termostato programable Guía de instalación rápida Su caja incluye Guía de instalación rápida Tornillos y anclajes Termostato RCHT8600 Sistema de montaje UWP™ (UWP) Herramientas que Herramientas que podría necesitará necesitar Destornillador de estrella Alicates Destornillador de hoja plana pequeño Lápiz Pinzas de punta Taladro y broca... - Page 32 ¿Hay cables negros gruesos con empalmes para cables? Si respondió de manera afirmativa a Empalme para cualquiera de estas preguntas, tiene cables un sistema de voltaje de línea y el Cable negro termostato no funcionará. grueso Si no está seguro, visite: yourhome.honeywell.com/support...
- Page 33 Terminal Cable del color A o L/A W2 o AUX El termostato RCHT8600 no es compatible con terminales U. Si hay cables en terminales no listados, será necesario soporte para cableado adicional. Visite yourhome.honeywell.com/support para determinar si el termostato funcionará.
- Page 34 Guía de instalación rápida Desconecte los cables y quite la placa de pared antigua. Use un destornillador para quitar los cables de los terminales. A continuación, use etiquetas para cables a fin de identificar cada cable a medida que lo desconecta.
- Page 35 Serie RCHT8600 Inserte los anclajes de pared. Se recomienda que para el montaje del termostato use los anclajes de pared incluidos en la caja. Puede usar el UWP para marcar el lugar donde desea colocar los anclajes de pared. a) Nivele la placa de pared. b) Marque la ubicación de los anclajes de pared con un lápiz.
-
Page 36: Opciones De Alimentación
Guía de instalación rápida Opciones de alimentación Inserte los cables R y C en los terminales designados para la alimentación de CA principal (el terminal C es opcional si las baterías están instaladas, pero se recomienda Inserte 3 baterías AA para la alimentación usarlo). - Page 37 Serie RCHT8600 Encienda la energía eléctrica. Encienda la energía eléctrica desde la Encedido caja de interruptores de circuito o el Encedido interruptor que controla el sistema de calefacción/refrigeración. Apagado Interruptor Caja de interruptores de circuito Volver al termostato Encedido Volver al termostato. Confirme que la pantalla muestra el mensaje START SETUP (Comenzar configuración).
- Page 38 Guía de instalación rápida Características claves Información del estado del Estado de la conexión a la Hora, N.º de ISU o sistema red Z-Wave N.º de Alerta Cool On (Refrigeración Muestra el estado de activa), Heat On conexión a la red Z-Wave. (Calefacción activa), Mensajes Emergency Heat On...
-
Page 39: Características Del Termostato
Serie RCHT8600 Características del termostato El termostato programable es un termostato Z-Wave Plus Serie Z-Wave RCHT8600 certificado, diseñado para funcionar con cualquier controlador o puerta de enlace compatibles con Z-Wave para poder programar y automatizar el termostato de manera fácil, y así ahorrar energía y disfrutar del confort al mismo tiempo. El termostato puede funcionar en cualquier red Z-Wave junto con dispositivos Z-Wave certificados de otros fabricantes. - Page 40 Guía de instalación rápida Opciones de configuración del sistema Para acceder a todas las opciones del sistema en la tabla a continuación, mantenga presionado MENU (Menú) durante 5 segundos. Toque para desplazarse por la lista. Opciones (las configuraciones predeterminadas de Número Descripción fábrica están en negrita)
- Page 41 Serie RCHT8600 Opciones (las configuraciones predeterminadas de Número Descripción fábrica están en negrita) 0 = Manual 1 = Automático Nota: El termostato puede controlar de manera automática tanto la calefacción como la refrigeración, con el Cambio de sistema fin de mantener la temperatura interna deseada. Para poder seleccionar el modo de sistema “automático” en la pantalla de inicio del termostato, active esta característica.
- Page 42 Guía de instalación rápida Opciones (las configuraciones predeterminadas de Número Descripción fábrica están en negrita) Refrigeración 2 CPH De 1 a 6 CPH (3 CPH) (etapa 2 de frecuencia del Nota: Esta ISU solo se muestra cuando las Etapas de refrigeración/del compresor están programadas en 2. ciclo de refrigeración) De 1 a 6 CPH (3 CPH) Nota: Esta ISU solo se muestra cuando las Etapas de calefacción/del compresor están programadas en 1...
- Page 43 Serie RCHT8600 Opciones (las configuraciones predeterminadas de Número Descripción fábrica están en negrita) Yes (Sí), Indoor Sensor (Sensor Nota: Establezca esta ISU cuando desee cablear un sensor interior remoto a los terminales “S” en el UWP. interior) Esta ISU solo aparece si ISU 130 se configura en NINGÚN sensor exterior cableado configurado. 20 000 10 000, Sensor type (Tipo de...
-
Page 44: Configuración De Z-Wave
Guía de instalación rápida Parámetros de configuración de Z-Wave Si la puerta de enlace/eje/controlador admite la función de configuración, puede configurar de manera remota o modificar los parámetros de configuración predeterminados del termostato. Para obtener una tabla detallada con todos los parámetros de configuración Z-Wave disponibles, busque Termostato Serie RCHT8600 Z-Wave en la sección de productos certificados Z-Wave en http://Z-Wavealliance.org Configuración de Z-Wave... -
Page 45: Estado De La Conexión A La Red Z-Wave
Serie RCHT8600 • Si no se utiliza o no hay una fuente de alimentación de 24 V CA disponible, el termostato deberá funcionar con baterías. El termostato funcionará en modo LSS (ahorro de energía, modo dormir) para ayudar a conservar la vida de la batería después de incluirse en una red Z-Wave. - Page 46 Guía de instalación rápida Ajustes de funcionamiento del sistema Presione el botón Mode (Modo) para continuar Following Schedule con el siguiente modo del sistema disponible. Recorra los modos hasta que aparezca el modo Mode del sistema requerido y déjelo para que se active.
-
Page 47: Opciones De Programación
Serie RCHT8600 Opciones de programación Este termostato se puede configurar para que tenga una opción de programación o de no programación. El programa del termostato es una configuración opcional del menú. Solo se visualiza en el menú del termostato si se habilitó desde la opción Configuración del instalador: menú... - Page 48 Guía de instalación rápida Consulte la tabla a continuación para obtener información sobre las configuraciones programables del programa predeterminado 5+2 (lunes a viernes; sábados y domingos). Programa del termostato HABILITADO, termostato incluido en una red Z-Wave Cool Heat Cool Heat Hora de Período (Refrigeración)
-
Page 49: Anulaciones De La Programación
Serie RCHT8600 Anulaciones de la programación Si el termostato está incluido en la red Z-Wave, por lo general, sigue el ajuste de su controlador Z-Wave. Si cambia los ajustes de la temperatura, se anulan los ajustes actuales hasta que se reciba un nuevo estado (por ejemplo, Home [Hogar] o Away [Ausente]) o nuevos ajustes de temperatura desde el controlador Z-Wave. -
Page 50: Cableado: Sistemas Convencionales
Guía de instalación rápida Cableado: sistemas convencionales Cableado alternativo (sistemas convencionales) Si las etiquetas no corresponden con los terminales, conecte los cables como se muestra a continuación (consulte las notas a continuación). NOTAS: 1. Si debe conectar tanto el cable R como el cable Rc, configure la lengüeta deslizante R a la posición hacia abajo (2 cables). -
Page 51: Cableado: Bomba De Calor
Serie RCHT8600 Cableado: Bomba de calor Conexión de los cables: bomba de calor Haga coincidir cada cable etiquetado con la misma letra en el termostato nuevo. Inserte los cables en el terminal correspondiente. NOTA: Si tiene problemas para insertar los cables, es posible que deba presionar el botón pulsador del terminal que se encuentra al lado del terminal correspondiente. -
Page 52: Tecnología Smart Response
Guía de instalación rápida Tecnología Smart Response® Esta característica permite que el termostato “sepa” cuánto demora su equipo de calefacción y su aire acondicionado en alcanzar las configuraciones de temperatura programadas, de manera que se alcance esa temperatura a la hora que usted la configuró. Por ejemplo: Configure la hora de despertarse a las 6 a.m. -
Page 53: Habilitar O Deshabilitar La Respuesta Inteligente
Serie RCHT8600 Habilitar o deshabilitar la respuesta inteligente Con el tiempo, su termostato serie RCHT8600 Z-Wave recordará cuánto tarda su sistema en alcanzar la temperatura deseada. Luego, puede encender su equipo de calefacción o refrigeración en el momento justo para asegurarse de que su hogar esté cómodo cuando así... -
Page 54: Limpiar La Pantalla Del Termostato
Guía de instalación rápida Limpiar la pantalla del termostato Con la opción de limpiar la pantalla, puede bloquear la pantalla del termostato para evitar que modifique las configuraciones por accidente cuando la limpie. Para activar el modo limpiar pantalla, siga los siguientes pasos. - Page 55 Serie RCHT8600 Alertas y recordatorios Las alertas y los recordatorios se muestran con el símbolo de alerta y el número de alerta en el área del reloj en la pantalla de inicio. Puede obtener más información acerca de las alertas activas y sobre cómo postergar o descartar alertas no cruciales en MENU/ALRT (Menú/ Alerta).
- Page 56 Guía de instalación rápida Alertas y recordatorios Número Alerta/ Definición recordatorio Pérdida de Si las baterías se usaran como alimentación de respaldo, corriente CA se agotarían rápidamente, por lo que se debe apagar la comunicación Z-Wave. El modo de alimentación en funcionamiento solo se puede modificar cuando el termostato NO está...
-
Page 57: Reemplazo De La Batería
Serie RCHT8600 Reemplazo de la batería Las baterías son opcionales (para proporcionar Following Schedule Auto Chg. On alimentación de respaldo) si el termostato se conectó para funcionar con corriente de 24 V CA al momento Mode de la instalación. Si el termostato se conectó para Heat Auto funcionar con corriente de 24 V CA, NO se necesitan... -
Page 58: Localización Y Solución De Problemas
Guía de instalación rápida Localización y solución de problemas Si tiene dificultades con el termostato, intente seguir las sugerencias que se indican a continuación. La mayoría de los problemas se pueden solucionar de manera fácil y rápida. La pantalla está en blanco Compruebe que las baterías alcalinas AA nuevas estén instaladas correctamente (consulte la página 6). -
Page 59: Garantía Limitada De 1 Año
Serie RCHT8600 Garantía limitada de 1 año Resideo garantit ce produit, à l’exception des piles, contre tout défaut de pièce ou de main- d’œuvre, durant une période pour un (1) año à partir de la date d’achat par le consommateur d’origine si le produit est utilisé... -
Page 60: Asistencia Al Cliente
Resideo Inc., 1985 Douglas Drive North 33-00450ES-03 Golden Valley, MN 55422 Impreso en EE. UU. www.resideo.com ©2019 Resideo Technologies, Inc. Todos los derechos reservados. La marca comercial Honeywell Home se utiliza en virtud de la licencia emitida por Honeywell International Inc.. 33-00450ES—03 M.S. Rev. 01-19...