Baicells Nova-436Q Installation Manual
Outdoor 4x1w two-carrier tdd enodeb
Hide thumbs
Also See for Nova-436Q:
- Installation manual (28 pages) ,
- Installation manual (39 pages) ,
- Installation manual (45 pages)

Related Manuals for Baicells Nova-436Q


Summary of Contents for Baicells Nova-436Q
-
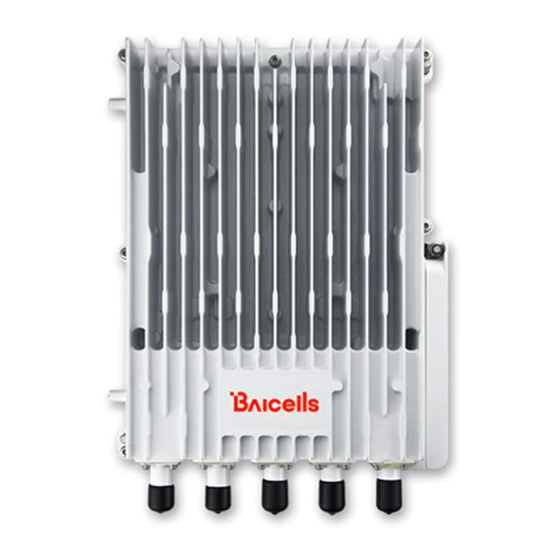
Page 1: Installation Guide
Nova-436Q Outdoor 4x1W Two-Carrier TDD eNodeB Installation Guide August 2019 Version 1.6... -
Page 2: About This Document
About This Document This document is intended for personnel who will be installing the Baicells Nova-436Q Outdoor 4x1W Two-Carrier Time Division Duplexing (TDD) eNodeB (eNB). The product overview is followed by the procedures for properly installing and verifying the eNB is operational. Please be advised that only personnel with the appropriate electrical skills and experience should install this device. -
Page 3: Safety Information
For the safety of installation personnel and for the protection of the equipment from damage, please read all safety warnings. If you have any questions concerning the warnings, before installing or powering on the base station contact the Baicells support team. Warning IMPORTANT SAFETY INSTRUCTIONS This warning symbol means danger. -
Page 4: Table Of Contents
Table of Contents 1 Overview ........................6 1.1 Introduction ......................... 6 1.2 Features ........................7 2 Installation Preparation ....................7 2.1 Materials ........................7 2.2 LEDs & Interfaces ......................8 2.3 Location & Environment ....................9 2.4 Grounding & Lightning Protection ................9 2.5 Weatherproofing ...................... - Page 5 List of Figures Figure 1–1: Nova-436Q eNB ...................... 6 Figure 2–1: LEDs & Interfaces ....................8 Figure 2–2: Weatherproofing ....................9 Figure 2–3: CloudCore Login Page ................... 10 Figure 3–1: Installation Process ....................10 Figure 3–2: GPS Antenna Installation ..................11 Figure 3–3: Omega Clamps ......................
-
Page 6: Overview
As a two-carrier eNB, the Nova-436Q hardware unit contains the equivalent of two separate eNBs. Initially, the 436Q will operate in carrier aggregation (CA) mode or HaloB mode; a later software upgrade will also support dual carrier (split) mode. -
Page 7: Features
1.2 Features Nova-436Q is based on 3GPP Release 12 standards and supports carrier aggregation and HaloB (optional feature) operation. CA provides the ability to aggregate channels from across the full Citizens Broadband Radio System (CBRS) range, even channels that are not adjacent. HaloB is an optional feature that enables the eNB to function independently with no EPC core network connection. -
Page 8: Leds & Interfaces
2.2 LEDs & Interfaces Refer to Figure 2–1 and Table 2-2 and Table 2-3 for a description of the 436Q eNB's LED status indicators and interfaces. Figure 2–1: LEDs & Interfaces Table 2-2: LEDs Color Status Description Steady on Power is on Green No power supply Fast flash: 0.125s on, 0.125s off... -
Page 9: Location & Environment
Interface Description ANT1 Port for external RF antenna 1, N-female connector ANT2 Port for external RF antenna 2, N-female connector ANT3 Port for external RF antenna 3, N-female connector 2.3 Location & Environment In addition to network planning, when determining where to place the eNB you need to consider factors such as climate, hydrology, geology, the possibility of earthquakes, reliable electric power, and transportation access. -
Page 10: Cloudcore Account
OMC functions. Installation Per typical cell site installations, the Nova-436Q eNB may be installed on a pole or on a wall. Instructions for each type of mounting are covered in this section. Refer to the process overview which follows, and then proceed to section 3.2 to begin the installation. -
Page 11: Install Gps Antenna
3.2 Install GPS Antenna Read the following GPS antenna installation requirements before installing it on the eNB. No major blocking from buildings in the vicinity. Make sure the space atop is at least 45 degrees unblocked by any buildings. ... -
Page 12: Figure 3-4: Attach Bracket To Pole
Figure 3–4: Attach Bracket to Pole 3. Using the 2 pins on the bracket on the back of the eNB, attach the eNB to the mounting bracket on the pole. Push the eNB until the hook is firmly attached to the mounting bracket (Figure 3–5). -
Page 13: Install On Wall
Ensure that the wall can bear at least 4 times the weight of the eNB. Follow the steps below to install the Nova-436Q eNB on the wall. 1. Take apart the assembled installation bracket. 2. Fit the installation bracket on the wall, as shown in Figure 3–7. Mark the drilling locations using a pencil or marker. -
Page 14: Connect Gps Antenna Cable
Connect one end of the 2 RF cables to the ANT0, ANT1, ANT2, and ANT3 interfaces on the eNB, and tighten them with a wrench. NOTE: When the Nova-436Q is operating in dual carrier (split) mode (future software upgrade), Cell 1 uses ANT2 and ANT3 and Cell 2 uses ANT0 and ANT1. -
Page 15: Connect Ground Cable
Prepare the grounding cable according to the actual measurements and requirements of the specific installation site. The Nova-436Q eNB has two grounding screws located on the bottom of the unit (Figure 3–9). Follow the steps below the figure to connect the ground cable. -
Page 16: Power On To Check Led Status
Reference: Baicells Configuration & Network Administration Guide The Nova-436Q eNB may be configured in Single Carrier, Single Carrier with Carrier Aggregation (CA), or HaloB mode. When first installing and testing the Nova-436Q, Baicells recommends configuring the standard single carrier settings (without enabling CA or HaloB) for simple verification that the new eNB is operational. -
Page 17: Basic Configuration Overview
The home page BTS Info > Basic Info menu reports the current eNB status (Figure 3–12). In section 3.6.7 you will come back to this page to confirm the eNB status. Figure 3–12: Home Page 3.6.2 Basic Configuration Overview Figure 3–13 indicates 3 main areas of basic configuration: network interfaces, management server address;... -
Page 18: Configure Network Interfaces
3.6.3 Configure Network Interfaces The network interfaces defined as part of the initial, basic setup include the WAN, LAN, Dynamic Host Configuration Protocol (DHCP), and the Local Gateway (LGW) mode. 3.6.3.1 WAN/LAN Go to the Network > WAN/LAN menu (Figure 3–14). The WAN interface is an external communication portal (Internet connection) between the eNB’s Network Management System (NMS) –... -
Page 19: Figure 3-15: Lgw
Domain Name Server (DNS) IP address; up to 2 may be configured. 3.6.3.2 LGW The Local GateWay (LGW) setting must be configured when using the Baicells CloudCore Evolved Packet Core (EPC). Refer to Figure 3–15 and Table 3-2. You must reboot the eNB when you make changes to these settings. -
Page 20: Figure 3-16 Lgw = Router
Table 3-2: LGW Field Name Description On or Off LGW Mode Select an option: NAT: Packages from internal network to external network need NAT translation Figure 3–16 Router: Select optimized route from the routing table ( Bridge: Transfer in the data link layer LGW Interface Binding WAN is the only option. -
Page 21: Configure The Management Server
3.6.4 Configure the Management Server In the BTS Settings > Management Server window you will enter the management server information (Figure 3–18). When using the Baicells CloudCore, in the http:// field enter the server address and port number: baiomc.cloudapp.net:48080/smallcell/AcsService. If you are using Local OMC or another LTE NMS, enter its server address and port number. -
Page 22: Configure Quick Settings
Under BTS Info > Quick Setting window (Figure 3–19) are several important fields you must configure or check. First, if the operator is using the Baicells CloudCore EPC, you must enter a fixed MME IP and PLMN setting, as shown below: •... -
Page 23: Configure Carrier Setting
Figure 3–19: Quick Setting 3.6.6 Configure Carrier Setting The Carrier Setting menu is new for the two-carrier Nova-436Q eNB (Figure 3–20). You can set the eNB to run as either a single carrier or as two combined carriers using Carrier Aggregation (CA). -
Page 24: Verify Enb Operational Status
Figure 3–22: Cell Status (OMC) Optionally, you may want to go ahead and: 1. Change the password. 2. Confirm the firmware version is the latest available from Baicells; upgrade if needed. 3. Set the Network Timing Protocol (NTP). For help, refer to the Baicells Configuration &... - Page 25 Before commercial operation, Baicells recommends implementing cell site acceptance testing of a new site to ensure the service meets expectations, to document network speeds at various locations in the cell, and to verify RF coverage. A forthcoming document, Cell Site Acceptance...
-
Page 26: Appendix A: Technical Specifications
Appendix A: Technical Specifications Hardware Specifications LTE Mode Frequency Bands 42/43/48 Channel Bandwidth 5/10/15/20 MHz per carrier Max Output Power 30 dBm / antenna Power Supply +/- 48VDC, AC adaptor (multi-national standards) Power Consumption < 60W Receive Sensitivity -100 dBm Synchronization Interfaces 1 optical (SFP) and 1 RJ-45 Ethernet interface (1 GE) -
Page 27: Environmental Specifications
UL: QPSK, 16QAM, 64QAM Modulation DL: QPSK, 16QAM, 64QAM (256QAM in future software release) Local IP Access (LIPA) Traffic Offload Selected IP Traffic Offload (SIPTO) Voice VoLTE (planned) Self-organizing network (planned): • Automatic setup • Automatic Neighbor Relation (ANR) • PCI confliction detection RAN Sharing Supported Network Mgmt... - Page 28 Global Part Number Nova-436QQ outdoor TDD eNodeB - LTE Release 13, 4x1W (30 dBm), 4 port, mBS31001 3.5 GHz (3550-3700 MHz), B42/43/48 Notes: 1 - Other models available for other regions. Contact sales_na@baicells.com. 2 - Customized versions may be requested.
-
Page 29: Appendix B: Regulatory Compliance
Appendix B: Regulatory Compliance FCC Compliance This device complies with part 15 of the FCC Rules. Operation is subject to the following two conditions: (1) This device may not cause harmful interference, and (2) this device must accept any interference received, including interference that may cause undesired operation. Any Changes or modifications not expressly approved by the party responsible for compliance could void the user's authority to operate the equipment.