
Related Manuals for Cisco Webex Room Kit Mini


Summary of Contents for Cisco Webex Room Kit Mini
-
Page 1: Installation Guide
Cisco Webex Room Kit Mini Installation Guide Guide d’installation Installationshandbuch Guida per l’installazione Guía de instalación Manual de Instalação... - Page 3 Mounting recommendations Conseils pour le montage / Montage-Empfehlungen / Consigli di montaggio / Recomendaciones de montaje / Recomendações de montagem The Room Kit Mini is made for huddle spaces and You can mount the Room Kit Mini on the wall or small rooms.
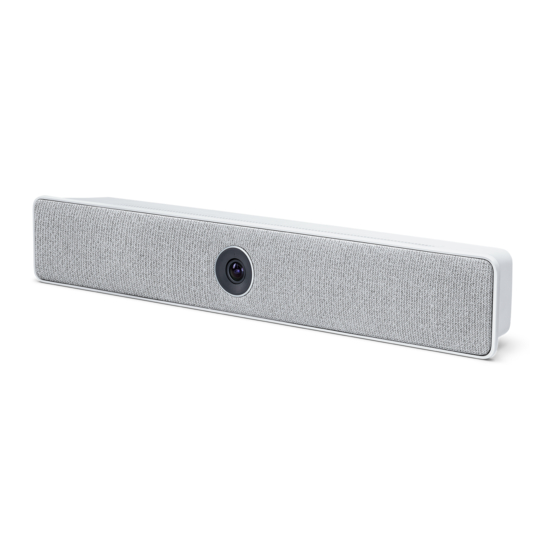
- Page 4 3. HDMI cable 1.5 m / 4.9 ft 10. USB-C to USB-A cable 4 m / 13.1 ft 4. Network cable 5 m / 16.4 ft 11. Cisco Table Multi-Connector 4K 9 m / 29.5 ft 5. Wall mount 6. Privacy cover...
- Page 5 9. Câble de présentation HDMI 8 m 4. Câble réseau, rond 5 m 10. Câble USB-C à USB-A 4 m 5. Wall mount bar 11. Cisco Table Multi-Connector 4K 9 m 6. Cache d’obstruction Clé Torx Verpackungsinhalt Medienleiste und Netzteil Separat bestellt 2.
- Page 6 1 A. Wall mounting Fixation murale / Wandhalterung / Montaggio a parete / Montaje en pared / Montagem na parede Go to Step 1 B if you want to mount the mediabar directly on the screen. Passez à l’étape 1 B pour fixer la mediabar directement à l’écran. / Gehen Sie zu Schritt 1 B, wenn Sie die Medienleiste direkt auf dem Bildschirm montieren möchten.
- Page 7 Fasten the wall mount. Fixez le support mural. / Befestigen der Wandhalterung. / Fissare il supporto a parete. / Fije el soporte de montaje en pared. / Apertar o suporte de parede. A causa delle dimensioni e del peso Debido al tamaño y volumen del Devido à...
- Page 8 Adjust the position and tighten the screw on the top. Ajustez la position et serrez la vis du dessus. / Passen Sie die Position an und ziehen Sie die Schraube oben fest. / Regolare la posizione e serrare la vite nella parte superiore. / Ajuste la posición y apriete el tornillo de la parte superior.
- Page 9 Place the mediabar. Placez la mediabar. / Platzieren Sie die Medienleiste. / Posizionare la barra multimediale / Coloque la barra multimedia. / Coloque a barra multimédia. Flip to place below the screen. Faites pivoter la barre pour la faire passer sous l’écran. / Zur Platzierung unterhalb des Bildschirms drehen Sie sie um.
- Page 10 1 B. Screen mounting Fixation à l’écran / Bildschirm-Montage / Montaggio dello schermo / Soporte de la pantalla / Montagem no ecrã Go directly to Step 2 if you have mounted the mediabar on the wall. Passez directement à l’étape 2 si vous avez fixé la mediabar au mur. / Gehen Sie direkt zu Schritt 2, wenn Sie die Medienleiste an der Wand angebracht haben.
- Page 11 Using the screen mount may change central L’utilizzo del supporto dello schermo potrebbe cambiare la gravità centrale dello schermo. gravity of the screen. Check the stability Verificarne la stabilità dopo aver installato Room after mounting the Room Kit Mini. If not Kit Mini.
- Page 12 Attach the horizontal piece to your screen and tighten the thumb nuts. Attachez la pièce horizontal à l’écran et serrez les écrous à ailettes. / Befestigen Sie das horizontale Stück auf den Bildschirm und ziehen Sie die Muttern fest. / Fissare l’elemento orizzontale allo schermo e serrare i dadi.
- Page 13 If your screen is thinner than 40 mm (1.6 in.) you must add more than one spacer. Add as many spacers as required to align the mediabar support with the screen (see page 15). Ajoutez plus d’une entretoise si l’écran est plus fin que 40 mm. Ajoutez autant d’entretoises que nécéssaire, afin d’aligner le support de la mediabar avec l’écran (voir page 15).
- Page 14 Remove the mediabar support from the wall mount bracket and mount it on the screen mount. Enlevez le support de la mediabar de la fixation murale et montez le sur la fixation à l’écran. / Entfernen Sie die Stütze für die Medienleiste aus der Wandhalterung und montieren Sie sie auf die Bildschirmbefestigung.
- Page 15 Place the vertical part on the screen and adjust the position. Placez la partie verticale sur l’écran et ajustez la position. / Befestigen Sie den vertikalen Teil am Bildschirm, und passen Sie die Position an. / Posizionare la parte verticale sullo schermo e regolare la posizione.
- Page 16 Fasten the screen mount. Fixez le support de l’écran. / Befestigen Sie die Bildschirmhalterung. / Fissare il supporto dello schermo. / Fije el soporte a la pantalla. / Aperte o suporte do ecrã.
- Page 17 Tighten the screw on the top. Serrez la vis du haut. / Ziehen Sie die Schraube oben fest. / Serrare la vite nella parte superiore. / Apriete los tornillos de la parte superior. / Aperte o parafuso na parte superior.
- Page 18 Place the mediabar. Placez la mediabar. / Platzieren Sie die Medienleiste. / Posizionare la barra multimediale. / Coloque la barra multimedia. / Coloque a barra multimédia.
- Page 19 Flip to place below the screen. Faites pivoter la barre pour la faire passer sous l’écran. / Zur Platzierung unterhalb des Bildschirms drehen Sie sie um. / Capovolgere la barra multimediale per effettuare l’installazione sotto lo schermo. / Voltear para colocarlo debajo de la pantalla.
- Page 20 2. Connect the mediabar to the screen, Touch 10 controller, network, and power Connectez la mediabar à l’écran, au contrôleur tactile Touch, au réseau et à l’alimentation / Verbinden der Medienleiste mit Bildschirm, Touch-Controller, Netzwerk und Strom / Connettere la barra multimediale a schermo, controller Touch, rete e alimentazione / Conecte la barra multimedia a la pantalla, al controlador Touch, a la red y a la fuente de alimentación / Ligação da barra multimédia ao ecrã, ao controlador Touch, à...
- Page 21 Make sure to connect the network cables to the Assurez-vous de connecter les câbles réseau aux ports appropriés. Utilisez le câble réseau plat pour le contrôleur correct ports, and use the flat network cable for tactile Touch. the Touch 10 controller. Après avoir connecté...
- Page 22 3. Adjust the camera tilt angle to optimize the view Ajustez l’inclinaison de la caméra / Anpassen des Neigungswinkels der Kamera zur Optimierung der Anzeige / Regolare l’angolo di inclinazione della videocamera per ottimizzare la visualizzazione / Ajuste el ángulo de inclinación de la cámara para optimizar la visión / Ajuste do ângulo de inclinação da câmara para otimizar a vista...
- Page 23 Release the mediabar Retirez la mediabar / Lösen der Medienleiste / Rimuovere la barra multimediale / Retire la barra multimedia / Retirar a barra multimédia...
- Page 24 Privacy cover Cache d’obstruction / Datenschutz-Abdeckung / Copertura per la privacy / Cubierta de privacidad / Cobertura de privacidade Attach the self-adhesive magnetic plate. Attachez la plaque magnétique autocollante. / Befestigen Sie die selbstklebende magnetische Platte. / Attaccare la piastra magnetica autoadesiva. / Fije la placa magnética autoadhesiva. / Instale a placa magnética autoadesiva.
- Page 25 Place the magnetic privacy cover. Placez le cache magnétique. / Befestigen Sie die magnetische Datenschutz-Abdeckung / Posizionare la copertura magnetica per la privacy. / Coloque la cubierta de privacidad magnética. / Coloque a cobertura de privacidade magnética.
- Page 26 Power 0 VAC, 50/60 Hz) Connector panel Panneau de connexion / Anschlussfeld / Pannello del connettore / Panel conector / Painel de conectores 1. Factory reset pinhole 5. USB-C Trou d’épingle pour la réinitialisation aux 6. USB-A paramètres par défaut / Stiftloch zum Zurücksetzen auf Werkseinstellungen / Foro 7.
-
Page 27: Troubleshooting
Troubleshooting Dépannage / Fehlerbehebung / Risoluzione dei problemi / Solución de problemas / Solução de problemas If you don’t see the on-screen display, check The system powers up automatically. If the system that you have selected the HDMI input you have doesn’t power up, check the power switch. - Page 28 Visit one of these websites to find out more about setup, management, and use of this product. Use the first link if your device is registered to the Cisco Webex service and the second link if the device is registered to another service.
- Page 32 Begriffs „Partner“ impliziert keine gesellschaftsrechtliche Beziehung zwischen Cisco und anderen Unternehmen. (1110R) Cisco e il logo Cisco sono marchi o marchi registrati di Cisco e/o dei relativi affiliati negli Stati Uniti e in altri paesi. Per visualizzare l’elenco di marchi Cisco, visitare il sito Web all’indirizzo: www.cisco.com/go/trademarks. I marchi commerciali di terze parti citati sono proprietà...