
Related Manuals for Sony PP-A2780


Summary of Contents for Sony PP-A2780
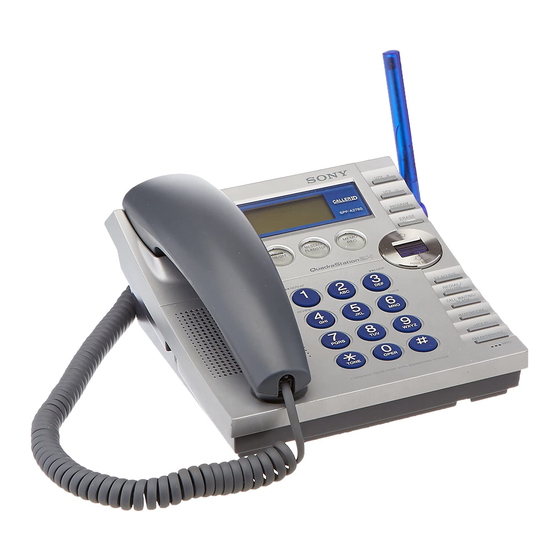
- Page 1 3-232-153-11 (1) Cordless Telephone with Answering System Operating Instructions Hearing-Aid Compatible SPP-A2780 ©2001 Sony Corporation...
- Page 2 The model and the serial numbers are located at the bottom of the unit. Record the serial number in the space provided below. Refer to these numbers whenever you call upon your Sony dealer regarding this product. Model No. SPP-A2780 Serial No. ________________...
- Page 3 7. If trouble is experienced with this equipment (SPP-A2780), for repair or warranty information, please contact Sony Direct Response Center: Tel 1- 800-222-7669. If the equipment is causing harm to the telephone network, the telephone company may request that you disconnect the equipment until the problem is resolved.
- Page 4 IMPORTANTES INSTRUCCIONES DE SEGURIDAD A fin de reducir el riesgo de incendio, descarga eléctrica y lesiones a las personas cuando usted use su equipo telefónico, siempre debe observar precauciones básicas de seguridad, entre ellas: 1. No use este producto cerca del agua, por ejemplo, cerca de una bañera, lavabo, fregadero de cocina o lavadora, en un sótano...
- Page 5 (SPP-A2780), con respecto a la reparación o a la información sobre la garantía, póngase en contacto con Sony Direct Response Center: Tel 1-800-222-7669 (EE. UU. solamente). Si el equipo causa problemas en la línea, la compañía telefónica puede solicitarle que desconecte el equipo hasta que se resuelva el problema.
-
Page 6: Table Of Contents
Table of contents Getting Started 8 Welcome 9 Read this first 10 Step 1: Checking the package contents 11 Step 2: Setting up the base phone 14 Step 3: Preparing the battery pack 16 Step 4: Choosing the dialing mode 17 Step 5: Entering the area code 21 Step 6: Setting the day and time 23 Setting up the EZ Access function... - Page 7 Transferring from the base phone to the cordless handset Transferring between the cordless handsets Answering Machine Features 60 Preparing the answering machine Recording the greeting Selecting the ring time Selecting the recording quality Selecting the answering mode Setting the audible message indicator Turning on the answering function...
-
Page 8: Getting Started
First, read the followings. • The system includes a cordless handset. If you utilize the walkie- talkie feature, it is necessary to purchase the SPP-H273 Sony cordless handset used for the QuadraStation 2.4 exclusively. • Be sure to register the additional cordless handset(s) to the base phone before use. -
Page 9: Read This First
Read this first Before you use your phone, you must first set it up. Here’s a quick way to set up your phone: Steps 1 to 6. Step 1 (page 10) First, unpack the phone and the supplied accessories. Base phone Cordless handset For using the EZ Access function, follow the procedure in “Setting up the EZ Access function”... -
Page 10: Step 1: Checking The Package Contents
Step 1 Checking the package contents Make sure you have received the following items in the package. If anything is missing, contact your local Sony dealer. AC power adaptor for the base phone (AC-T46) Charger/AC power adaptor for the charger... -
Page 11: Step 2: Setting Up The Base Phone
• The cordless telephone operates at a frequency that may cause interference to nearby TVs, VCRs, and microwave oven; the base phone should not be placed near or on the top of a TV or VCR;... -
Page 12: Connect The Base Phone
Step 2: Setting up the base phone (continued) Connect the base phone If you want to hang the base phone on the wall, see page 86. Hook the cord. To an AC outlet To a telephone outlet To tilt the phone If you want to tilt the phone, attach the supplied wall bracket on the bottom of the base phone. - Page 13 Notes • Use only the supplied AC-T46 AC power adaptor. Do not use any other AC power adaptor. • Connect the AC power adaptor to a continuous power supply. • Place the base phone close to the AC outlet so that you can unplug the AC power adaptor easily.
-
Page 14: Step 3: Preparing The Battery Pack
Step 3 Preparing the battery pack Charge the battery pack for more than 12 hours before you start using your cordless handset. BP-T38 Front side To DC IN 9V CHARGE lamp Getting Started Slide open the battery compartment lid of the cordless handset. -
Page 15: Battery Duration
If the battery lasts only a few minutes even after 12 hours of charging, the usable life of the battery has expired and needs replacement. Contact your local Sony authorized dealer or service center, and ask for a Sony BP-T38 rechargeable battery pack. -
Page 16: Step 4: Choosing The Dialing Mode
Step 4 Choosing the dialing mode For the telephone to work properly, select an appropriate dialing mode (tone or pulse). You can select the dialing mode on both the base phone and cordless handset. The dialing mode that has been last set either with the base phone or cordless handset is selected. -
Page 17: Step 5: Entering The Area Code
Step 5 Entering the area code When you use this phone for the first time, or move to an area that has a different area code, you must enter the area code. Otherwise, you cannot use some functions of this phone and the Caller ID functions. This is also necessary because the phone must be able to select an area code to properly dial a call from the Caller ID list. - Page 18 Step 5: Entering the area code (continued) Enter the three digits of your home area code using the dialing keys. Press (PGM). You hear a long confirmation beep. Notes • If the home area code is already entered, it appears on the display in step 2. To enter a different home area code, see “To change the home area code”...
- Page 19 To enter the local area code (For 10 digits phone numbers users) If a call matches one of the local area codes you entered, the phone number will be registered with 10 digits in the Caller ID list (area code + number).
- Page 20 Step 5: Entering the area code (continued) To change the local area code Perform steps 1 to 3 on page 19. The current local area code appears on the display. Press (ERASE) to erase the current local area code. Enter a new local area code using the dialing keys. Press (PGM).
-
Page 21: Step 6: Setting The Day And Time
Step 6 Setting the day and time Set the day and time so that you can stamp day and time for the incoming messages. You will hear the recorded day and time when you play back messages. You can set the day and time only with the cordless handset. - Page 22 Step 6: Setting the day and time (continued) Press Jog Dial. Set the minute (00 to 59) by turning Jog Dial. Press Jog Dial. Select “AM” or “PM” by turning Jog Dial, and then press Jog Dial. You hear a long confirmation beep. Then the phone starts counting time.
-
Page 23: Setting Up The Ez Access Function
Setting up the EZ Access function The EZ Access function enables you to access to any set of numbers up to 32 digits long by simple one-touch. Use for calling cards plus PIN, voice mail, long distance provider, or any other set of frequently used number. - Page 24 Setting up the EZ Access function (continued) To use the EZ Access –for making calls, see page 33, 35. –for redialing, see page 37. –for making calls from the Phone Directory, see page 47. –for making calls from Caller ID list, see page 80. To change the access number Perform steps 1 and 2 on page 23.
-
Page 25: Registering Additional Cordless Handsets
Registering additional cordless handsets The phone system includes a cordless handset. You can expand the system including a total of four cordless handsets. Be sure to register the ID number of the additional cordless handset called “station number” to the base phone before using the additional cordless handset. - Page 26 Registering additional cordless handsets (continued) System ID Notes • Do not allow more than 60 seconds to elapse during the operation procedure. • Once you add a cordless handset to the base phone system, you cannot change the station numbers, or cancel the additional registrations. •...
-
Page 27: Changing The Language Of The Display
Changing the language of the display You can choose English or Spanish as the display language by following the procedure below. You can select the display language both the base phone and the cordless handset, further more, you can select the display language on each unit (base phone and cordless handset). -
Page 28: Identifying The Parts
Identifying the parts Refer to the pages indicated in parentheses for details. Base phone 1 Display window (p. 35, 68, 76) 2 MEMO REC button (p. 73) Records a memo message. 3 MESSAGE PLAY/STOP button (p. 68) Plays back recorded messages. 4 ANSWER ON/OFF button (p. - Page 29 qh VOL – button (p. 35, 69) Adjusts the handset or speaker volume. qj VOL + button (p. 35, 69) Adjusts the handset or speaker volume. qk Jog Dial (p. 21, 77) ql EZ ACCESS button (p. 23, 35) Lets you make a call with the registered access number.
- Page 30 Identifying the parts (continued) Cordless handset 1 Antenna 2 Speaker 3 Display window (p. 32, 76) 4 TALK button (p. 32) Lets you make or receive a call. 5 HOLD/PLAY button (p. 33, 68, 72) Puts a call on hold/plays back recorded messages.
- Page 31 qf REPEAT . button (p. 69) Press once to repeat the current message or twice to go back to the previous message. TONE button (p. 33) Allows you to switch temporarily to tone dialing. qh RINGER qj I (HEADSET) jack (p. 33, 39, 87) qk VOL (volume) switch (p.
-
Page 32: Basics
Basics Making calls Making calls with the cordless handset (HOLD) (*TONE) (EZ ACCESS) (ERASE) (CALL WAITING/FLASH) To make a call after checking the phone number You can dial the phone number before pressing (TALK) or (EZ ACCESS). If you make a mistake when dialing the phone number, press (ERASE) to erase the number. - Page 33 Making calls when the headset is connected When a headset (optional) is connected to the I (HEADSET) jack on the cordless handset, you can talk through the headset. Making calls using the EZ Access function To set up the access number, see “Setting up the EZ Access function”...
- Page 34 Making calls (continued) Notes • When making a call on the cordless handset, “ indicating the receiver sensitivity with the base phone. Three bars indicate a good reception, no bar indicates a bad reception. When calling from an area with poor reception, you may experience interference or the call may be disconnected, so try to use the cordless handset in areas that have a good reception.
-
Page 35: Making Call With The Base Phone
Making calls with the base phone Pick up the handset or press (SPEAKERPHONE) on the base phone. “TALK” or “SPEAKERPHONE” appears on the display and the display also shows the talk time in hours, minutes and seconds. Dial the phone number. When you’re done talking, replace the handset in the cradle or press (SPEAKERPHONE) again. - Page 36 Making calls (continued) Additional tasks Adjust the handset or speakerphone volume Put a call on hold Switch to tone dialing temporarily Switch to another call (“call waiting” service*) * You need to subscribe to the service from your telephone company. Notes •...
-
Page 37: Redialing
Redialing Both the base phone and the cordless handset can each individually store five dialed phone numbers. Turn Press (EZ ACCESS) Notes • The redial memory only registers up to 32 digits. Exceeding numbers will not be redialed. • If an access number of the long distance call is registered in (EZ ACCESS), the number cannot be stored for the redial button use. - Page 38 Making calls (continued) To erase the dialed phone number one by one Display the name or phone number you want to erase by doing steps 1 to 3 on page 37. Turn Jog Dial to choose “ERASE REDIAL”, and then press Jog Dial.
-
Page 39: Receiving Calls
Receiving calls Receiving calls with the cordless handset (HOLD) (CALL WAITING/FLASH) (PGM) Receiving calls when the headset is connected When a headset (optional) is connected to the I (HEADSET) jack on the cordless handset, you can talk through the headset. When you hear the phone ring: •... - Page 40 Receiving calls (continued) Additional tasks Adjust the cordless handset volume Put a call on hold Switch to another call (“call waiting” service*) Receive a call by only picking up the cordless handset from the charger, without pressing (TALK)(Quick talk) Adjust the ringer volume of the cordless handset * You need to subscribe to this service from your telephone company.
-
Page 41: Receiving Calls With The Base Phone
Receiving calls with the base phone When you hear the phone ring, pick up the handset or press (SPEAKERPHONE) on the base phone. “TALK” or “SPEAKERPHONE” appears on the display and the display also shows the talk time in hours, minutes and seconds. When you’re done talking, replace the handset in the cradle or press (SPEAKERPHONE) again. - Page 42 Receiving calls (continued) Note Even when you set the ringer volume on the base phone to off, the cordless handset will ring when the ringer volume on the cordless handset is set to high or low. Tips • To inform you of an incoming call, the display shows “** RINGING **” even when you set the ringer volume on the base phone to off.
-
Page 43: Telephone Features
Both the base phone and the cordless handset can each store up to 50 separate numbers. Storing phone numbers and names Turn Press (ERASE) (REDIAL/PAUSE) Example: to store “SONY” “123- 4567”. Press (PGM). (Press (PROGRAM) on the base phone.) If “PHONE DIRECTORY” is not selected, turn Jog Dial to select it. - Page 44 Phone Directory (continued) Each press of Jog Dial after choosing “M” or “m” switches the characters from upper case letters t lower case letters t numbers and symbols. Enter successive characters in the same way. To enter a “space”, turn Jog Dial to choose “...
- Page 45 Notes • If you try to save a 51st phone number, you will hear five short error beeps and “THE MEMORY IS FULL” will be displayed. You cannot store the phone number. To store another phone number, erase one of the stored phone numbers (see page 49).
-
Page 46: Making Calls From The Phone Directory
Phone Directory (continued) Making calls from the Phone Directory Turn Press (TALK) (EZ ACCESS) Turn Jog Dial to select an alphabet group ([ABC], [DEF]...) which includes the initial character of the name you want to search for, and then press Jog Dial. If a numbers or a symbol is the initial character, select the “[etc]”... - Page 47 Turn Jog Dial to choose “DIAL”, and then press Jog Dial. The phone number will be dialed. Tips • When you select “(GO BACK)”, you can return to the previous set display by pressing Jog Dial. • If there is no data recorded in the selected alphabet group in step 2, the data memory of the next following group will be displayed.
-
Page 48: Changing A Stored Name And/Or Phone Number
Phone Directory (continued) Changing a stored name and/or phone number Display the name you want to change by doing steps 1 to 3 on page 46. Press Jog Dial. Turn Jog Dial to choose “EDIT”, and then press Jog Dial. The cursor “_”... -
Page 49: Erasing A Memory Location
Erasing a memory location To erase the phone number one by one Display the name you want to erase by doing steps 1 to 3 on page 46. Press Jog Dial. Turn Jog Dial to choose “ERASE DIRECTORY”, and then press Jog Dial. Turn Jog Dial to choose “YES”, and then press Jog Dial. -
Page 50: Transferring The Phone Directory Memory
Phone Directory (continued) Transferring the Phone Directory memory The Phone Directory memory can be transferred one by one or all at once (with a maximum of 50 numbers) from a cordless handset to the base phone or to an additional cordless handset, or from a base phone to one of the cordless handsets. - Page 51 To transfer all phone numbers from the Phone Directory The Phone Directory receiving the transfer will be totally overwritten. Press (PGM). (Press (PROGRAM) on the base phone.) Turn Jog Dial to choose “MEMORY MANAGE”, and then press Jog Dial. Turn Jog Dial to choose “SEND ALL DIR”, and then press Jog Dial.
-
Page 52: Switching The Phones During A Call
Switching the phones during a call You can easily switch between the cordless handset and the base phone, or between the cordless handsets without disconnecting the call. Switching from the base phone to the cordless handset (SPEAKERPHONE) Switching from the cordless handset to the base phone (TALK) Telephone Features... -
Page 53: Switching From The Cordless Handset To Another Cordless Handset
Switching from the cordless handset to another cordless handset (When the system has an additional cordless handset) Press (HOLD) on the cordless handset. The call is on hold and “HOLD” appears on the display. Pick up another cordless handset from the charger (When Quick talk is set to “ON”;... -
Page 54: Intercom Operation
Intercom Operation Talking between the phones – Intercom You can make an intercom call between the cordless handset and base phone, or between the cordless handsets. You can start the intercom from any phone. Talking from the cordless handset to the base phone If no one answers the phone Press (INTERCOM) again. -
Page 55: Talking From The Base Phone To The Cordless Handset
Talking from the base phone to the cordless handset If no one answers the phone Press (INTERCOM) again. Notes • If there is an incoming call during intercom conversation between the base phone and the cordless handset, intercom call will be disconnected, and both the base phone and the cordless handset will ring. -
Page 56: Talking Between The Cordless Handsets - Walkie-Talkie Function
Talking between the phones – Intercom (continued) Talking between the cordless handsets – Walkie-Talkie function (When the system has an additional cordless handset) You can make an intercom conversation between a couple of cordless handsets (Walkie-Talkie function) of the same phone system far from the base phone (e.g. -
Page 57: Transferring A Call
Transferring a call You can transfer a call between the cordless handset and base phone, or between the cordless handsets without disconnecting the call. Transferring from the cordless handset to the base phone (OFF) (INTERCOM) (SPEAKERPHONE) If no one answers the phone Press (INTERCOM) again. -
Page 58: Transferring From The Base Phone To The Cordless Handset
Transferring a call (continued) Transferring from the base phone to the cordless handset (SPEAKERPHONE) (TALK) If no one answers the phone Press (INTERCOM) again. You can receive an intercom call on the cordless handset even when the ringer volume is set to off. The phone will ring at a low level. Intercom Operation Example: Transferring a call from the base phone to the cordless... -
Page 59: Transferring Between The Cordless Handsets
Transferring between the cordless handsets (When the system has an additional cordless handset) If no one answers the phone Press (INTERCOM) again. You can receive an intercom call on the cordless handset even when the ringer volume is set to off. The cordless handset will ring at a low level. Example: Transferring a call from station number 1 to station number 2. -
Page 60: Answering Machine Features
Answering Machine Features Preparing the answering machine Recording the greeting This answering machine has prerecorded greetings (see page 61). However, you can record your own greeting. The greeting must be between two seconds and one minute long. You can record only one greeting, and it is used regardless of the answering mode (“normal”... - Page 61 Notes • Do not allow more than 60 seconds to elapse during the operation procedure. • If recording did not succeed, you hear five short error beeps. Start over the procedure. • If a call comes in while recording a greeting, recording is cancelled. Start over the procedure.
-
Page 62: Selecting The Ring Time
Preparing the answering machine (continued) Selecting the ring time You can select the number of rings before the answering machine starts to play back the greeting and records incoming messages. There are three options of ring time. The ring time is preset to “TOLL SAVER”. You can set the ring time only with the cordless handset. -
Page 63: Selecting The Recording Quality
Note • Do not allow more than 60 seconds to elapse during the operation procedure. • When “ERROR” appears on the display and five short error beeps are heard after Jog Dial is pressed in step 4, move the cordless handset closer to the base phone, make sure the base phone is not in use, and then start over the procedure. -
Page 64: Selecting The Answering Mode
Preparing the answering machine (continued) Notes • Do not allow more than 60 seconds to elapse during the operation procedure. • The approx. length of the three recording grades are: “HI (SHORT PLAY)”– 8 minutes “MID”– 15 minutes “NORM (LONG PLAY)”– 20 minutes Actual recording time may vary. - Page 65 Turn Jog Dial to choose “ANNOUNCE ONLY” or “NORMAL”, and then press Jog Dial. You hear a long confirmation beep. Answering mode When you wish to play a greeting to ask the caller “ANSWERING MODE” to leave a message. is set to “NORMAL” (normal mode) make an announcement to the “ANSWERING MODE”...
-
Page 66: Setting The Audible Message Indicator
Preparing the answering machine (continued) When the memory is full The recording area of this phone’s memory is about 20 minutes* (including the greeting, messages, and memo). If the remaining recording area becomes less than 30 seconds, the phone automatically switches to announcement only mode, which does not record messages, and the greeting will be switched to the pre-recorded greeting. -
Page 67: Turning On The Answering Function
Notes • When the memory is full, you hear five short error beeps and you cannot turn on the answering function. Erase unnecessary messages (see page 71). • If four minutes have passed while recording the incoming message, the line is automatically disconnected. -
Page 68: Playing Back Messages
Playing back messages You can play back messages on both the base phone and the cordless handset. When the phone is not in use and not in announcement only mode, the display of the base phone shows the following. NEW MESSAGE NEW CALL (ANSWER ON/OFF) (MESSAGE PLAY/STOP) - Page 69 Additional tasks when playing back messages Adjust the answering volume During playback, press (VOL +) or (VOL -) Adjust the cordless handset volume Stop playback Skip to the next message Repeat the current message Go back to previous messages Press (1) . REPEAT within the first three Review playback Play back quickly Notes...
-
Page 70: Displaying Remaining Available Recording Time For Message
Playing back messages (continued) Displaying remaining available recording time for message You can see how much recordable message quantity remains available simply by checking the display. The message recordable quantity is displayed in 14 levels. When all of the squares on the display are black, it means that the memory is full. Press (PGM). -
Page 71: Erasing Messages
Erasing messages To erase the message one by one Press (ERASE) while the message is being played back. You hear a voice guidance and the message is erased. To erase the entire messages at once Entire message deletion can only be made on the base phone. Note that new messages that have not as yet been played back will also be erased. -
Page 72: Screening Incoming Calls
Screening incoming calls You can screen calls by leaving the answering function on (see page 67) while you are at home. When a call is answered, you can hear the message being recorded through the base phone or cordless handset but the caller cannot hear you. Then, you can decide whether to answer the call or not. -
Page 73: Recording A Memo
Recording a memo You can record a “memo” (up to four minutes) as a personal reminder or as a message for other people. You can play back the recorded memo like any incoming messages (see page 68). Memo recording is only available on the base phone. MIC (Microphone) Notes •... -
Page 74: Operating From An Outside Phone
Operating from an outside phone You can call from a touch-tone phone and pick up new messages recorded on the phone. First, you just set the remote ID code (security code) and turn on the answering function before going out. The remote ID code (security code) setting can only be made on the cordless handset. -
Page 75: Picking Up New Messages
Picking up new messages Call your phone from a touch-tone phone. While you hear your greeting play, press (#). The greeting stops. After confirming the greeting stops, enter your remote ID code (security code). You hear a long confirmation beep. Following the voice guidance informing you of the number of messages recorded, the phone stands by for you to enter a control code. -
Page 76: Caller Id Features
Caller ID Features Understanding the Caller ID service Caller ID allows the caller’s phone number to be shown on the display before you answer the call. In order to use this feature, you must first subscribe to Caller ID service. The name of this service may vary depending on your telephone company. -
Page 77: Looking At The Caller Id List
Looking at the Caller ID list The phone stores the data of the last 70 calls received including “UNKNOWN NUMBER/NAME/CALLER” and “BLOCKED NUMBER/NAME/CALL” calls. It keeps track of all calls received; even if they were not answered. Viewing the Caller ID list You can look through the Caller ID list on both the base phone and the cordless handset to check the phone number and/or name of the calls received. -
Page 78: Erasing Data From The Caller Id List
Looking at the Caller ID list (continued) Erasing data from the Caller ID list Old data will be erased automatically when a 71st call comes in, but you can also manually erase unnecessary data one by one or erase the entire list. - Page 79 To erase the entire list at once Entire Caller ID list deletion can only be made on the cordless handset. Note that Caller ID data in the list that has not been viewed will also be erased. Press (PGM). Turn Jog Dial to choose “MEMORY MANAGE”, and then press Jog Dial.
-
Page 80: Using The Caller Id List
Using the Caller ID list By using the Caller ID list, you can call back a phone number from the Caller ID list easily, play back messages, or store numbers from the Caller ID list into the Phone Directory. Calling back a number from the Caller ID list Turn Press (TALK) -
Page 81: Playing Back A Message From The Caller Id List - Direct Message Access Function
Playing back a message from the Caller ID list – Direct Message Access function When there is a message in the received Caller ID data, you can play back the message while continuing to display the Caller ID list. Turn Press (HOLD/PLAY) Note... -
Page 82: Storing A Number Of The Caller Id List Into The Phone Directory
Using the Caller ID list (continued) Storing a number of the Caller ID list into the Phone Directory Display the name and phone number you want to store from the Caller ID list (see page 77). Confirm the number and press Jog Dial. Turn Jog Dial to choose “PROGRAM”, and then press Jog Dial. -
Page 83: To Change The Number Of Digits Of The Phone Number
Notes • If the area code is not entered, “ENTER AREA CODE” will appear on the display, and you will not be able to store into the Phone Directory. Enter the area code (see page 17). • Do not allow more than 60 seconds to elapse during the operation procedure. •... - Page 84 Using the Caller ID list (continued) When the home area code matches SMITH JOHN 123-4567 7.04 4:53PM MASSAGE SMITH JOHN 1-123-4567 7.04 4:53PM MASSAGE When the local area code matches SMITH JOHN 201-123-4567 7.04 4:53PM MASSAGE SMITH JOHN 1-201-123-4567 7.04 4:53PM MASSAGE Continue the operation to call or store the phone number...
-
Page 85: Using "Caller Id With Call Waiting" Service
Using “Caller ID with call waiting” service This telephone is compatible with the “Caller ID with call waiting” service. Make sure that your telephone company offers this service. Like the basic Caller ID service, you need to subscribe to “Caller ID with call waiting”... -
Page 86: Additional Information
Additional Information Mounting the base phone on a wall Hang-up tab AC power adaptor cord Wall bracket To remove the wall bracket, press the lower tabs. Additional Information Reverse the hang-up tab. Plug the telephone line cord to the LINE jack and the AC power adaptor to the DC IN 9V jack, and hook the cords. -
Page 87: Carrying The Cordless Handset By The Belt Clip
Carrying the cordless handset by the belt clip You can hang the cordless handset on the belt using the belt clip. Using the headset You can talk on the cordless handset without using your hands by connecting a headset (optional) to the I (HEADSET) jack on the cordless handset. -
Page 88: Notes On Power Sources
Notes on power sources On battery pack • Store the battery pack at a temperature between 41°F (5°C) and 95°F (35°C) for best performance. • If you do not use the cordless handset for a long period of time, remove the battery pack after charging for more than 12 hours. -
Page 89: Maintenance
• If the charge terminals of the charger and cordless handset are soiled, wipe them with a soft cloth. If you have any questions or problems concerning your phone, please consult your nearest Sony dealer. Additional Information... -
Page 90: Troubleshooting
The base phone does not ring. Additional Information Remedy • Make sure the AC-T46 Sony AC power adaptor is connected to the base phone and an AC outlet. Do not use the AC-T127 Sony AC power adaptor with the base phone. - Page 91 Symptom You hear interference during conversation. You hear a beep every second during a conversation and “ ” appears on the display. You hear a beep twice per second and “BATTERY LOW” appears on the display. The cordless handset does not ring when you use the intercom from the base phone or an additional cordless handset,...
- Page 92 Troubleshooting (continued) Symptom You cannot hear anything from the speaker. No time stamp is heard. You cannot record the greeting properly. The phone does not record messages. The phone does not accept your remote ID code (security code). You hear error beeps when you enter your remote ID code (security code).
- Page 93 Symptom The caller’s name and/or phone number does not appear on the display. The caller’s name and/or phone number does not appear on the display during call waiting. You cannot dial the number from the Caller ID list. The memory match function does not work.
- Page 94 Troubleshooting (continued) Note Should any problems persist, press RESET on the bottom of the base phone with the tip of a toothpick or some other sharp instrument. This has no effect on the memory in the base phone and handset. RESET Additional Information...
-
Page 95: Specifications
Specifications General Spread method Direct-Sequence Spread-Spectrum Access method FDMA-TDD Frequency band 2.4075 - 2.4720 GHz Operating channel 40 channels Dial signal Tone, 10 PPS (pulse) selectable Supplied accessories See page 10. Cordless handset Power source Rechargeable battery pack BP-T38 Battery life Standby: Approx. -
Page 96: Index
Index Adjusting volume answering 69 cordless handset volume 33, 40 handset volume 36, 41 ringer volume 40, 41 speakerphone volume 36, 41 Answering machine turning on 67 Answering mode 64 Area code 17 Audible indicate 66 Battery pack charging 14 duration 15 BLOCKED NUMBER/ NAME/CALL 76... - Page 97 Screening calls 72 Setting up base phone 11 cordless handset 14 Speakerphone 36 Stamping messages with day and time 21 Storing Caller ID list into Phone Directory 82 Switching phones during a call 52 Toll-saver feature 62 Talking between the phones 54 Tone dialing dialing mode 16...
- Page 98 Additional Information...
- Page 99 Additional Information...
- Page 100 For the customers in the USA Be sure to save the receipt and attach it to your WARRANTY card when having your equipment repaired at an authorized Sony service center. For online product registration, please contact www.sony.com/productregistration Sony Corporation Printed in Taiwan, R.O.C.