Sony CDX-C7500 Operating Instructions (English, Español) Operating Instructions Manual
Fm/am compact disc player
Hide thumbs
Also See for CDX-C7500 Operating Instructions (English, Español):
- Service manual (56 pages)
Table of Contents
Advertisement
Available languages
Available languages
Quick Links
Download this manual
See also:
Service Manual
FM/AM
Compact Disc
Player
Operating Instructions
Manual de instrucciones
¤ˇ¥˛»¡'œfi
For installation and connections, see the supplied installation/connections
manual.
Para obtener información sobre la instalación y las conexiones, consulte el manual
de instalación/conexiones suministrado.
ˆ ' ¥»
""ƒw‚¸⁄˛‰u‚ ‡s– ¡A‰—
CDX-C7500
1999 by Sony Corporation
3-865-913-31 (1)
¤£·£¤ ""¡§ƒw‚¸¡ ‰u‚ ‡s– »¡'œfi ¡¤¡C
GB
ES
CT
Advertisement
Chapters
Table of Contents

Related Manuals for Sony CDX-C7500 Operating Instructions (English, Español)


Summary of Contents for Sony CDX-C7500 Operating Instructions (English, Español)
-
Page 1: Operating Instructions
For installation and connections, see the supplied installation/connections manual. Para obtener información sobre la instalación y las conexiones, consulte el manual de instalación/conexiones suministrado. ˆ ' ¥» “”ƒw‚¸⁄˛‰u‚ ‡s– ¡A‰— CDX-C7500 1999 by Sony Corporation 3-865-913-31 (1) ¤£·£¤ “”¡§ƒw‚¸¡ ‰u‚ ‡s– »¡'œfi ¡¤¡C... - Page 2 Welcome ! Thank you for purchasing the Sony Compact Disc Player. This unit lets you enjoy a variety of features as well as an optional rotary commander or a wireless remote. In addition to the CD playback and radio operations, you can expand your system by...
-
Page 3: Table Of Contents
Table of Contents This Unit Only Location of controls ... 4 Getting Started Resetting the unit ... 6 Detaching the front panel ... 6 Setting the clock ... 7 CD Player Listening to a CD ... 8 Playing a CD in various modes ... 9 Radio Memorising stations automatically —... -
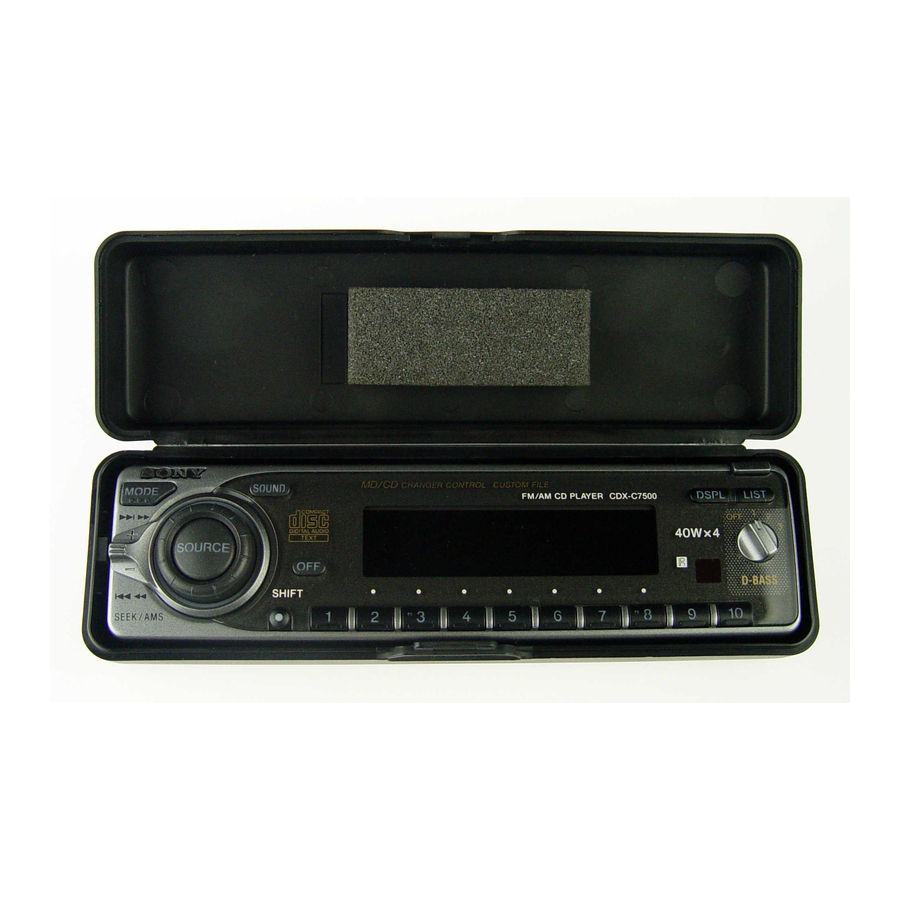
Page 4: Location Of Controls
Location of controls SOUND MODE SOURCE SEEK/AMS Refer to the pages for details. 1 SEEK/AMS (seek/Automatic Music Sensor/manual search) control 9, 10, 11, 18, 20 2 MODE (band/unit select) button 10, 17, 19 3 6 (eject) button (located on the front side of the unit behind the front panel) 4 SOURCE (source select) button 8, 10, 16, 17, 19... - Page 5 Optional wireless remote (RM-X47) The corresponding buttons of the wireless remote control the same functions as those on this unit. 1 OFF button 2 SEEK/AMS button 3 (–) (+) buttons 4 ATT button 5 SOUND/SEL button MODE SOURCE SEEK – PRESET DISC –...
-
Page 6: Getting Started
Getting Started Resetting the unit Before operating the unit for the first time or after replacing the car battery, you must reset the unit. Remove the front panel and press the reset button with a pointed object, such as a ballpoint pen. -
Page 7: Setting The Clock
Setting the clock The clock uses a 12-hour digital indication. Example: To set the clock to 10:08 Press (SHIFT), then press (3) (SET UP) repeatedly until “CLOCK” appears. 1 Press (5) (n). The hour indication flashes. 2 Set the hour. to go backward SOURCE to go forward... -
Page 8: Cd Player
“CD” appears to start playback. CD indication Elapsed playing time Track number Note To play back an 8 cm CD, use the optional Sony compact disc single adapter (CSA-8). Press Stop playback (OFF) (OPEN) then 6 Eject the CD... -
Page 9: Playing A Cd In Various Modes
During playback, press (SHIFT). Press (3) (SET UP) repeatedly until “A.SCRL” appears. Press (5) (n) to select “A.SCRL-ON.” Press (SHIFT). To cancel Auto Scroll, select “A.SCRL-OFF” in step 3 above. Note For some CD TEXT discs with very many characters, the following cases may happen: —... -
Page 10: Radio
Radio Memorising stations automatically — Best Tuning Memory (BTM) The unit selects the stations with the strongest signals and memorises them in the order of their frequencies. You can store up to 10 stations on each band (FM1, FM2, and AM). Caution When tuning in stations while driving, use Best Tuning Memory to prevent accidents. -
Page 11: Storing The Station Names
If you cannot tune in a preset station Push and release the SEEK/AMS control up or down to search for the station (automatic tuning). Scanning stops when the unit receives a station. Push the SEEK/AMS control up or down repeatedly until the desired station is received. -
Page 12: Locating A Station By Name - List-Up
Displaying the station name Press (DSPL) during radio reception. Each time you press (DSPL), the item changes as follows: z Station name* Clock Z * If the station name of a station is not stored, “NO NAME” appears in the display for one second. -
Page 13: Other Functions
Other Functions You can connect an optional rotary commander (RM-X4S) with this unit. Labelling the rotary commander Depending on how you mount the rotary commander, attach the appropriate label as shown in the illustration below. L IS T M O D E S O U N D S O U N D M O D E... -
Page 14: Adjusting The Sound Characteristics
Other operations Rotate the VOL control to adjust the volume. Press (SOUND) to adjust the volume and sound menu. Press (LIST) to display the memorised names. Changing the operative direction The operative direction of controls is factory- set as shown below. To increase To decrease If you need to mount the rotary commander on... -
Page 15: Changing The Sound And Display Settings
Changing the sound and display settings The following items can be set: •CLOCK (page 7). •D.INFO (Dual Information) - to display the clock and the play mode at the same time (ON) or to display the information alternately (OFF). •AMBER/GREEN - to change the illumination color to amber or green. -
Page 16: Adjusting The Frequency Of The Speakers And The Subwoofer(S)
Adjusting the frequency of the speakers and the subwoofer(s) By setting the cut off level of unwanted frequency signals, the speakers connected to the output terminal and/or the subwoofer(s) connected to the sub out terminal will out put a cleare sound image. Adjusting the frequency of the speakers connected from the output terminal... -
Page 17: With Optional Equipment
With Optional Equipment CD/MD Unit This unit can control a maximum of seven external CD/MD units in this configuration: CD unit - maximum of five MD unit - maximum of five. Any combination up to seven will work. If you connect an optional CD unit with the CD TEXT function, the CD TEXT information will appear in the display when you play a CD TEXT disc. -
Page 18: Playing Tracks Repeatedly
During playback, press (SHIFT). Press (3) (SET UP) repeatedly until “A.SCRL” appears. Press (5) (n) to select “A.SCRL-ON.” Press (SHIFT). To cancel Auto Scroll, select “A.SCRL-OFF” in step 3 above. Note For some CD TEXT discs with very many characters, the following cases may happen: —... -
Page 19: Labelling A Cd
Labelling a CD — Disc Memo (For a CD unit with the custom file function) You can label each disc with a personalised name. You can enter up to eight characters for a disc. If you label a CD, you can locate the disc by name (page 20) and select the specific tracks for playback (page 20). -
Page 20: Locating A Disc By Name
Locating a disc by name — List-up (For a CD unit with the custom file function or an MD unit) You can use this function for discs that have been assigned a custom name. For more information on disc names, refer to “Labelling a CD”... -
Page 21: Additional Information
(accessory) position on the ignition key switch. If you have any questions or problems concerning your unit that are not covered in this manual, please consult your nearest Sony dealer. Notes on handling CDs A dirty or defective disc may cause sound dropouts while playing. -
Page 22: Maintenance
In this case, remove the disc and wait for about an hour until the moisture evaporates. When you play 8 cm CDs Use the optional Sony compact disc single adapter (CSA-8) to protect the CD player from damage. Maintenance... -
Page 23: Dismounting The Unit
Dismounting the unit Press the clip inside the front cover with a thin screwdriver, and gently pry the front cover free. Repeat step 1 on the left side. The front cover is removed. Use a thin screwdriver to push in the clip on the left side of the unit, then pull out the left side of the unit until the catch clears the mounting. -
Page 24: Specifications
RCA pin cord) RC-61 (1 m), RC-62 (2 m) Cleaning cloth XP-CD1 Compact disc single adapter CSA-8 CD changer (10 discs) CDX-828, CDX-727, CDX-626 MD changer (6 discs) MDX-65 Other CD/MD changers with the Sony-BUS system Source selector XA-C30... -
Page 25: Troubleshooting Guide
Troubleshooting guide The following checklist will help you remedy the problems you may encounter with your unit. Before going through the checklist below, check the connection and operating procedures. General Problem No sound. The contents of the memory have been erased. Indications do not appear in the display. - Page 26 When an error occurs during playback of an MD or CD, the disc number of the MD or CD does not appear in the display. The disc number of the disc causing the error appears in the display. If the above-mentioned solutions do not help improve the situation, consult your nearest Sony dealer. Solution Insert the disc magazine in the CD/ MD unit.
- Page 28 ¡Bienvenido! Enhorabuena por la adquisición del reproductor de discos compactos Sony. Esta unidad le permitirá disfrutar de una serie de funciones, así como de un mando rotativo o inalámbrico opcionales. Además de las operaciones de reproducción de CD o de recepción de emisoras, es posible...
- Page 29 Indice Sólo esta unidad Localización de los controles ... 4 Procedimientos iniciales Restauración de la unidad ... 6 Extracción del panel frontal ... 6 Ajuste del reloj ... 7 Reproductor de discos compactos Reproducción de discos compactos ... 8 Reproducción de discos compactos en diversos modos ...
-
Page 30: Localización De Los Controles
Localización de los controles SOUND MODE SOURCE SEEK/AMS Consulte las páginas indicadas para obtener más información. 1 Control SEEK/AMS (búsqueda/sensor de música automático/búsqueda manual) 9, 10, 11, 18, 20 2 Botón MODE (selección de banda/ unidad) 10, 17, 19 3 Botón 6 (expulsión) (situado en la parte frontal de la unidad, detrás del panel frontal) 8 4 Botón SOURCE (selección de fuente) - Page 31 Control remoto inalámbrico opcional (RM-X47) Botones del control remoto inalámbrico con la misma función que los de esta unidad 1 Botón OFF 2 Botón SEEK/AMS 3 Botones (–) (+) 4 Botón ATT 5 Botón SOUND/SEL MODE SOURCE SEEK – PRESET DISC –...
-
Page 32: Procedimientos Iniciales
Procedimientos iniciales Restauración de la unidad Antes de utilizar la unidad por primera vez o después de sustituir la batería del automóvil, es necesario restaurar dicha unidad. Pulse el botón de restauración con un objeto puntiagudo, por ejemplo, un bolígrafo. Botón de restauración Notas •... -
Page 33: Ajuste Del Reloj
Ajuste del reloj El reloj dispone de una indicación digital de 12 horas. Ejemplo: Para ajustar el reloj a las 10:08 Pulse (SHIFT) y, a continuación, (3) (SET UP) varias veces hasta que aparezca “CLOCK”. 1 Pulse (5) (n). Los dígitos de la hora parpadean. 2 Ajuste la hora. -
Page 34: Reproductor De Discos Compactos
Número de tema Nota Si desea reproducir un CD de 8 cm, utilice el adaptador sencillo opcional de discos compactos Sony (CSA-8). Para Detener la reproducción Expulsar el CD Cambio de la indicación del visor Cada vez que pulse (DSPL)durante la reproducción de un CD o de un disco CD... -
Page 35: Reproducción De Discos Compactos En Diversos Modos
Durante la reproducción, pulse (SHIFT). Pulse (3) (SET UP) varias veces hasta que aparezca “A.SCRL”. Pulse (5) (n) para seleccionar “A.SCRL-ON”. Pulse (SHIFT). Para cancelar la función de desplazamiento automático, seleccione “A.SCRL-OFF” en el paso 3 anterior. Nota Con algunos discos CD TEXT con un gran número de caracteres, pueden producirse las siguientes situaciones: —... -
Page 36: Radio
Radio Memorización automática de emisoras — Memorización de la mejor sintonía (BTM) Esta unidad selecciona las emisoras de señal más intensa y las memoriza por orden de frecuencia. Es posible almacenar hasta 10 emisoras de cada banda (FM1, FM2, y AM). Precaución Durante la conducción, utilice la memorización de la mejor sintonía para evitar accidentes. -
Page 37: Almacenamiento De Nombres De Emisoras
Si no puede sintonizar una emisora programada Desplace el control SEEK/AMS hacia arriba o abajo y suéltelo para buscar la emisora (sintonización automática). La exploración se detiene cuando la unidad recibe una emisora. Desplace el control SEEK/AMS hacia arriba o abajo varias veces hasta recibir la emisora que desee. -
Page 38: Localización De Una Emisora Por Su Nombre
Visualización del nombre de la emisora Pulse (DSPL) durante la recepción de una emisora. Cada vez que pulse (DSPL), el elemento cambiará de la forma siguiente: ” Nombre de la emisora* Reloj “ * Si el nombre de la emisora no está almacenado, en el visor aparecerá... -
Page 39: Otras Funciones
Otras funciones También puede controlar esta unidad con un mando rotativo (RM-X4S) opcional. Etiquetado del mando rotativo En función de cómo monte el mando rotativo, adhiera la etiqueta adecuada como se muestra en la siguiente ilustración. L IS T M O D E S O U N D S O U N D Uso del mando rotativo... -
Page 40: Ajuste De Las Características De Sonido
Otras operaciones Gire el control VOL para ajustar el volumen. Pulse (SOUND) para ajustar el menú de sonido y el volumen. Pulse (LIST) para hacer que se visualicen los nombres memorizados. Cambio de la dirección de funcionamiento La dirección de funcionamiento de los controles se ha ajustado en fábrica como se indica en la siguiente ilustración: Para aumentar... -
Page 41: Cambio De Los Ajustes De Sonido Y
Cambio de los ajustes de sonido y visualización Es posible ajustar los siguientes elementos: •CLOCK (Reloj) (página 7). •D. INFO (Información dual)- que permite mostrar simultáneamente el reloj y el modo de reproducción (ON) o la información de forma alternativa (OFF). •AMBER/GREEN - que permite cambiar el color de iluminación entre ámbar o verde. -
Page 42: Ajuste De La Frecuencia De Los Altavoces Y Del
Ajuste de la frecuencia de los altavoces y del altavoz o altavoces potenciadores de graves Mediante el ajuste del nivel de corte de señales de frecuencia no deseadas, los altavoces conectados al terminal de salida y/o el altavoz o altavoces conectados al terminal de salida secundario emitirán una imagen de sonido nítida. -
Page 43: Equipo Opcional
Equipo opcional Unidad de CD/MD Es posible controlar un máximo de siete unidades externas de CD/MD con esta unidad, con la siguiente configuración: Unidades de CD - máximo de cinco. Unidades de MD - máximo de cinco. Cualquier combinación de hasta siete unidades funcionará. -
Page 44: Reproducción Repetida De Temas
Pulse (SHIFT) durante la reproducción. Pulse (3) (SET UP) varias veces hasta que aparezca “A.SCRL”. Pulse (5) (n) para seleccionar “A.SCRL- ON”. Pulse (SHIFT). Para cancelar la función de desplazamiento automático, seleccione “A.SCRL-OFF” en el paso 3 anterior. Nota Con algunos discos CD TEXT con un gran número de caracteres, pueden producirse las siguientes situaciones: —... -
Page 45: Asignación De Títulos A Los Discos Compactos
Asignación de títulos a los discos compactos — Memorando de discos (Unidad de CD con función de archivo personalizado) Es posible asignar un título personalizado a cada disco, utilizando un máximo de ocho caracteres para cada uno de éstos. La asignación de títulos permitirá... -
Page 46: Localización De Discos Mediante El Nombre
Localización de discos mediante el nombre — Función de listado (unidad de CD con función de archivo personalizado o una unidad de MD) Esta función puede utilizarse con discos a los que se ha asignado un título personalizado. Para obtener más información sobre los títulos de disco, consulte “Asignación de títulos a los discos compactos”... -
Page 47: Información Complementaria
Si desea realizar alguna consulta o solucionar algún problema referentes a la unidad que no aparezcan en este manual, póngase en contacto con el proveedor Sony más próximo. Notas sobre el manejo de discos compactos Si el disco está sucio o es defectuoso, puede producirse pérdida de sonido durante la... -
Page 48: Mantenimiento
Reproducción de discos compactos de 8 cm Utilice el adaptador sencillo de discos compactos opcional de Sony (CSA-8) para evitar que el reproductor de discos compactos se dañe. Mantenimiento Sustitución del fusible... -
Page 49: Desmontaje De La Unidad
Desmontaje de la unidad Presione el clip del interior de la cubierta frontal con un destornillador fino, y libere dicha cubierta con suavidad. Repita el paso 1 en el lado izquierdo. La cubierta frontal podrá extraerse. Emplee un destornillador fino para presionar el clip de la parte izquierda de la unidad;... -
Page 50: Especificaciones
RC-61 (1 m), RC-62 (2 m) Paño de limpieza XP-CD1 Adaptador sencillo de discos compactos CSA-8 Cambiador de CD (10 discos) CDX-828, CDX-727, CDX-626 Cambiador de MD (6 discos) MDX-65 Otros cambiadores de CD/ MD con el sistema BUS de Sony Selector de fuente XA-C30... -
Page 51: Guía De Solución De Problemas
Guía de solución de problemas La siguiente lista de comprobaciones proporciona ayuda para solucionar la mayoría de los problemas que pueden producirse con la unidad. Antes de consultar la lista que aparece a continuación, compruebe los procedimientos de conexión y funcionamiento. Generales Problema Ausencia de sonido... - Page 52 El visor mostrará el número del disco que causa el error. Si el problema no se soluciona con las sugerencias anteriormente enumeradas, póngase en contacto con el proveedor Sony más próximo. Solución Inserte el cargador con discos en la unidad de CD/MD.
- Page 54 Sony Corporation Printed in Korea...