Linksys WIP310 User Manual
Wireless-g ip phone, voip voice
Hide thumbs
Also See for WIP310:
- Product data (4 pages) ,
- Installation and configuration manual (163 pages)
Table of Contents
Advertisement
Quick Links
Download this manual
See also:
Product Data
Advertisement
Table of Contents

Related Manuals for Linksys WIP310


Summary of Contents for Linksys WIP310
- Page 1 Wireless-G IP Phone User Guide Voice WIP310 Model No.
- Page 2 Copyright and Trademarks Specifications are subject to change without notice. Linksys is a registered trademark or trademark of Cisco Systems, Inc. and/or its affiliates in the U.S. and certain other countries. Copyright © 2006 Cisco Systems, Inc. All rights reserved. Other brands and product names are trademarks or registered trademarks of their respective holders.
-
Page 3: Table Of Contents
Wireless-G IP Phone Table of Contents Chapter 1: Introduction Welcome What’s in This User Guide? Chapter 2: Getting to Know the Wireless-G IP Phone The Bottom Panel The Front Panel The Side Panel The Back Panel Chapter 3: Installing and Using the Wireless-G IP Phone Overview Charging the IP Phone’s Battery Setting up the Wireless-G IP Phone... - Page 4 Wireless-G IP Phone Phonebook E-mail Network Profile Settings Upload Upgrade Password Reboot Appendix A: Troubleshooting Common Problems and Solutions Frequently Asked Questions Appendix B: Glossary Appendix C: Specifications Appendix D: Warranty Information Appendix E: Regulatory Information Appendix F: Contact Information...
- Page 5 Wireless-G IP Phone List of Figures Figure 3-1: Enter Phone Password9 Figure 3-20: Select default SIP Account15 Figure 3-2: Profile menu9 Figure 3-21: Account Reg. - On15 Figure 3-3: Profile menu - SIP Account10 Figure 3-22: Profile Options - Auto Detect15 Figure 3-4: SIP Account menu - Edit10 Figure 3-23: Auto Detect - On15 Figure 3-5: Edit SIP Account Settings10...
-
Page 6: Chapter 1: Introduction Welcome
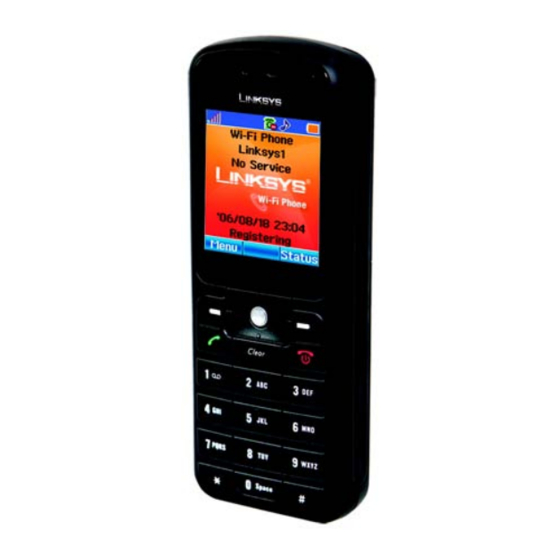
Chapter 1: Introduction Welcome Thank you for choosing the Linksys Wireless-G IP Phone. Whether you are at home or in your office, this phone lets you use your broadband connection to make phone calls. How does the IP Phone do this? It connects to your wireless router or access point to receive telephone service through your cable or DSL Internet connection. -
Page 7: What's In This User Guide
Provides warranty information for the IP Phone. • Appendix E: Regulatory Information Provides regulatory information regarding the IP Phone. • Appendix F: Contact Information Provides contact information for a variety of Linksys resources, including Technical Support. Chapter 1: Introduction What’s in This User Guide? -
Page 8: Chapter 2: Getting To Know The Wireless-G Ip Phone
Wireless-G IP Phone Chapter 2: Getting to Know the Wireless-G IP Phone The Bottom Panel The IP Phone’s USB mini-B port is located on the bottom panel of the Phone. Use the USB mini-B port to connect the included AC adapter to the IP Phone to charge its battery. -
Page 9: The Front Panel
Wireless-G IP Phone The Front Panel The IP Phone’s buttons and their functions are described in the table below: Icon Button Name Function Soft Keys Press the Soft Keys to select menu items directly above the Soft Keys. Navigation Button Move the Navigation button up or down to scroll through menus and settings. -
Page 10: The Side Panel
Wireless-G IP Phone The Side Panel The IP Phone’s Headset jack is located on the side panel of the Phone. Use it to connect a headset for hands-free operation. Headset Jack Chapter 2: Getting to Know the Wireless-G IP Phone The Side Panel... -
Page 11: The Back Panel
Wireless-G IP Phone The Back Panel The IP Phone’s battery compartment is located on the back panel of the IP Phone. For directions on how to insert the battery, refer to “Chapter 3: Installing and Using the Wireless-G IP Phone”. Battery compartment Chapter 2: Getting to Know the Wireless-G IP Phone The Back Panel... -
Page 12: Chapter 3: Installing And Using The Wireless-G Ip Phone
Wireless-G IP Phone Chapter 3: Installing and Using the Wireless-G IP Phone Overview This chapter provides instructions for first-time installation and basic use of the IP Phone. Follow the steps below to get started. Once you have finished configuring the phone you will be able to make and receive Internet phone calls. -
Page 13: Charging The Ip Phone's Battery
Wireless-G IP Phone Charging the IP Phone’s Battery 1. Connect the small end of the included AC power adapter to the USB mini-B port on the bottom of the IP Phone. USB mini-B port 2. Plug the other end of the adapter into a standard electrical outlet. You see a charging indicator on the LCD screen Note: Allow the battery to charge for eight hours before initial use. -
Page 14: Setting Up The Wireless-G Ip Phone
Wireless-G IP Phone Setting up the Wireless-G IP Phone Before you begin, make sure you have an active Internet connection and your SIP account information provided by your Internet phone service provider. Note: The Phone automatically dims and turns off the LCD display when the Phone is not in use. - Page 15 Wireless-G IP Phone 6. Scroll to SIP Account, then press the Select Soft Key to enter the SIP Account menu. 7. Press the Option Soft Key, then press the Select Soft Key to edit the default SIP account Figure 3-3: Profile Figure 3-4: SIP Account menu - SIP Account menu - Edit...
- Page 16 Wireless-G IP Phone 10. Highlight each setting your service provider requires you to change, then press the Select Soft Key to change the setting. When you are finished changing the setting, press the Navigation button to save your changes. 11. When you are finished making changes in the advanced settings menu, press the Back Soft Key until you return to the Profile menu.
- Page 17 Wireless-G IP Phone 14. Press the Select Soft Key to edit the network profile. 15. Highlight Wireless Settings, then press the Select Soft Key to enter the Wireless Settings menu. Figure 3-10: Profile - Figure 3-11: Edit Network Network Profile Security 16.
- Page 18 Wireless-G IP Phone 18. If you do not see your wireless network’s ESSID in the list, your wireless network may not be set to broadcast its ESSID. To enter the ESSID manually, press the Back Soft Key to return to the ESSID menu, highlight New ESSID, then press the Navigation button to edit the ESSID.
- Page 19 Wireless-G IP Phone 21. Highlight the type of security you have enabled on your wireless network and press the Navigation button to select it. Then change the settings to match your wireless network. If you do not have security enabled on your wireless network, select OPEN. Note: You can view the security settings for your network by connecting to the router’s configuration utility.
- Page 20 Wireless-G IP Phone 24. Press the Navigation button to assign the default SIP account to the current network profile. 25. Highlight On, then press the Navigation button to activate the SIP Account. 26. Press the Back Soft Key twice so that the Profile Options menu displays. Scroll down to Auto Detect and press the Select Soft Key.
-
Page 21: Using The Wireless-G Ip Phone
Wireless-G IP Phone Using the Wireless-G IP Phone To make a call, enter the phone number you want to dial, then press the Call button. To answer an incoming call, press the Accept Soft Key or the Call button. To disconnect from a call, press the End Call button. When you’re on a phone call, you can select the following options: Option Description... -
Page 22: Chapter 4: Configuring The Wireless-G Ip Phone
Wireless-G IP Phone Chapter 4: Configuring the Wireless-G IP Phone Home Screen Note: The IP Phone may be configured more easily using your PC. Please see Chapter 5: Using the Web-Based Utility for more information. The home screen displays a variety of information about the IP Phone. The table below displays a list of icons and definitions that appear on the home screen. Icon Description Signal Strength: Indicates the signal strength of the access point you’re IP Phone is connected to. -
Page 23: Status
Wireless-G IP Phone Status Press the Status Soft Key on the Phone’s home screen to access the current settings of the IP Phone. Option Description Wireless The wireless settings used by the Phone including • BSSID: The MAC address of the access point that the phone is connected to. •... -
Page 24: Call Log
Wireless-G IP Phone Option Description Search Search for a contact by name. Edit Edit the currently selected contact. Delete Delete the currently selected contact. Add a new contact. Call Log The IP Phone keeps a list of the calls you’ve recently missed, dialed, and received. Refer to the table below for a list of options available in the Call Log: Option Description Missed Calls... -
Page 25: E-Mail
Wireless-G IP Phone E-mail The IP Phone’s built-in e-mail client allows you to send and receive messages using your POP3 e-mail account. Note: Not all e-mail services support POP3. Contact your e-mail service provider for more information about POP3 settings and support. Configuring Your Account 1. - Page 26 Wireless-G IP Phone Option Description Receive Receive new e-mail messages. To save power, the phone only checks e-mail messages when you use the Receive option in the e-mail client. Inbox Access e-mail messages you’ve received. To read a message, highlight the message you want to read, then press the Navigation button to view it.
-
Page 27: Speed Dial
Wireless-G IP Phone Speed Dial The Speed Dial menu allows you to assign up to nine phone numbers you frequently call to the number keys on the phone. Follow the steps below to assign a contact to your Speed Dial list. 1. - Page 28 Wireless-G IP Phone Option Description Edit Edit the current network profile. Rename Change the current network profile’s name. Delete Delete the current network profile. Auto Detect Enable or disable the current network profile. Move Move the current network profile up or down in the network profile list. The IP phone will try to connect to all of the access points, in the order they appear in the network profile list, until it is able to make a connection.
- Page 29 Wireless-G IP Phone Option Description IP Settings Select from the following IP modes: • Fixed IP: Allows you to manually enter IP settings for the IP Phone. • DHCP: Allows you to use DHCP to acquire IP settings for the IP Phone. •...
- Page 30 Wireless-G IP Phone Option Description Proxy Address Enter the address of your Internet phone service provider’s SIP proxy server. Advanced Make advanced changes to the SIP account. Press the Select Soft Key to select from the following advanced options: • Proxy Port: Allows you to enter the network port of your Internet phone service provider’s proxy server.
- Page 31 Wireless-G IP Phone Option Description Roam Metric Specify an RSSI (Received Signal Strength Indication) value to begin a roaming scan. Roam Delta Specify the RSSI threshold for target access points to join. NProbes Specify the number of probes per channel to send when scanning. Active Time Specify the amount of time spent on each channel when scanning.
- Page 32 Secure Setup The Secure Setup menu allows you to configure your IP Phone’s wireless network settings with the push of a button. If you have a Linksys wireless router or access point that supports SecureEasySetup, you can use the Secure Setup feature to quickly and easily configure your IP Phone’s wireless network settings.
-
Page 33: Settings
Wireless-G IP Phone Settings Use the Settings menu to make changes to select regional settings, set the date and time, and personalize your phone. Refer to the sections below for the options available in the Settings menu. Language The Language menu allows you set the IP Phone’s display language. To change the language, highlight the language you would like the phone to use, then press the Navigation button to save your setting. - Page 34 Wireless-G IP Phone Alarm Clock The Alarm Clock allows you to set an alarm to go off at a specified time. You can also set the alarm to go off once, daily, or weekly. Refer to the table below for a list of options available in the Alarm Clock menu. Option Description Alarm Time...
- Page 35 Wireless-G IP Phone Option Description Beep Enable or disable the Beep Notification feature. When this feature is enabled, the phone will beep Notification every 50 seconds so that you can keep track of how long you’ve been on a call. Hold Transfer Select SIP or DTMF Flash as the method used for transferring calls.
- Page 36 Wireless-G IP Phone Display Settings The Display Settings menu allows you to customize the IP Phone’s display. Refer to the table below for a list of options available in the Display Settings menu. Option Description Wallpaper Change the picture displayed on the home screen. Default Wallpaper is wallpaper that came with the Phone.
- Page 37 Wireless-G IP Phone Personal Settings The Personal Settings menu lets you view and delete the wallpapers and sounds that you have uploaded onto the Phone using the web-based utility. You may also view and delete the recordings you have saved using the Voice Recorder. Option Description Wallpaper...
-
Page 38: Tools
Wireless-G IP Phone Tools Use the Tools menu to view information about your IP Phone and network status. Option Description Signal Quality Provides wireless network information including signal quality and data rate. Site Survey Displays a list of access points that are available for your phone to connect to. Select the Navigation button to access status information about each access point. - Page 39 Wireless-G IP Phone Chapter 4: Configuring the Wireless-G IP Phone Tools...
-
Page 40: Chapter 5: Using The Web-Based Utility
Wireless-G IP Phone Chapter 5: Using the Web-Based Utility Overview For your convenience, you can use the web-based utility on your PC to view, change, or edit the most commonly used features of your IP Phone. Note: Your phone must be set to its home screen to use the web-based utility. You can make choices from either the phone or the PC, but not both at the same time. - Page 41 Wireless-G IP Phone 3. You will see the Wi-Fi Phone login screen. Enter the IP Phone’s Username and Password. Click Submit. You will log in to the Status screen and can select any of the tabs to add or change phone setting information.
-
Page 42: Phonebook
Wireless-G IP Phone Phonebook The Phonebook stores and displays up to 200 contacts. Phonebook List Access a list of all of your contacts and numbers. To edit a contact, click the contact’s Name. To create a new phonebook entry, click New. Click Clear All to clear all phone entries from the Phone. Phonebook Edit Figure 5-2: Phonebook List When you click either the contact’s name or the New button from the Phonebook List, The Phonebook... -
Page 43: E-Mail
Wireless-G IP Phone E-mail The Phone’s built-in e-mail client lets you send and receive messages using your POP3 account. E-mail Account List You can create up to five different e-mail accounts. From the list, click Configure to set up a new account. -
Page 44: Network Profile
Wireless-G IP Phone Network Profile The Phone can connect to up to six wireless routers (or access points). You need to obtain the connection settings from the router to configure the settings in this section. Network Profile List The Network Profile List displays up to six wireless access points for the Phone to connect to, including the active account. - Page 45 Wireless-G IP Phone Wireless Network Settings Once you click Configure, the Wireless Network Settings option displays. Use the settings from the router you are using to continue this section. Enter a profile name, ESSID, and Data Rate of the router. IP Settings Choices are DHCP, Fixed IP, or PPPoE.
-
Page 46: Sip
Wireless-G IP Phone You can assign up to six SIP accounts to your IP Phone. The Account List option displays first. Account List The Account List displays the configured accounts and which ones are active. You can configure or remove a SIP account. When you click Configure, the SIP Setting screen opens. To edit a SIP account, click on Configure. -
Page 47: Settings
Wireless-G IP Phone Settings Set the Phone’s call, sound, display, and clock settings, and the phone protection. Call Setting Option Description Call Waiting Check to enable Call Waiting, uncheck to disable. Forward Number Enter a phone number or IP address to forward your calls to. Forward All Check to send all incoming calls to the Forward Number. - Page 48 Wireless-G IP Phone Sound Settings Option Description Speaker Volume Set the IP Phone’s speaker volume. Melody Choose one of the available ring tone melodies. Ring Volume Set the IP Phone’s ring volume. Ring Mode Set the IP Phone’s ring mode to Silent, Ring, Vibrate, or Ring + Vibrate. Warning Tone Check to enable the IP Phone’s warning tones, such as low battery.
- Page 49 Wireless-G IP Phone Clock Option Description Daylight Check to enable or uncheck to disable automatic Daylight Savings time adjustment. Savings Time Zone Set your local timezone. Network Time Enable or disable the phone from updating the time from an NTP server. Network Time Select the server for time settings.
-
Page 50: Upload
Wireless-G IP Phone Upload Upload Option Description Melody Click Browse to locate the sound you want to use. Click Upload to load the music onto the Phone. Wallpaper Click Browse to locate the image you want to use. Click Upload to load the image onto the Phone. -
Page 51: Upgrade
Wireless-G IP Phone Upgrade Software Option Description Active View the Active software application. Inactive View the Inactive software application. New Image Select a New software Image by typing in the address, or click Browse and locate the image. Active Firmware Upgrade You can upgrade the Phone’s Firmware. -
Page 52: Password
Wireless-G IP Phone Password This screen lets you change the password information of the Phone. Enter the new Username and/or Password for the IP Phone. Click Save Settings to immediately change the password, or click Cancel Settings to cancel. Figure 5-13: Password Reboot Click Go to Reboot the phone. - Page 53 Wireless-G IP Phone Chapter 5: Using the Web-Based Utility Reboot...
- Page 54 Wireless-G IP Phone Chapter 5: Using the Web-Based Utility Reboot...
- Page 55 Wireless-G IP Phone Chapter 5: Using the Web-Based Utility Reboot...
-
Page 56: Appendix A: Troubleshooting
This appendix provides solutions to problems that may occur during the installation and operation of the Wireless-G IP Phone. Read the description below to solve your problems. If you can't find an answer here, check the website of your Internet phone service provider or the Linksys website at www.linksys.com/international. Common Problems and Solutions 1. - Page 57 Wireless-G IP Phone If you have a Linksys router, then follow these instructions: 1. On one of your networked computers, open your web browser. 2. Access the Router’s web-based utility by going to http://192.168.1.1 or the IP address of the Router.
- Page 58 Wireless-G IP Phone 2. When I’m on a telephone call, words are dropped intermittently. Go through this checklist until your problem is solved: • Are you using a wireless router and cordless phone? If so, the router and cordless phone may be using the same frequency and interfere with each other.
- Page 59 IP address to the IP Phone. Contact your Internet phone service provider for assistance. If you have a non-Linksys router, refer to its documentation for instructions. If you have a Linksys router, then follow these instructions: 1.
- Page 60 Wireless-G IP Phone 8. Repeat steps 5-7 until you have entered all four port ranges for the IP Phone. Application Start and End Protocol IP Address Enable Internet phone 1 5060 to 5061 (IP address of IP Phone) Internet phone 2 53 to 53 (IP address of IP Phone) Internet phone 3...
-
Page 61: Frequently Asked Questions
Wireless-G IP Phone Frequently Asked Questions Can I make calls if my Internet connection is down? No. Your high-speed Internet connection must be active when you make Internet phone calls. Can I use the IP Phone to make a call and browse the Internet at the same time? No. -
Page 62: Appendix B: Glossary
This glossary contains some basic networking terms you may come across when using this product. For more advanced terms, see the complete Linksys glossary at http://www.linksys.com/glossary. Access Point - A device that allows wireless-equipped computers and other devices to communicate with a wired network. - Page 63 Wireless-G IP Phone DMZ (Demilitarized Zone) - Removes the Router's firewall protection from one PC, allowing it to be “seen” from the Internet. DNS (Domain Name Server) - The IP address of your ISP's server, which translates the names of websites into IP addresses. Domain - A specific name for a network of computers.
- Page 64 Passphrase - Used much like a password, a passphrase simplifies the WEP encryption process by automatically generating the WEP encryption keys for Linksys products. Port - The connection point on a computer or networking device used for plugging in cables or adapters.
- Page 65 Wireless-G IP Phone Switch - 1. A data switch that connects computing devices to host computers, allowing a large number of devices to share a limited number of ports. 2. A device for making, breaking, or changing the connections in an electrical circuit. TCP (Transmission Control Protocol) - A network protocol for transmitting data that requires acknowledgement from the recipient of data sent.
-
Page 66: Appendix C: Specifications
Wireless-G IP Phone Appendix C: Specifications Model WIP310 Standards 802.11b, 802.11g Channels 11 Channels (US, Canada), 13 Channels (Europe) Transmit Power 12.5 dBm for 802.11g / 16.6 dBm for 802.11b External Interface One USB 1.1 port, 2.5m Standard 4 Segment Ear Phone Jack Display 1.8 inch TFT, LCD (128 x 160 pixels) with 65K colors... - Page 67 Wireless-G IP Phone Voice Quality G.168 Echo Cancellation Jitter Buffer Control CNG - Comfortable Noise Generation Handsfree Speaker Speaker and Microphone Volume Control Silence Suppression VAD - Voice Activity Detection Dimensions 1.77" x 4.65" x 0.81" (W x H x D) (45 mm x 118 mm x 21 mm) Unit Weight .22 lb (10 g)
-
Page 68: Appendix D: Warranty Information
LIMITED WARRANTY Your Internet phone service provider warrants to You that, for a period of one year (the “Warranty Period”), your Linksys Product will be substantially free of defects in materials and workmanship under normal use. Your exclusive remedy and Your Internet phone service provider’s entire liability under this warranty will be for Your Internet phone service provider at its option to repair or replace the Product or refund Your purchase price less any rebates. - Page 69 Wireless-G IP Phone Appendix D: Warranty Information...
- Page 70 This transmitter must not be co-located or operating in conjunction with any other antenna or transmitter. This equipment has been SAR-evaluated. The Maximum average SAR(1g) test value is 1.490W/kg. Linksys declares that WIP310 (FCC ID: Q87-WIP310) is limited in CH1~CH11 for 2.4 GHz by specified firmware controlled in U.S.A. Appendix E: Regulatory Information...
- Page 71 Wireless-G IP Phone Safety Notices Caution: To reduce the risk of fire, use only No. 26 AWG or larger telecommunication line cord. Do not use this product near water, for example, in a wet basement or near a swimming pool. Avoid using this product during an electrical storm.
- Page 72 User Information for Consumer Products Covered by EU Directive 2002/96/EC on Waste Electric and Electronic Equipment (WEEE) This document contains important information for users with regards to the proper disposal and recycling of Linksys products. Consumers are required to comply with this notice for all electronic products bearing the following symbol:...
- Page 73 Wireless-G IP Phone Appendix E: Regulatory Information...
- Page 74 Wireless-G IP Phone Appendix E: Regulatory Information...
- Page 75 Wireless-G IP Phone Appendix E: Regulatory Information...
- Page 76 Wireless-G IP Phone Appendix E: Regulatory Information...
- Page 77 Wireless-G IP Phone Appendix E: Regulatory Information...
- Page 78 Wireless-G IP Phone Appendix E: Regulatory Information...
- Page 79 Wireless-G IP Phone Appendix E: Regulatory Information...
- Page 80 Wireless-G IP Phone Appendix E: Regulatory Information...
- Page 81 Wireless-G IP Phone Appendix E: Regulatory Information...
-
Page 82: Appendix F: Contact Information
Wireless-G IP Phone Appendix E: Regulatory Information... - Page 83 Wireless-G IP Phone For more information, visit www.linksys.com. Appendix E: Regulatory Information...
- Page 84 Can't find information about a product you want to buy on the web? Do you want to know more about networking with Linksys products? Give our advice line a call at: 800-546-5797 (LINKSYS) Or fax your request in to:...
- Page 85 Wireless-G IP Phone Appendix F: Contact Information...
- Page 86 www.linksys.com...