AEG FFB41600ZW User Manual
Hide thumbs
Also See for FFB41600ZW:
- User manual (28 pages) ,
- User manual (28 pages) ,
- User manual (72 pages)
Table of Contents
Advertisement
Advertisement
Table of Contents

Related Manuals for AEG FFB41600ZW


Summary of Contents for AEG FFB41600ZW
- Page 1 FFB41600ZW User Manual Dishwasher USER MANUAL...
-
Page 2: Table Of Contents
13. TECHNICAL INFORMATION................. 21 FOR PERFECT RESULTS Thank you for choosing this AEG product. We have created it to give you impeccable performance for many years, with innovative technologies that help make life simpler features you might not find on ordinary appliances. Please spend a few minutes reading to get the very best from it. - Page 3 ENGLISH manufacturer is not responsible for any injuries or damages that are the result of incorrect installation or usage. Always keep the instructions in a safe and accessible location for future reference. 1.1 Children and vulnerable people safety This appliance can be used by children aged from 8 •...
-
Page 4: Safety Instructions
Do not leave the appliance with the open door • unattended to avoid stepping accidentally onto it. Before any maintenance operation, deactivate the • appliance and disconnect the mains plug from the socket. Do not use high pressure water sprays and/or steam •... -
Page 5: Product Description
ENGLISH • Do not drink and play with the water in the appliance. • Do not remove the dishes from the appliance until the programme is complete. Some detergent may remain on the dishes. • The appliance can release hot steam if you open the door while a programme operates. -
Page 6: Control Panel
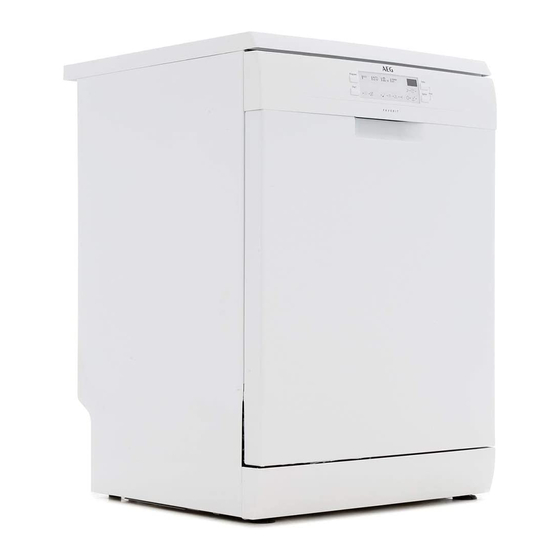
Rating plate Cutlery basket Salt container Lower basket Air vent Upper basket Rinse aid dispenser Detergent dispenser 4. CONTROL PANEL On/off button Option button Program button Indicators Programme indicators Start button Display Delay button 4.1 Indicators Indicator Description Washing phase. It comes on when the washing phase operates. -
Page 7: Programmes
ENGLISH Indicator Description XtraDry indicator. Rinse aid indicator. It is always off while the programme operates. Salt indicator. It is always off while the programme operates. Delay indicator. ExtraHygiene indicator. Door indicator. It comes on when the appliance door is open or is not cor- rectly closed. -
Page 8: Settings
5.1 Consumption values Water Energy Duration Programme (kWh) (min) 1.039 7 - 12 0.7 - 1.4 45 - 156 14-15 1.5 - 1.7 155 - 170 1) The pressure and the temperature of the water, the variations of the mains supply, the options and the quantity of dishes can change the values. - Page 9 ENGLISH Water hardness German de- French degrees mmol/l Clarke de- Water softener lev- grees (°dH) (°fH) grees 47 - 50 84 - 90 8.4 - 9.0 58 - 63 43 - 46 76 - 83 7.6 - 8.3 53 - 57 37 - 42 65 - 75 6.5 - 7.5...
-
Page 10: Options
How to deactivate the rinse During the drying phase, the aid empty notification door opens automatically and remains ajar. The appliance must be in programme selection mode. CAUTION! 1. To enter the user mode, press and Do not try to close the... -
Page 11: Before First Use
ENGLISH How to activate XtraDry Not all options are compatible with each other. Press Option until the indicator If you have selected non comes on. compatible options, the If the option is not applicable to the appliance will automatically programme, the related indicator does deactivate one or more of not come on or it flashes quickly for a them. -
Page 12: Daily Use
4. Remove the salt around the opening of the salt container. CAUTION! Only use rinse aid specifically designed for dishwashers. 1. Press the release button (D) to open the lid (C). 2. Pour the rinse aid in the dispenser (A) until the liquid reaches the fill level 5. - Page 13 ENGLISH • If the rinse aid indicator is on, fill 9.2 Setting and starting a the rinse aid dispenser. programme 3. Load the baskets. 4. Add the detergent. The Auto Off function 5. Set and start the correct programme for the type of load and the degree This function decreases energy of soil.
-
Page 14: Hints And Tips
Opening the door while the Press simultaneously Delay and Option until the appliance is in programme appliance operates selection mode. Opening the door while a programme is Cancelling the programme running stops the appliance. It may affect the energy consumption and the Press and hold simultaneously Delay and programme duration. - Page 15 ENGLISH 10.2 Using salt, rinse aid and • Do not put in the appliance items that can absorb water (sponges, detergent household cloths). • Remove remaining food from the • Only use salt, rinse aid and detergent items. for dishwasher. Other products can •...
-
Page 16: Care And Cleaning
11. CARE AND CLEANING WARNING! Before maintenance, deactivate the appliance and disconnect the mains plug from the main socket. Dirty filters and clogged spray arms decrease the washing results. Make a 4. Wash the filters. check regularly and, if necessary, clean them. -
Page 17: Troubleshooting
ENGLISH 11.3 External cleaning • Clean the appliance with a moist soft cloth. • Only use neutral detergents. • Do not use abrasive products, abrasive cleaning pads or solvents. 11.4 Internal cleaning • Carefully clean the appliance, including the rubber gasket of the door, with a soft damp cloth. - Page 18 Problem and alarm code Possible cause and solution The program does not start. • Make sure that the appliance door is closed. • Press Start. • If the delay start is set, cancel the setting or wait for the end of the countdown.
- Page 19 ENGLISH Problem and alarm code Possible cause and solution The appliance trips the cir- • The amperage is insufficient to supply simultaneously all cuit-beaker. the appliances in use. Check the socket amperage and the capacity of the meter or turn off one of the applian- ces in use.
- Page 20 Problem Possible cause and solution The dishes are wet. • For the best drying performance activate the option XtraDry and set AirDry . • The programme does not have a drying phase or has a drying phase with low temperature.
-
Page 21: Technical Information
ENGLISH Refer to "Before first use", "Daily use" or "Hints and tips" for other possible causes. 13. TECHNICAL INFORMATION Dimensions Width / height / depth (mm) 600 / 850 / 625 Voltage (V) 200 - 240 Electrical connection Frequency (Hz) 50 / 60 Water supply pressure Min. - Page 22 www.aeg.com...
- Page 23 ENGLISH...
- Page 24 www.aeg.com/shop...