Table of Contents
Advertisement
Advertisement
Table of Contents

Related Manuals for Samsung DIGIMAX 301


Summary of Contents for Samsung DIGIMAX 301
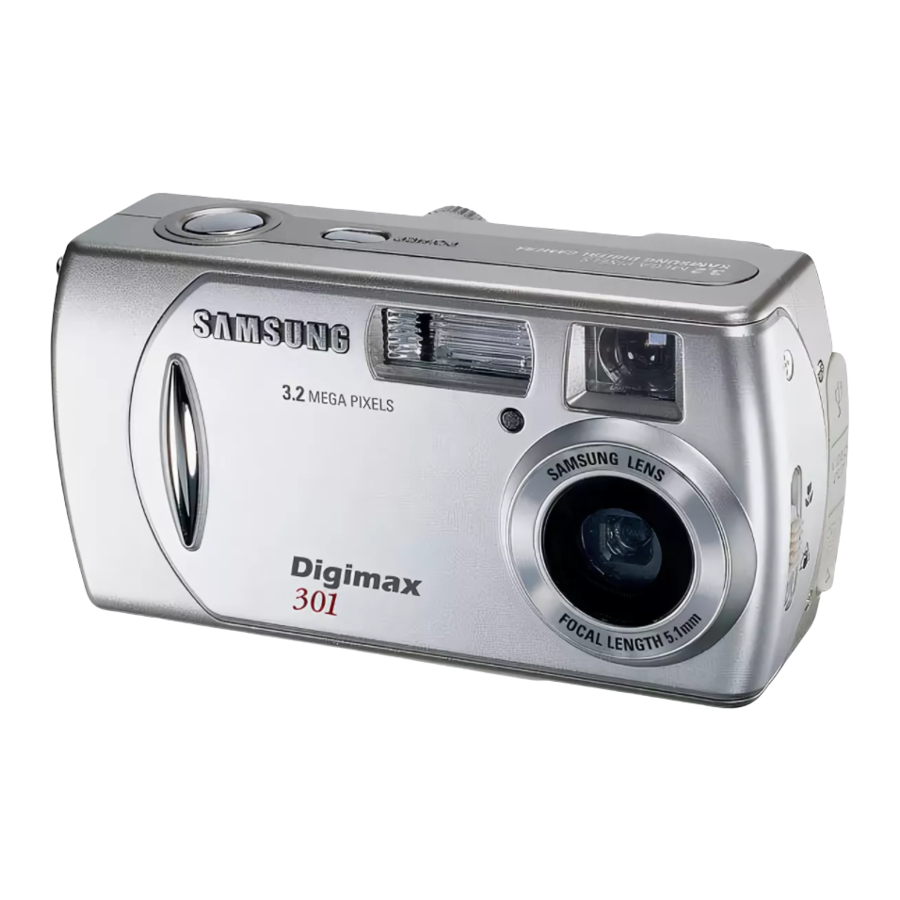
- Page 1 English Thank you for buying a Samsung Camera. This manual will guide you through using the Digimax 301, including capturing images, downloading images and using the MGI PhotoSuite III SE software. Please read this manual carefully before using your new camera.
- Page 2 Instructions Use this camera in the following order Set up the camera driver Take a picture Insert the USB cable Check the camera’s power Check [Removable Disk] If you use a card reader to copy the images on the memory card to your PC, the images could be damaged.
-
Page 3: Table Of Contents
Contents READY Getting to know your camera About the icons Danger Warning Caution An FCC warning This digital camera can be used for Manufacturer's contents Identification of features Front & Top Back & Bottom Side/ 5-function button Mode dial Connecting to a Power Source Using the AC power adapter (3.3V 2.0A) Using the batteries... - Page 4 Contents Voice memo / Up button Play & Pause / Down button LEFT / RIGHT/ MENU/ OK button LCD button Delete button Setting up the play back function using the LCD monitor Starting the slide show Protecting images Deleting all images Copy to card DPOF : Setting the Number of Copies to Print...
-
Page 5: Getting To Know Your Camera
Please check that the camera is operating properly prior to when you intend to use it (e.g. for a trip or an important event) to avoid disappointment. Samsung camera takes no responsibility for any loss or damages that may result from camera malfunction. -
Page 6: Danger
Should any form of liquid or a foreign object enter the camera, do not use it. Switch off the camera, and then disconnect the power source (batteries or AC Power Adapter). You must contact your dealer or Samsung Camera Service Center. Do not continue to use the camera as this may cause a fire or electric shock. -
Page 7: Caution
Increase distance between the camera and the affected device. Use a different socket away from the affected device. Please contact a Samsung agent or a radio/TV engineer. This device complies with part 15 of the FCC Rules. Changes or modifications not expressly approved by the party responsible for... -
Page 8: This Digital Camera Can Be Used For
This digital camera can be used for Printing images using a dedicated printer, DPOF-compatible printer or DPOF-equipped photo lab. (refer to page 53) Downloading image files from camera to computer. (refer to page 83) Viewing images on a TV. (refer to page 63) Taking a picture. - Page 9 This digital camera can be used for Creation of a digital photo album. Recording your voice. (refer to page 22) You can even create your own unique gift wrap paper by using your digital images. Taking a self-portrait and using the image to personalize name cards.
-
Page 10: Manufacturer's Contents
Manufacturer's contents Please check that you have the correct contents before using this product. marked contents are optional. 2 AA Alkaline Digital Camera Pouch VIDEO cable Batteries USB cable Camera strap User manual Product warranty SD memory card Battery pack Software CD AC adapter (3.3V) (SBP-3603) -
Page 11: Identification Of Features
Identification of features Front & Top Power button Shutter button Flash Self-timer lamp Back & Bottom Camera status lamp Viewfinder LCD monitor Tripod socket * When using the digital zoom to take a picture, the composition of the picture may be different depending on whether you are using the LCD monitor or the viewfinder. -
Page 12: Side/ 5-Function Button
Identification of features Side/ 5-function button Battery chamber cover Memory card slot Battery chamber Mode dial You can select the desired working mode by using the mode dial located on the back of the camera. This digital camera has 6 recording modes. These are listed below. Still image mode MySET mode Voice memo/ UP button... - Page 13 Identification of features Voice recording mode Movie clip mode Photo Frame mode Night scene mode The meaning of the camera operation mode icons used in this manual are as follows: Icon Mode dial Camera working mode Still image mode Voice recording mode Photo Frame mode Play mode A voice recording can be recorded for as long as the...
-
Page 14: Connecting To A Power Source
Identification of features Camera status lamp Color Status Blinking and off Green Blinking slowly Blinking fast Self-timer lamp (Based on 10-second Self-timer; see p. 28) Color Status - For the first seven seconds, the LED blinks at 1second intervals. Blinking - For the final three seconds, the LED blinks quickly at 0.5-second intervals. -
Page 15: Using The Ac Power Adapter
Connecting to a Power Source INFORMATION Important information about battery usage It is easy to buy alkaline batteries. However, the duration for using batteries varies in accordance with the battery manufacturer or the photographic conditions. When the camera is not used, turn off the camera power. Do not recharge the non rechargeable batteries. -
Page 16: Using The Batteries
Connecting to a Power Source : If the camera does not turn on after you have inserted batteries, Using the batteries 1. Open the battery chamber cover by pushing in the direction of Inserting the AA type battery Inserting the CR-V3 type battery 3. -
Page 17: Instructions On How To Use The Memory Card
Should this be the case, you will need to purchase a new memory card. Wear and tear on the memory card is not covered by the Samsung warranty. The memory card is an electronic precision device. Do not bend, drop or subject the memory card to any heavy impact. - Page 18 Instructions on how to use the memory card INFORMATION If you open the memory card cover when the camera power is turned on, the power will turn off automatically. Don't remove the memory card when the camera status lamp(Green) is blinking as this may cause damage to data in the memory card.
-
Page 19: Inserting The Memory Card
Inserting the memory card 1. Turn off the camera’s power and push the memory card cover in the direction of the arrow to open. 2. Have the front of the memory card facing toward the front of the camera (lens) and the card pins toward the back of the camera (LCD monitor), and then push the memory card into the card slot until you hear a click. -
Page 20: Lcd Monitor Indicator
LCD monitor indicator The LCD monitor displays information about the shooting functions and selections. Description Battery Recording mode Camera shake warning Flash Self-timer Voice memo Macro Metering Time Date Exposure compensation White Balance Card Inserted indicator [ Image & Full Status ] Icons 01:00 PM 2003/ 10/ 01... -
Page 21: Starting The Recording Mode
LCD monitor indicator Sharpness Image quality Image size Number of available shots remaining Remaining time( Movie clip/ Voice recording) Digital Zoom rate Digital zoom Starting the recording mode If the memory card is inserted in the camera, all the camera functions apply only to the memory card. - Page 22 Starting the recording mode Using MySET Mode This mode allows users to save frequently used shooting settings for later use. Steps 1 through 4 are the same as for shooting still images. 5. Rotate the Mode Dial to MySET mode ( 6.
- Page 23 Starting the recording mode 7. Point the camera towards the subject and compose the image by using either the viewfinder or LCD monitor. Press the shutter button and movie clips are recorded for as long as the available memory permits. Movie clips will still be recorded if the shutter button is released.
-
Page 24: Using The Camera Buttons To Adjust The Camera
Using the camera buttons to adjust the camera The RECORDING mode function can be set up by using the camera buttons. POWER button Used for turning the camera’s power on / off. If there is no operation during the specified time, the camera’s power will be turned off automatically to save battery life. - Page 25 WIDE / TELE button TELE Zoom Digital zoom TELE : Pressing the zoom button T activates the digital zoom software. Releasing zoom button T stops the digital zooming at the required setting. Once the maximum digital zoom (3X) is achieved, pressing the zoom button T will have no effect.
-
Page 26: Voice Memo / Up Button
Voice memo( While the menu is showing, press the UP button to move up the submenu cursor. When the menu is not displayed on the LCD monitor, the UP button operates as the voice memo button. You can add your voice-over to a stored still image. Recording a voice memo 1. -
Page 27: Flash / Left Button
FLASH( ) / LEFT button When the menu is displayed on the LCD monitor, pressing the LEFT( ) button makes the cursor shift to the left tab. When the menu is not displayed on the LCD monitor, the LEFT( ) button operates as the FLASH ( Selecting the flash mode 1. -
Page 28: Self-Timer / Right Button
FLASH( ) / LEFT button Flash mode indicator Icon Flash mode Auto flash Auto & Red eye reduction Fill in flash Slow synchro Flash off Self-timer( ) / Right button When the menu is displayed on the LCD monitor, pressing the Right button makes the cursor shift to the sub tab. -
Page 29: Self-Timer
Self-timer( Selecting the self-timer 1.Rotate the MODE DIAL to select a recording mode other than Voice Recording mode. 2. Press the SELF-TIMER button until the desired mode indicator displays on the LCD monitor. A 10 second, 2 second or Double self-timer icon appears on the LCD monitor. -
Page 30: Button
+/- button You can use the +/- button to adjust the values for the exposure compensation. Exposure compensation : This camera automatically adjusts the exposure according to the ambient lighting conditions. You can also select the exposure value by using the +/- button. In Still image, MySET and Photo Frame mode, the exposure compensation can be adjusted between -2.0EV and +2.0EV (at 0.5EV increment), and in Night Scene mode, you can set the Longtime shutter. -
Page 31: Focus Lever
Focus lever Before taking an image, you have to check that the Focus lever is in the desired position. As there can be some differences between what is seen through the Viewfinder and the resulting image when taken at a range closer than 1.5m, it is recommended that you use the LCD monitor to compose the shot. -
Page 32: Menu/ Ok Button
MENU/ OK button If the menu is displayed, use the 5-Function buttons to change the data values and for your changes to be accepted. If the menu is not displayed, press the MENU/OK button to display a menu for the current camera mode on the LCD monitor. -
Page 33: Using The Lcd Monitor To Adjust The Camera Settings
Using the LCD monitor to adjust the camera settings You can use the menu on the LCD monitor to set up recording functions. INFORMATION The menu will not be displayed on the LCD monitor in the following circumstances: - When another button is being operated. - While image data is being processed. -
Page 34: How To Use The Menu
Using the LCD monitor to adjust the camera settings Menu tab Main menu W.BALANCE P.FRAME How to use the menu 1. Turn on the camera and press the MENU button. A menu for each camera mode appears. However, there is no menu for Voice Recording mode ( 2. -
Page 35: Size
Size You can select the image size appropriate for your application. You can select from STILL IMAGE, PHOTO FRAME, NIGHT SCENE and MySET modes. Icon 2048 Size 2048 1536 The higher the resolution, the lower the number of available shots will be because high resolution images require more memory than lower resolution images. -
Page 36: Metering
Quality Image Size and Quality for the Number of Images that can be saved in a Memory Card/Shooting Time (When using a 16MB internal memory ; based on Samsung's own testing) These figures are approximate as image capacities can be affected by variables such as subject matter. -
Page 37: Sharpness
Metering SPOT ( : The indicated area at the center will be metered, as shown on the right. This is suitable when the subject at the center is exposured correctly regardless of back lighting. INFORMATION If the subject is not the centre of the focus area, do not use the spot metering as this may result in an exposure error. -
Page 38: White Balance
White balance White balance : The white balance control allows you to adjust the colours to appear more natural looking. The White Balance is available in STILL IMAGE, PHOTO FRAME, MOVIE CLIP and MySET mode. W.BALANCE AUTO DAYLIGHT CLOUDY FLUORESCENT [STILL IMAGE mode] White balance - AUTO... -
Page 39: Effect
Effect By using the camera’s digital processor, it is possible to add special effects to your images. You can select from STILL IMAGE, MOVIE CLIP, PHOTO FRAME and MySET modes. EFFECT B&W NORMAL SEPIA [ STILL IMAGE mode ] B&W : Converts the image to black and white. -
Page 40: Lcd Monitor Indicator
LCD monitor indicator The LCD monitor displays information about the shooting conditions. Description Battery Play mode File Type Voice memo Protect indicator DPOF indicator Card Inserted indicator Stored image number If you press the LCD button, you can check the following recording information SIZE : 1024X768 DATE: 2003/10/01 TIME : 17:40:21... -
Page 41: Starting Play Mode
Starting play mode If the memory card is inserted in the camera, all the camera functions apply only to the memory card. If the memory card is not inserted in the camera, all the camera functions apply only to the internal memory. -
Page 42: Playing Back A Movie Clip
Starting play mode Playing back a movie clip Steps from 1-2 are the same as those to play back a still image. 3. Select the recorded movie clip that you want to play back by using the LEFT/RIGHT button. If you select a movie clip, the movie clip indicator ( on the LCD monitor. -
Page 43: Using The Camera Buttons To Adjust The Camera
Using the camera buttons to adjust the camera In Play mode, you can use the buttons on the camera to conveniently set up the Play mode functions. Thumbnail ( You can view multiple pictures or enlarge a selected picture. Thumbnail display 1. - Page 44 Thumbnail ( Image enlargement 1. Select an image that you want to enlarge and press the enlargement button. 2. Different parts of the image can be viewed by pressing the 5 function button. 3. Pressing the thumbnail button will zoom back to the original full sized image.
-
Page 45: Voice Memo / Up Button
Voice( ) memo / Up button When the menu is displayed on the LCD monitor, pressing the UP button makes the menu cursor move up. When the menu is not displayed on the LCD monitor, the UP button operates as the voice memo button. -
Page 46: Play & Pause / Down Button
Play & Pause ( In Play mode, the play & pause/ down button works as follows: - If the menu is displayed Press the DOWN button to move from the main menu to a sub menu, or to move down the sub menu cursor. -
Page 47: Lcd Button
LCD ( ) button The shooting information will be displayed on the LCD monitor. The last image stored in the memory is displayed on the LCD monitor by pressing the play mode button. Pressing the LCD button in the PLAY( [Image &... -
Page 48: Lcd Monitor
Setting up the play back function using the LCD monitor PLAY mode functions can be changed by using the LCD monitor. In the PLAY mode, pressing the MENU button displays the menu on the LCD monitor. The menus you can set up in Play mode are as follows. -
Page 49: Starting The Slide Show
Starting the slide show Images can be displayed continuously at pre-set intervals. You can view the slide show by connecting the camera to an external monitor. (p.63) 1. Press the play mode button and press the menu button. 2. Press the LEFT/ RIGHT button and select the [SLIDE] menu tab. -
Page 50: Protecting Images
Protecting images This is used to protect specific shots from being accidentally erased (LOCK). It also unprotects images that have been previously protected (UNLOCK). Protecting Images 1. Press the play mode button and press the menu button. 2. Press the LEFT/ RIGHT button and select the [PROTECT] menu tab. -
Page 51: Deleting All Images
Deleting all images Of all the files stored in the memory card, the unprotected files in the DCIM subfolder will be deleted. Deleting All images 1. Press the play mode button and press the menu button. 2. Press the LEFT/ RIGHT button and select the [DEL.ALL] menu tab. -
Page 52: Copy To Card
Copy to card This enables you to copy image files to the memory card. Copy to card 1. Press the play mode button and press the MENU button. 2. Select the [COPY TO CARD] menu tab by pressing the LEFT/ RIGHT button. 3. -
Page 53: Copies To Print
DPOF : Setting the Number of Copies to Print DPOF DPOF(Digital Print Order Format) allows you to embed printing information on your memory card. Select the pictures to be printed and how many prints to make. (Print quantity : 0 ~ 30 ) The DPOF indicator will display on the LCD monitor when an image that has DPOF information plays back. -
Page 54: Rotating An Image
Rotating an image You can rotate the stored images by 90, 180, or 270 degrees. 1. Press the play mode button and press the menu button. 2. Press the LEFT/ RIGHT button and select the [ROTATE] menu tab. 3. Select a desired sub menu by pressing the UP/ DOWN button. -
Page 55: Resize
Resize A stored image size can be changed and used as a logo image. The resized image will have a new file name. 1. Press the play mode button and press the menu button. 2. Press the LEFT/ RIGHT button and select the [RESIZE] menu tab. -
Page 56: Setup Menu
Setup menu In this mode, you can set up basic settings. You can use the setup menu in all camera modes, except Voice Recording mode. The items indicated by Menu tab Main menu FILE PWR OFF LANGUAGE FORMAT D.TYPE DATE TIME IMPRINT are default settings. -
Page 57: File Name
Setup menu Menu tab Main menu BEEP VIDEO Q.VIEW RESET LATEST File name This function allows the user to select the file naming format. Assigning File Names 1. In any mode other than Voice Recording mode, press the MENU button. 2. -
Page 58: File Name
File name INFORMATION The first stored folder name is 100SSCAM, and the first file name is S3010001. Whenever you store an image, the file number is increased by 1. The file numbers are named from S3010001 to S3019999 automatically, 9999 files will be stored in a folder. -
Page 59: Language
Language There is a choice of languages that can be displayed on the LCD monitor. Even if the batteries or AC adapter are removed and inserted again, the language setting will be preserved. Setting Language 1. In any mode other than Voice Recording mode, press the MENU button. -
Page 60: Setting Up The Date Type
Formatting a memory card Formatting a Memory Card from a PC When formatting a memory card from a Windows 2000 or XP-based PC, format the card under the "FAT" files system. When formatting a memory card, connect the camera to your PC with the USB cable. -
Page 61: Date Setup
Date Setup You can change the date that will be displayed on the captured images. Setting the Date 1. In any mode other than Voice Recording mode, press the MENU button. 2. Press the LEFT/ RIGHT button and select the [SETUP] menu tab. -
Page 62: Imprinting Date Recording
Imprinting date recording There is an option to include DATE/TIME on still images. Date Imprinting 1. In any mode other than Voice Recording mode, press the MENU button. 2. Press the LEFT/ RIGHT button and select the [SETUP] menu tab. 3. -
Page 63: Selecting Video Out Type
Selecting Video out type The Movie output signal from the camera can be NTSC or PAL. Your choice of output will be governed by the type of device (monitor or TV, etc.) to which the camera is connected. PAL mode can support only BDGHI. Setting the Video Out Type 1. -
Page 64: Quick View
Quick view If you enable Quick View before capturing an image, you can view the image you just captured on the LCD monitor for the duration set in the [Q.VIEW] setup. Quick view is possible only with still images. Setting Quick View 1. -
Page 65: Latest
Latest The most recent changes made to the camera setting values since [LATEST] has been set to [YES] will be maintained. The changed setting values are maintained even after the camera is turned off and then back on. Saving Camera Functions 1. -
Page 66: Start Up Sound
OK button. - If [OFF] is selected - If [IMAGE1] is selected : The Samsung brand logo - If [IMAGE 2] is selected : The startup image you 5. Press the menu button twice and the menu will disappear. -
Page 67: Important Notes
Important notes Be sure to observe the following precautions! This unit contains precision electronic components. Do not use or store this unit in the following locations. - Areas exposed to severe changes in temperature and humidity. - Areas exposed to dust and dirt. - Areas exposed to direct sunlight or the inside of a vehicle in hot weather. - Page 68 Important notes If the camera is exposed to an electronic interference, it will turn itself off to protect the memory card. Camera Maintenance - Use a soft brush (available from photo stores) to gently clean the lens and LCD assemblies. If this does not work, lens-cleaning paper with lens cleaning fluid can be used.
-
Page 69: Warning Indicator
Warning indicator There are several warnings that may appear on the LCD display Warning indicator There is insufficient memory capacity to CARD FULL ! take an image. LOW LIGHT ! When taking pictures in dark places. CARD LOCKED ! The memory card is locked There are no images stored on the NO IMAGE ! internal memory or the CARD. -
Page 70: Before Contacting A Service Center
Before contacting a service center Please check the following Symptom The camera - There is low battery capacity doesn’t switch on - An AC Power Adapter is not connected The camera - The batteries are exhausted power ceases - The Camera is turned off automatically. whilst in use - The Adapter plug is not connected securely - The Camera is being used in low... - Page 71 Before contacting a service center Symptom Camera malfunction The camera buttons do not operate A card error has occurred whi l e the memory card i s Incorrect memory card format i n the camera. Col o ur of i m age i s di f ferent White balance setting is incorrect.
-
Page 72: Specifications
Specifications Type Image Sensor Effective Pixels Total Pixels Focal Length Lens F No. Digital Zoom Optical Viewfinder Viewfinder LCD Monitor Type Focusing Range Type Shutter Speed Control Exposure Compensation Mode Flash Range Recharging Time Effect Photo Frame White balance Sharpness Voice recording Shooting Movie clip... -
Page 73: Software
1024 : Super fine 40, Fine 85, Normal 122 640 : Super fine 106, Fine 214, Normal 428 * These figures are measured under Samsung’s standard conditions and may vary depending on shooting conditions and camera settings. Single image/ Thumbnails/ Slide show/ Movie Clip... -
Page 74: Software Notes
Using a Hand-made PC or a PC and OS that has not been guaranteed by the manufacturer is not covered by the Samsung warranty. Before reading this manual, you should have a basic knowledge of computers and O/S (Operating Systems). -
Page 75: About The Software
You should allow 5~10 seconds for running the automatic setup program according to the capability of the computer. If the frame does not show, run the [Windows Explorer] and select [Samsung.exe] in the CD-ROM Drive root directory. Before connecting the camera to the PC, you should first install the camera driver. -
Page 76: Setting Up The Application Software
INFORMATION Close other programs before installing the application software. Before installing the application software, disconnect the USB connection. You can visit the Samsung web-site through the internet. http://www.samsungcamera.com : English http://www.samsungcamera.co.kr : Korean 1. Click the [Install] menu in the Autorun frame. - Page 77 Setting up the application software 3. Install Digimax Viewer. Click [Next(N) >]. INFORMATION If you select [Cancel] at step 3, a window for installing MGI PhotoSuite III SE will be displayed. 4. The Software License Agreement window will be displayed. If you agree to this, click [Yes], the window will then move to the next step.
- Page 78 Setting up the application software 7. Installation is completed. The [MGI PhotoSuite III SE] installation window will be displayed as shown alongside. Click the [OK] button. INFORMATION If you click [Cancel] in Step 7, the MGI PhotoSuite III SE installation will be canceled and the Restart Computer window will appear.
- Page 79 Setting up the application software * A [Read Only File Dectected] window may be displayed. Click the [No] button. 12. The MGI Registration window will be displayed. Click the [Continue] button. 13. The [Online Registration Utility] window will be displayed. Fill in the blanks and click the [Register] button.
- Page 80 Setting up the application software 15. Installation is complete. Click the [Finish] button. 16. To apply changes, you must restart the computer. Select [Yes, I want to restart my computer now], and then click [OK]. 17. After restarting the computer, connect the PC to the camera with the USB cable. 18.
- Page 81 2. Refer to FAQ (p.100~101) to check for a possible solution to the problem. 3. If your PC’s central processing unit is VIA chip (This is shown in the USB Host Controller), download the patch file from the Samsung Camera web page. (http://www.samsungcamera.com)
-
Page 82: Starting Pc Mode
Starting PC Mode If you insert the USB cable into the USB connection terminal, the camera working mode will change to the PC mode automatically. In this mode, you can download stored images to your PC through the USB cable. The LCD monitor is always turned off in PC mode. - Page 83 Starting PC Mode Downloading stored images You can download the still images stored on the camera to your PC's hard disk and print them or use a photo editing software to edit them. 1. Connect the camera to your PC with the USB cable. 2.
- Page 84 Starting PC Mode 6. Press the right mouse button and a pop-up menu will open. Click [Paste]. 7. An image file is transferred from the camera to your PC. - You can view the pictures on the memory card if it is inserted into the camera. - If the memory card is not inserted, the pictures stored in the internal memory will appear.
-
Page 85: Removing The Usb Driver For Windows 98Se
Removing the USB Driver for Windows 98SE To remove the USB driver, refer to the process shown below. 1. Trace [Start Settings] and click [Control Panel]. 2. Double-click [Add/Remove programs]. 3. The [Add/Remove Programs Properties] window will open. Click [Digimax 301] and click the [Add/Remove] button. -
Page 86: Removable Disk
Removable Disk To use this camera as a Removable Disk, install (p.76) the USB Driver. 1. Before turning the camera power on, connect the camera to the PC with the USB cable. 2. Click [Removable Disk] under [My computer] or [Windows Explorer]. 3. -
Page 87: Removing The Removable Disk
Select the [USB Mass Storage Device] and click the [Stop] button. 4. The [Stop a Hardware device] window will open. Select the [SAMSUNG DIGIMAX 301 USB Device] and click the [OK] button. 5. A [Safe to Remove Hardware] window will open. -
Page 88: Setting Up The Usb Driver For Mac
Removing the removable disk 6. A [Unplug or Eject Hardware] window will open. Click the [Close] button and the removable disk will be removed safely. 7. Unplug the USB cable. Setting up the USB Driver for MAC 1. A USB Driver for MAC is not included with the software CD as MAC OS supports the camera driver. -
Page 89: Digimax Viewer
Digimax Viewer This software is only compatible with Windows. 1. To open Digimax Viewer, click the [ Start Samsung Digimax Viewer 2.0 2.0 ] and Digimax Viewer 2.0 will then open. 2. If the [Auto Launch] option is selected, this program will be executed automatically upon recognizing the camera. -
Page 90: Mgi Photosuite Iii Se
MGI PhotoSuite III SE This software is only compatible with Windows. To open MGI PhotoSuite lll SE, click the [Start PhotoSuite lll SE] and MGI PhotoSuite lll SE will then open. An introduction to the Welcome screen Programs Get images. Prepare A number of photo editing activities can be performed within this module. - Page 91 MGI PhotoSuite III SE Introduction to navigation bar Back Return to the previous step. Home Return to Welcome screen. Help Display help window. Get images. Prepare A number of photo editing activities can be performed within this module. Compose Use your photos in a variety of fun and interesting ways. Organize Organize your photos and other media files into albums.
- Page 92 MGI PhotoSuite III SE To obtain images from the computer 1. To acquire images, Click the large [Get] button on the Welcome screen, or the [Get] button on the Navigation bar. Click [Computer] from the list of options displayed on the activity panel. 2.
- Page 93 MGI PhotoSuite III SE 3. Select the [ DCIM 100sscam ] folder. Then select an image and click [ Open ]. 4. The Welcome screen will change to the next work step, with the selected image displayed. INFORMATION When you use the Digimax camera, only [Computer] and [Album] from the list of options displayed are available.
- Page 94 MGI PhotoSuite III SE 2. After selecting Album on the [ Choose a photo album], click an image in the album and click [Open]. 3. The Welcome screen will change to the next work step, with the selected image displayed. Refer to page 97 for more information about creating an Album.
- Page 95 MGI PhotoSuite III SE Compose Add text, Compound Images etc. are available in this step. Menu of [COMPOSE] steps Collages : A collage consists of several photos or sections of photos arranged together on a common background. Photo Layouts : The Photo Layouts activity includes many collage and layout options.
- Page 96 MGI PhotoSuite III SE Organize Organize your photos and other media files into albums. Menu of [ORGANIZE] steps Choose a photo album to view or edit] Select Album : To create an Album, click [Organize] in the welcome screen or navigation bar. Album..
- Page 97 MGI PhotoSuite III SE Creating an Album 1. To create an Album, click the large Organize button on the Welcome screen, or the Organize button on the Navigation bar. 2. Click [Album..] in [ Choose a photo album to view or edit.] 3.
- Page 98 MGI PhotoSuite III SE Add images to the album 1. Select [ Choose an action to manage your album. Add..] to add images to the album. 2. Click [Computer] in Add Photos menu. [Digital Camera(Direct)], [Scanner(TWAIN)], [Digital Camera(TWAIN)] sources can't be used.
- Page 99 MGI PhotoSuite III SE Share Saving or sharing images. Menu of [SHARE] steps Save To save the active file according to its current name and path. Save As To assign a new name or path to the file. Send E-mail e-mailing images.
-
Page 100: Faq
Please check the following if the USB connection malfunctions. [Case 1] The camera power is off. Turn the camera power on. We recommend using an AC power adapter in PC mode. [Case 2] USB Driver is not installed correctly. Install the USB Driver correctly. Refer to page 76. [Case 3] The USB cable is not connected or you are using a cable with an incorrect specification. - Page 101 Win XP There must be USB Host Controller and USB root hub under [Universal serial bus controller]. In addition, double-click on the USB Universal Host Controller and the USB Root Hub to check if the Device Status states "This device is working properly". If the Device Status says the device is "not working properly", click the "Driver"...
- Page 102 MEMO...
- Page 103 MEMO...
- Page 104 SAMSUNG TECHWIN CO., LTD. OPTICS & DIGITAL IMAGING DIVISION 145-3, SANGDAEWON 1-DONG, JUNGWON- GU,SUNGNAM-CITY, KYUNGKI-DO, KOREA 462-121 TEL : (82) 31-740-8086,8088, 8090, 8092, 8099 FAX : (82) 31-740-8398, 8111 SAMSUNG OPTO-ELECTRONICS AMERICA, INC. HEADQUARTERS 40 SEAVIEW DRIVE, SECAUCUS, NJ07094, U.S.A.