Advertisement
Quick Links
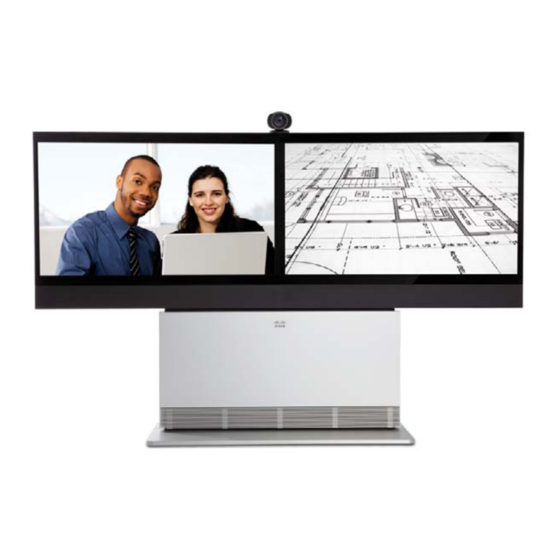
Installing Cisco TelePresence System Profile 55" Dual
the Profile 55" dual deliVery contains:
Monitor box:
Monitor back cover box:
• Two monitors and
• Monitor back cover
speaker grilles
• Two M4×15 screws for the back
cover
Bottom module column
• Monitor brackets
Camera
• M4×25 and M4×8 screws for the
Touch 8" interface device
monitor brackets
Foot module box:
• Four M8×15 screws to fasten the
• Foot module (stand-alone or wall
monitors to the column
mount)
Accessories box:
• Six M8×45 screws
• Cables
• Two wall mount brackets and four
• Microphones, 4 pcs
M6×10 screws (for wall mount only)
• Remote control and 4 AAA
• Level adjustment tool
batteries
• Gloves, 2 pairs
• Cleaning cloth
• Allen key, screwdriver
1
content overview
Remove the outer cover and locate the different boxes as illustrated below.
heaVy
caution
Bottom module column
Monitor back cover and monitor brackets
heaVy
caution
Foot module
Touch controller
Accessories box
Camera
Rev. Date
Prep.
Checked Change
Telecom AS
120601 rev.
Packaging Kit Profile 52" Dual
3D CAD model file 120601 rev. 03 is master
The monitors come in a separate box. The monitor box contains monitors and
heaVy
speaker grilles for the monitors. Remove the lid and locate the left and right
caution
monitors and the speaker grilles.
Right and left monitor
78-20440-01 Profile 55 Dual Installation Sheet | 2011 OCTOBER | © 2011 Cisco Systems, Inc. All rights reserved.
Left monitor
Right monitor
2
lifting the column out of the package. mounting the column to the foot module to complete the bottom module
heaVy
Grab here when
caution
lifting the column.
Front
Rev. Date
Sheet 1 of 1
Processes
Tolerances
Specification:
Material
Surface treatment
117325 rev.
-
Type:
-
-
European
TANDBERG Aquarius dual 52"
-
Manufacturer:
-
-
projection
-
Type number:
-
-
3D CAD model file 117325 rev. 00D is master
3
Thickness:
-
-
Unit:
mm
Dimensions without paint or finish
-
when you haVe a wall mount foot module:
Color:
-
Sheet size:
A3
All materials, finishes, and proccesses
Surface:
-
-
must comply with the RoHS directives
Glossiness:
-
-
Scale:
1:8
Flame class:
-
-
Part weight:
71743g
Flame class requirement: -
UL reference:
-
-
mounting the column to the foot module and fastening it to the wall
Mount the column to the wall mount foot module, similar to step 2.
1.
Fasten the wall brackets to the bottom module with the four M6×10
screws. Use the Allen key.
2.
Place the bottom module by the wall, mark where to fasten the
bracket and move the bottom module away.
3.
Add the suitable fixing device for the screws in the wall, and fasten
the bottom module.
leVelling adJustment
Make sure the unit is stable.
Place the level adjustment tool on the
foot wheel under the foot module for
height adjustment.
Seen from above, turn clockwise to
adjust the height up. Use the opposite
side of the tool and turn counterclockwise
to adjust down.
Precautions
Please follow the steps in this installation guide when
unpacking and assembling Profile 55" Dual.
unPacking the system at the destination
It is highly recommend to start the unpacking and assembling
of Profile 55" Dual at the place where it is to be used.
note:
If it is not possible to bring the complete delivery to
the room where Profile 55" Dual is to be used, then unpack
and bring the smaller units to the destination.
• The monitor box requires two (2) persons to lift (55 kg /
121 lb).
• The bottom module column requires two (2) persons to lift
(40 kg / 88 lb).
Column
• The foot module requires two (2) persons to lift
(stand-alone: 35 kg / 77 lb; wall mount: 20 kg / 44 lb).
Stand-alone
foot module
1.
Move the foot module to its
permanent location, and place the
column on the foot module.
2.
Open the rear door. Unscrew the two
thumb nuts and remove the door stop
bracket.
3.
Carefully open the rear door
completely.
Rear side
Rear side
Prep.
Checked Change
Specification:
Material
Surface treatment
-
Sheet 1 of 1
Processes
Tolerances
-
Type:
-
-
-
European
-
Manufacturer:
-
-
-
projection
-
Type number:
-
-
-
Thickness:
-
-
-
Unit:
mm
Dimensions without paint or finish
Color:
-
-
-
Sheet size:
A3
All materials, finishes, and proccesses
Surface:
-
-
-
Glossiness:
-
-
-
Scale:
1:7
must comply with the RoHS directives
Flame class:
-
-
-
Part weight:
38276168g
Flame class requirement: -
UL reference:
-
-
-
Front
Page 1
manPower
A minimum of two (2) persons are required when installing
Profile 55" Dual.
installation near a socket-outlet
The equipment must be installed near a socket-outlet. The
socket-outlet shall be easily accessible after installation.
room guidelines
note:
The floor must be in level.
The recommended distance between the Profile 55" Dual
and the meeting room table should be minimum 1.5 m / 59 in.
Read more about room guidelines in the Video conferencing
room primer.
4.
Fasten the column to the foot module
with three M8×45 screws on each
side as illustrated to the right.
5.
Fasten the door stop bracket again
with the two thumb nuts.
Allen key and
six M8×45
screws
Screws to
fasten the
column
Door stop bracket
Add the suitable fixing device for the screws in the wall.
Screws to fasten the wall
bracket to the bottom module
Allen key and four
M6×10 screws
user documentation
The user documentation for this product, including
compliance and safety information, is available on the Cisco
web site.
Go to: http://www.cisco.com/go/telepresence/docs.
dimensions of the Profile 55" dual
• Height: 64.6" / 164 cm
• Width: 99.2" / 252 cm
• Depth (wall mount): 10.2" / 26 cm
• Depth (stand-alone): 17.7" / 45 cm
• Weight: 440 lb / 200 kg
Access the innermost screws through these holes.
Screws to
fasten the
column
The bottom module is viewed from the rear side.
caution
Due to the size and weight of this equipment, it is very
important that the wall mount unit is safely installed
according to the installation instructions and that the
wall is able to safely support the product. It is highly
recommended that the wall mounted system is installed
by trained personnel.
The wall
Advertisement

Related Manuals for Cisco TelePresence Profile 55 Dual


Summary of Contents for Cisco TelePresence Profile 55 Dual
- Page 1 Screws to fasten the wall to adjust down. bracket to the bottom module Front Allen key and four M6×10 screws 78-20440-01 Profile 55 Dual Installation Sheet | 2011 OCTOBER | © 2011 Cisco Systems, Inc. All rights reserved. Page 1...
- Page 2 PrecisionHD 1080p camera grilles. DIP switch to: 00100. Use the supplied cloth to PC cable clean the system. Microphone cable Power cable 78-20440-01 Profile 55 Dual Installation Sheet | 2011 OCTOBER | © 2011 Cisco Systems, Inc. All rights reserved. Page 2...