Panasonic FZ-N1 Operating Instructions Manual
Fz-n1 series.
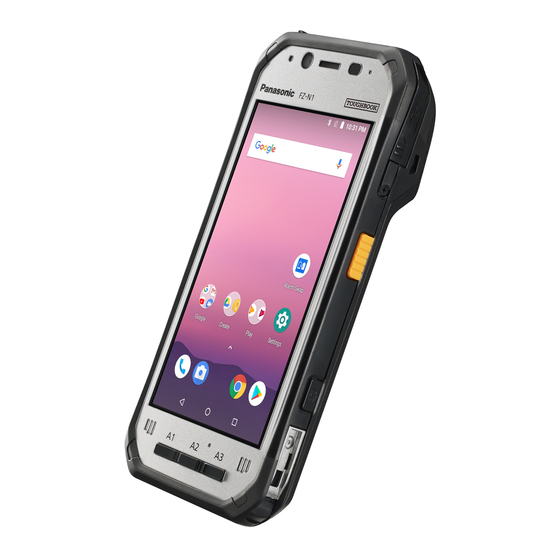
tablet computer
Hide thumbs
Also See for FZ-N1:
- Operating instructions manual (236 pages) ,
- Operating instructions manual (52 pages) ,
- Operating instructions manual (32 pages)
Table of Contents
Advertisement
Operating Instructions
Smart Handheld
EB-3901
Operating Instructions
Basic Guide
Tablet Computer
FZ-N1
Model No.
series
Thank you for purchasing a Panasonic product.
For optimum performance and safety, please read these
instructions carefully.
For detailed information about this product, refer to the Reference
Manual, which is available by tapping [Online Manual] in the
product's app list. (Download required.)
Advertisement
Table of Contents

Related Manuals for Panasonic FZ-N1


Summary of Contents for Panasonic FZ-N1
-
Page 1: Operating Instructions
Tablet Computer FZ-N1 Model No. series Thank you for purchasing a Panasonic product. For optimum performance and safety, please read these instructions carefully. For detailed information about this product, refer to the Reference Manual, which is available by tapping [Online Manual] in the... -
Page 2: Table Of Contents
Table of Contents Introduction.............. 3 Handling cautions ............3 Trademarks..............8 Terms and illustrations in this document ....... 9 Disclaimers ..............10 Getting Started............11 Confirming the included items ........11 Description of parts............12 Opening and closing the interface cover ..... 16 Removing and attaching the battery cover .... -
Page 3: Introduction
Introduction Handling cautions Handling cautions General use • Operating environment Temperature: Operation: -10 °C to 50 °C (IEC60068-2-1, 2) Storage: -30 °C to 70 °C Humidity: Operation: 30 % to 80 % RH (No condensation) Storage: 30 % to 90 % RH (No condensation) Even within the above temperature/humidity ranges, operation for a long time in extreme environments, smoking nearby, or operation in places where oil is used or where there is a lot of dust will result... - Page 4 • Do not place objects on the surface of the product or press down hard on the product with sharp objects. The screen surface may get scratched. • Do not scratch the rear camera, barcode reader, or flash panel. • Do not use the dedicated stylus when dust or dirt (e.g., oil) is on the screen.
- Page 5 Protecting your data • To prevent accidental loss of data, we recommend that you back up any important data that you store in the product, SIM card, and SD card. • To prevent the unintended disclosure of private information, always confirm the destination before sending messages, file attachments, or any other communications, such as email.
- Page 6 • Do not leave any water droplets on the product. Water droplets may cause the micro USB port or headset jack to short circuit, or create smears on the screen. • If the product is wet, wipe off the moisture before connecting with peripheral devices.
- Page 7 • Store the battery in environments with an ambient temperature of -20 °C to 35 °C. If the battery is stored in other environments, battery performance and battery life may be reduced. • When storing or transporting the battery, make sure that the battery's terminals do not become dirty and that no foreign objects or debris become attached to the battery's terminals.
-
Page 8: Trademarks
Bluetooth SIG, Inc. and any use of such marks by Panasonic Corporation is under license. • microSDXC Logo is a trademark of SD-3C, LLC. • The N-Mark is a trademark or registered trademark of NFC Forum, Inc. -
Page 9: Terms And Illustrations In This Document
Terms and illustrations in this document Terms and illustrations in this document • Panasonic Corporation and/or its affiliates are referred to collectively as “we” or “Panasonic”. • This product supports microSD, microSDHC, and microSDXC memory cards. In this document, the term “SD card” is used as a generic term for any supported memory card. -
Page 10: Disclaimers
Disclaimers Disclaimers Panasonic shall not be liable for loss of data or other incidental or consequential damages resulting from the use of this product. This product can download, store, forward, and receive additional content, such as applications, ringtones, contact information, and media files. -
Page 11: Getting Started
Getting Started Confirming the included items Confirming the included items If any items are missing, please contact your technical support representative. – Main unit ×1 – Battery (Model number FZ-VZSUN110U or FZ-VZSUN120U) ×1 • In general, FZ-VZSUN110U is used in the illustrations, but FZ- VZSUN120U is used in some illustrations. -
Page 12: Description Of Parts
Description of parts Description of parts Front view A Indicator Orange, lit: Battery is charging Green, lit: Battery charging is complete Red, lit: Battery level is less than 15 % of a full charge B Front camera C Earpiece... - Page 13 D Ambient light sensor, proximity sensor The ambient light sensor automatically adjusts the screen brightness. The proximity sensor prevents accidental operations on the touch panel during phone calls. E NFC antenna (internal) When using an NFC card or other NFC device, touch the card/ device to this area of the unit.
- Page 14 Rear view A Microphone B Rear camera C Barcode reader D Battery cover E Battery lock lever F Cellular antenna (internal) G GPS antenna (internal) H Flash Can be used when taking pictures. I Strap attachment hole J Wi-Fi, Bluetooth antenna (internal) K Side button (page 30) L Volume buttons...
- Page 15 M Cradle rail Used when connecting the unit to an optional cradle, etc. N Expansion bus connector Used when connecting an optional cradle, etc. or for other future expansion options. Opening and closing the headset jack cover Pull back at the protrusion of the headset jack cover with your fingertip.
-
Page 16: Opening And Closing The Interface Cover
Opening and closing the interface cover Opening and closing the interface cover Opening the interface cover Slide in the direction of the 2. Pull back the cover and arrow at the protrusion rotate it downward. (circled in the illustration above) with your fingertip. Closing the interface cover Rotate the cover upward 2. -
Page 17: Removing And Attaching The Battery Cover
IMPORTANT • Observe the following to ensure the waterproof and dustproof performance of the unit. – Make sure the interface cover is securely closed and locked when the micro USB port is not being used. – When closing the interface cover, make sure there is no debris lodged in the gasket that seals the cover. - Page 18 2. Slide the battery cover by firmly placing your hands as shown in the illustration. • When removing the battery cover, be careful so that you do not drop the battery. Attaching the battery cover 1. Place the battery cover on the unit as shown in the illustration. •...
- Page 19 2. Slide the battery cover by firmly placing your hands as shown in the illustration until you hear a click. 3. Lock the cover by sliding the battery lock lever (circled in the illustration) toward . • Firmly slide until the red area is no longer visible. IMPORTANT •...
-
Page 20: Installing Sim Cards (Certain Models Only)
Installing SIM cards (certain models only) Installing SIM cards (certain models only) You can install up to two SIM cards. 1. Remove the battery cover (page 17). • If a battery is installed, remove it (page 24). 2. Slide the Micro SIM card slot in the direction of the arrow (A), and then open it (B). -
Page 21: Installing An Sd Card
4. Close the Micro SIM card slot (A), and slide it in the direction of the arrow (B) until you hear a click. • To remove a SIM card, follow the same procedure, and then pull out the SIM card at step 3. Note •... - Page 22 3. Insert the microSD card into the microSD card slot (A), and then close the slot (B). • Install only microSD cards. • Hold the microSD card so that the metal terminals are facing you, and insert with the notch facing in the same direction of the circled area in the illustration below.
-
Page 23: Installing And Removing The Battery
Installing and removing the battery Installing and removing the battery Make sure to turn off the unit before replacing the battery. Installing the battery 1. Remove the battery cover (page 17). 2. Insert the tabs at the battery’s terminal side (A) into the notches of the unit (B), and then lower the battery into place (C). - Page 24 IMPORTANT • Observe the following to ensure the waterproof and dustproof performance of the unit. – When installing the battery, make sure there is no debris lodged in the gasket that seals the unit and in the area around the battery.
-
Page 25: Replacing The Battery (Battery Warm Swap)
IMPORTANT • Do not remove the battery while the unit is wet. When the unit is wet, remove the water by wiping off the water droplets and thoroughly drying the unit before removing the battery. (See "Waterproof/dustproof", page 5.) Replacing the battery (Battery warm swap) Replacing the battery (Battery warm swap) You can replace the battery without turning the unit off. -
Page 26: Charging The Battery
Charging the battery Charging the battery • The battery is not charged at the time of purchase. Charge the battery before turning on the unit for the first time or after an extended period of storage. Using the AC adaptor (VSK0815 or FZ-AAE184E) to charge the unit 1. - Page 27 Note • When removing the USB connection cable, make sure to remove it while holding the plug. Do not pull by the cable. • When connecting a USB connection cable, note the shape of the micro USB plug and the micro USB port. Do not attempt to connect the USB connection cable upside down.
- Page 28 • Charge the battery in environments with an ambient temperature of 10 °C to 35 °C (50 °F to 95 °F). • The indicator lights in orange while the battery is charging, and lights in green when charging is complete. •...
-
Page 29: Turning The Unit On And Off
Turning the unit on and off Turning the unit on and off Turning the unit on Press and hold (power button) on the top of the unit until the unit briefly vibrates. Turning the unit off 1. Press and hold until the power options dialog is displayed. -
Page 30: Navigation And Function Buttons
Using the status bar The status bar is displayed at the top of the screen when using most apps. It displays icons that let you know the status of the battery, network signal, and other features. • See the Reference Manual for a list of commonly used icons and their meanings. -
Page 31: Factory Data Reset
The default button assignments are described below. The same function as The same function as Displays the list of options (if available) for the current screen. Side buttons No function by default. Camera Press and hold to launch the camera app. When button using the camera app, press this button to take a picture, start and stop video recording, etc. -
Page 32: Troubleshooting
Troubleshooting If you experience any trouble while using the unit, refer to the information in this section for troubleshooting. See the Reference Manual (tap [Online Manual] in the app list) for additional troubleshooting information. If the problem persists, contact your technical support representative. Starting up The unit does not turn on. - Page 33 Shutting down The unit does not turn off. • It may take one or two minutes for the unit to turn off. This is not a malfunction. • Press and hold (power button) for at least 10 seconds to force the unit to restart, and then try again.
- Page 34 Indicator The indicator flashes in orange. • The battery cannot be charged temporarily because the ambient temperature is too low or too high. Leave the unit in an environment of 10 °C to 35 °C for about an hour. The indicator lights in red. •...
- Page 35 Other The date and time are incorrect. • Confirm the date and time settings. From the home screen, tap → [Settings] → [Date & time]. • Set the date and time automatically. → [Settings] → [Date & 1. From the home screen, tap time].
-
Page 36: Appendix
Appendix Specifications Specifications Typical unit specifications and certain options are described below. Unit configuration may vary. Model No. FZ-N1 ® Qualcomm MSM8974AB 2.3 GHz Quad Core Memory 2 GB Storage 16 GB Display Internal LCD 4.7 in. HD (1280 × 720 dots),... - Page 37 Wi-Fi Standards supported IEEE 802.11a / IEEE 802.11b / IEEE 802.11g / IEEE 802.11n / IEEE 802.11ac Transmission method OFDM system, DSSS system Wireless channels used IEEE 802.11a / IEEE 802.11n (5 GHz) / IEEE 802.11ac • W52 (36, 38, 40, 42, 44, 46, 48 ch) •...
- Page 38 Bluetooth Version 4.1, Class 1 Transmission method FHSS system Wireless channels used 0 - 78 ch (Low energy: 0 - 39 ch) RF frequency band 2402 MHz - 2480 MHz Supported profile A2DP, AVRCP, HFP, HID, HOGP, HSP, MAP, OPP, PAN, PBAP, SPP, GAVDP, GATT Mobile networking LTE, HSPA+, UMTS, EDGE, GPRS, GSM (certain models...
- Page 39 Sensors Ambient light sensor, Digital compass, Gyro sensor, Acceleration sensor, Proximity sensor, Pressure sensor Built-in (Type A, B, FeliCa) microSD card slot ×1 Card slots (microSDXC compatible) USB 2.0 port ×1 , Headset jack ×1, Interfaces Expansion bus connector (inside rear side, lower part of the unit) Touchscreen 10-finger touch (capacitive) with:...
- Page 40 Battery Lithium-ion (FZ-VZSUN110U) 3200 mAh (typ.) / 3100 mAh (min.) Rated Voltage 3.8 V Operating time (approx.) Standby: 700 hours Talk: 24 hours Barcode scanning : 12 hours Charging time (approx.) 3 hours (when using the AC adaptor (VSK0815 or FZ-AAE184E)) 2 hours (when using the optional charging cup or cradle) Extended Life...
- Page 41 *1 1 MB = 1 048 576 bytes, 1 GB = 1 073 741 824 bytes *2 Operation has been tested and confirmed using the following Panasonic brand memory cards: SD (up to 2 GB), SDHC (up to 32 GB). Compatibility with other SD devices is not guaranteed.
- Page 42 *5 Only single-finger operation is enabled. *6 Actual performance varies depending on usage conditions, connected peripherals, etc. Typically, operating time is reduced in colder environments. *7 Results measured with a stable signal, a new battery, and at a stationary position. Results will vary depending on the signal quality, operating environment, and system settings.
-
Page 43: Accessories
Accessories Accessories Product name Model number AC Adaptor CF-AA6373A Battery Pack FZ-VZSUN110U FZ-VZSUN120U Cradle FZ-VEBN111 Charging Cup FZ-VCBN11U Holster FZ-VSTN12U Hand Strap FZ-VSTN11AU 4-Bay Cradle FZ-VEBN121 4-Bay Battery FZ-VCBN121 Charger Appendix... -
Page 44: Standard Limited Warranty
This warranty only applies to new Panasonic Toughbooks or Toughpads purchased in the EEA and Switzerland and Turkey. - Page 45 We strongly recommend that customers backup their data before sending back their unit to an Authorised Service Provider. Panasonic shall not be liable for loss of data or other incidental or consequential damages resulting from the use of this product, or arising out of any breach of this warranty.
- Page 46 God. In addition, Panasonic shall have no obligation for any defects in the disk(s) or other media if you have modified, or attempted to modify any Program.
- Page 47 Panasonic assumes no risk of and shall not in any case be liable for any damages, including, without limitation, any special, incidental, consequential, or...
- Page 48 Italy: +39 800986915 Spain: +34(0)901101157 +44(0) 8000884324 e-mail: toughbooksupport@eu.panasonic.com Czech speaking service 0800 143234 (in country only) Hungarian speaking service 06800 163 67 (in country only) Polish speaking service 00800 4911558 (in country only) Romanian speaking service 0800 894 743 (in country only)
- Page 49 Appendix...
- Page 50 Web Site : https://panasonic.net/cns/pc/ © Panasonic Mobile Communications Co., Ltd. 2016-2017 20160175ZFD C0616-5087...