
Related Manuals for Casio EX-843


Summary of Contents for Casio EX-843
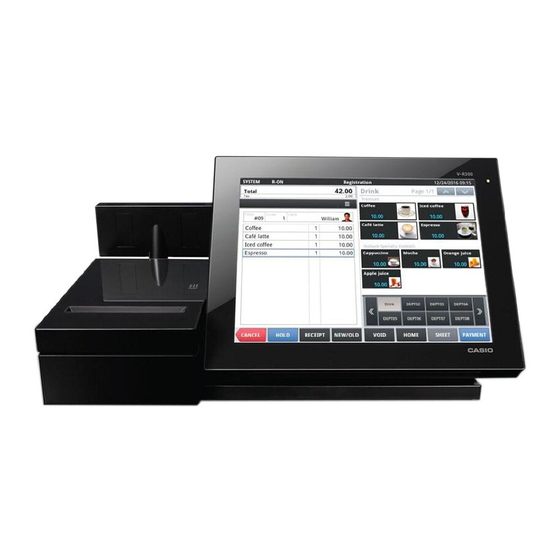
- Page 1 SERVICE MANUAL ELECTRONIC CASH REGISTER V-R200 (EX-843) JUL. 2016 Ver.3 : Jun. 2017...
-
Page 2: Table Of Contents
V-R200 / VER.1 CONTENTS IMPORTANT NOTICE ..................P. 1 PRODUCT SPECIFICATIONS ................P. 8 DIAGNOSTIC OPERATION ................P. 12 DISASSEMBLY/ASSEMBLY ................P. 33 CIRCUIT DIAGRAM ..................P. 59 EXPLODED VIEW/PARTS LIST ..............P. 63... -
Page 3: Important Notice
V-R200 / VER.1 IMPORTANT NOTICE 1. Safety Precautions ................... P. 2 2. Precautions for Use ................. P. 3 3. Information 3-1. Basic Operation ....................P. 5 3-2. SD/SDHC memory card ..................P. 7 Repair Information When the main PCB is replaced with a spare part one. •... -
Page 4: Safety Precautions
V-R200 / VER.1 1. Safety Precautions * Caution LAN Conenector Ethernet (LAN) Connector: Not used to a telecommunication network To Prevent malfunctions caused by the weak batteries, charge the memory protection batteries for over 6-hours. 1. Before installation, initialize the terminal and leave it power on over 6-hours. 2. -
Page 5: Precautions For Use
Contact the dealer or the CASIO service representative around 5 years after purchase to replace the battery (this time depends on how the product is used). - Page 6 The content of this manual may be changed without prior notice due to improvement or specifi cation change of the product. Please note that CASIO bears no responsibility for damage, loss of profi t, or any claim from third party due to loss or change of data caused by usage, malfunction, or repair of this product.
-
Page 7: Information
V-R200 / VER.1 3. Information 3-1. Basic Operation (1) General information Power lamp Power switch Maintenance switch Reset switch Fig. 1 • The power switch is pressed. OFF state ON state Power lamp: OFF Power lamp: Green • The power switch is held down more than 5 sec., then choose "Power off". - Page 8 V-R200 / VER.1 (2) Shutdown procedure There are two ways to shut down. 0Shutting down by the power switch Press and hold the power switch until “Power off” / “force tablet reboot” appears. Select “Power off” “OK”. Fig. 3 Fig. 4 0Shutting down by the maintenance switch Press and hold the maintenance switch until “Pwer off”...
-
Page 9: Sd/Sdhc Memory Card
V-R200 / VER.1 3-2. SD/SDHC memory card (1) Recommended SD/SDHC memory card SanDisk Corporation Transcend Information, Inc. SDSDB-016- SDSDUL-016- TS16GSDU1 Fig. 6 (2) Mounting the SD/SDHC memory card SD/SDHC memory card is automatically mounted when it is inserted. If it has been unmounted due to incorrect operation, mount it again. -
Page 10: Product Specifications
*2: The internal battery is a consumable item. Contact the dealer or the CASIO service representative around 5 years after purchase to replace the battery (this time depends on how the product is used). Memory protection may not operate properly if the battery becomes depleted. - Page 11 V-R200 / VER.1 Y Parts Names and Functions Front Dallas key For operators to sign on and off. (Factory option) Printer cover Open this replacing the paper roll. Keep closed during normal use. Printer head Prints the receipts. Auto cutter block The customer receipt is cut automatically when it is issued.
- Page 12 V-R200 / VER.1 Rear DC jack Connect the AC adaptor. Drawer connecting cable Cable for connecting to the drawer. USB port Connect the USB device. *1 LAN port Connects with external devices via a hub. *1 COM3 port Connect device such as printer, etc. *1 COM2 port Connect device such as printer, etc.
- Page 13 V-R200 / VER.1 Y Option List Device name Model Specifi cation Note Remote printer (RS-232C port) UP-370B EX-PRT-UNIT-11B Remote printer (RS-232C / LAN port) UP-400B EX-PRT-UNIT-10B Customer display with original stand VA-B70DE-BK EX-DP-UNIT-17B-BK Height 170 mm VA-B70DE-BK + EX-DP-UNIT-17B-BK + with extension pole kit A Height 350 mm VA-B73PK-BK...
-
Page 14: Repair Information
V-R200 / VER.2 DIAGNOSTIC OPERATION 1. HARDWARE TEST 1-1. List of test items ..........P. 13 . -
Page 15: Hardware Test
V-R200 / VER.2 1. HARDWARE TEST 1-1. List of test items Test items Remarks Flash memory (USB memory or SD card), 1-2. Installing the Test Application To be prepared Test application “FuncTest843_0100000003.apk” 1-3. About the Test Application 1-4. Touch panel calibration 1-5. - Page 16 V-R200 / VER.2 1-2. Installing the Test Application To be prepared 0 Flash memory (USB memory or SD card) 0 Test application “FuncTest843_0100000003.apk” Store the test application “FuncTest843_0100000003.apk” to the root directory of the fl ash memory (USB memory or SD card). Tap “Settings”...
- Page 17 V-R200 / VER.2 1-3. About the Test Application The test application runs. Function Description Refer to Test items Red frame 1-5. Test Method TIPS: “CF Bench” is excluded from the test item. Checking and registering the serial number 1-6. Checking and Set Serial Number TIPS: Carry out when the main PCB is replaced with a Registering the Serial...
-
Page 18: Touch Panel Calibration
V-R200 / VER.2 1-4. Touch panel calibration 0 When the F case “CASE ASSY/FRONT” is replaced with a new one, be sure to carry out the touch panel calibration. TIPS: Same operation as Touch Screen Calibration in Settings mode. Tap “TouchPanel Calibration”. Tap the screen, following the onscreen instructions. - Page 19 V-R200 / VER.2 1-5. Test Method Preparation Before Testing Prepare the necessary items referring to “1-1. List of test items”. Before testing, set the following items to the product. 0 Set the paper roll. 0 Insert the USB memory and SD card. 0 Connect the LAN cable (DHCP).
- Page 20 V-R200 / VER.2 Button 0 Test the tilt switch, power switch and maintenance switch. Power lamp Power switch Maintenance switch Tilt switch Operate the tilt switch to check that the angle of the main display changes accordingly. TILT TILT DOWN DOWN Tap “Button”...
-
Page 21: Touch Panel
V-R200 / VER.2 Touch Panel 0 Carry out a handwriting test. Tap “Touch Panel” tap any place on the screen. Since the screen turns to white, handwrite anything with your fi nger tip. When you lift your fi nger from the screen, the judgment screen appears. - Page 22 V-R200 / VER.2 Backlight 0 Check that the intensity of the backlight is adjustable. Tap “Backlight” tap any place on the screen. Move the slider and check that the brightness of the screen changes accordingly. When you lift your fi nger from the screen, the judgment screen appears.
-
Page 23: Mac Address
V-R200 / VER.2 SD Card 0 Carry out the SD card test. 0 Make sure that the SD card is already inserted. Tap “SD Card”. Automatic judgment is done and the test result appears on the menu screen. Ethernet 0 Make sure that the LAN cable (DHCP) is already connected. 0 Once success of this test, if you need to test again, perform reboot, then test again. - Page 24 V-R200 / VER.2 COM 1, COM 2, COM 3 0 Carry out the COM port communication test. 0 Information of the loop back tool. Pin assignment on the register side (male) Signal name Connection information Connect the loop-back connector to the COM port to be tested. Start the test by tapping the COM port to which the loop-back connector is connected.
-
Page 25: Dallas Key
V-R200 / VER.2 Dallas Key 0 For Dallas key model only 0 Carry out the recognition test of Dallas key. Tap “Dallas Key”. Set the Dallas key. When the Dallas key is recognized normally, the light green tile appears. Remove the Dallas key. Another light green tile appears and the display returns to the menu screen. - Page 26 V-R200 / VER.2 Drawer 1, Drawer 2 0 DAWER 1: Longer cable, DAWER 2: Shorter cable Drawer 2 Drawer 1 0 The check method and test procedure differ depending on the drawer type. Model name Check item DL-2814 Without drawer detecting switch Drawer opening operation only DL-2822 DL-2436...
- Page 27 V-R200 / VER.2 For models with drawer detecting switch Tap “Drawer Open”. The drawer opens and the drawer status is displayed. Close the drawer. The drawer status is displayed, and then the judgment screen appears. Tap the test result to return to the menu screen. –...
- Page 28 V-R200 / VER.2 0 For MCR model only 0 Carry out the magnetic card reading test. Tap “MCR”. Slide the magnetic card for testing. When the test result is “OK”. When the magnetic card is correctly scanned, a large green circle appears, and then the display automatically returns to the menu screen.
-
Page 29: Customer Display
V-R200 / VER.2 Speaker 0 Carry out the speaker output test. Tap “Speaker” tap any place on the screen. Check that an alarm sound is heard. Tap the test result to return to the menu screen. Customer Display 0 Carry out the sub display test. Tap “Customer Display”... - Page 30 V-R200 / VER.2 Auto-Run 0 The following items are tested in succession. Test items Judgment Remarks Button Auto Touch Panel Manual Manual Backlight Manual USB Storage Auto To be prepared USB memory Internal Storage Auto SD Card Auto To be prepared SD card CF Bench Skip * Skip this test item as test is not required.
- Page 31 V-R200 / VER.2 1-6. Checking and Registering the Serial Number 0 Carry out check and registration of the product serial number. Tap “Set Serial Number”. Enter the serial number and tap the “Enter key”. Tap “Set Serial No.”. Tap “ ”...
- Page 32 V-R200 / VER.2 1-7. Uninstalling the Test Application Tap “Settings” “Apps” “Function Tester”. Tap “Uninstall” “OK”. – 30 –...
- Page 33 V-R200 / VER.2 2. UPDATING THE OS 2-1. Checking the Version Select “Settings” “About tablet”, and check the “Build number”. The OS version is displayed in the following red rectangular box. 1.0.0_ 1005 Example: 2-2. Updating Method Preparation 1. Prepare the data with the version you want to update. Example : V-R200_5059-AAUDAC-ota_update-1.0.0_1011-signed.zip NOTE : Do not uncompress or change the fi...
- Page 34 V-R200 / VER.2 3. Confi rm the display content and tap “Execute” twice. 4. After completion of the update, restart begins. – 32 –...
-
Page 35: Disassembly/Assembly
V-R200 / VER.1 DISASSEMBLY/ASSEMBLY Y Important ........................P. 34 Y Screws ........................P. 35 A. Replacing the Main PCB ................... P. 36 B. Replacing the LCD Unit .................... P. 41 C. Replacing the IOC ASSY ................... P. 44 D. Replacing the Sub Display ..................P. 47 E. -
Page 36: Y Important
V-R200 / VER.1 Y Important • Please note that the product on this manual may appear to be different from the actual one according to the changes such as engineering design change. • In order to prevent static electricity and avoid leaving grease from the hand, wear conductive gloves, fi... -
Page 37: Y Screws
V-R200 / VER.1 Y Screws There are several kinds of screws. Be sure to use the correct type of screws when reassembling. It is advisable to sort the screws as shown on the right after removing them. ( φ : 3mm, L: 10mm) ( φ... -
Page 38: Replacing The Main Pcb
V-R200 / VER.1 A. Replacing the Main PCB Supplementary explanation When the main PCB is replaced with a spare part one. • Since an OS is already installed on the spare part main PCB, update the OS to an appropriate version as required. - Page 39 V-R200 / VER.1 (3) Remove one cable tie. (4) Undo one screw and remove two ground wires. (5) Disconnect three connectors. (Four connectors for the model “V-R200-BD” (Dallas key built in model)). Note on reassembling 0 Put the lead wires of the speaker in the case. Cable tie Screw (S2) Ground wire...
- Page 40 V-R200 / VER.1 A-3. Undo fi ve screws and remove the REAR CASE. Screw (S6) 5 REAR CASE Note on reassembling 0 Assemble the REAR CASE in the order indicated by the numbers below. – 38 –...
- Page 41 V-R200 / VER.1 A-4. Undo four screws and remove the CHASSIS/HNG. Screw (S2) 4 CHASSIS/HNG Note on reassembling 0 Fix the lead wires of the battery with tape. Tape Note on reassembling V-R200-BD (Dallas key built in model) 0 Fix the ferrite core with double-sided tape, and then fi x its lead wires and the lead wires of the battery together with tape.
- Page 42 V-R200 / VER.1 A-5. Removal of the main PCB (PCB ASSY/E843-1) (1) Unlock the connector lock and disconnect the FPC. (2) Disconnect four connectors. (3) Undo four screws. (4) Replace the main PCB (PCB ASSY/E843-1) with a new one. (2) Connectors Ground wire (3) Screw (S2) (2) Connector...
-
Page 43: Replacing The Lcd Unit
V-R200 / VER.1 B. Replacing the LCD Unit Supplementary explanation When the CASE ASSY/FRONT is replaced with a spare part one. • Carry out the touch panel calibration. Refer to: Diagnostic operation 1-4. Touch panel calibration Model with no Dallas key B-1. - Page 44 V-R200 / VER.1 Dallas key built in model B-1. Remove the CHASSIS/HNG. Reference Procedure: A-1 to A-4 B-2. Remove the CHASSIS/LCD. (1) Peel off tape (3 pcs.). (2) Unlock the connector lock and disconnect the FPC. (3) Disconnect three connectors. (4) Peel off the tape that is fi...
- Page 45 V-R200 / VER.1 B-3. Remove the LCD unit (LCD UNIT). CASE ASSY/FRONT LCD UNIT Note on reassembling 0 Attach the four cushions to the new LCD UNIT. NOTE: Attach them in the order indicated by the numbers below. CUSHION/LCD 0 Make sure that no dirt or dust is on the touch panel surface and LCD surface.
-
Page 46: Replacing The Ioc Assy
V-R200 / VER.1 C. Replacing the IOC ASSY Supplementary explanation When the IOC PCB is replaced with a spare part one. • Firmware is already installed on it. • The fi rmware version is confi rmed at power on and, if necessary, it is automatically updated. •... - Page 47 V-R200 / VER.1 C-2. Remove the following parts. (1) Connector 4 (Model with no Dallas key) Connector 5 (Dallas key built in model) (2) Printer FFC (3) Tape, Ferrite core, Sub Display FFC (4) Scrwe NOTE: There are two types of screws (S2 × 8, S7 × 4). Ground wire (2) Printer FFC (1) Connector...
- Page 48 V-R200 / VER.1 C-5. Remove the following parts. (1) Cable tie (2) Scrwe (3) Cable C-6. Replace the IOC ASSY with a new one. (2) Screw + Ground wire IOC ASSY (3) CABLE/DRW1 (3) CABLE/DRW2 (1) Cable tie Note on reassembling 0 Drawer cables •...
-
Page 49: Replacing The Sub Display
V-R200 / VER.1 D. Replacing the Sub Display D-1. Remove the CHASSIS/BOTTOM. Reference Procedure: C-1 D-2. Peel off tape (2 pcs.) and disconnect the FFC. CLOTH-TEPE (10 Ferrite core CLOTH-TEPE (15 NOTE: Peel off the tape without giving a load to the connector. D-3. - Page 50 V-R200 / VER.1 D-4. Assemble the parts in the reverse order of the disassembly procedure. – 48 –...
-
Page 51: Replacing The Motor
V-R200 / VER.1 E. Replacing the Motor E-1. Remove the IOC ASSY. Reference Procedure: C-1 to C-3 E-2. Undo two screws and remove the MOTOR SUPPORT. E-3. Undo two screws and replace the motor (GEAR ASSY) with a new one. MOTOR SUPPORT Screw (S11) Screw (S4) -
Page 52: Replacing The Printer
V-R200 / VER.1 F. Replacing the Printer F-1. Undo two screws and remove the PLATE/BLIND. Screw (S7) PLATE/BLIND F-2. Unlock the connector lock and disconnect two FPCs. F-3. Remove the SHEET/BLIND. NOTE: Be careful not to put a scratch on the MASK/PRINTER, when removing the SHEET/BLIND. F-4. - Page 53 V-R200 / VER.1 F-5. Undo two screws and remove the PRINTER. PRINTER Screw (S5) F-6. Undo two screws and remove the PLATEN. PLATEN Screw (S2) F-7. Assemble the parts in the reverse order of the disassembly procedure. – 51 –...
-
Page 54: Replacing The Cable
V-R200 / VER.1 G. Replacing the Cable G-1. IOC PCB - E843-PR PCB FFC-JOINER-E840PR Note on replacing 0 Form the FFC into shape by using the following jigs. 33 mm 13 mm 33 mm 48 mm 33 mm 19 mm 79 mm 29 mm 22 mm... - Page 55 V-R200 / VER.1 8 mm – 53 –...
- Page 56 V-R200 / VER.1 – 54 –...
-
Page 57: G-2. Ioc Pcb - Main Pcb
V-R200 / VER.1 G-2. IOC PCB - Main PCB 0 Remove the IOC ASSY. 0 Remove the DISPLAY-ASSY. Reference Procedure: C-1 to C-3 Reference Procedure: A-1 Ferrite core 0 Remove the ferrite core. 0 Remove the CABLE MASK. 0 Replace the cables. FG-CABLE-SUBASSY CABLE MASK IOC-CABLE-SUBASSY... - Page 58 V-R200 / VER.1 Note on replacing 0 Bundle the three or four cables with tube. Tube (70mm, 10 mm) 175 ± 5 mm CABLE-SUBASSY/FG 130 ± 5 mm CABLE-SUBASSY/IOC 110 ± 5 mm CABLE-SUBASSY/USB CABLE-SUBASSY/DASR * V-R200-BD only 80 ± 5 mm Connector (male) Connector (female) Note on reassembling...
-
Page 59: Other Parts
V-R200 / VER.1 H. Other Parts Supplementary explanation • For the parts other than the replaced parts, reuse the original ones. H-1. REAR CASE BLOCK Screw (S7) SPEAKER Screw (S9) BLIND/DALLAS COVER/BOOT CASE/REAR Screw (S6) H-2. CASE ASSY/FRONT Screw (S10) PCB ASSY/E843-E61 LENS/LED CASE ASSY/FRONT... -
Page 60: H-3. Chassis/Bottom
V-R200 / VER.1 H-3. CHASSIS/BOTTOM CHASSIS/BOTTOM PAD/RUBBER PAD/RUBBER/E843 BLIND/CN H-4. CHASSIS/LCD BATTERY-ASSY BOX/BAT SHEET/BAT CHASSIS/LCD – 58 –... -
Page 61: Circuit Diagram
V-R200 / VER.1 CIRCUIT DIAGRAM Y Block Diagram 10.4 inch TFT-LCD 10.4 inch Touch Panel Switch (5 pin) (20 pin) (4 pin) Reset Switch LVDS CN14 Control (3 pin) eMMC SD Card Battery × 3 NAND Charger Slot E843-1 Speaker E843-E61 PMIC (2 pin) - Page 62 V-R200 / VER.1 Y PCB E843-1 PCB Top entry 3(D) 1(G) 2(S) 0.3TH 66 67 68 3(D) 1(G) 2(S) C204 R196 R193 R195 R192 IC29 C202 C151 R208 R216 R143 IC16 C144 C149 R202 C267 R268 IC21 R262 R267 C209 R273 R256 C213...
- Page 63 V-R200 / VER.1 E843-IOC PCB E843-PR PCB – 61 –...
- Page 64 V-R200 / VER.1 E843-E22 PCB E843-E61 PCB E843-E63 PCB – 62 –...
-
Page 65: Exploded View/Parts List
3. The numbers in item column correspond to the same numbers in drawing. 4. CASIO does not supply the spare parts without parts code. 5. Refer to the latest “Parts Price Code” at “PARTS FINDER” on the Casio Service WEB site (https://www.servicecasio.com). - Page 66 V-R200 / VER.2 1. MAIN UNIT EXPLODED VIEW DISPLAY-ASSY – 64 –...
- Page 67 V-R200 / VER.2 PARTS LIST 1: V-R200-BD 2: V-R200-BD-WE 3: V-R200-U 4: V-R200-U-WE 5: V-R200-C Qt'y Item Code No. Parts Name Specification Remarks 1 2 3 4 5 MAIN UNIT 10540722 CASE ASSY/UPPER/BK RJE504576*001V01 10540723 CASE ASSY/UPPER/WE RJE504576*002V01 SCREW (3x10) S-PADSMA-3X10Z3 2 2 2 2 2 X 10540717 COVER/PRINTER/BK RJE504693*001V01...
- Page 68 V-R200 / VER.2 2. DISPLAY-ASSY EXPLODED VIEW Screws Dallas key model Dallas key model Dallas key model Dallas key model – 66 –...
- Page 69 V-R200 / VER.2 PARTS LIST 1: V-R200-BD 2: V-R200-BD-WE 3: V-R200-U 4: V-R200-U-WE 5: V-R200-C Qt'y Item Code No. Parts Name Specification Remarks 1 2 3 4 5 DISPLAY-ASSY 10537626 CASE ASSY/FRONT/BK RJE504694*001 TK 1 A Including Touch Panel 10537627 CASE ASSY/FRONT/WE RJE504694*002 TK A Including Touch Panel 10537628 CASE ASSY/FRONT/BK/DLS RJE504694*003 TK...
- Page 70 V-R200 / VER.2 3. CABLES EXPLODED VIEW Item 40 (CABLE-SUBASSY/DRAWER) E843-IOC PCB Drawer Item 41 (CABLE-SUBASSY/DRAWER) E843-IOC PCB Drawer Item 42 (CABLE/FFC JOINER) E843-IOC PCB E843-PR PCB CN18 CN501 Item 43 (CABLE-SUBASSY/PRN) E843-IOC PCB E843-PR PCB CN502 CN502 Item 44 (CABLE-SUBASSY/FG) E843-IOC PCB E843-1 PCB Item 45 (CABLE-SUBASSY/USB)
-
Page 71: Parts List
V-R200 / VER.2 Item 47 (CABLE-SUBASSY/BL) E843-1 PCB LCD UNIT Item 48 (CABLE-SUBASSY/LCD) E843-1 PCB LCD UNIT Item 49 (CABLE-SUBASSY/DASR) E843-IOC PCB DALLAS ASSY PARTS LIST 1: V-R200-BD 2: V-R200-BD-WE 3: V-R200-U 4: V-R200-U-WE 5: V-R200-C Qt'y Item Code No. Parts Name Specification Remarks... - Page 72 V-R200 / VER.2 4. ACCESSORIES EXPLODED VIEW PARTS LIST 1: V-R200-BD 2: V-R200-BD-WE 3: V-R200-U 4: V-R200-U-WE 5: V-R200-C Qt'y Item Code No. Parts Name Specification Remarks 1 2 3 4 5 ACCESSORIES 10331637 SUBASSY/TRAY-BK RJE503185*001V01 1 C Multi-purpose tray (Black) 10436522 SUBASSY/TRAY-WE RJE503185*002V01 C Multi-purpose tray (White)
- Page 73 EXPLODED VIEW/PARTS LIST (Ver.2) • Correction of the EXPLODED VIEW (P66) Ver.3 : Jun. 2017 DIAGNOSTIC OPERATION (Ver.2) • Correction of the CHECKING THE VERSION (P31) CASIO COMPUTER CO., LTD. Overseas CS Department TOKYO, JAPAN © 2016 – 2017 CASIO COMPUTER CO., LTD.