
Related Manuals for NETGEAR GS810EMX


Summary of Contents for NETGEAR GS810EMX
- Page 1 Nighthawk Pro Gaming SX10 8-Port Gigabit Ethernet Switch with 2-Port 10G/Multi-Gig Ethernet User Manual Model GS810EMX December 2017 202-11833-01 350 E. Plumeria Drive San Jose, CA 95134...
- Page 2 For regulatory compliance information, visit http://www.netgear.com/about/regulatory. See the regulatory compliance document before connecting the power supply. Trademarks NETGEAR, Inc., NETGEAR, and the NETGEAR Logo are trademarks of NETGEAR, Inc. Any non-NETGEAR trademarks are used for reference purposes only. Revision History...
-
Page 3: Table Of Contents
Set Up a Fixed IP Address for the Switch by Connecting Directly to the Switch Off-Network....................18 Use the NETGEAR Insight App to Access the Switch.........19 Use the NETGEAR ProSAFE Plus Utility to Discover the Switch......20 Change the Switch Password................21 Register the Switch....................22 Chapter 3 Optimize the Switch Performance Apply a Performance Preset Mode..............24... - Page 4 Nighthawk Pro Gaming SX10 Switch Model GS810EMX Manage Flow Control for a Port...............36 Change the Speed for a Port or Disable a Port..........37 Unblock and Reenable a Port................38 Add or Change the Name Label for a Port............39 Chapter 4 Use VLANS for Traffic Segmentation VLAN Overview....................42...
- Page 5 Nighthawk Pro Gaming SX10 Switch Model GS810EMX Manage Individual Port LEDs................69 Manage Port LEDs in a Batch.................70 Reset the Port LEDs to Default Settings............71 Manage the Power LED..................72 View System Information..................73 Change the Switch Device Name................73 View Switch Connections..................74 View the Status of a Port..................74 Chapter 7 Diagnostics and Troubleshooting Test a Cable Connection..................76...
-
Page 6: Chapter 1 Hardware Overview Of The Switch
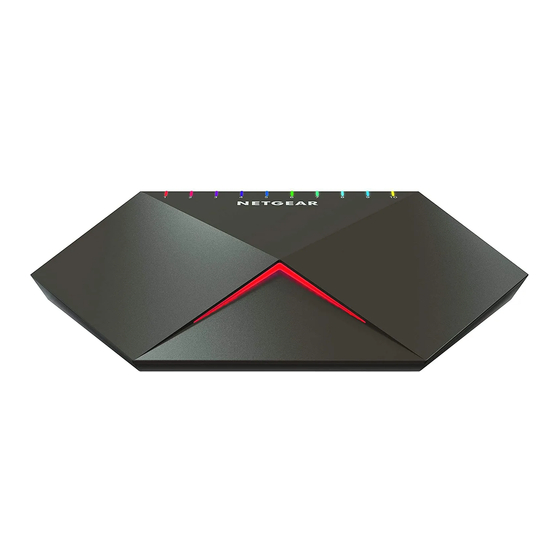
Pro Gaming SX10 8-Port Gigabit Ethernet Switch with 2-Port 10G/Multi-Gig Ethernet (GS810EMX), in this manual referred to as the switch, provides high-speed (up to 10G) and high-performance switching for multiplayer, online, or VR gaming and 4K resolution HD and UHD (ultra-high-definition) television media streaming. -
Page 7: Related Documentation
Nighthawk Pro Gaming SX10 Switch Model GS810EMX Related Documentation The following related documentation is available at downloadcenter.netgear.com: • Installation guide • Data sheet Switch Package Contents The package contains the switch, AC power adapter (localized to the country of sale), and installation guide. - Page 8 Nighthawk Pro Gaming SX10 Switch Model GS810EMX Table 1. LED descriptions Description Power LED Off. No power is supplied to the switch or the switch functions in Quiet mode with its Power LED disabled (see Manage the LEDs on page 69).
-
Page 9: Back Panel
Nighthawk Pro Gaming SX10 Switch Model GS810EMX Back Panel The back panel of the switch provides the LED button, eight Gigabit Ethernet ports, two 10 Gigabit/Multi-Gig Ethernet ports, and the DC power connector. The port LEDs are also located on the back panel. -
Page 10: Switch Label
Nighthawk Pro Gaming SX10 Switch Model GS810EMX Switch Label The switch label on the bottom panel of the switch shows the serial number, MAC address, default login information, and other information for the switch. Figure 4. Switch label Hardware Overview of the Switch... -
Page 11: Chapter 2 Install And Access The Switch In Your Network
Access the Switch and Discover the IP Address of the Switch • Use the NETGEAR Insight App to Access the Switch • Use the NETGEAR ProSAFE Plus Utility to Discover the Switch • Change the Switch Password • Register the Switch... -
Page 12: Set Up The Switch In Your Network And Power On The Switch
Nighthawk Pro Gaming SX10 Switch Model GS810EMX Set Up the Switch in Your Network and Power On the Switch Figure 5. Sample connections Table 2. Figure components Letter Description Letter Description GS810EMX switch Main media streaming device Network router High-speed device such as another switch... -
Page 13: Methods To Discover And Access The Switch
Discover the IP Address of the Switch on page 13). • Insight app. Install the NETGEAR Insight app on a smartphone or tablet to discover the switch in your network and access the local browser interface of the switch (see Use the NETGEAR Insight App to Access the Switch on page 19). -
Page 14: Access The Switch From A Mac Using Bonjour
Access the Switch From a Mac Using Bonjour If your Mac supports Bonjour, you can use the following procedure. If your Mac does not support Bonjour, Access the Switch From a Mac or Windows-Based Computer Using the NETGEAR Switch Discovery Tool on page 15. -
Page 15: Access The Switch From A Mac Or Windows-Based Computer Using The Netgear Switch Discovery Tool
Open the Switch Discovery Tool. If the NETGEAR Switch Discovery Tool icon is in the Dock of your Mac or on the desktop of your Windows-based computer, click or double-click the NETGEAR Switch Discovery Tool icon to open the program. -
Page 16: Set Up A Fixed Ip Address For The Switch
Nighthawk Pro Gaming SX10 Switch Model GS810EMX The initial page displays a menu and a button. From the Choose a connection menu, select the network connection that allows the Switch Discovery Tool to access the switch. Click the Start Searching button. -
Page 17: Set Up A Fixed Ip Address For The Switch Through A Network Connection
Nighthawk Pro Gaming SX10 Switch Model GS810EMX Set Up a Fixed IP Address for the Switch Through a Network Connection If the switch and your computer are connected to the same network (which is the most the likely situation), you can change the IP address of the switch through a network connection. -
Page 18: Set Up A Fixed Ip Address For The Switch By Connecting Directly To The Switch Off-Network
Nighthawk Pro Gaming SX10 Switch Model GS810EMX Set Up a Fixed IP Address for the Switch by Connecting Directly to the Switch Off-Network In the unlikely situation that the switch is not connected to a network, or for some reason you cannot connect to the switch over a network connection, you can change the IP address of the switch by using an Ethernet cable and making a direct connection to the switch. -
Page 19: Use The Netgear Insight App To Access The Switch
To access the switch from the Insight app: On your iOS or Android mobile device, go to the app store, search for NETGEAR Insight, and download and install the app. If the switch is directly connected to a WiFi router or access point, connect your mobile device to the WiFi network of the router or access point. -
Page 20: Use The Netgear Prosafe Plus Utility To Discover The Switch
IP addresses, power on the switch, and then use a computer that is connected to the same network as the switch. The NETGEAR ProSAFE Plus Utility runs on Windows-based computers and lets you discover the switch in your network, after which you can access the local browser interface of the switch. -
Page 21: Change The Switch Password
Nighthawk Pro Gaming SX10 Switch Model GS810EMX The discovery process initiates and completes automatically and the configuration home page displays a list of Smart Managed Plus Switches that the utility discovers on the local network. For each switch, the utility displays the IP address. -
Page 22: Register The Switch
Nighthawk Pro Gaming SX10 Switch Model GS810EMX Register the Switch Registering the switch allows you to receive email alerts and streamlines the technical support process. For you to register the switch, the switch must be connected to the Internet. To register the switch: Open a web browser from a computer that is connected to the same network as the switch or to the switch directly through an Ethernet cable. -
Page 23: Chapter 3 Optimize The Switch Performance
Optimize the Switch Performance This chapter describes how you can optimize the performance of the switch. The chapter contains the following sections: • Apply a Performance Preset Mode • Monitor the Gaming Traffic and Optimize the Gaming Settings • Manage Custom Performance Preset Modes •... -
Page 24: Apply A Performance Preset Mode
Nighthawk Pro Gaming SX10 Switch Model GS810EMX Apply a Performance Preset Mode The switch comes with three predefined preset modes that let you optimize the performance of the switch with a preset configuration. These modes include a gaming mode, a media streaming mode, and a standard mode. -
Page 25: Apply The Media Streaming Preset Mode
Nighthawk Pro Gaming SX10 Switch Model GS810EMX The PRESET MODES page displays. Select GAMING PRESET. The PREVIEW GAMING PRESET section shows the settings for the Gaming Preset mode. Click the APPLY button. Your settings are saved. Apply the Media Streaming Preset Mode The Media Streaming Preset mode maximizes the throughput of traffic that the switch manages so that streaming media such as music, videos, and movies can be processed very quickly. -
Page 26: Apply The Standard Preset Mode
Nighthawk Pro Gaming SX10 Switch Model GS810EMX The PRESET MODES page displays. The LOAD tab is automatically selected. Select MEDIA STREAMING PRESET. The PREVIEW MEDIA STREAMING section shows the settings for the Media Streaming Preset mode. Click the APPLY button. -
Page 27: Monitor The Gaming Traffic And Optimize The Gaming Settings
Nighthawk Pro Gaming SX10 Switch Model GS810EMX Your settings are saved. Monitor the Gaming Traffic and Optimize the Gaming Settings You can monitor the downloaded and uploaded traffic on the ports. The traffic is presented in graphs that show the amount of traffic and achieved traffic speed in Mbps over a period that you can select, from 5 minutes, 30 minutes, 1 hour, to 10 hours. -
Page 28: Manage Custom Performance Preset Modes
Nighthawk Pro Gaming SX10 Switch Model GS810EMX Right-click the small square port icon at the bottom of the graph. This is not the larger rectangular port block under the Time (seconds) bar of the graph, but the smaller square port icon below that. -
Page 29: Apply A Custom Preset Mode
Nighthawk Pro Gaming SX10 Switch Model GS810EMX You can save two custom preset modes, one in each slot. Click the APPLY button. Your settings are saved. The preset custom mode is displayed on the PRESET MODES page. Apply a Custom Preset Mode... -
Page 30: Delete A Custom Preset Mode
Nighthawk Pro Gaming SX10 Switch Model GS810EMX Click the SAVE tab. Select the Slot 1 or 2 button. In the Preset Name field, enter a new name from 1 to 16 characters for the custom preset mode. Click the RENAME button. -
Page 31: Use Port-Based Quality Of Service And Set Port Priorities
Nighthawk Pro Gaming SX10 Switch Model GS810EMX This QoS mode applies only to devices that support 802.1P and Differentiated Services Code Point (DSCP) tagging. For devices that do not support 802.1P and DSCP tagging, ports are not prioritized but the configured rate limit is still applied. -
Page 32: Use 802.1P/Dscp Quality Of Service
Nighthawk Pro Gaming SX10 Switch Model GS810EMX If the selection from the QoS Mode menu is 802.1P/DSCP, do the following to change the selection to Port-Based: From the QoS Mode menu, select Port-Based. A pop-up warning window opens. Click the CONTINUE button. - Page 33 Nighthawk Pro Gaming SX10 Switch Model GS810EMX Note If the QoS mode on the switch is Port-Based, we recommend that you first save your current QoS settings as a custom preset mode before you change the QoS mode to the 802.1P/DSCP QoS mode. For more information, see...
-
Page 34: Manage Broadcast Filtering And Set Port Storm Control Rate Limits
Nighthawk Pro Gaming SX10 Switch Model GS810EMX Manage Broadcast Filtering and Set Port Storm Control Rate Limits A broadcast storm is a massive transmission of broadcast packets that are forwarded to every port in a VLAN on the switch. If they are not blocked, broadcast storm packets can delay or halt the transmission of other data and cause problems. -
Page 35: Manage Individual Port Settings
Nighthawk Pro Gaming SX10 Switch Model GS810EMX Manage Individual Port Settings For each individual port, you can set rate limits for incoming and outgoing traffic, set the port speed (by default, the speed is set automatically), enable flow control, change the port name label, and change the LED color scheme. -
Page 36: Manage Flow Control For A Port
Nighthawk Pro Gaming SX10 Switch Model GS810EMX you set for that port. If you set the rate limit on a port too low, you might, for example, see degraded video stream quality, sluggish response times during online activity, and other problems. -
Page 37: Change The Speed For A Port Or Disable A Port
Nighthawk Pro Gaming SX10 Switch Model GS810EMX The HOME page displays. The PORT STATUS pane displays on the right or the bottom of the HOME page, depending on the size of your browser window. A port that is in use shows as CONNECTED. A port that is not in use shows as AVAILABLE. A port that is disabled shows as DISABLED. -
Page 38: Unblock And Reenable A Port
Nighthawk Pro Gaming SX10 Switch Model GS810EMX • Auto.The port speed is set automatically after the switch determines the speed using autonegotiation with the linked device. This is the default setting. • Disable. The port is shut down (blocked). •... -
Page 39: Add Or Change The Name Label For A Port
Nighthawk Pro Gaming SX10 Switch Model GS810EMX • Auto.The port speed is set automatically after the switch determines the speed using autonegotiation with the linked device. • 10M Half. The port is forced to function at 10 Mbps with half-duplex. - Page 40 Nighthawk Pro Gaming SX10 Switch Model GS810EMX The pane displays detailed information about the port. Click the EDIT button. The settings for the selected port become available. In the Port Name field, type a name label for the port. The name label can be from 1 to 16 characters.
-
Page 41: Chapter 4 Use Vlans For Traffic Segmentation
Use VLANS for Traffic Segmentation This chapter describes how you can use VLANs to segment traffic on the switch. The chapter contains the following sections: • VLAN Overview • Manage Port-Based VLANs • Manage 802.1Q-Based VLANs • Deactivate the Port-Based or 802.1Q-Based VLAN Mode and Delete All VLANs... -
Page 42: Vlan Overview
Nighthawk Pro Gaming SX10 Switch Model GS810EMX VLAN Overview Virtual LANs (VLANs) are made up of networked devices that are grouped logically into separate networks. You can group ports on a switch to create a virtual network made up of the devices connected to the ports. -
Page 43: Create A Port-Based Vlan
Nighthawk Pro Gaming SX10 Switch Model GS810EMX The QOS page displays. From the menu on the left, select VLAN. The VLAN page displays. In the PORT BASED VLAN section, click the ACTIVATE MODE button. A pop-up window opens, informing you that the current VLAN settings will be lost. -
Page 44: Change A Port-Based Vlan
Nighthawk Pro Gaming SX10 Switch Model GS810EMX Click the Select All link to add all ports to the VLAN. Click the Remove All link to remove all selected ports from the VLAN. Click the icon for an unselected port to add the port to the VLAN. -
Page 45: Delete A Port-Based Vlan
Nighthawk Pro Gaming SX10 Switch Model GS810EMX Click the icon for an unselected port to add the port to the VLAN. Click the icon for a selected port to remove the port from the VLAN. The icon for a selected port displays purple. -
Page 46: Activate The 802.1Q-Based Vlan Mode
Nighthawk Pro Gaming SX10 Switch Model GS810EMX Activate the 802.1Q-Based VLAN Mode By default, all types of VLANs are disabled on the switch. Before you can add and manage 802.1Q-based VLANs, port modes, and PVIDs, you must activate the 802.1Q-based VLAN mode. -
Page 47: Manage The Port Mode, Vlan Membership, And Pvid For A Port
Nighthawk Pro Gaming SX10 Switch Model GS810EMX The default password is password. The password is case-sensitive. The HOME page displays. From the menu at the top of the page, select SWITCHING. The QOS page displays. From the menu on the left, select VLAN. - Page 48 Nighthawk Pro Gaming SX10 Switch Model GS810EMX end device such as a gaming device, media device, or computer. When a port that functions in access mode receives data that is untagged, the data is delivered normally. When a port that functions in access mode receives data that is tagged for a VLAN other than the one the port belongs to, the data is discarded.
-
Page 49: Change An 802.1Q-Based Vlan
Nighthawk Pro Gaming SX10 Switch Model GS810EMX You change the settings for multiple ports simultaneously. Click the SAVE button. Your settings are saved. Change an 802.1Q-Based VLAN You can change the settings for an existing 802.1Q-based VLAN. To change an 802.1Q-based VLAN: Open a web browser from a computer that is connected to the same network as the switch or to the switch directly through an Ethernet cable. -
Page 50: Delete An 802.1Q-Based Vlan
Nighthawk Pro Gaming SX10 Switch Model GS810EMX Delete an 802.1Q-Based VLAN You can delete an 802.1Q-based VLAN that you no longer need. You cannot delete the default VLAN. You cannot delete a VLAN that is in use as the PVID for a port either. You must first remove the VLAN as the PVID for the port before you can delete the VLAN. - Page 51 Nighthawk Pro Gaming SX10 Switch Model GS810EMX Enter the switch password. The default password is password. The password is case-sensitive. The HOME page displays. From the menu at the top of the page, select SWITCHING. The QOS page displays. From the menu on the left, select VLAN.
-
Page 52: Chapter 5 Manage The Switch In Your Network
Manage the Switch in Your Network This chapter describes how you can manage the switch in your network. The chapter contains the following sections: • Manage Switch Discovery Protocols • Manage Multicast • Set Up Link Aggregation • Change the IP Address of the Switch •... -
Page 53: Manage Switch Discovery Protocols
It is important to know the IP address of the switch so that you can access the local browser interface of the switch. The switch supports Universal Plug and Play (UPnP), Bonjour, and NETGEAR Switch Discovery Protocol (NSDP), which are protocols that can discover the switch. A device that functions in the same network as the switch and that supports one of these protocols can discover the switch and obtain the IP address. -
Page 54: Manage Netgear Switch Discovery Protocol
Manage NETGEAR Switch Discovery Protocol A NETGEAR device or application that supports NETGEAR Switch Discovery Protocol (NSDP) can discover the switch in the network so that you can find the switch IP address and log in to the local browser interface of the switch. -
Page 55: Manage Multicast
Nighthawk Pro Gaming SX10 Switch Model GS810EMX When NSDP is enabled, the button bar displays green. Click the APPLY button. Your settings are saved. Manage Multicast Multicast IP traffic is traffic that is destined to a host group. Host groups are identified by Class D IP addresses, which range from 224.0.0.0 to 239.255.255.255. -
Page 56: Enable A Vlan For Igmp Snooping
Nighthawk Pro Gaming SX10 Switch Model GS810EMX Enable a VLAN for IGMP Snooping You can enable IGMP for a VLAN only if you enabled the port-based VLAN mode (see Manage Port-Based VLANs on page 42) or the 802.1Q-based VLAN mode (see Manage 802.1Q-Based VLANs... -
Page 57: Manage Igmpv3 Ip Header Validation
Nighthawk Pro Gaming SX10 Switch Model GS810EMX From the menu on the left, select MULTICAST. The MULTICAST page displays. Enable or disable the blocking of unknown multicast traffic by clicking the button in the Block Unknown Multicast Address section. When the blocking of unknown multicast traffic is enabled, the button bar displays green. -
Page 58: Set Up A Static Router Port For Igmp Snooping
Nighthawk Pro Gaming SX10 Switch Model GS810EMX Set Up a Static Router Port for IGMP Snooping If your network does not include a device that sends IGMP queries, the switch cannot discover the router port dynamically. (The router port is a port on a device in the network that performs IGMP snooping in the network.) In this situation, select one port on the switch as the dedicated static router port for IGMP snooping,... -
Page 59: Set Up A Link Aggregation Group
Nighthawk Pro Gaming SX10 Switch Model GS810EMX You set up link aggregation on the switch through a LAG in the following order: Set up the LAG on the switch (see Set Up a Link Aggregation Group on page 59). Connect the ports that you intend to make members of a LAG on the switch to the ports that are members... -
Page 60: Make A Physical Link Aggregation Connection
Nighthawk Pro Gaming SX10 Switch Model GS810EMX Your settings are saved. Make a Physical Link Aggregation Connection Before you make a physical link aggregation connection to another network device (usually a router or another switch) that also supports link aggregation, you must first set up a link aggregation group (LAG) on... -
Page 61: Change The Ip Address Of The Switch
Nighthawk Pro Gaming SX10 Switch Model GS810EMX When the LAG is enabled, the button bar displays green. Click the APPLY button. Your settings are saved. Change the IP Address of the Switch By default, the switch receives an IP address from a DHCP server (or a router that functions as a DHCP server) in your network. -
Page 62: Reenable The Dhcp Client Of The Switch
Nighthawk Pro Gaming SX10 Switch Model GS810EMX Reenable the DHCP Client of the Switch If you disabled the DHCP client of the switch and changed the IP address of the switch to a fixed (static) IP address, you can reverse the situation. -
Page 63: Chapter 6 Maintain And Monitor The Switch
Maintain and Monitor the Switch This chapter describes how you can maintain and monitor the switch. The chapter contains the following sections: • Manually Check for New Switch Firmware and Update the Switch • Manage the Configuration File • Return the Switch to Its Factory Default Settings •... -
Page 64: Manually Check For New Switch Firmware And Update The Switch
Nighthawk Pro Gaming SX10 Switch Model GS810EMX Manually Check for New Switch Firmware and Update the Switch You can manually check for the latest firmware version through the local browser interface of the switch, download the firmware, and upload the firmware to the switch. If firmware release notes are available with new firmware, read the release notes to find out if you must reconfigure the switch after updating. -
Page 65: Manage The Configuration File
Nighthawk Pro Gaming SX10 Switch Model GS810EMX Manage the Configuration File The configuration settings of the switch are stored within the switch in a configuration file. You can back up (save) this file to your computer or restore it from your computer to the switch. -
Page 66: Return The Switch To Its Factory Default Settings
Nighthawk Pro Gaming SX10 Switch Model GS810EMX The HOME page displays. From the menu at the top of the page, select SETTINGS. The PRESET MODES page displays. From the menu on the left, select CONFIGURATION FILE. The RESTORE FULL CONFIGURATIONS page displays. -
Page 67: Use The Local Browser Interface To Reset The Switch
Nighthawk Pro Gaming SX10 Switch Model GS810EMX To reset the switch to factory default settings: On the bottom of the switch, locate the recessed RESET button. Using a straightened paper clip, press and hold the RESET button for more than 10 seconds or until the Power LED turns off. -
Page 68: Manage The Power Saving Mode
The default password is password. The password is case-sensitive. The HOME page displays. From the menu at the top of the page, to the right of NETGEAR, click the three-dot icon and select Power Saving. The POWER SAVING page displays. -
Page 69: Manage The Leds
Nighthawk Pro Gaming SX10 Switch Model GS810EMX Manage the LEDs You can customize your visual environment by managing the color and activity of the Power LED and many settings for the port LEDs (also referred to as Activity LEDs). The LED settings do not affect the way in which traffic is switched. -
Page 70: Manage Port Leds In A Batch
Nighthawk Pro Gaming SX10 Switch Model GS810EMX Click the number for the port LED that you want to manage. The LED settings for the port display. Specify the following settings: • Activity. By default, the port LED lights when you connect a powered-on device to the port. To disable the port LED, click the ACTIVITY LED button. -
Page 71: Reset The Port Leds To Default Settings
Nighthawk Pro Gaming SX10 Switch Model GS810EMX Enter the switch password. The default password is password. The password is case-sensitive. The HOME page displays. In the SYSTEM INFO pane, select LED. By default, the PORT ACTIVITY LEDS tab is selected and the ACTIVITY LEDs page displays. -
Page 72: Manage The Power Led
Nighthawk Pro Gaming SX10 Switch Model GS810EMX The HOME page displays. In the SYSTEM INFO pane, select LED. By default, the PORT ACTIVITY LEDS tab is selected and the ACTIVITY LEDs page displays. At the bottom of the page, click the RESET TO DEFAULT link. -
Page 73: View System Information
Nighthawk Pro Gaming SX10 Switch Model GS810EMX View System Information You can view basic information about the switch, such as the firmware version, switch name, MAC address, serial number, and model number. To view basic information about the switch: Open a web browser from a computer that is connected to the same network as the switch or to the switch directly through an Ethernet cable. -
Page 74: View Switch Connections
Nighthawk Pro Gaming SX10 Switch Model GS810EMX View Switch Connections You can see the number of connections that are established on the switch. To see the number of connections on the switch: Open a web browser from a computer that is connected to the same network as the switch or to the switch directly through an Ethernet cable. -
Page 75: Chapter 7 Diagnostics And Troubleshooting
Diagnostics and Troubleshooting This chapter provides information to help you diagnose and solve problems that you might experience with the switch. If you do not find the solution here, check the NETGEAR support site at netgear.com/support for product and contact information. -
Page 76: Test A Cable Connection
Nighthawk Pro Gaming SX10 Switch Model GS810EMX Test a Cable Connection You can use the cable diagnostic feature to easily find out the health status of network cables. If any problems exist, this feature helps to quickly locate the point where the cabling fails, allowing connectivity issues to be fixed much faster, potentially saving technicians hours of troubleshooting. -
Page 77: Enable Port Mirroring
Nighthawk Pro Gaming SX10 Switch Model GS810EMX The login page displays. Enter the switch password. The default password is password. The password is case-sensitive. The HOME page displays. From the menu at the top of the page, select DIAGNOSTICS. The CABLE TEST page displays. -
Page 78: View The Port Statistics
Nighthawk Pro Gaming SX10 Switch Model GS810EMX When port mirroring is enabled, the button bar displays green. By default, port mirroring is disabled and the button bar displays white. After you enable port mirroring, you must specify the ports. In the upper port section, select one or more source ports by clicking the port icons. -
Page 79: Reboot The Switch From The Local Browser Interface
Enter the switch password. The default password is password. The password is case-sensitive. The HOME page displays. From the menu at the top of the page, to the right of NETGEAR, click the three-dot icon and select Reboot Switch. A pop-up window opens. -
Page 80: Hardware Troubleshooting Chart
Nighthawk Pro Gaming SX10 Switch Model GS810EMX Hardware Troubleshooting Chart The following table lists symptoms, possible causes, and possible solutions for hardware problems that might occur. Table 3. Troubleshooting chart Symptom Possible Cause Possible Solution Power LED is off. Power is not supplied to the switch or Check the power cable connections at the the Power LED is disabled. -
Page 81: Appendix A Factory Default Settings And Technical Specifications
Factory Default Settings and Technical Specifications This appendix includes the following sections: • Factory Default Settings • Basic Technical Specifications... -
Page 82: Factory Default Settings
Nighthawk Pro Gaming SX10 Switch Model GS810EMX Factory Default Settings You can return the switch to its factory default settings. Use the end of a paper clip or some other similar object to press and hold the RESET button on the bottom panel of the switch for more than five seconds. -
Page 83: Basic Technical Specifications
Jumbo frames Enabled (nonconfigurable) Basic Technical Specifications The following table shows the basic technical specifications of the switch. For more specifications, see the data sheet that you can download by visiting downloadcenter.netgear.com. Table 5. Basic technical specifications Feature Description Network interfaces Two RJ-45 ports (ports 1 and 2) supporting 100BASE-TX, 1000BASE-T, 2.5GBASE-T, 5GBASE-T, or 10GBASE-T... - Page 84 Nighthawk Pro Gaming SX10 Switch Model GS810EMX Table 5. Basic technical specifications (Continued) Feature Description Power consumption From 5.54W to 14.19W Dimensions (W x D x H) 10.55 x 8.0 x 3.66 in. (268 x 203 x 93 mm) Weight 3.34 lb (1.515 kg)
- Page 85 Nighthawk Pro Gaming SX10 Switch Model GS810EMX Table 5. Basic technical specifications (Continued) Feature Description Electromagnetic certifications 47 CFR FCC Part 15, Subpart B, Class B ICES-003:2016 Issue 6, Class B ANSI C63.4:2014 EN 55032:2012 + AC:2013 / CISPR 32:2012...