
Related Manuals for Cambium Networks cnPilot R190W


Summary of Contents for Cambium Networks cnPilot R190W
- Page 1 The cnPilot R190W User’s Guide V1.0 The page 1 of 56 Revision time: 2016-07-07...
- Page 2 The page 2 of 56 Revision time: 2016-07-07...
-
Page 3: Table Of Contents
Table of Contents 1 Preface ............................................................. 5 2 LED Indicators and Connectors ....................................................... 6 2.1 LED Indicators ......................................................... 6 2.2 Hardware Installation ....................................................... 8 3 Voice Prompt ........................................................... 9 4 Configuring Basic Settings ......................................................12 4.1 Two-Level Management ....................................................12 4.2 ... - Page 4 5.4.2 Security ........................................................33 5.4.3 WMM........................................................33 5.4.4 WPS ........................................................33 5.4.5 Station list ......................................................34 5.4.6 Advanced ....................................................... 35 5.5 SIP Account ........................................................36 5.5.1 SIP Settings ......................................................36 5.5.2 FXS ........................................................37 5.5.3 VOIP QoS Setting ....................................................38 5.6 ...
-
Page 5: Preface
1 Preface The page 5 of 56 Revision time: 2016-07-07... -
Page 6: Led Indicators And Connectors
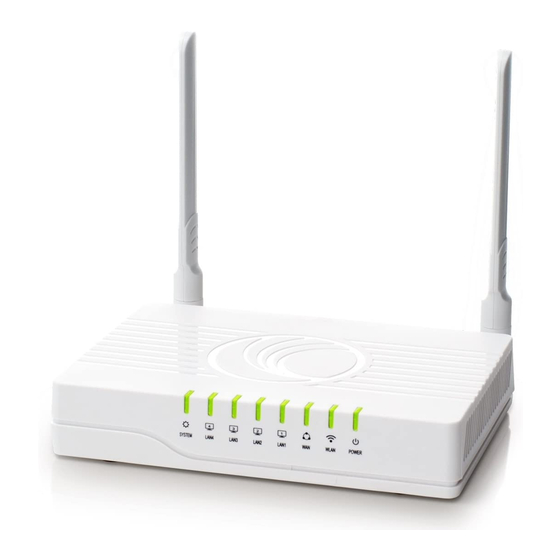
2 LED Indicators and Connectors 2.1 LED Indicators The page 6 of 56 Revision time: 2016-07-07... - Page 7 Front Panel Status Explanation Rear Panel Interface Description The page 7 of 56 Revision time: 2016-07-07...
-
Page 8: Hardware Installation
2.2 Hardware Installation The page 8 of 56 Revision time: 2016-07-07... -
Page 9: Voice Prompt
Step 1.Pick up phone and press “****” to start IVR Step 2.Choose “1”, and cnPilot R190W report the current WAN port connection type Step 3.Prompt "Please enter password”, user need to input password with end char # if user want to configuration WAN port connection type. - Page 10 If you want to quit by the wayside, press “*”. Step 4.Prompt “operation successful” if password is right and then cnPilot R190W will be factory setting. Step 5.Press “7” reboot to make changes effective. Step 1.Pick up phone and press “****” to start IVR Step 2.Choose “7”, and cnPilot R190W report “Reboot”...
- Page 11 To input: D, E, F, d, e, f -- press ‘3’ To input: G, H, I, g, h, i -- press ‘4’ To input: J, K, L, j, k, l -- press ‘5’ ...
-
Page 12: Configuring Basic Settings
4 Configuring Basic Settings 4.1 Two-Level Management “ ” “ ” “ “ ” ” 4.2 Accessing Web Page 4.2.1 From LAN port ’ ’ Notice: You may either simply set up your computer to get IP dynamically from the router or set up the IP address of the computer to be the same subnet as the default IP address of router is 192.168.1.1. -
Page 13: From Wan Port
4.2.2 From WAN port ’ ’ “ ” “ ” “ “ ” ” Notice: If you fail to access to the web configuration, please go to “Trouble Shooting” for detecting and solving your problem. The page 13 of 56 Revision time: 2016-07-07... -
Page 14: Webpage
4.3 Webpage The page 14 of 56 Revision time: 2016-07-07... -
Page 15: Setting Up The Time Zone
4.4 Setting up the Time Zone 4.5 Setting up the Internet Connection The page 15 of 56 Revision time: 2016-07-07... -
Page 16: Static Ip
4.5.1 Static IP IP Address Type the IP address Subnet Mask Type the subnet mask Gateway IP Type the gateway IP address Address Primary DNS Type in the primary IP address for the Server route Type in secondary IP address for Secondary DNS Server necessity in the future... -
Page 17: Dhcp
4.5.2 DHCP Set the DNS Mode from Auto and Manual, If user choose manual, you should fill the DNS Mode primary DNS address and Secondary DNS address into Primary DNS Address and Secondary DNS Address. Primary DNS Type in the primary IP address for the route Server Secondary DNS Type in secondary IP address for necessity in the... -
Page 18: Setting Up The Wireless Connection
4.6 Setting up the Wireless Connection 4.6.1 Encryption Choose one SSID from Off-premises 1, off-premises SSID Choice 2 and Premises. Select an appropriate encryption mode to improve the security and privacy of your wireless data Security Mode packets. Each encryption mode will bring out different web page and ask you to offer additional configuration. -
Page 19: Configuration Sip From Webpage
4.7.3 Configuration SIP from Webpage 4.7.4 View the Register Status The page 19 of 56 Revision time: 2016-07-07... -
Page 20: Make Call
4.8 Make Call 4.8.1 Calling phone or extension numbers 4.8.2 Direct IP calls “ ” “ ” 4.8.3 Call Hold “ ” “ ” “ “ ” ” 4.8.4 Blind Transfer “ “ ” ” ’ ’ 4.8.5 Attended Transfer “... -
Page 21: Conference
’ ’ 4.8.6 Conference “ ” ’ “ ” ’ “ ” “ ” The page 21 of 56 Revision time: 2016-07-07... -
Page 22: Web Configuration
5 Web Configuration 5.1 Login “ ” “ ” The page 22 of 56 Revision time: 2016-07-07... - Page 23 The page 23 of 56 Revision time: 2016-07-07...
-
Page 24: Status
5.2 Status ’ ’ 5.3 Network&Security The page 24 of 56 Revision time: 2016-07-07... -
Page 25: Wan
5.3.1 WAN IP Address Type the IP address Subnet Mask Type the subnet mask Gateway IP Type the gateway IP address Address Primary DNS Type in the primary IP address for the route Server Secondary DNS Type in secondary IP address for necessity in the Server future The page 25 of 56... - Page 26 Set the DNS Mode from Auto and Manual, If user choose manual, you should fill the DNS Mode primary DNS address and Secondary DNS address into Primary DNS Address and Secondary DNS Address. Type in the primary IP address for the Primary DNS Server route Type in secondary IP address for...
-
Page 27: Lan
PPPoE Account Assign a specific valid user name provided by the ISP PPPoE Password Assign a valid password provided by the ISP PPPoE Auto-Dial If or not enable PPPoE Password. Set the DNS Mode from Auto and Manual, If user choose manual, you should fill the primary DNS DNS Mode address and Secondary DNS address into Primary DNS Address and Secondary DNS Address. - Page 28 Type in local IP address for connecting to a local private Local IP Address network (Default: 192.168.1.1) Type in an address code that determines the size of the Local Subnet Mask network. (Default: 255.255.255.0/ 24) If or not enable DHCP server. Local DHCP Server If or not enable DHCP server.
-
Page 29: Dmz/Port Forward
You must specify a DNS server IP address here because your ISP should provide you with usually more than one DNS Primary DNS Server. If your ISP does not provide it, the router will automatically apply default DNS Server IP address: 202.96.134.33 to this field. -
Page 30: Mac Clone
5.3.4 MAC Clone ’ ’ The page 30 of 56 Revision time: 2016-07-07... -
Page 31: Multi Wan
5.3.5 Multi WAN Note: Muti-wan only used in WAN connection mode The page 31 of 56 Revision time: 2016-07-07... -
Page 32: Wireless
5.4 Wireless 5.4.1 Basic Select Radio On to enable the wireless, select Radio Off Radio On/Off to disable wireless. Choose one network mode from the five types. Network Mode The name of the wireless name, it can be any text SSID numbers or various special characters. -
Page 33: Security
5.4.2 Security Choose one SSID from SSID, Multiple SSID1, SSID Choice Multiple SSID2 and Multiple SSID3. Select an appropriate encryption mode to improve the security and privacy of your wireless data packets. Security Mode Each encryption mode will bring out different web page and ask you to offer additional configuration. -
Page 34: Station List
If or not enable WPS. Press the button to apply. 5.4.5 Station list The page 34 of 56 Revision time: 2016-07-07... -
Page 35: Advanced
5.4.6 Advanced The page 35 of 56 Revision time: 2016-07-07... -
Page 36: Sip Account
5.5 SIP Account 5.5.1 SIP Settings The page 36 of 56 Revision time: 2016-07-07... -
Page 37: Fxs
5.5.2 FXS The page 37 of 56 Revision time: 2016-07-07... -
Page 38: Voip Qos Setting
5.5.3 VOIP QoS Setting The page 38 of 56 Revision time: 2016-07-07... -
Page 39: Phone
5.6 Phone 5.6.1 Preferences The page 39 of 56 Revision time: 2016-07-07... -
Page 40: Dial Plan
5.6.2 Dial Plan The page 40 of 56 Revision time: 2016-07-07... -
Page 41: Phonebook
5.6.3 Phonebook The page 41 of 56 Revision time: 2016-07-07... -
Page 42: Call Log
5.6.4 Call Log The page 42 of 56 Revision time: 2016-07-07... -
Page 43: Security
5.7 Security 5.7.1 Filtering Setting The page 43 of 56 Revision time: 2016-07-07... -
Page 44: Dmz
5.7.2 DMZ 5.7.3 MAC Clone The page 44 of 56 Revision time: 2016-07-07... -
Page 45: Port Forward
5.7.4 Port Forward The page 45 of 56 Revision time: 2016-07-07... -
Page 46: Content Filtering
5.7.5 Content Filtering The page 46 of 56 Revision time: 2016-07-07... -
Page 47: Administration
5.8 Administration 5.8.1 Mnagement The page 47 of 56 Revision time: 2016-07-07... -
Page 48: Firmware Upgrade
5.8.2 Firmware Upgrade 1) Choose upgrade file type from Image File and Dial Rule 2) Press to browser file. 3) Press to start upgrading. 5.8.3 Provision Please refer to the provision user manual to test provision. The page 48 of 56 Revision time: 2016-07-07... - Page 49 The page 49 of 56 Revision time: 2016-07-07...
-
Page 50: Snmp
5.8.4 SNMP The page 50 of 56 Revision time: 2016-07-07... -
Page 51: Tr069
5.8.5 TR069 5.9 System Log The page 51 of 56 Revision time: 2016-07-07... -
Page 52: Logout
5.10 Logout 5.11 Reboot The page 52 of 56 Revision time: 2016-07-07... -
Page 53: Trouble Shooting Of The Guide
6 Trouble shooting of the guide Setting your PC gets IP automatically “ “ ” ” “ ” “ ” “ ” “ ” “ ” “ ” “ ” “ ” “ ” “ ” “ ” “ ” “... -
Page 54: Can Not Connect To The Configuration Website
6.1 Can not connect to the configuration Website 6.2 Forget the Password The page 54 of 56 Revision time: 2016-07-07... -
Page 55: Statement
7 Statement FCC Radiation Exposure Statement This equipment has been tested and found to comply with the limits for a Class B digital device, pursuant to part 15 of the FCC rules. These limits are designed to provide reasonable protection against harmful interference in a residential installation. This equipment generates, uses and can radiate radio frequency energy and, if not installed and used in accordance with the instructions, many cause harmful interference to radio communications. - Page 56 and your body. This equipment complies with Part 15 of the FCC Rules. Operation is subject to the following two conditions: (1) This device may not cause harmful interference, and (2) This device must accept any interference received, including interference that may cause undesired operation.