Cisco SNS 3515 Manual
Installation of ise software
Hide thumbs
Also See for SNS 3515:
- Hardware installation manual (41 pages) ,
- Troubleshooting manual (8 pages)
Table of Contents
Advertisement
Quick Links
Install Cisco ISE Software on the SNS 3515 and
SNS 3595 Appliances
•
•
•
•
Cisco SNS 3500 Series Appliance Overview
Cisco SNS 3500 Series Appliances
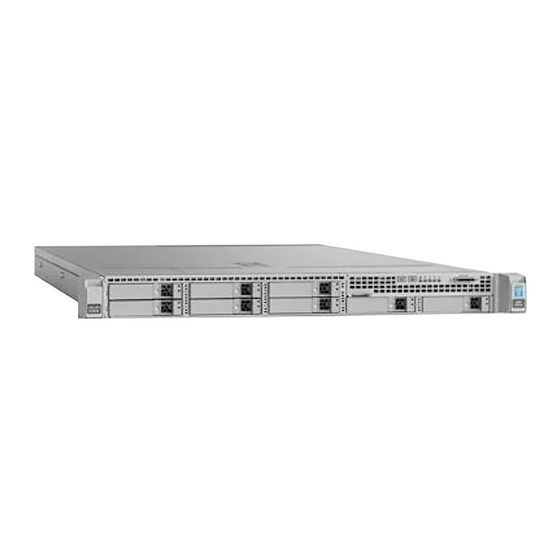
The Cisco SNS 3515 or Cisco SNS 3595 appliance is designed for performance and density over a wide range
of business workloads, from web serving to distributed databases.
Cisco ISE, Release 2.0.1 is available on SNS 3515 and SNS 3595 platforms.
Note
The SNS 3515 and SNS 3595 appliances support only Cisco ISE 2.0.1 or later releases. You cannot install
a release earlier than 2.0.1 on the SNS 3515 or SNS 3595 appliance.
Support for UEFI Secure Boot
The SNS 3515 and SNS 3595 appliances support the Unified Extensible Firmware Interface (UEFI) secure
boot feature. This feature ensures that only a Cisco-signed ISE image can be installed on the SNS 3515 and
SNS 3595 appliances, and prevents installation of any unsigned operating system even with physical access
to the device. For example, generic operating systems, such as Red Hat Enterprise Linux or Microsoft Windows
cannot boot on this appliance.
Cisco SNS 3500 Series Appliance Overview, page 1
Before You Begin, page 10
Install the Cisco SNS 3515 and Cisco SNS 3595 Hardware Appliances, page 15
Install Cisco ISE Software on the SNS 3515 and SNS 3595 Appliances, page 30
Cisco Identity Services Engine Hardware Installation Guide, Release 2.0.1
1
Advertisement
Table of Contents

Related Manuals for Cisco SNS 3515


Summary of Contents for Cisco SNS 3515
- Page 1 Cisco SNS 3500 Series Appliance Overview Cisco SNS 3500 Series Appliances The Cisco SNS 3515 or Cisco SNS 3595 appliance is designed for performance and density over a wide range of business workloads, from web serving to distributed databases. Cisco ISE, Release 2.0.1 is available on SNS 3515 and SNS 3595 platforms.
- Page 2 Install Cisco ISE Software on the SNS 3515 and SNS 3595 Appliances Cisco SNS 3500 Series Appliances LED Indicators on Cisco SNS 3515 and 3595 Appliances This section describes the front- and rear-panel controls, ports, and LED indicators on the Cisco SNS 3515 and Cisco SNS 3595 appliances. •...
- Page 3 USB 2.0, one VGA, and one serial connector) System status LED The following table describes the LEDs located on the front panel of the Cisco SNS-3515 or Cisco SNS-3595 appliance. Cisco Identity Services Engine Hardware Installation Guide, Release 2.0.1...
- Page 4 Install Cisco ISE Software on the SNS 3515 and SNS 3595 Appliances Cisco SNS 3500 Series Appliances Front Panel LEDs Hard drive fault • Off—The hard drive is operating properly. • Amber—Drive fault detected. • Amber, blinking—The device is rebuilding.
- Page 5 Install Cisco ISE Software on the SNS 3515 and SNS 3595 Appliances Cisco SNS 3500 Series Appliances Front Panel LEDs System status • Green—The server is running in normal operating condition. • Green, blinking—The server is performing system initialization and memory check.
- Page 6 • Green, blinking—One or more Ethernet LOM ports are link-active, with activity. Cisco SNS 3515 or SNS 3595 Appliance Back Panel View The following figure shows the components of the Cisco SNS-3515 and Cisco 3595 appliance back panel view. Figure 2: Back Panel LEDs...
- Page 7 Install Cisco ISE Software on the SNS 3515 and SNS 3595 Appliances Cisco SNS 3500 Series Appliances 1-GbE Ethernet dedicated management port The following table describes the LEDs located on the back panel of the Cisco SNS 3515 or Cisco SNS 3595 appliance. LED Name State Optional mLOM 1-GbE SFP+ (there is a single status •...
-
Page 8: Internal Diagnostic Leds
Install Cisco ISE Software on the SNS 3515 and SNS 3595 Appliances Cisco SNS 3500 Series Appliances LED Name State 1-GbE Ethernet link status • Off—No link is present. • Green—Link is active. • Green, blinking—Traffic is present on the active link. - Page 9 Install Cisco ISE Software on the SNS 3515 and SNS 3595 Appliances Cisco SNS 3500 Series Appliances The following figure shows the locations of these internal LEDs in Cisco SNS-3515 or Cisco SNS-3595 appliance. Figure 3: Cisco SNS-3515 or 3595 Internal Diagnostic LED Locations The following table describes the callouts in the above figure.
-
Page 10: Regulatory Compliance
Regulatory Compliance and Safety Information for Cisco SNS-3415 and Cisco SNS-3495 Appliances. Before You Begin This section provides information on how you can prepare your site for safely installing the Cisco SNS-3515 or Cisco SNS-3595 appliance. Safety Guidelines Note Before you install, operate, or service a Cisco SNS-3515 or Cisco SNS-3595 appliance, review the Regulatory Compliance and Safety Information for Cisco SNS-3515 and Cisco SNS-3595 Appliances important safety information. -
Page 11: Unpack And Inspect The Server
15. If available, you can use an uninterruptible power supply (UPS) to protect against power failures. Caution Avoid UPS types that use ferroresonant technology. These UPS types can become unstable with systems such as the Cisco UCS, which can have substantial current draw fluctuations from fluctuating data traffic patterns. Unpack and Inspect the Server... -
Page 12: Prepare For Server Installation
Install Cisco ISE Software on the SNS 3515 and SNS 3595 Appliances Prepare for Server Installation • Effect of damage on the installation Figure 4: Shipping Box Contents Prepare for Server Installation • Installation Guidelines, on page 12 • Rack Requirements, on page 13 •... -
Page 13: Server Specifications
• The minimum vertical rack space per server must be one RU, equal to 1.75 in. (44.45 mm). Equipment Requirements The slide rails supplied by Cisco Systems for this server do not require tools for installation. The inner rails (mounting brackets) are pre-attached to the sides of the server. -
Page 14: Physical Specifications
Install Cisco ISE Software on the SNS 3515 and SNS 3595 Appliances Server Specifications Physical Specifications The following table lists the physical specifications of the server. Description Specification Height 1.7 in. (4.3 cm) Width 16.9 in. (42.9 cm) Depth 29.8 in. (75.8 cm) Weight (fully loaded chassis) SNS 3515: 37.9 lb. -
Page 15: Power Specifications
Standby power: 12 VDC Install the Cisco SNS 3515 and Cisco SNS 3595 Hardware Appliances This section describes how to install your Cisco SNS 3515 or 3595 appliance and connect it to the network. It contains: • Install the Cisco SNS 3515 or 3595 Appliance in a Rack, on page 16 •... -
Page 16: Install The Side Rails
Statement 1017 Install the Cisco SNS 3515 or 3595 Appliance in a Rack This section describes how to install the Cisco SNS 3515 or Cisco SNS 3595 appliance in a rack. Install the Side Rails Warning: To prevent bodily injury when mounting or servicing this unit in a rack, you must take special precautions to ensure that the system remains stable. - Page 17 Install Cisco ISE Software on the SNS 3515 and SNS 3595 Appliances Install the Cisco SNS 3515 or 3595 Appliance in a Rack On the outside of the assembly, push the green arrow button toward the rear to open the securing plate.
- Page 18 Install Cisco ISE Software on the SNS 3515 and SNS 3595 Appliances Install the Cisco SNS 3515 or 3595 Appliance in a Rack Caution This server can weigh up to 67 pounds (59 kilograms) when fully loaded with components. We recommend that you use a minimum of two people or a mechanical lift when lifting the server.
-
Page 19: Install The Cable Management Arm (Optional)
Install Cisco ISE Software on the SNS 3515 and SNS 3595 Appliances Install the Cisco SNS 3515 or 3595 Appliance in a Rack What to Do Next Install the Cable Management Arm (Optional) The CMA is reversible left to right. To reverse the CMA, see Reversing the Cable Management Arm Note (Optional) before installation. - Page 20 Install Cisco ISE Software on the SNS 3515 and SNS 3595 Appliances Install the Cisco SNS 3515 or 3595 Appliance in a Rack CMA tab on arm farthest from server and end of CMA tab on width-adjustment slider and end of...
-
Page 21: Reverse The Cable Management Arm (Optional)
CMA tab on end of width-adjustment slider Metal button for rotating Connect Cables This section describes how to connect your Cisco SNS-3515 or Cisco SNS-3595 appliance to the network and the appliance console. • Connect the Network Interface, on page 22 •... -
Page 22: Connect The Network Interface
Connect the other end to a switch in your network. Ethernet Port Connector The Cisco SNS 3515 or Cisco SNS-3595 appliance comes with six integrated dual-port Ethernet controllers. The controllers provide an interface for connecting to 10-Mb/s, 100-Mb/s, or 1000-Mb/s networks and provide full-duplex (FDX) capability, which enables simultaneous transmission and reception of data on the Ethernet LAN. -
Page 23: Connect The Console
Warning: Do not work on the system or connect or disconnect cables during periods of lightning activity. Statement 1001 Your Cisco SNS-3515 or Cisco SNS-3595 appliance has a DCE-mode console port for connecting a console terminal to your appliance. The appliance uses a DB-9 serial connector for the console port. -
Page 24: Connect The Keyboard And Video Monitor
The Cisco SNS-3515 or Cisco SNS-3595 appliance does not provide support for a mouse. The Cisco SNS-3515 or Cisco SNS-3595 provides USB ports on the rear of the appliance that can be used to connect a keyboard and video monitor. -
Page 25: Connect And Power On The Server (Standalone Mode)
• Local setup—Use this procedure if you want to connect a keyboard and monitor to the system for setup. This procedure can use a KVM cable (Cisco PID N20-BKVM) or the ports on the rear of the server. Local Connection Procedure, on page •... - Page 26 MAC address is printed on a label on the rear of the server node. This server node has a range of six MAC addresses assigned to the Cisco IMC. The MAC address printed on the label is the beginning of the range of six contiguous MAC addresses.
-
Page 27: Cisco Integrated Management Controller
Allow your preconfigured DHCP server to assign an IP address to the server node. Step 4 Use the assigned IP address to access and log in to the Cisco IMC for the server node. Consult with your DHCP server administrator to determine the IP address. - Page 28 See also the required VIC Slot setting below. • VIC Slot—If you use the Cisco Card NIC mode, you must select this setting to match where your VIC is installed. The choices are Riser1, Riser2, or Flex-LOM (the mLOM slot).
- Page 29 Use a browser and the IP address of the Cisco IMC to connect to the Cisco IMC management interface. The IP address is based upon the settings that you made (either a static address or the address assigned by your DHCP server).
- Page 30 Install Cisco ISE Software on the SNS 3515 and SNS 3595 Appliances See also the required VIC Slot setting below. • VIC Slot—If you use the Cisco Card NIC mode, you select this setting to match where your VIC is installed. The choices are Riser1, Riser2, or Flex-LOM (the mLOM slot).
- Page 31 Cisco ISE services when the installation and initial configuration is complete. Install the ISE Server After you download the Cisco ISE ISO image, you can use any of the following options to install and set up the Cisco ISE software on your appliance: •...
- Page 32 Install ISE 2.0.1 on the Cisco SNS 3515 or 3595 Appliance Remotely Using CIMC After you have configured the CIMC for your appliance, you can use it to manage your Cisco SNS-3515 or Cisco SNS-3595 appliance. You can perform all operations including BIOS configuration on your Cisco SNS-3515 or Cisco SNS-3595 appliance through the CIMC.
- Page 33 Step 10 At the boot prompt, press Enter to install Cisco ISE using a serial console. If you want to use a keyboard and monitor, use the arrow key to select the Cisco ISE Installation (Keyboard/Monitor) option. The following message appears.
- Page 34 Continue with Verify the Installation Process, on page Create a Bootable USB Device to Install Cisco ISE Use the Fedora LiveUSB Creator tool to create a bootable USB device from the Cisco ISE installation ISO file. Before You Begin • Download Fedora LiveUSB Creator for Windows or Linux to the local system from the following location: https://fedorahosted.org/liveusb-creator/.
-
Page 35: Run The Setup Program
Step 9 Safely remove the USB device from the local system. Step 10 Plug in the bootable USB device to the Cisco ISE appliance, restart the appliance, and boot from the USB drive to install Cisco ISE. Run the Setup Program This section describes the setup process to configure the ISE server. - Page 36 Install Cisco ISE Software on the SNS 3515 and SNS 3595 Appliances Install the ISE Server The console displays a set of parameters. You must enter the parameters as described in the following table Table 1: Cisco ISE Setup Program Parameters...
- Page 37 (A–Z), and one numeral (0–9). After the setup program is run, the system reboots automatically. Now, you can log in to Cisco ISE using the username and password that was configured during the setup process. Verify the Installation Process...
- Page 38 Identity Mapping Service disabled Reset the Administrator Password If you are not able to log in to the system due to the loss of the administrator password, you can use the Cisco ISE software DVD to reset the administrator password. Note You can also use the bootable USB drive and CIMC to reset the administrator password.
- Page 39 Install Cisco ISE Software on the SNS 3515 and SNS 3595 Appliances Reset the Administrator Password For example, the Cisco ISE console displays the following message: Cisco ISE Installation (Serial Console) Cisco ISE Installation (Keyboard/Monitor) System Utilities (Serial Console) System Utilities (Keyboard/Monitor)
- Page 40 For example, generic operating systems, such as Red Hat Enterprise Linux or Microsoft Windows cannot boot on this appliance. The SNS 3515 and SNS 3595 appliances support only Cisco ISE 2.0.1 or later releases. You cannot install a release earlier than 2.0.1 on the SNS 3515 or SNS 3595 appliance.