Table of Contents
Advertisement
Advertisement
Table of Contents

Related Manuals for NEC AP400


Summary of Contents for NEC AP400
- Page 1 AP400 - All Types Installation Manual Issue: December 2011...
- Page 2 AP400 – All Types Installation Manual Page 1 of 34 © NEC Nederland B.V. 2011...
- Page 3 THE NETHERLANDS NEC Nederland B.V., 2011 All rights are reserved. Reproduction in whole or in part is prohibited without written consent of the copyright owner. AP400 – All Types Installation Manual © NEC Nederland B.V. 2011 Page 2 of 34...
- Page 4 Regulatory information European Union Declaration of Conformity Hereby, “NEC Unified Solutions”, declares that this “AP400” is in compliance with the essential requirements and other relevant provisions of Directive 1999/5/EC. http://www.nec-unified.com/doc PRODUCT DISPOSAL INFORMATION (EN) For countries in the European Union...
- Page 5 This device with internal antennas must provide a separation distance of at least 20 cm from all persons and must not be co-located or operating in conjunction with any other antenna or transmitter. AP400 – All Types Installation Manual © NEC Nederland B.V. 2011 Page 4 of 34...
- Page 6 Consult the dealer or an experienced radio/TV technician for help.” Privacy of communications may not be ensured when using this equipment. Note: Please note that the AP400E is not available in USA/Canada. AP400 – All Types Installation Manual Page 5 of 34 © NEC Nederland B.V. 2011...
- Page 7 This device with internal antennas must provide a separation distance of at least 20 cm from all persons. This device and its antenna must not be co-located or operating in conjunction with any other antenna or transmitter. AP400 – All Types Installation Manual © NEC Nederland B.V. 2011 Page 6 of 34...
- Page 8 Cet appareil numérique de la classe B est conforme à la norme NMB-003 du Canada. Note: Please note that the AP400E is not available in USA/Canada. AP400 – All Types Installation Manual Page 7 of 34 © NEC Nederland B.V. 2011...
- Page 9 AP400 – All Types Installation Manual © NEC Nederland B.V. 2011 Page 8 of 34...
-
Page 10: Table Of Contents
1.11 INSTALLATION PROCEDURES ............... 16 1.12 UNPACKING ..................... 17 ADJUSTING THE ANTENNA POSITION ..............18 MOUNTING THE G.729 DAUGHTERBOARD ............23 MOUNTING THE AP400 AGAINST A WALL/CEILING ..........26 LEDs .......................... 30 LED Status ......................30 LED Colours ...................... 31 SPECIFICATIONS ...................... - Page 11 PREFACE This manual is applicable for the AP400, DECT Transceiver. Please note that some product models or features described in this manual may not be available in all world regions.” No legal rights can be obtained from information in this manual.
- Page 12 AP400 – All Types Installation Manual Page 11 of 34 © NEC Nederland B.V. 2011...
-
Page 13: Ap400 General
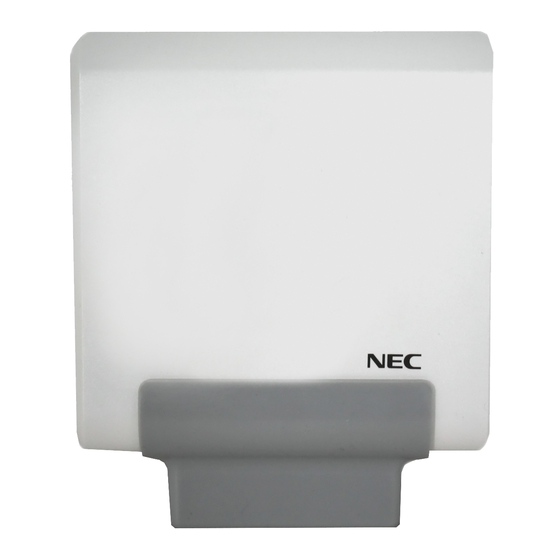
AP400 GENERAL GENERAL This installation Manual is valid for installing a DECT transceiver (AP400) to a wall in horizontal or vertical position. The AP400 is designed for indoor use. When installing an AP400 outdoors, please use the dedicated Outdoor Cabinet and appropriate outdoor... -
Page 14: Site Requirements
The Outdoor Cabinet should not be exposed to sunlight! CABLE SPECIFICATIONS FOR AP400 Types The cabling to the AP400(E) should be “Category 5” or “Category 6” Ethernet cabling. The interface is defined as an SELV interface according EN60950-1. For this reason the safety restriction as given in the next chapter should be respected: AP400 –... -
Page 15: Cabling Safety Regulations
CABLING SAFETY REGULATIONs Please read the following notes carefully: Note: When you are going to install an AP400(E) outdoors, it should always be installed in an Outdoor Box. Note: The cabling and/or the AP400(E) may never be exposed to over-voltages (e.g. -
Page 16: Daughter Board
G.729 DAUGHTER BOARD The AP400 does support the G.729 codec, but only if the G.729 Daughter Board is installed. If the G.729 Daughter Board is not installed, the AP400 supports only G.711u law or G.711a law. Installation of the Daughter Board is described in chapter 3. -
Page 17: Installation Procedures
When the AP400 is mounted horizontally, the antenna position must be changed (see chapter 2). Figure 2. AP400 mounted horizontally 1.11 INSTALLATION PROCEDURES The installation of an Outdoor Cabinet comprises the installation of: Adjusting the Antenna position (if necessary). Mounting the G.729 Daughter Board (if applicable) Mounting the AP400 against the wall. -
Page 18: Unpacking
Check the AP400 for any damage. Continue with one of the following Chapters: When you mount the AP400 vertically, the antenna position will normally be OK, and when you do not need to install the G.729 Daughter Board, continue with Chapter 4 MOUNTING THE AP400 AGAINST A WALL. -
Page 19: Adjusting The Antenna Position
ADJUSTING THE ANTENNA POSITION This chapter is not applicable for the AP400E. Note: You only need to change the antenna position when you mount the AP400 horizontally! In all other cases you don’t need to change the antenna position. Figure 3. AP400 mounted horizontally PROCEDURE: “Adjusting the Antenna position”. - Page 20 Open the cabinet CAREFULLY! Make sure that you shift the cover of the antenna’s carefully from the antenna’s. Take the antenna cover from the AP400 cover. To put the antennas in vertical position, bend them carefully as shown in Figure 5.
- Page 21 Figure 5. Bend Antennas carefully into vertical position. After the antennas are put in the vertical position, close the AP400 cabinet again. In other words, put the AP400 cover back into position and secure the screws at the rear side of the cabinet. See Figure 6. Antennas locked into Cover.
- Page 22 Make sure that the antennas are properly locked into the locks in the AP400 cover. Figure 7. Detail of Antenna in lock. Move the antenna cover carefully over the antennas in the vertical position and make sure that the antennas do not bend. When the antenna cover is in its position, push it further into its position in the AP400 cabinet to fix it.
- Page 23 Figure 8. Cover installed. Now your AP400 is ready to be installed. AP400 – All Types Installation Manual © NEC Nederland B.V. 2011 Page 22 of 34...
-
Page 24: Mounting The G.729 Daughterboard
Note: Mind the light conductor for the LEDs. It can drop off! LED Light conductor Figure 9. Light conductor for LEDs Now you should have the AP400 PWB and the G.729 Daughter Board as separate items. Remove the protection foil from the sticky part on the G.729 Daughter Board. - Page 25 The white connector should fit well. Make sure that the sticky part sticks to the Main Board. Figure 11. Mounting the G.729 Daughter Board onto the Main board. AP400 – All Types Installation Manual © NEC Nederland B.V. 2011 Page 24 of 34...
- Page 26 Put the AP400 together in the reverse order as it was disassembled, mounting the PCB into the cabinet and assembling the cabinet. Do not forget to mount the two screws back into the rear side of the cabinet. AP400 – All Types Installation Manual Page 25 of 34 ©...
-
Page 27: Mounting The Ap400 Against Awall/Ceiling
MOUNTING THE AP400 AGAINST A WALL/CEILING PROCEDURE: “Procedure for mounting the AP400 to the wall”. Actions Remove the mounting plate from the AP400 cabinet. Push clip up, to take mounting plate off. Figure 12. How to take the mounting plate off. - Page 28 If necessary, mount the RJ45 connector to the cable using the tool for mounting an RJ45 connector plug to a Category 5 or Category 6 cable. AP400 – All Types Installation Manual Page 27 of 34 © NEC Nederland B.V. 2011...
- Page 29 Lead the cable to the AP400 cabinet and connect the RJ45 connector. Push the cable into the groove. Figure 14. Cable at rear side of the cabinet. AP400 – All Types Installation Manual © NEC Nederland B.V. 2011 Page 28 of 34...
- Page 30 Push the cabinet onto the mounting plate. Note: When pushing the AP400 on to the mounting plate, make sure that you hear/feel a distinct click. This indicates that the AP400 is firmly mounted to the mounting plate. Figure 15. AP400 mounted against the wall.
-
Page 31: Leds
LEDs LED Status The AP400 is equipped with two LEDs. Top LED – Yellow This LED represents the status of the AP400. LED Status (Top LED, Yellow) Meaning No power 0,5 seconds On - 0,5 seconds Loading software/firmware Short flash every 0,25 seconds... -
Page 32: Led Colours
Green flashing Network status display and showing network activity AP400 operational Table 2. Lower LED status on the AP400. LED Colours The colour of the top LED might be different depending on the operational mode. The following operational modes are distinguished: Normal (single band) mode In the normal single band mode, the top LED will be Yellow. -
Page 33: Aspecifications
In Outdoor Box = IP66 Relative Humidity ......... : 5 . . . 95 % PoE Specifications: Voltage at AP400 via PoE ......: 36 ..57 V. DC PoE Class ............ : Class 2 Power Consumption ........: 6 Watt maximum Note: PoE source must comply with clause 2.5 (Limited Power Source) per EN 60950-1... - Page 34 1920 – 1930 MHz (< 21 dBm) North America ..........: power) Note: Country selection is determined by the DAP Controller Type! See section 1.2 COUNTRY SELECTION. AP400 – All Types Installation Manual Page 33 of 34 © NEC Nederland B.V. 2011...