
Related Manuals for Motorola VERVE CAM


Summary of Contents for Motorola VERVE CAM
-
Page 1: User Guide
VERVE VERVE CAM+ User Guide We aim to provide you with the best user experience. Please check out the latest software and user manual update from our website: www.verve.life... -
Page 2: Here's What You Can Do
1. Here’s what you can do The MOTOROLA VerveCam Ultra Portable Lifestyle Video Camera is packed with the following features: • Video recording in 2.5K at 30 fps and 135° field of view • Share videos in real time via Youtube live stream •... -
Page 3: Box Contents
2. Box Contents VerveCam • 1 x Camera • 1 x Micro USB cable • 1 x Quick Start Guide VerveCam+ • 1 x Camera • 1 x Micro USB cable • 1 x Quick Start Guide • 1 x Waterproof Case •... -
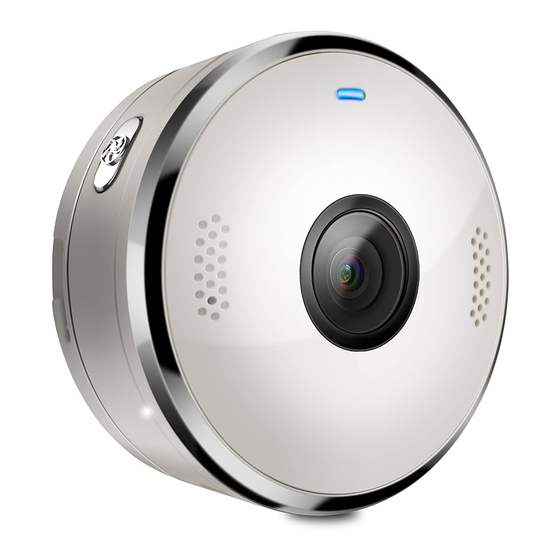
Page 4: Your Camera At A Glance
3. Your Camera at a Glance 1. LED Indicator - Blue / Red 2. Speakers 3. Camera Lens 4. Microphone 5. micro SD Card* Slot and Reset Button (micro SD Card is not included.) 6. Power / Mode Button 7. Mode Indicators - White (Photo / Video / Streaming) 8. -
Page 5: Safety Instructions
4. Safety Instructions WARNING The Camera is compliant with all relevant electromagnetic field standards and is, when handled as described in the User’s Guide, safe to use. Therefore, always read the instructions in this User’s Guide carefully before using the product. •... -
Page 6: Charge The Battery
5. Charge the Battery Connect the power adapter to an electrical outlet and insert the plug into the micro-USB socket on the underside of the Camera. Only use the power adapter (5V 1A) with the micro-USB plug. Note: If the Camera is OFF, the LED indicator lights up in red when charging and goes off when the battery is fully charged. -
Page 7: Power On & Off The Camera
6. Power On & Off the Camera To power ON the Camera, hold down the POWER 0 for 3 seconds. The LED / MODE button indicator lights up in blue. To power OFF the Camera, hold down the 0 for 3 seconds. You will POWER / MODE button hear a voice prompt indicating that the Camera is powering off before the LED indicator goes off. -
Page 8: Standby Mode
7. Standby Mode When the Camera is not connected to the power supply or not connected to Hubble Connect for VerveCam app for more than 3 minutes, it will enter standby mode. The LED indicator flashes in blue once every 3 seconds. Press any button on the Camera to exit standby mode. -
Page 9: Connecting Devices
8. Connecting Devices System Requirements: Smartphone: iOS 7 (and higher) or Android™ 4.3 (and higher) Not supported on iPad and Android tablets. ® Wi-Fi requirements: At least 2Mbps upload bandwidth per camera. Test your Internet speed at: http://www.speedtest.net/ Download & Install Hubble Connect for Verve- Cam app on your smartphone for free at the ®... -
Page 10: Insert Microsdhc Card (Not Included)
9. Insert microSDHC Card (not included) Your Camera supports microSDHC cards with storage capacities of up to 32GB. 1. Insert a microSDHC card with the gold-plated side facing the same direction as the camera lens into the card slot. 2. To remove the microSDHC card, push the card in to eject it. -
Page 11: Your Computer
10. Transfer files from the Camera to your Computer Power on the Camera and make sure that the Camera is disconnected from Hubble Connect for VerveCam App. To disconnect the Camera from the App, you can close the App or turn off the Camera and turn it on again. -
Page 12: Basic Operation Of Your Camera
11. Basic Operation of your Camera 11.1 Take a picture using the Camera Hold down the POWER / MODE button 0 for 3 seconds to power ON the Camera. The LED indicator lights up in blue. Press the POWER / MODE button 0 to switch to photo mode. - Page 13 11.2 Record video using the Camera Hold down the POWER / MODE button 0 for 3 seconds to power ON the Camera. The LED indicator lights up in blue. Press the POWER / MODE button 0 to switch to video mode. Video mode indicator lights up in white.
-
Page 14: Take Photos
12. Take Photos (via Hubble Connect for VerveCam app) Note: The App will remember the last used mode and will go to that mode automatically when connected. Photos will be stored on the Camera’s memory card. Run Hubble Connect for VerveCam app on your smartphone. - Page 15 2 Seconds 5 Seconds Timer 10 Seconds Auto Daylight Cloudy White Balance Fluorescent Underwater Shade Tungsten Take Photos (via Hubble Connect for VerveCam app) 14...
-
Page 16: Record Videos
13. Record Videos (via Hubble Connect for VerveCam app) Note: The App will remember the last used mode and will go to that mode automatically when connected. Videos will be stored on the Camera’s memory card. Run Hubble Connect for VerveCam app on your smartphone. - Page 17 Auto Daylight Cloudy White Balance Fluorescent Underwater Shade Tungsten Record Videos (via Hubble Connect for VerveCam app) 16...
- Page 18 14. Take Time Lapse Video (via Hubble Connect for VerveCam app) Note: The App will remember the last used mode and will go to that mode automatically when connected. Time lapse function allows you to take a series of photographs at a certain preset interval within a specific period of time, so that you can create a seamless video footage by assembling the photos that were taken during that period of time.
- Page 19 14.3 Record Time Lapse Video Run Hubble Connect for VerveCam app on your smartphone. In the viewfinder screen, tap to select Time Lapse mode on the bottom panel. again to start time lapse video recording. You will hear a beep sound. The blue LED indicator and the white video mode indicator flash when video recording is in progress.
-
Page 20: Loop Recording
15. Loop Recording (via Hubble Connect for VerveCam app) Note: The App will remember the last used mode and will go to that mode automatically when connected. Loop recording function allows you to record and save video files in 5, 10, 20, 30 or 60 minutes looping intervals. - Page 21 15.3 Start Loop Recording Run Hubble Connect for VerveCam app on your smartphone. In the viewfinder screen, tap to select Loop Recording mode on the bottom panel. again to start loop recording. You will hear a beep sound. The blue LED indicator and the white video mode indicator flash when loop recording is in progress.
- Page 22 16. Stream Live Videos (via Hubble Connect for VerveCam app) Note: The App will remember the last used mode and will go to that mode automatically when connected. Run Hubble Connect for VerveCam app on your smartphone. Go to the viewfinder screen and tap Livestream mode on the bottom panel.
-
Page 23: Trim Videos
17. Edit, Share, Download & Delete Photos and Videos 17.1 Edit Photo Run Hubble Connect for VerveCam app on your smartphone. Go to Camera Roll mode Select a photo. Tap the edit button Select one of the options to edit the photo: Crop the photo. - Page 24 17.3 Share Photos & Videos Run Hubble Connect for VerveCam app on your smartphone. Go to Camera Roll mode Select a photo or video. 17.4 Download Photos & Videos from Camera to smartphone Run Hubble Connect for VerveCam app on your smartphone.
-
Page 25: General Settings
18. General Settings Run Hubble Connect for VerveCam app on your smartphone. On the home screen, tap to access the following settings: • Turn Viewfinder Grid On or Off Application Settings • Check App Information Camera • Disconnect/Forget Camera Settings •... -
Page 26: Reset The Camera
19. Reset the Camera In the event that you experience a device issue or you've forgotten the password you've set, you can do a factory reset of your Camera using the Reset button (located next to the microSD card slot). To restore the camera to its factory default settings, hold down the Reset button for 3 seconds. -
Page 27: Firmware Upgrade
20. App and Firmware Upgrades 20.1 App Upgrade You can find the latest version of Hubble Connect for VerveCam app by visiting the app store (e.g.: iTunes App Store, Google Play ). From there, you can see what's new with the app and install the latest version. Occasionally, the App Server will also send you a notification that a latest version of the app is available. -
Page 28: Camera Accessories
21. Camera Accessories The following accessories are included with your VERVE CAM+. Clip Mount Bumper & Lanyard Waterproof Case Universal Mount Camera Accessories 27... -
Page 29: Optional Accessories
22. Optional Accessories To enhance your use of the Camera, we provide the following optional accessories, which can be purchased separately: Suction Mount Home Mount Stand Remote Control Bike Mount Helmet Mount Head Mount Optional Accessories 28... -
Page 30: Disposal Of The Device (Environment)
23. Disposal of the Device (Environment) At the end of the product’s life cycle, you should not dispose of this product with normal household waste. Take this product to a collection point for the recycling of electrical and electronic equipment. The symbol on the product, user's guide and/or box indicates this. -
Page 31: Technical Specifications
24. Technical Specifications ® Wi-Fi 2.4G 802.11 b/g/n Image sensor Colour 4MP sensor, OV4689 2688 x 1520, CMOS Lens f = 2.3mm, F = 2.4 3 colours Battery Built-in 640mAh Memory Card Slot Micro SD card (support up to 32GB SDHC) Internal memory 1Gb DDR3, 256Mb SPI Flash Technical Specifications 30... - Page 32 US and Canada 1-888-331-3383 E-mail: support@verve.life Consumer Products and Accessories Limited Warranty Thank you for purchasing this Motorola branded product manufactured under license by Binatone Electronics International LTD ("BINATONE"). What Does this Warranty Cover? Subject to the exclusions contained below, BINATONE warrants that this Motorola branded product ("Product")
- Page 33 WARRANTY IS THE EXCLUSIVE REMEDY OF THE CONSUMER, AND IS PROVIDED IN LIEU OF ALL OTHER WARRANTIES, EXPRESS OR IMPLIED. IN NO EVENT SHALL MOTOROLA OR BINATONE BE LIABLE, WHETHER IN CONTRACT OR TORT (INCLUDING NEGLIGENCE) FOR DAMAGES IN EXCESS OF THE...
- Page 34 (c) use of the Products or Accessories for commercial purposes or subjecting the Product or Accessory to abnormal usage or conditions; or (d) other acts which are not the fault of MOTOROLA or BINATONE, are excluded from coverage. Use of Non-Motorola branded Products and Accessories.
- Page 35 communication service or signal you may subscribe to or use with the Products or Accessories is excluded from coverage. How to Obtain Warranty Service or Other Information? To obtain service or information, please call: US and Canada 1-888-331-3383 E-mail: support@verve.life You will receive instructions on how to ship the Products or Accessories at your expense and risk, to a BINATONE Authorized Repair Center.
- Page 36 responsible for compliance could void the user’s authority to operate the equipment. NOTE: This equipment has been tested and found to comply with the limits for a Class B digital device, pursuant to Part 15 of the FCC Rules. These limits are designed to provide reasonable protection against harmful interference in a residential installation.
- Page 37 network. In general, the closer you are to a wireless base station antenna, the lower the power output. While there may be differences between the SAR levels of various devices and at various positions, they all meet the government requirement. In general, the closer you are to a wireless base station antenna, the lower the power output.
- Page 38 Manufactured, distributed, or sold by Binatone Electronics International LTD., official licensee for this product. MOTOROLA and the Stylized M Logo are trademarks or registered trademarks of Motorola Trademark Holdings, LLC. and are used under license. Apple logo is a trademark of Apple Inc., registered in the U.S.