Motorola FOCUS66-B User Manual
Wi-fi home video camera
Hide thumbs
Also See for FOCUS66-B:
- User manual (53 pages) ,
- Quick start manual (2 pages) ,
- Quick start up manual (2 pages)

Related Manuals for Motorola FOCUS66-B


Summary of Contents for Motorola FOCUS66-B
- Page 1 USER’S GUIDE ® Wi-Fi Home Video Camera Models: FOCUS66-B, FOCUS66-B2, FOCUS66-BLK2, FOCUS66-S, FOCUS66-S2, FOCUS66-W, FOCUS66-W2 The features described in this user’s guide are subject to modifications without prior notice.
- Page 2 Android™ devices. Please keep your original dated sales receipt for your records. For warranty service of your Motorola product, you will need to provide a copy of your dated sales receipt to confirm warranty status. Registration is not required for warranty coverage.
-
Page 3: Product View
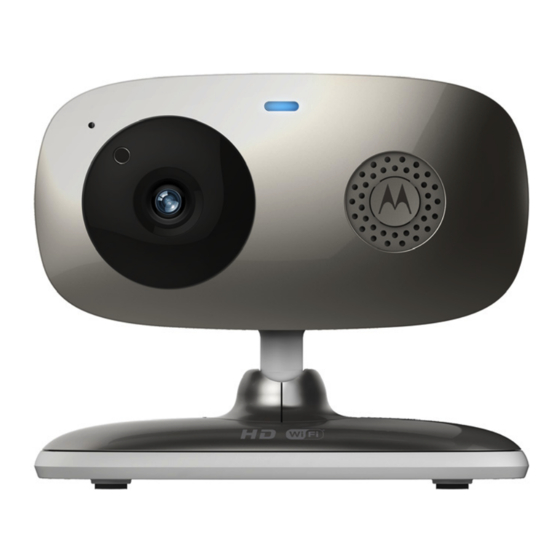
Overview of your Camera Power / Status indicator Speaker Microphone ON/OFF Switch Light Sensor (for night mode Temperature Sensor detection) Micro USB socket Camera Lens PAIR Button Infrared LEDs (for night vision) ® Important guidelines for installing your Wi-Fi Camera Unit ®... -
Page 4: Table Of Contents
User Account and Camera Setup on Android™ Devices......9 3.2.1 Power ON and Connect the Camera ........9 3.2.2 Download Hubble for Motorola Monitors App ......9 3.2.3 Run Hubble for Motorola Monitors App on Android™ device ..................9 3.2.4 Add Camera to your account........... -
Page 5: Safety Instructions
1. Safety Instructions WARNING: STRANGULATION HAZARD - In case this unit is being used to monitor infants or children, keep the unit and adapter cord more than 1 metre away from the cot and out of their reach. Never place the Camera or cords within a cot or near a bed. - Page 6 WARNING ® This Wi-Fi Camera Unit is compliant with all relevant electromagnetic field standards and is, when handled as described in the User’s Guide, safe to use. Therefore, always read the instructions in this User’s Guide carefully before using the device. •...
-
Page 7: System Requirements
2. System Requirements Web Portal ® • Windows ® • Mac OS 10.7 • Chrome™ 24 ® • Internet Explorer ® • Safari • Java™ 7 ® • Firefox 18.0 ® ® • Adobe Flash Player 15.0 ™ Android System •... -
Page 8: Getting Started - Connecting Devices
3. Getting Started - Connecting Devices How does it work? Access your View your Camera from any Camera locally compatible device remotely When a user tries to access the Camera, our Hubble server authenticates the user’s identity and permits access to the Camera. Setup Connect the Camera to the Power Adapter, then plug into an mains power socket and make sure the ON/OFF Switch is in the ON position. -
Page 9: User Account And Camera Setup On Android™ Devices
Camera is ready for setup. 3.2.2 Download Hubble for Motorola Monitors App • Go to Google Play™ Store to search for "Hubble for Motorola Monitors". • Download "Hubble for Motorola Monitors" App from Google Play™ Store and install it on your Android™ device 3.2.3... -
Page 10: Add Camera To Your Account
3.2.4 Add Camera to your account • Tap on the top right corner of the screen to add camera. (Picture A2) • The following setup instructions will appear on the screen. (Picture A3) • Plug in and switch on the camera, and wait for a couple of minutes for it to warm up. - Page 11 • The following setup instructions will appear on the screen. (Picture A4) • Press and hold the PAIR button on the bottom left edge of the Camera Unit for 3 seconds. You will then hear a beep tone, followed by a voice prompt indicating that the Camera is ready for pairing.
- Page 12 ® • Select your Wi-Fi Network, enter your password and then tap Connect. (Pictures A7, A8) ® • It will take a few minutes for the Camera to connect to the Wi-Fi network before showing the connection status. (Pictures A9, A10) •...
-
Page 13: Ipad
3.3.2 Download Hubble for Motorola Monitors App • Go to App Store to search for "Hubble for Motorola Monitors". ® ® • Download "Hubble for Motorola Monitors" App and install it on your iPhone /iPad ® ® 3.3.3 Run Hubble App on your iPhone /iPad ®... -
Page 14: Add The Camera To Your Account
Account? to go to the next step (Picture i1). 3.3.4 Add the Camera to your account • Tap on the top right corner of the screen to add camera. (Picture i2) Getting Started - Connecting Devices... - Page 15 • The following setup instructions will appear on the screen. (Picture i3) • Plug in and switch on the camera, and wait for a couple of minutes for it to warm up. • Tap Continue when the camera LED starts to blink. •...
- Page 16 • Return to the Hubble app to resume setup. • Name the location of your Camera Unit and tap Continue. (Pictures i7, i8) ® • Select your Wi-Fi network and tap Continue. (Picture i10) Getting Started - Connecting Devices...
- Page 17 ® • Enter your Wi-Fi password and tap Next. (Picture i11) ® • It will take a few minutes for the Camera Unit to connect to the Wi-Fi network before showing the connection status. (Pictures i12, i13) • Tap View Live Camera to view the video captured by the Camera. The LED indicator on the Camera Unit will flash in red/blue.
-
Page 18: Camera Functions
4. Camera Functions: Connecting the Camera Unit to power • Connect the power adapter to a mains power socket and insert the plug into the micro USB socket on the back of the Camera Unit. • Slide the ON/OFF switch to the ON position. The power indicator LED will light up in green. - Page 19 Lullaby Tap to access the Melody menu and select one of the 5 pre-set melodies you wish to play on your Camera Unit. Temperature The temperature reading from the temperature Measure sensor at the back of the Camera Unit will display on the screen of your Android™...
- Page 20 Camera Setting You can change the Camera settings by tapping on the Settings icon. • Tap Details to review Camera Name, Cloud Subscription, Change Image, Timezone, Camera Model, Firmware Version and Delete All Events. • Tap Notifications to set the sensitivity of Sound Detection, Motion Detection and to set Alerts for High temperature (Up to 33 C or 91...
-
Page 21: Working With Pc/Notebook
5. Working with PC/Notebook • Go to https://app.hubbleconnected.com/#login Enter your User Name and Password, and then click Login if you have already created an account. • Click on the Camera list paired in your account via Android™ device or ® ®... -
Page 22: Procedure For Resetting The Camera
6. Procedure for Resetting the Camera Note: If your Camera is moved from one router (e.g. home) to another (e.g. office) or you have Camera setup issues, then the Camera must be reset. Please reset the Camera with the following procedures: 1. -
Page 23: Help
7. Help Noise interference To avoid background noise or echoes, ensure that there is enough distance ® between your device and the Wi-Fi Camera Unit. ® Use of other 2.4 GHz products, such as Bluetooth systems or microwave ® ovens, may cause interference with this product. Keep the Wi-Fi Camera Unit at least 5ft away from these types of products, or turn them off if they appear to be causing interference. - Page 24 Account I am unable to receive a 1. The e-mail might have been sent to your Junk Mail Folder. Please new password although check your Junk Mail Folder. I have used the "Forgot 2. There might be a delay in getting password"...
- Page 25 Setting Up While I am adding a If you are trying to add a Camera new Camera to my which has previously been added into account, I am not able your account or another account, you to find any Cameras to will first have to reset the Camera.
- Page 26 Setting Up During setup on Please reset the Camera to setup devices for Android™ mode and try again. Press and hold and iOS, I am not able the PAIR button on the bottom of the to find my Camera Camera untill you hear a beep. Wait during the last step and for a minute for the Camera to restart.
- Page 27 App for Android™ and - Open the Google Play Store on iOS devices? your Android™ device. - Select Search - Type in "Hubble for Motorola Monitors" - The results will show the Hubble - Select to install it iOS Device:...
- Page 28 Setting up When the video is cut You will need to turn off the Auto Lock off, the application function of your device to ensure attempts to reconnect continuous video/audio streaming. and this results in lost sound and choppy video. Features How many users can If you are accessing in Local Mode,...
-
Page 29: General Information
To order a replacement battery pack for parent Unit, contact customer service. Consumer Products and Accessories Limited Warranty ("Warranty") Thank you for purchasing this Motorola branded product manufactured under license by Binatone Electronics International Ltd ("BINATONE"). What Does this Warranty Cover? Subject to the exclusions contained below, BINATONE warrants that this Motorola branded product ("Product") or certified accessory ("Accessory") sold... - Page 30 PROVIDED UNDER THIS EXPRESS LIMITED WARRANTY IS THE EXCLUSIVE REMEDY OF THE CONSUMER, AND IS PROVIDED IN LIEU OF ALL OTHER WARRANTIES, EXPRESS OR IMPLIED. IN NO EVENT SHALL MOTOROLA OR BINATONE BE LIABLE, WHETHER IN CONTRACT OR TORT (INCLUDING...
- Page 31 (c) use of the Products or Accessories for commercial purposes or subjecting the Product or Accessory to abnormal usage or conditions; or (d) other acts which are not the fault of MOTOROLA or BINATONE, are excluded from coverage.
- Page 32 (b) broken seals or that show evidence of tampering; (c) mismatched board serial numbers; or (d) nonconforming or non-Motorola branded housings, or parts, are excluded from coverage. Communication Services. Defects, damages, or the failure of Products or Accessories due to any communication service or signal you may subscribe to or use with the Products or Accessories is excluded from coverage.
-
Page 33: Technical Specifications
9. Technical Specifications Camera Unit ® Wi-Fi 802.11 b/g/n Image sensor Colour CMOS 1M Pixels Lens f = 2.3 mm, F = 2.4 IR LED 7 pcs Power Adapter: Ten Pao International Ltd. Input: 100-240Vac, 50/60Hz, 300mA Output: 5Vdc, 1000mA Technical Specifications... - Page 34 Manufactured, distributed or sold by Binatone Electronics International LTD., official licensee for this product. MOTOROLA and the Stylised M logo are trademarks or registered trademarks of Motorola Trademark Holdings, LLC. and are used under license. Apple logo and Safari are trademarks of Apple Inc., registered in the U.S.