D-Link AC750 User Manual
Wireless dual-band multi-wan router
Hide thumbs
Also See for AC750:
- User manual (227 pages) ,
- Quick install manual (13 pages) ,
- Quick installation manual (2 pages)

Related Manuals for D-Link AC750


Summary of Contents for D-Link AC750
-
Page 1: User Manual
Version 1.00 | 10/16/2015 User Manual Wireless AC750 Dual-Band Multi-WAN Router DWR-118... -
Page 2: Manual Revisions
Preface D-Link reserves the right to revise this publication and to make changes in the content hereof without obligation to notify any person or organization of such revisions or changes. Manual Revisions Revision Date Description 1.00 October 16, 2015 Trademarks D-Link and the D-Link logo are trademarks or registered trademarks of D-Link Corporation or its subsidiaries in the United States or other countries. -
Page 3: Table Of Contents
PPPoE .................12 Advanced Network ............41 PPTP ..................13 System ....................42 L2TP ..................14 Time Settings ...............42 4G LTE/3G .................15 Administration ..............43 Failover ...................17 Reboot & Reset ..............44 ..................18 Firmware Upgrade ..............45 Wi-Fi ....................22 System Logs ................46 Device List ................22 D-Link DWR-118 User Manual... - Page 4 Windows® XP ................61 WPA/WPA2 ................62 Troubleshooting ..............64 Wireless Basics ..............68 What is Wireless? .................69 Tips ....................71 Wireless Modes ................72 Networking Basics ............73 ...............73 ..........74 Wireless Security ............75 What is WPA? ..............75 Technical Specifications ..........76 Regulatory Information ..........77 D-Link DWR-118 User Manual...
-
Page 5: Product Overview
Section 1 - Product Overview Product Overview Package Contents DWR-118 Wireless AC750 Dual-Band Multi-WAN Router Power Adapter RJ45 cable System Requirements A compatible 3G / 4G USB dongle with service.* Computer with Windows, Mac OS, or Linux-based operating system with an installed Ethernet adapter * Subject to services and service terms available from your carrier. - Page 6 Once connected, users can transfer data, stream media, and send SMS messages. Simply insert a 3G / 4G USB dongle, and Ethernet ports. The Wireless AC750 Dual-Band Multi-WAN Router can be installed quickly and easily almost anywhere. This router is great for situations where an impromptu wireless network must be set up, or wherever conventional network access is unavailable.
-
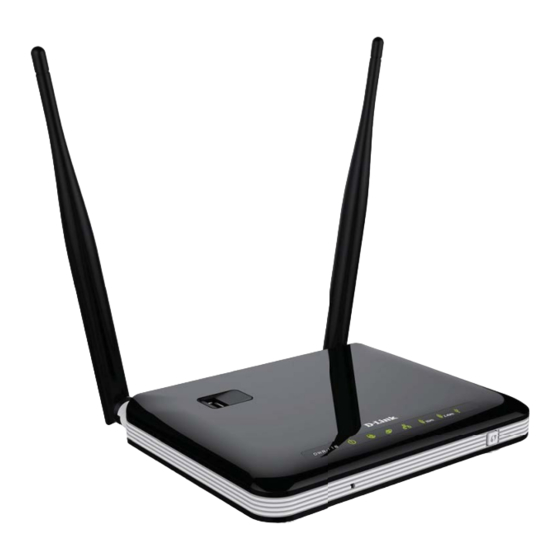
Page 7: Hardware Overview
Reset Button Press this button with an unfolded paperclip and hold for ten seconds to reset the device. WPS Button Press this button to initiate a new WPS connection. See WPS Button on page 48 for details. D-Link DWR-118 User Manual... -
Page 8: Leds
2.4 GHz WLAN LED Will be lit if the 2.4 GHz wireless function is enabled, and will blink when wireless data is being transferred. USB LED Will be lit if a USB dongle is successfully connected. D-Link DWR-118 User Manual... -
Page 9: Back View
Section 1 - Product Overview Back View Ethernet LAN Ports For connection to a network-enabled desktop or notebook computer. Ethernet WAN Port For connection to a DSL/cable modem or router Power Connector Connects to the included power adapter. D-Link DWR-118 User Manual... -
Page 10: Installation
5. Connect the power adapter to the socket on the back panel of your DWR-118 Wireless AC750 Dual-Band Multi-WAN Router. Plug the other end of the power adapter into a wall outlet or power strip and turn the device on. -
Page 11: Wireless Installation Considerations
1. Minimize the number of walls and ceilings between the D-Link router and other network devices. Each wall or ceiling can reduce your adapter’s 3. Try to position access points, wireless routers, and computers so that the signal passes through open doorways and drywall. Materials such as doors, and aluminum studs may also have a negative effect on range. -
Page 12: Configuration
At the top of the page is a menu. Clicking on one of these icons will take you to the Apply when you are done or Reset to revert to the old settings. D-Link DWR-118 User Manual... -
Page 13: Wan Service
For PPTP refer to PPTP on page 13. For L2TP refer to L2TP on page 14. For 4G LTE/3G refer to 4G LTE/3G on page 15. Apply to save your changes. To restore your settings to the most recent save, click Reset. D-Link DWR-118 User Manual... - Page 14 Maximum Transmission Unit - you may need to change the MTU MAC Address: Enter the MAC address, or click Clone to clone your client’s MAC address to the WAN port. Auto-reconnect: Check the box to allow the router to automatically attempt to D-Link DWR-118 User Manual...
- Page 15 Primary DNS Server: Secondary DNS Server: MTU: Maximum Transmission Unit - you may need to change the MTU MAC Address: Enter the MAC address, or click Clone to clone your client’s MAC address to the WAN port. D-Link DWR-118 User Manual...
-
Page 16: Pppoe
Enter the MAC address, or click Clone to clone your client’s MAC address to the WAN port. Maximum Idle Time: Auto-reconnect MTU: Maximum Transmission Unit - you may need to change the MTU Auto-reconnect: Check the box to allow the router to automatically attempt to D-Link DWR-118 User Manual... -
Page 17: Pptp
PPTP Server IP Address: Username: Password: Verify Password: Reconnect Select Always on if you would like the router to never disconnect, Mode: or Connect-on-demand to allow the router to establish a Maximum Idle Time: Always on above, D-Link DWR-118 User Manual... -
Page 18: L2Tp
L2TP Server IP Address: Username: Password: Verify Password: Reconnect Select Always on if you would like the router to never disconnect, Mode: or Connect-on-demand to allow the router to establish a Maximum Idle Time: Always on above, D-Link DWR-118 User Manual... -
Page 19: 4G Lte/3G
Dialed Number: Authentication: Select Auto, PAP, or CHAP detection. The default authentication method is Auto. APN: Pin Code: Reconnect Select either Auto or Manual. Mode: Maximum Idle Time: Auto above, this Primary DNS Server: Secondary DNS Server: D-Link DWR-118 User Manual... - Page 20 Section 4 - Configuration Keep Alive: Select Disable or Use Ping depending on the settings required Use Ping address to ping. Bridge ethernet Click Enable to use the router’s WAN port as an additional LAN ports: port. D-Link DWR-118 User Manual...
-
Page 21: Failover
The Secondary WAN can be set by clicking Add, and the available options will be shown in the drop down box that appears. Select 4G LTE/3G to use your mobile connection as a backup. Apply to save your changes. To restore your settings to the most recent save, click Reset. D-Link DWR-118 User Manual... - Page 22 For PPPoE refer to PPPoE on page 21. Apply to save your changes. To restore your settings to the most recent save, click Reset. Link-local Only LAN IP Link-Local Displays the router’s LAN link-local address. Address: D-Link DWR-118 User Manual...
-
Page 23: Static Ipv6
Enter the primary DNS server address. Address: Secondary DNS Enter the secondary DNS server address. Address: LAN IPv6 Address: LAN IP Link-Local Displays the router’s LAN link-local address. Address: Enable Autoconfiguration: Autoconfiguration Type: DHCPv6. Router Advertisement Lifetime: D-Link DWR-118 User Manual... - Page 24 Enter the primary DNS server address. Address: Secondary DNS Enter the secondary DNS server address. Address: Enable DHCP-PD: LAN IPv6 Address: LAN IP Link-Local Displays the router’s LAN link-local address. Address: Enable Autoconfiguration: Autoconfiguration Type: DHCPv6. Router Advertisement Lifetime: D-Link DWR-118 User Manual...
- Page 25 Enter the primary DNS server address. Address: Secondary DNS Enter the secondary DNS server address. Address: Enable DHCP-PD: LAN IPv6 Address: LAN IP Link-Local Displays the router’s LAN link-local address. Address: Enable Autoconfiguration: Autoconfiguration Type: DHCPv6. Router Advertisement Lifetime: D-Link DWR-118 User Manual...
-
Page 26: Wi-Fi
Section 4 - Configuration Wi-Fi Device List The Device List displays a list of currently-connected wireless clients. Each device’s ID and MAC Address will be shown. D-Link DWR-118 User Manual... -
Page 27: Wi-Fi Settings
Select the optimum channel width for your wireless network from the drop-down menu. Visibility Status: The default setting is Visible. Select Invisible if you do not want Security Mode: Select your security mode, and refer to the next page for details. D-Link DWR-118 User Manual... - Page 28 Select Auto (WPA or WPA2), WPA only, or WPA2 only. Cipher Type: Select TKIP, AES, or TKIP and AES. AES is the most secure, but TKIP allows for compatibility with clients that don’t support AES. Pre-Shared Key: D-Link DWR-118 User Manual...
-
Page 29: Wps
Config Mode: Select either Registrar or Enrollee Config Status: Release to Disable WPS-PIN Method: Config Method: Select either Push Button or PIN Code WPS Status: Displays the current WPS status. Click Trigger to activate WPS. D-Link DWR-118 User Manual... -
Page 30: Wi-Fi Advanced
Check this box to reduce the guard interval to 400 ns. This can increase the throughput rate provided that the delay spread of the connection is also low. However, it can also increase error rate in some installations, due to increased sensitivity to radio-frequency reflections. D-Link DWR-118 User Manual... - Page 31 Section 4 - Configuration HT 20/40 Select Enable to reduce interference from other wireless networks Coexistence: is another wireless network’s channel overlapping and causing D-Link DWR-118 User Manual...
-
Page 32: Lan
Name, IP Address, and MAC Address. LAN Settings IP Address: 192.168.0.1. Default Subnet Enter the subnet mask of the router. The default subnet mask is Mask: 255.255.255.0. Local Domain Enter the local domain name for your network. Name: D-Link DWR-118 User Manual... -
Page 33: Dhcp
Check the box to enable the DHCP server on your router. Server: DHCP IP Address Range: addresses to devices on your network. DHCP Lease Enter the lease time for DHCP assignments. The default is 86400. Time: Primary DNS IP Address: Secondary DNS IP Address: D-Link DWR-118 User Manual... -
Page 34: Advanced
Select your DDNS provider from the dropdown box. Host Name: Enter the Host Name that you registered with your DDNS service provider. Username / Enter the Username for your DDNS account. E-mail: Password / Key: Enter the Password for your DDNS account. D-Link DWR-118 User Manual... -
Page 35: Applications
Enter the port or range of ports to listen to in order to trigger the rule. Incoming Ports: Enter the port or range of ports that will be used to access the application. Enable: Check the box to enable the rule. D-Link DWR-118 User Manual... - Page 36 Section 4 - Configuration DMZ (Exposed Host) recommended in ordinary situations. Enable SPI: Enable DMZ: Check the box to enable DMZ. DMZ IP Address: the Computer Name from the drop-down menu and click << to D-Link DWR-118 User Manual...
-
Page 37: Virtual Server
Server IP: Port: port number that you would like to open. Enable: Select this box to enable the rule. Schedule Rule #: Specify the schedule rule number or click Add New Rule... to add a new schedule rule. D-Link DWR-118 User Manual... -
Page 38: Parental Control
Section 4 - Configuration Parental Control URL Filtering: Check the box to enable URL Filtering. URL: Enter URL that you would like to block. Enable: D-Link DWR-118 User Manual... -
Page 39: Routing
RIP: Select this box to enable routing. RIPv1 RIPv2 authentication, routing domain, next hop forwarding, and subnet mask exchange. Destination: the static route. Subnet Mask: Gateway: Hop: network. Enable: Select this box to enable the rule. D-Link DWR-118 User Manual... -
Page 40: Qos
QoS Priority: Select Low, Normal, or High. Enable: Select a checkbox to enable the particular QoS rules individually. Use Rule #: Specify the schedule rule number or click Add New Rule... to add a new schedule rule. D-Link DWR-118 User Manual... -
Page 41: Mac Address Filter
Wireless and wired clients with C selected can connect to this Control: device and allow/deny addresses. Association Wireless clients with A selected can associate to the wireless LAN Control: DHCP clients: drop-down menu, an ID, and click Copy to, to copy the client’s MAC Address: D-Link DWR-118 User Manual... -
Page 42: Outbound Filter
Select whether to Allow or Deny all data to pass except those rules list: Source IP : Ports: colon. Destination IP : Ports: Enable: Schedule Rule #: Specify the schedule rule number or click Add New Rule... to add a new schedule rule. D-Link DWR-118 User Manual... -
Page 43: Inbound Filter
Select whether to Allow or Deny all data to pass except those rules list: Source IP : Ports: colon. Destination IP : Ports: Enable: Schedule Rule #: Specify the schedule rule number or click Add New Rule... to add a new schedule rule. D-Link DWR-118 User Manual... -
Page 44: Snmp
Get Community: to network administration using SNMP. You can view the network, Set Community: to the network using SNMP. IP 1 ~ 4: SNMP Version: Select the SNMP version of your system. WAN Access IP Address: D-Link DWR-118 User Manual... -
Page 45: Advanced Network
UPnP provides compatibility with networking equipment, software and peripherals. Enable WAN Select the box to allow the WAN port to be “pinged. ” Blocking the Ping Respond: Ping option may provide some extra security from hackers. D-Link DWR-118 User Manual... -
Page 46: System
Internet time server: NTP Server Choose the NTP Server used for synchronizing time and date. Click Used: Update Now to synchronize with the NTP server now. Sync. Result: Shows the result of the last time synchronization. D-Link DWR-118 User Manual... -
Page 47: Administration
Administrator tasks. This feature enables you to perform IP Allowed to Access: Port: This is the port number used to access the router. Example: 8080 is the port used for the web-management interface. D-Link DWR-118 User Manual... -
Page 48: Reboot & Reset
This option will restore all settings back to their defaults. Any Factory Default settings that have not been backed up will be lost, including any Settings: rules that you have created. Save and Reboot Click Reboot to save your settings and reboot the device. the Device: D-Link DWR-118 User Manual... -
Page 49: Firmware Upgrade
Section 4 - Configuration Firmware Upgrade Firmware Information: Firmware Browse... and navigate Update: Accept unofficial firmware Upgrade to start the upgrade process or Cancel to cancel the upgrade. D-Link DWR-118 User Manual... -
Page 50: System Logs
Enable Logging Select this box to send the router logs to a syslog server. to Syslog Server: Syslog Server IP Enter the address of the syslog server that will be used to send the Address: logs. D-Link DWR-118 User Manual... -
Page 51: Schedules
Select the day of the week on which you would like the schedule to become active. Start Time Enter the time at which you would like the schedule to become (hh:mm): active. End Time Select the time at which you would like the schedule to become (hh:mm): inactive. D-Link DWR-118 User Manual... -
Page 52: Connect A Wireless Client To Your Router
WPS. Once you know, follow the steps below: Step 1 WPS Button Step 2 Step 3 and your wireless connection will be secure with WPA2. D-Link DWR-118 User Manual... -
Page 53: Windows® 8
To join an existing network, locate the wireless network icon in the taskbar next to the time display. Clicking on this icon will display a list of wireless networks that are within connecting proximity of your computer. Select the desired network by clicking on the network name. D-Link DWR-118 User Manual... - Page 54 WPS button on your router during this step to enable the WPS function. When you have established a successful connection to a wireless network, the word Connected will appear next to the name of the network to which you are connected to. D-Link DWR-118 User Manual...
-
Page 55: Windows® 7
Section 5 - Connecting to a Wireless Network Windows® 7 WPA/WPA2 2. The utility will display any available wireless networks in your area. D-Link DWR-118 User Manual... - Page 56 Section 5 - Connecting to a Wireless Network like to connect to and click the Connect button. Networking Basics on page 73 for more information. 4. The following window appears while your computer tries to connect to the router. D-Link DWR-118 User Manual...
- Page 57 Connect. You can also connect by pushing the WPS button on the router. connection fails, please verify that the security settings are correct. The key or passphrase must be exactly the same as the one on the wireless router. D-Link DWR-118 User Manual...
-
Page 58: Wps
Section 5 - Connecting to a Wireless Network 1. Click the Start button and select Computer from the Start menu. 2. Click Network on the left side. D-Link DWR-118 User Manual... - Page 59 Section 5 - Connecting to a Wireless Network 3. Double-click the DWR-118. Setup > Wireless Setup Next. D-Link DWR-118 User Manual...
- Page 60 Section 5 - Connecting to a Wireless Network 5. Type a name to identify the network. Click Next to continue. D-Link DWR-118 User Manual...
- Page 61 Make a note of the security key as you may need to provide this security key if adding an older wireless device to the network in the future. 9. Click Close to complete WPS setup. D-Link DWR-118 User Manual...
-
Page 62: Windows Vista
Wireless Networks Detected bubble, click on the center of the bubble to access the utility. Connect to a network. The utility will display any available wireless networks in your area. Click Connect button. Networking Basics section in this manual for more information. D-Link DWR-118 User Manual... -
Page 63: Wpa/Wpa2
Section 5 - Connecting to a Wireless Network WPA/WPA2 1. Open the Windows Vista® Wireless Utility by right-clicking on the Connect to a network. click Connect. D-Link DWR-118 User Manual... - Page 64 Section 5 - Connecting to a Wireless Network your router and click Connect. connection fails, please verify that the security settings are correct. The key or passphrase must be exactly the same as the one on the wireless router. D-Link DWR-118 User Manual...
-
Page 65: Windows® Xp
Wireless Networks Detected bubble, click on the center of the bubble to access the utility. View Available Wireless Networks. The utility will display any available wireless networks in your area. Click Connect button. Networking Basics section in this manual for more information. D-Link DWR-118 User Manual... -
Page 66: Wpa/Wpa2
Section 5 - Connecting to a Wireless Network WPA/WPA2 joining an existing network, you will need to know the WPA key being used. 1. Open the Windows® XP Wireless Utility by right-clicking on the wireless View Available Wireless Networks. click Connect. D-Link DWR-118 User Manual... - Page 67 3. The Wireless Network Connection box will appear. Enter the WPA- PSK Wi-Fi password and click Connect. connection fails, please verify that the WPA-PSK settings are correct. The Wi-Fi password must be exactly the same as on the wireless router. D-Link DWR-118 User Manual...
-
Page 68: Troubleshooting
1. Why can’t I access the web-based configuration utility? 192.168.0.1 - Mozilla Firefox 23 or higher - Apple Safari 6 or higher be on. Norton Personal Firewall, and Windows ® D-Link DWR-118 User Manual... - Page 69 2. What can I do if I forgot my password? to hold the button down for 10 seconds. Release the button and the router will go through its reboot process. Wait about 30 192.168.0.1. When logging in, leave the password box empty. D-Link DWR-118 User Manual...
- Page 70 3. Why can’t I connect to certain sites or send and receive emails when connecting through my router? another computer, or a URL. Start and then click Run. command press Enter ping [url] [-f] [-l] [MTU value] Example: ping yahoo.com -f -l 1472 D-Link DWR-118 User Manual...
- Page 71 You should start at 1472 and work your way down by 10 each time. Once you get a reply, go up by 2 until you get a fragmented To change the MTU rate on your router follow the steps below: 192.168.0.1 for the device. Setup and then click Manual Configure. Save Settings to save your settings. of ten. D-Link DWR-118 User Manual...
-
Page 72: Wireless Basics
Wireless Basics D-Link wireless products are based on industry standards to provide easy-to-use and compatible high-speed wireless wireless family of products will allow you to securely access the data you want, when, and where you want it. You will be able to enjoy the freedom that wireless networking delivers. -
Page 73: What Is Wireless
D-Link is the worldwide leader and award winning designer, developer, and manufacturer of networking products. D-Link delivers the performance you need at a price you can afford. D-Link has all the products you need to build your network. How does wireless work? Wireless works similarly to how cordless phones work, through radio signals that transmit data from one point A to point B. - Page 74 This makes it ideal for personal devices, such as mobile phones, PDAs, headphones, laptops, speakers, and other devices that operate on batteries. Who uses wireless? D-Link has a wireless solution for it. Home Uses/Benefits Small Office and Home Office Uses/Benefits...
-
Page 75: Tips
Eliminate Interference Place home appliances such as cordless telephones, microwaves, and televisions as far away as possible from the router/access D-Link DWR-118 User Manual... -
Page 76: Wireless Modes
DWR-118 wireless network CardBus adapters. wireless router or access point. An ad hoc network contains only clients, such as laptops with wireless CardBus adapters. All the adapters must be in ad hoc mode to communicate. D-Link DWR-118 User Manual... -
Page 77: Networking Basics
Click on Start > Run cmd and click OK. cmd in the Start Search At the prompt, type ipconfig and press Enter. default gateway of your adapter. security settings, and the settings on your router. request on newly installed adapters. D-Link DWR-118 User Manual... -
Page 78: Statically Assign An Ip Address
Step 4 Click Use the following IP address where X is a number between 2 and 99. Make sure that the number you choose is not in Step 5 Click OK twice to save your settings. D-Link DWR-118 User Manual... -
Page 79: Wireless Security
WPA-PSK/WPA2-PSK uses a passphrase or key to authenticate your wireless connection. The key is an alpha-numeric password between wireless router or access point. key encryption system to ensure that only authorized network users can access the network. D-Link DWR-118 User Manual... -
Page 80: Technical Specifications
1 x USB port Standards Antenna LED Status Indicators Power Frequency 2.4 - 2.4835 GHz 5.15 - 5.875 GHz Wireless Security Power Input Firewall Dimensions (L x W x H) Operating Temperature MAC Filtering Operating Humidity D-Link DWR-118 User Manual... -
Page 81: Regulatory Information
- Consult the dealer or an experienced radio/TV technician for help. Non-modifications Statement: authority to operate this equipment. Caution: This device complies with Part 15 of the FCC Rules. Operation is subject to the following two conditions: D-Link DWR-118 User Manual... - Page 82 FCC Radiation Exposure Statement This equipment complies with FCC radiation exposure limits set forth for an uncontrolled environment. This equipment should be installed and operated with minimum distance 20 cm between the radiator and your body. D-Link DWR-118 User Manual...
- Page 83 For detailed information the end-user should contact the national spectrum authority in France. Usage Notes: applied on the products according to the country where the equipment will be deployed. communication between two client devices without an Access Point. 5 GHz wireless frequency and channel operation in EEC countries D-Link DWR-118 User Manual...
- Page 84 Appendix D - Regulatory Information Allowable 802.11a Frequencies and Channels Countries 5.15-5.25 GHz Liechtenstein 5.15-5.25 GHz & 5.725-5.875 Ghz Austria 5.15-5.35 GHz France 5.15-5.35 & 5.47-5.725 GHz Netherlands, Norway, Poland, Sweden, 5.15-5.35 GHz & 5.725-5.875 GHz Czech Republic D-Link DWR-118 User Manual...
- Page 85 Hereby, D-Link, declares that this DWR-118 is in compliance with the essential requirements English and other relevant provisions of Directive 1999/5/EC. Por medio de la presente D-Link declara que el DWR-118 cumple con los requisitos esenciales Español [Spanish] y cualesquiera otras disposiciones aplicables o exigibles de la Directiva 1999/5/CE.
-
Page 86: Safety Instructions
D-Link may result in the loss of product warranty. Unless expressly approved by an authorized representative of D-Link in writing, you may not and may not permit others to: the device or from any other information provided by D-Link, except to the extent that this restriction is expressly prohibited by local law. - Page 87 These cables are equipped with three-prong plugs to help ensure proper grounding. Do not use adapter plugs or remove the cable or power strip does not exceed 80 percent of the ampere ratings limit for the extension cable or power strip. follow your local/national wiring rules. guidelines. D-Link DWR-118 User Manual...
- Page 88 Static electricity can harm delicate components inside your system. To prevent static damage, discharge static electricity from your body before you touch any of the electronic components, such as the microprocessor. You can do so by periodically touching an unpainted metal surface on the chassis. D-Link DWR-118 User Manual...
- Page 89 1. When unpacking a static-sensitive component from its shipping carton, do not remove the component from the antistatic packing material until you are ready to install the component in your system. Just before unwrapping the antistatic packaging, be sure to discharge static electricity from your body. grounding strap. D-Link DWR-118 User Manual...
- Page 90 D-Link recommends that you always switch off or unplug your D-Link products when they are not in use. By doing so you will help to save energy and reduce CO2 emissions.
- Page 91 Chez D-Link, nous sommes conscients de l'impact de nos opérations et produits sur l'environnement et nous engageons à le réduire. Pour limiter cet impact, D-Link conçoit et fabrique ses produits de manière aussi écologique que possible, en utilisant des matériaux recyclables et faiblement toxiques, tant dans ses produits que ses emballages.
- Page 92 D-Link e l'ambiente D-Link cerca da sempre di ridurre l'impatto ambientale dei propri stabilimenti e dei propri prodotti. Allo scopo di ridurre al minimo tale impatto, D-Link progetta e realizza i propri prodotti in modo che rispettino il più possibile l'ambiente, utilizzando materiali riciclabili a basso tasso di tossicità...
- Page 93 D-Link raadt aan om steeds uw D-Link producten uit te schakelen of uit de stekker te halen wanneer u ze niet gebruikt. Door dit te doen bespaart u energie en beperkt u de CO2-emissies.
- Page 94 životní prostředí i lidské zdraví. D-Link a životní prostředí "Ve společnosti D-Link jsme si vědomi vlivu našich provozů a výrobků na životní prostředí a snažíme se o minimalizaci těchto vlivů. Proto své výrobky navrhujeme a vyrábíme tak, aby byly co nejekologičtější, a ve výrobcích i obalech používáme recyklovatelné...
- Page 95 For å minimalisere denne innvirkningen designer og lager D-Link produkter som er så miljøvennlig som mulig, ved å bruke resirkulerbare, lav-toksiske materialer både i produktene og forpakningen. D-Link anbefaler at du alltid slår av eller frakobler D-Link-produkter når de ikke er i bruk. Ved å gjøre dette hjelper du å spare energi og å redusere CO2-utslipp.
- Page 96 På D-Link förstår vi och är fast beslutna att minska den påverkan våra verksamheter och produkter kan ha på miljön. För att minska denna påverkan utformar och bygger D-Link sina produkter för att de ska vara så miljövänliga som möjligt, genom att använda återvinningsbara material med låg gifthalt i både produkter och förpackningar.
- Page 97 Na D-Link compreendemos e comprometemo-nos com a redução do impacto que as nossas operações e produtos possam ter no ambiente. Para minimizar este impacto a D-Link concebe e constrói os seus produtos para que estes sejam o mais inofensivos para o ambiente possível, utilizando meteriais recicláveis e não tóxicos tanto nos produtos como nas embalagens.