Table of Contents

Related Manuals for Cisco RV345


Summary of Contents for Cisco RV345
- Page 1 RV345/345P Administration Guide First Published: -- Last Modified: -- Americas Headquarters Cisco Systems, Inc. 170 West Tasman Drive San Jose, CA 95134-1706 http://www.cisco.com Tel: 408 526-4000 800 553-NETS (6387) Fax: 408 527-0883...
- Page 2 Cisco and the Cisco logo are trademarks or registered trademarks of Cisco and/or its affiliates in the U.S. and other countries. To view a list of Cisco trademarks, go to this URL: www.cisco.com/go/trademarks . Third-party trademarks mentioned are the property of their respective owners. The use of the word partner does not imply a partnership relationship between Cisco and any other company.
-
Page 3: Table Of Contents
WAN QoS Statistics Application Statistics Connected Devices Routing Status DHCP Bindings Mobile Network VPN Status View Logs Administration C H A P T E R 3 Reboot File Management Manual Upgrade Auto Update Diagnostic License Smart License Usage Certificate RV345/345P Administration Guide... - Page 4 Service Management Schedule C H A P T E R 5 WAN Settings Multi-WAN Mobile Network Mobile Network Setup Bandwidth Cap Setting Dynamic DNS Hardware DMZ IPv6 Transition IPv6 in IPv4 Tunnel (6in4) IPv6 Rapid Deployment (6rd) RV345/345P Administration Guide...
- Page 5 Static Routing Firewall C H A P T E R 9 Basic Settings Access Rules Network Address Translation Static NAT Port Forwarding Port Triggering Session Timeout DMZ Host C H A P T E R 1 0 RV345/345P Administration Guide...
- Page 6 C H A P T E R 1 1 Application Control Wizard Application Control Web Filtering Content Filtering IP Source Guard Where To Go From Here C H A P T E R 1 2 Where To Go From Here RV345/345P Administration Guide...
-
Page 7: Introduction
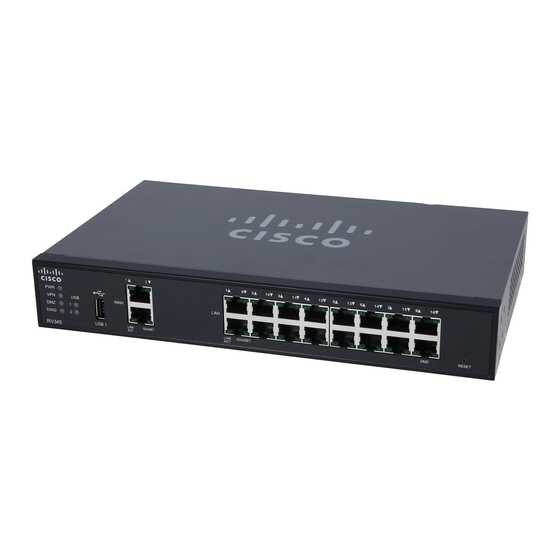
C H A P T E R Introduction Thank you for choosing the Cisco RV345/P router. This guide describes how to install and manage your router. This chapter includes information to help you get started on your device. Your Cisco RV345/P comes with default settings. -
Page 8: Rv345/345P Administration Guide
To reboot the router, press the reset button with a paper clip or pen tip for less than 10 seconds. To reset the router to factory default settings, press and hold the reset button for 10 seconds. RV345/345P Administration Guide... -
Page 9: Launch Setup Wizard
Directs you to the Config Management page where you can manage the router’s Configuration configuration. Device Status Directs you to the System Summary page that displays the IPv4 and IPv6 System Summary configuration, and firewall status on the device. RV345/345P Administration Guide... -
Page 10: Troubleshooting Tips
If your web browser displays a warning message about the popup window, allow the blocked content. Logout To exit the web interface, click Logout near the top right corner of the web interface. The sign-in page appears. RV345/345P Administration Guide... -
Page 11: Status And Statistics
• Host Name — Name of host. • Serial Number — Serial number of the device. • System Up Time — Length of time in yy-mm-dd, hours, and minutes that the device has been active. • Current Time — Current time and date. RV345/345P Administration Guide... -
Page 12: Rv345/345P Administration Guide
• Denial of Service (Dos) — Status of the Dos filter service is enabled (On) or disabled (Off). A DoS attack is an attempt to make a machine or network resource unavailable to its intended users. RV345/345P Administration Guide... -
Page 13: Tcp/Ip Services
The Port Traffic page displays the statistics and status of the interfaces of the device. To view the device’s Port Traffic page, click Status and Statistics >Port Traffic. Port Traffic • Port ID — Defined name and number of the port. • Link Status — Status of the interface. RV345/345P Administration Guide... -
Page 14: Wan Qos Statistics
• Traffic Class — Name of traffic class assigned to queue. • Packets Sent — Number of outbound packets of the traffic class sent. • Packets Dropped — Number of outbound packets dropped. Inbound QoS Statistics • Queue — Number of inbound queues. RV345/345P Administration Guide... -
Page 15: Application Statistics
• OS — List of operating systems used. • Traffic Volume — Traffic volume in megabytes. A pop-up stating AVC disabled or license expired may appear if the AVC is disabled or the license is Note expired. RV345/345P Administration Guide... -
Page 16: Connected Devices
The DHCP Bindings page displays the statistics of the DHCP client information such as IP address, MAC address, Lease Expire Time and Type of Binding (static or dynamic). To view the device’s DHCP Bindings, click Status and Statistics > DHCP Bindings. In the DHCP Binding Table, the following is displayed: RV345/345P Administration Guide... -
Page 17: Mobile Network
• Card Status — Card status disconnected or connected. VPN Status The VPN Status displays the tunnel status of the Site-to-Site, Client-to-Site, SSL VPN, PPTP, L2TP, and Teleworker VPN Client. To view the device’s VPN status, click Status and Statistics > VPN Status. RV345/345P Administration Guide... -
Page 18: Rv345/345P Administration Guide
Point-to-Point Tunneling Protocol has the capability to encrypt data with 128-bit. It is used to ensure that messages sent from one VPN node to another are secure. • Tunnel(s) Used — PPTP Tunnels used for the VPN connection. RV345/345P Administration Guide... -
Page 19: View Logs
You can also refresh, clear, and export these logs to a PC or USB. To view the device’s logs, follow these steps: Step 1 Click Status and Statistics > View Logs. Step 2 Under Logs Filtered By, select the appropriate option. RV345/345P Administration Guide... -
Page 20: Rv345/345P Administration Guide
• Refresh — Click to refresh logs. • Clear Logs — Click to clear logs. • Export Logs to PC — Click to export logs to PC. • Export Logs to USB — Click to export logs on to a USB storage device. RV345/345P Administration Guide... -
Page 21: Administration
Step 3 Select the preferred reboot option. • Reboot the device. • Return to factory default settings after reboot. • Return to factory default settings including certificates after reboot. Step 4 Click Reboot to reboot device. RV345/345P Administration Guide... -
Page 22: File Management
• Current Dongle Driver Version — Version of built-in USB dongle driver. • Last Update — Last date of when an update was performed. • Latest Version Available on Cisco.com — Latest dongle driver version. • Last Checked — Date when last checked. -
Page 23: Manual Upgrade
In the Manual Upgrade section, select the file type (Firmware Image, Signature File, USB Dongle Driver or Language File). Step 3 In the Upgrade From section, select an option (Cisco.com, PC, or USB) and click Refresh. Step 4 Check Reset all configuration/setting to factory defaults to reset all the configuration and apply factory defaults. -
Page 24: Diagnostic
4 Reload the new firmware again if necessary. Diagnostic Your device provides several diagnostic tools to help you with troubleshooting network issues. Use the following diagnostic tools to monitor the overall health of your network. Using Ping or Trace RV345/345P Administration Guide... -
Page 25: License
To perform a DNS lookup, enter the IP address or domain name in the Perform a DNS Lookup>IPAddress/Domain Name field and click Lookup. License In the License section, you can configure the licenses or register the router. It simplifies the Cisco software experience and helps you understand how the Cisco software is used. Smart Software Licensing Status The Smart Software Licensing Status section displays your device’s license information. -
Page 26: Certificate
Enter the following information: Enter a name for certificate. Certificate name should not contain spaces or special Certificate Name characters. Enter a name and select one of the following: IP Address, FQDN, or Email. Subject Alternative Name RV345/345P Administration Guide... -
Page 27: Config Management
• Destination File Name — Select the destination file name from the drop-down list. • Save Icon Blinking — Indicates whether an icon blinks when there is unsaved data. To disable/enable this feature, click Disable Save Icon Blinking. RV345/345P Administration Guide... -
Page 28: Rv345/345P Administration Guide
Administration Config Management RV345/345P Administration Guide... -
Page 29: System Configuration
User Groups, page 31 • IP Address Group, page 32 • SNMP, page 33 • Discovery Bonjour, page 33 • LLDP, page 34 • Automatic Updates, page 35 • Service Management, page 36 • Schedule, page 36 RV345/345P Administration Guide... -
Page 30: Initial Setup Wizard
Confirm Password Confirm the password. Enter the static IP address. Static IP Address Subnet Mask Enter the subnet mask. Gateway IP Enter the gateway IP. Remote Server Enter the remote server. Enter the IP address of the DNS. RV345/345P Administration Guide... -
Page 31: System
You can configure the time zone, adjust for daylight savings time if necessary, and select the Network Time Protocol (NTP) server to synchronize the date and time. RV345/345P Administration Guide... -
Page 32: Log
Level 5, which indicates a normal but significant condition. A notification log is logged when the device is functioning properly, but a system notice has occurred. Information Level 6, which indicates a condition that is not a condition error, but requires special handling. RV345/345P Administration Guide... -
Page 33: Email Server
Email Server The email server can be configured to your email account. The email server logs are periodically sent to specific email address, so that the administrator is always up to date on the network. The router supports RV345/345P Administration Guide... -
Page 34: Remote Syslog Server
To configure the email server, follow these steps. Step 1 Select System Configuration > Email. Step 2 Under Email Server, enter the following: SMTP Server Enter the address of the SMTP server. Enter the SMTP port. SMTP Port RV345/345P Administration Guide... -
Page 35: User Accounts
In the Local Users Membership List table, click Add to add a user on the router. Step 5 In the Add User Account page, enter the following information: Username Enter a username. Enter a password. New Password New Password Confirm Confirm the password. RV345/345P Administration Guide... -
Page 36: Remote Authentication Service
Enter the IP address of the primary server. Primary Server Port — Enter the primary port of the server. Backup Server Enter the IP address of the backup server. Port — Enter the backup port of the server. RV345/345P Administration Guide... -
Page 37: User Groups
Site to Site VPN Check Permit in this group to enable access to a site-to-site VPN policy. • Click Add to open the Add Feature List pop up. • Select a profile from the drop down list and click Add. RV345/345P Administration Guide... -
Page 38: Ip Address Group
• IP Address Subnet — Enter an IP address in the IP Address filed and its subnet mask in the Mask field. • IP Address Range — Enter the Start IP Address and End IP Address. Step 4 Click Apply. RV345/345P Administration Guide... -
Page 39: Snmp
Bonjour is a service discovery protocol that locates network devices such as computers and servers on your LAN. When this feature is enabled, the device periodically multicasts Bonjour service records to the LAN to advertise its existence. RV345/345P Administration Guide... -
Page 40: Lldp
For discovery of Cisco Small Business products, Cisco provides a utility that works through a simple Note toolbar on the web browser called FindIt. This utility discovers Cisco devices in the network and displays basic information, such as serial numbers and IP addresses. For more information and to download the utility, visit www.cisco.com/go/findit. -
Page 41: Automatic Updates
Select the time from the drop-down list of when the firmware is automatically updated. You can select to receive notifications and configure the updates for the following: • System Firmware • USB Modem Firmware • Security Signature Step 6 Click Apply. RV345/345P Administration Guide... -
Page 42: Service Management
Check Everyday to apply the schedule to all the days of the week. Leave it unchecked if you want it to only apply to certain days. If so, then check the desired days of the week you want to apply the schedule to. You can also choose Weekdays or Weekends. Step 6 Click Apply. RV345/345P Administration Guide... -
Page 43: Wan
IPv4 and IPv6 Connections Step 7 For an IPv4 connection, click the IPv4 tab. Step 8 Select the connection type from the list: When the IPv4 or IPv6 connection uses DHCP In the DHCP Settings, enter the following information: RV345/345P Administration Guide... -
Page 44: Rv345/345P Administration Guide
Multi-WAN page to disable the “Network Service Detection” feature or choose a valid host to detect. Otherwise, the traffic will not be forwarded by the device. When the IPv4 connection is through PPTP In the PPTP section, enter the following: RV345/345P Administration Guide... -
Page 45: Rv345/345P Administration Guide
Select Keep Alive to periodically check the connection, and to re-establish the connection when it is disconnected. Authentication Type Select the authentication type from the drop-down list (Auto, PAP, CHAP, MS-CHAP, MS-CHAPv2). When the IPv6 connection uses Bridge RV345/345P Administration Guide... -
Page 46: Multi-Wan
WAN interface if connectivity is lost. The specific outbound traffic rules can also be configured because of 5-tuple of a connection. Outgoing network load-balancing is performed on a per IP connection basis; it is not channel-bonding, where a single connection uses multiple RV345/345P Administration Guide... -
Page 47: Step 1
Select On or Off from the Failover to back up WAN drop-down list. Failover to backup WAN If you select Off, the traffic is dropped when the binding interface goes off line Note or down. Status Select Enable or Disable to enable or disable the status of the policy. RV345/345P Administration Guide... -
Page 48: Mobile Network
• SIM PIN — Enter the PIN code associated with your SIM card. • Server Name — Enter the name of the server. • Authenticate — Select the option to authenticate. Step 4 Select one for the following for the Connect Mode. RV345/345P Administration Guide... -
Page 49: Bandwidth Cap Setting
WAN IP address. Hence, you can host your own web FTP, or another type of TCP/IP server on your LAN. There are several DDNS services to choose from, most of which are free, or available at a nominal cost. The most popular is DynDNS. RV345/345P Administration Guide... -
Page 50: Hardware Dmz
IPv6 traffic over configured IPv4 links. The 6in4 traffic is sent over the IPv4, in which the IPv4 packet header. This is followed by the IPv6 packet whose IP headers have the IP protocol number set to 41. RV345/345P Administration Guide... -
Page 51: Ipv6 In Ipv4 Tunnel (6In4)
Click Automatically from DHCP to use the DHCP (option 212) to obtain 6rd Prefix, Relay IPv4 Address, and IPv4 Mask Length. Step 3 Or, select Manual and set the following 6rd parameters. a) Enter the IPv4 Address of Relay . b) Enter the IPv4 Common Prefix Length. RV345/345P Administration Guide... -
Page 52: Rv345/345P Administration Guide
Enter the IPv6 Prefix/Length. The IPv6 network (subnetwork) is identified by the prefix. All hosts in the network have the identical initial bits for their IPv6 address. Enter the number of common initial bits in the network addresses. Default is 64. Step 4 Click Apply. RV345/345P Administration Guide... -
Page 53: Qos
• Description — Enter the description of the class. • In Use — Traffic class record is being used by a queuing policy. Step 3 In the Service Table, click Add (or select the row and click Edit) and enter the following information: RV345/345P Administration Guide... -
Page 54: Wan Queuing
Select the DSCP value from the drop-down list, to be replaced with, in incoming packets. Step 4 Click Apply. WAN Queuing Net traffic coming from the LAN-to-WAN can be managed in three modes (Rate Control, Priority, and Low Latency) which are mutually exclusive. RV345/345P Administration Guide... -
Page 55: Wan Policing
Click Apply. WAN Bandwidth Management WAN interfaces can be configured with the maximum bandwidth provided by the ISP. When the value (transfer rate in KBP/S) is configured, the traffic entering the interface is shaped in defined rate. RV345/345P Administration Guide... -
Page 56: Switch Classification
40 will be put into Queue 1. The switch must use the DSCP field of the incoming packets and schedule the packet for prioritization into a particular queue using the mapping table. • Based on the DSCP value of the incoming packet, map the traffic to the different queues. RV345/345P Administration Guide... -
Page 57: Switch Queuing
In LAN Port Queue Weight, select the appropriate weight for each of the queues. Step 2 Click Apply. Step 3 Click Restore Defaults to restore system default settings. Step 4 In the LAG Port Queue Weight table, the LAG ports and their queue weights are displayed. RV345/345P Administration Guide... -
Page 58: Rv345/345P Administration Guide
Switch Queuing RV345/345P Administration Guide... -
Page 59: Lan
Check to enable the port to allow the settings. When this check box is disabled, all settings on the port are lost. EEE (Energy Efficient on Check to allow port to consume less power during period of low data activity. Ethernet) RV345/345P Administration Guide... -
Page 60: Poe Settings (Rv345P)
The current enters the cable by means an injector. If the device at the other end of the cable is PoE compatible, then that device will function properly without modification. If the device is not PoE compatible, then a picker must be installed to remove the current from the cable. RV345/345P Administration Guide... -
Page 61: Vlan Settings
Traffic on the port can be tagged by applying a specified VLAN. This tagging can help in differentiating the traffic and forwarding it. There are only 32 VLANs in the system. If there are few VLANs used by WAN, then LAN can use rest of them. RV345/345P Administration Guide... -
Page 62: Lan/Dhcp Settings
To configure the DHCP for IPv4, select the DHCP type for IPv4. Disables the DHCP server for IPv4 on this device. There are no additional parameters Disabled to complete. The DHCP server assigns addresses to clients from their respective pools. Server RV345/345P Administration Guide... -
Page 63: Rv345/345P Administration Guide
192.168.1.1, the starting value must be 192.168.1.2 or greater. Starting address of the IPv6 address pool. Range Start Range End Ending address of the IPv6 address pool. DNS Server Type of DNS (server static), proxy, or the DNS server provided by your ISP. RV345/345P Administration Guide... -
Page 64: Rv345/345P Administration Guide
• Option 66 — Enter the IP address or the hostname of a single TFTP server. • Option 150 — Enter the IP addresses of a list of TFTP servers. • Option 67 — Enter the boot filename. Step 12 Click Ok, then click Apply. RV345/345P Administration Guide... -
Page 65: Static Dhcp
• Auto — Enables port-based authentication. The interface moves between an authorized or unauthorized state based on the authentication exchange between the device and the client. Step 4 Click Apply. Ensure that the respective configuration is active and correct before enabling a Port-based authentication. Note RV345/345P Administration Guide... -
Page 66: Dns Local Database
• Managed — Hosts use an administered, stateful configuration protocol (DHCPv6) to obtain stateful addresses and other information through DHCPv6. • Other — Uses an administered, stateful configuration protocol (DHCPv6) to obtain other, non-address information, such as DNS server address. RV345/345P Administration Guide... -
Page 67: Rv345/345P Administration Guide
The default is 3600 seconds. Step 4 In the Prefix Table, click ADD and enter a name for the prefix. Step 5 Enter the prefix length and the lifetime in the Prefix Length and Lifetime fields. Step 6 Click Apply. RV345/345P Administration Guide... -
Page 68: Rv345/345P Administration Guide
Router Advertisement RV345/345P Administration Guide... -
Page 69: Routing
For example, if WAN1 and WAN2 are in load balance mode, and you select WAN 2 as the upstream port, the WAN1 will not receive the multicast traffic regardless of whether the WAN2 is up or down. If selecting the Fixed Interface, make sure to also choose between WAN 1, WAN 2 or VLAN1. RV345/345P Administration Guide... -
Page 70: Rip
• Check Enable to enable sending and receiving routing information on RIP version 2. • Check Passive to disable routing information from being sent on RIP version Passive configuration is activated only when Enable is Note checked. RV345/345P Administration Guide... -
Page 71: Static Routing
The value in the Metric field represents the number of routers between your network Metric and the destination. This is a direct connection, so it can be set to the minimum value of 1. Interface Choose the interface to use for this static route from the drop-down list. RV345/345P Administration Guide... -
Page 72: Rv345/345P Administration Guide
This is a direct connection, so it can be set to the minimum value of 1. Interface Choose the interface to use for this static route from the drop-down list. Step 5 Click Apply. RV345/345P Administration Guide... -
Page 73: Firewall
Check Enable to enable DoS. DoS blocks Ping of Death, SYN Flood Detect Rate [max/sec], IP Spoofing, Echo Storm, ICMP Flood, UDP Flood, and TCP Flood attacks. Block WAN Request Check Enable to block the ICMP echo requests to WAN. LAN/VPN Web Select HTTP or HTTPS. Management RV345/345P Administration Guide... -
Page 74: Access Rules
Step 2 Click Add or select the row and click Edit and enter the following: Rule Status Check Enable to enable the specific access rule. Uncheck to disable. Action Choose Allows or Denies from the drop-down list. RV345/345P Administration Guide... -
Page 75: Rv345/345P Administration Guide
To add a service, click Add. To edit or delete a service, select the row and click Edit or Delete. Step 7 Configure the following: • Application Name — Name of the service or application. • Protocol — Required protocol. Refer to the documentation for the service that you are hosting. RV345/345P Administration Guide... -
Page 76: Network Address Translation
1. Services Select the name of the service, from the drop-down list, to apply for the Static NAT. Interfaces Select the name of the interface from the drop-down list. Check Active to enable. Active RV345/345P Administration Guide... -
Page 77: Port Forwarding
• Protocol — Required protocol. Refer to the documentation for the service that you are hosting. • Port Start/ICMP Type/IP Protocol — Range of port numbers reserved for this service. • Port End — Last number of the port, reserved for this service. RV345/345P Administration Guide... -
Page 78: Port Triggering
• Protocol — Required protocol. Refer to the documentation for the service that you are hosting. • Port Start/ICMP Type/IP Protocol — Range of port numbers reserved for this service. • Port End — Last number of the port, reserved for this service. Step 4 Click Apply. RV345/345P Administration Guide... -
Page 79: Session Timeout
Access to the DMZ Host from the Internet can be restricted by using firewall access rules. We recommend that you place hosts that must be exposed to the WAN for services in the DMZ network. RV345/345P Administration Guide... -
Page 80: Rv345/345P Administration Guide
Firewall DMZ Host To configure the DMZ follow these steps: Step 1 Choose Firewall > DMZ. Step 2 In DMZ Host, check Enable. Step 3 Enter the DMZ Host IP Address. Step 4 Click Apply. RV345/345P Administration Guide... -
Page 81: C H A P T E
50 tunnels. The VPN Setup Wizard guides in configuring a secure connection for site-to-site IPSec tunnel. This simplifies the configuration by avoiding complex and optional parameters, so any user can set up the IPSec tunnel in a fast and efficient manner. RV345/345P Administration Guide... - Page 82 Check Enable to enable PFS and enter the lifetime in seconds, or uncheck Enable to Perfect Forward Secrecy (PFS) disable. When the PFS is enabled, the IKE Phase 2 negotiation generates a new key for the IPSec traffic encryption and authentication. Enabling this feature is recommended. RV345/345P Administration Guide...
-
Page 83: Ipsec Profiles
Phase I and II negotiations in auto mode. These profiles also contain keys for corresponding algorithms in case keying mode is manual. The IPsec profiles are referred in any of IPsec VPN records like site-to-site, client-to-site, or Teleworker VPN client RV345/345P Administration Guide... - Page 84 • AH: Select this for data integrity in situations where data is not secret but must be authenticated. Encryption Select an encryption option (3DES, AES-128, AES-192, or AES-256) from the drop-down list. This method determines the algorithm used to encrypt or decrypt ESP/ISAKMP packets. Select an authentication (MD5, SHA1 or SHA2-256). Authentication RV345/345P Administration Guide...
- Page 85 Enter a number (Hex, 32 characters). Key for encrypting the plain packets in hex format. Step 7 Select an IPsec profile and click Edit or Delete. Step 8 To clone an exiting profile, select a profile and click Clone. Step 9 Click Apply. RV345/345P Administration Guide...
-
Page 86: Site-To-Site
• Connect — Click to connect and establish the tunnel. • Disconnect — Click to disconnect the connection. Create a site-to-site VPN Click to create a new site-to-site tunnel. Create a secure GRE tunnel Click to create a new GRE tunnel. RV345/345P Administration Guide... -
Page 87: Create A Site-To-Site Vpn Connection
Local Identifier Local IP Type Select IP address or Subnet from the drop-down list. IP Address Enter the IP address of the device that can use this tunnel. Enter the subnet mask. Subnet Mask Remote Group Setup RV345/345P Administration Guide... - Page 88 Extended Authentication Check Extended Authentication to enable. For a single user, select User and enter the username and password. For a group, select Group Name, and select admin or guest from the drop-down list. RV345/345P Administration Guide...
-
Page 89: Creating A Secure Gre Tunnel
Click Enable to enable the configuration and complete the following: For GRE Tunnel Information Interface Name Enter the name of the interface to connect to tunnel. Tunnel Source Select the tunnel source (WAN1, WAN2, USB1, or USB2) from the drop-down list. RV345/345P Administration Guide... - Page 90 • Tunnel all traffic — To allow all the traffic through the tunnel. IP Address Click Add and enter the IP Address. You can also edit or delete the existing record by clicking Edit or Delete. RV345/345P Administration Guide...
-
Page 91: Client To Site
Step 3 To add a Client to Site connection, click Add. Step 4 In the Add a New Group section, select an option (Cisco VPN Client or 3rd Party Client). Step 5 For Cisco VPN Client, configure the following: Enable Click Enable to enable the configuration. - Page 92 Enter the IP address of the primary WINS. Primary Windows Internet Name Service (WINS) Server Secondary WINS Server Enter the IP address of the secondary WINS. Enter the name of the default domain to be used in remote network. Default Domain RV345/345P Administration Guide...
- Page 93 Check Extended Authentication to enable. Click Add to add an extended authentication and select admin or guest. Pool Range for Client LAN Start IP - Enter the start IP address for the pool range.End IP - Enter the end IP address for the pool range. RV345/345P Administration Guide...
- Page 94 Protocol (IP Camp)) When the router is the responder, it accepts compression, even if compression is not enabled. If you enable this feature for this router, also enable it on the router at the other end of the tunnel. RV345/345P Administration Guide...
-
Page 95: Teleworker Vpn Client
The Teleworker VPN Client feature minimizes the configuration requirements at remote locations by allowing the device to work as a Cisco VPN hardware client. When the Teleworker VPN Client starts the VPN connection, the IPSec VPN server pushes the IPSec policies to the Teleworker VPN Client and creates the corresponding tunnel. - Page 96 VPN connection to the backup servers. The backup server 1 has the highest priority and the backup server 3 has the lowest priority. Enter the time in seconds (Range 30 to 480). Peer Timeout Step 5 Click Apply. RV345/345P Administration Guide...
-
Page 97: Pptp Server
Check On or Off to enable or disable the L2TP server. L2TP Server Maximum Transmission The size of the largest packet that can be sent over L2TP tunnel. If L2TP has been enabled, enter the size of a packet (Range 128-1400, Default 1400). Unit RV345/345P Administration Guide... -
Page 98: Ssl Vpn
2 SSL VPN tunnels by default, and the user can register a license to support up to 50 tunnels. Once installed and activated, the SSL VPN will establish a secure, remote-access VPN tunnel. In addition, a Cisco AnyConnect Secure Mobility Client license is required to install and use the Cisco Note AnyConnect Secure Mobility Client on your device. - Page 99 Enter the policy name. Group policies that apply whole sets of attributes to a group of users, rather than having to specify each attribute individually for each user. Primary DNS Enter the IP address of the primary DNS server. RV345/345P Administration Guide...
-
Page 100: Vpn Passthrough
The VPN Passthrough allows VPN clients to pass through this router and connect to a VPN endpoint. It is enabled by default. To configure the VPN Passthrough, follow these steps: Step 1 Select VPN > VPN Passthrough. Step 2 To enable VPN Passthrough, check Enable for each of the approved protocols: RV345/345P Administration Guide... - Page 101 • PPTP Passthrough — Point-to-Point Tunneling Protocol (PPTP) allows the Point-to-Point Protocol (PPP) to be tunneled through an IP network. • L2TP Passthrough — Layer 2 Tunneling Protocol is the method used to enable Point-to-Point sessions by using the Internet at Layer 2. Step 3 Click Apply. RV345/345P Administration Guide...
- Page 102 VPN Passthrough RV345/345P Administration Guide...
-
Page 103: Security
Click Next, and above the Application List Table, click Edit to configure the application names to be filtered (blocked or logged etc). Click Apply, once you have selected the content you wish to filter. Step 4 Click Next and select the schedule to block the application from the drop-down list. Step 5 Click Submit. RV345/345P Administration Guide... -
Page 104: Application Control
• OS Type — Select OS type To specify when the Application Control policy should be active, select the schedule Schedule from the drop down list or Click Always On to apply web filtering. Step 5 Click Apply. RV345/345P Administration Guide... -
Page 105: Web Filtering
• Black List — Click Add to define the Domain Name or Keyword that should be blocked. • Exclusion List — Click Add to specify the IP Address that is excluded from this policy. Click Apply. RV345/345P Administration Guide... -
Page 106: Content Filtering
IP address and MAC address of each packet matches entries in the IP-MAC Binding table. This feature helps prevent IP spoofing attacks when a host tries to spoof and use the IP address of another host. RV345/345P Administration Guide... - Page 107 Click Edit or Delete to edit or delete and existing address. Note The DHCP Lease Table list all available Static DHCP and Dynamic leases from the DHCP server/relay. Click Add to IP & MAC Binding Table to add the available leases to the binding table. RV345/345P Administration Guide...
- Page 108 Security IP Source Guard RV345/345P Administration Guide...
-
Page 109: Chapter 1 2 Where To Go From Here
Cisco Firmware Downloads http://www.cisco.com/go/smallbizfirmware Select a link to download the firmware for your Cisco product. No login is required. Cisco Open Source Requests If you wish to receive a copy of the source code to which you are... - Page 110 Where To Go From Here Where To Go From Here RV345/345P Administration Guide...