D-Link DNR-322L User Manual
Hide thumbs
Also See for DNR-322L:
- User manual (110 pages) ,
- Quick installation manual (81 pages) ,
- Quick install manual (8 pages)
Table of Contents
Advertisement
Quick Links
Advertisement
Table of Contents

Related Manuals for D-Link DNR-322L


Summary of Contents for D-Link DNR-322L
-
Page 1: User Manual
Version 3.00 | 2015/07/23 User Manual mydlink Network Video Recorder DNR-322L... - Page 2 Manual Overview D-Link reserves the right to revise this publication and to make changes in the content hereof without obligation to notify any person or organization of such revisions or changes. Information in this document may become obsolete as our services and websites develop and change.
-
Page 3: Table Of Contents
..................14 Help ....................60 mydlink Website ................14 NVR Status ................15 Applications ................61 Live Video ................16 D-Link NVR Search Utility - Windows ........61 Playback .................17 D-Link NVR Search Utility - Mac ..........63 Open Recording ..............18 Playback Manager ..............64 Status ..................19 Remote Backup ................66... - Page 4 Table of Contents Knowledge Base ..............74 What is RAID? ................74 RAID Options ................76 Troubleshooting ..............78 Technical Specifications ............79 D-Link DNR-322L User Manual...
-
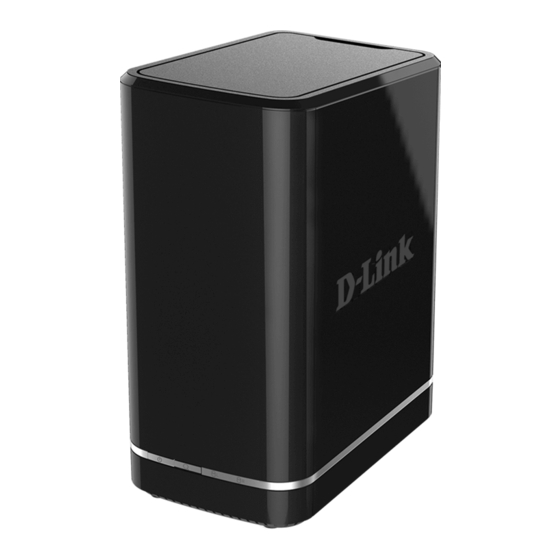
Page 5: Product Overview
Quick Install Guide If any of the above items are missing, please contact your reseller. Note: Using a power supply with a different voltage rating than the one included with the DNR-322L will cause damage and void the warranty for this product. -
Page 6: System Requirements
• One 3.5” SATA hard disk drive (Up to two 3.5” SATA hard disk drives supported) • Broadband Internet connection (for remote access) Network Requirements • Network camera(s) (refer to the D-Link website for a list of supported cameras) • 10/100/1000 Mbit Ethernet switch or router Computer with the following: •... -
Page 7: Introduction
If one drive fails while configured as RAID 1, the unaffected drive continues to function as a single drive until the failed drive is replaced. The new drive will then be re-mirrored, allowing the DNR-322L to return to its full protective state. -
Page 8: Features
Comprehensive IP Surveillance Solution • Total Solution: The DNR-322L is a standalone network video recorder capable of 24/7 recording without a PC. The NVR can manage multiple network cameras, providing direct access to view live video and play recorded data through the Internet from anywhere, anytime. - Page 9 • Multiple User Privilege Control: Administrators may also choose access privileges for users by specifying the cameras they may have access to for live view, playback, audio, and PTZ functions. • Backup Recording Data: Recorded data is stored in a secure database. This recorded data can be backed up D-Link DNR-322L User Manual...
- Page 10 • AVI Outputs: Raw video can be exported to AVI format. • Playback Speed Control: Playback speed control allows for fast forward or fast rewind, and step playback can display video one frame at a time. D-Link DNR-322L User Manual...
-
Page 11: Checking The Hardware Requirements
Checking the Hardware Requirements To use your DNR-322L, you will need at least one hard drive installed. If you plan to use RAID 1, which protects your data against failure of one hard drive, you will need to install two hard drives. -
Page 12: Hardware Overview
Press once to power on the NVR. Press and hold the button for more than 5 seconds to power it down. Auto Scan Button Press this button to automatically scan for cameras on the network. Left/Right HDD Identifies the left and right installed hard drives. LED Indicators Illuminates depending on activity (see next page for details). D-Link DNR-322L User Manual... -
Page 13: Hardware Overview
Not searching for Cameras Searching for cameras Scan Camera Search Finished Left HDD HDD installed Reading/Writing No HDD installed Installed Hard Drive has failed Right HDD HDD installed Reading/Writing No HDD installed Installed Hard Drive has failed D-Link DNR-322L User Manual... -
Page 14: Rear Panel
Connect the supplied power cord to the receptor. Gigabit Ethernet Port Use the Gigabit Ethernet port to connect the NVR to your local network. USB 2.0 Port The type A USB 2.0 port supports connections to UPS devices for power state monitoring. D-Link DNR-322L User Manual... -
Page 15: Bottom Panel
COMPONENT DESCRIPTION Product Details Information about the product - DNR-322L including serial number, part number, manufacturer number etc. Reset Button Press and hold this button for more than 10 seconds to restore the factory defaults to the unit. D-Link DNR-322L User Manual... -
Page 16: Product Setup
Setup Wizard - Windows Run the NVR Setup Wizard from the CD-ROM included in your package. The NVR Setup Wizard will walk you through installing and configuring your DNR-322L, including installing the hard drive and connecting it to your network. Step 1: Insert the DNR-322L installation CD. -
Page 17: Setup Wizard - Mac
Setup Wizard - Mac Run the NVR Setup Wizard from the CD-ROM included in your package. The NVR Setup Wizard will walk you through installing and configuring your DNR-322L, including installing the hard drive and connecting it to your network. Step 1: Insert the DNR-322L installation CD in the CD-ROM drive. -
Page 18: Mydlink
To connect to your NVR, click on the Connect button and provide your DNR-322L’s password to complete the login process. After you have connected to the DNR-322L’s NVR, you will be taken to the Live Video page. (Refer to”Live Video” on page D-Link DNR-322L User Manual... -
Page 19: Nvr Status
• Check to make sure that the LED on your NVR is lit solid green. If you still cannot access your NVR, reset your NVR and run the NVR Setup Wizard again from the CD-ROM included in your package. D-Link DNR-322L User Manual... -
Page 20: Live Video
Use this control to view video in its native resolution. Record Use this control to start/stop recording. Save to Image Use this option to save a snapshot image. Glance Use this option to toggle glance mode. D-Link DNR-322L User Manual... -
Page 21: Playback
Zoom Control Use the + and - buttons to zoom in or out. Use this control to view video in its native Actual Size resolution. Save to Image Use this option to save a snapshot image. D-Link DNR-322L User Manual... -
Page 22: Open Recording
Available recordings are shown in the timeline. Blue bars indicate an Available Recordings event was recorded. Red bars indicate the camera is set to always record. Selected Period Click within the timeline to select a recording period. D-Link DNR-322L User Manual... -
Page 23: Status
Unused Space: This shows the amount of space available for recording on the storage device attached to the HDD or USB Port. Status: This shows if the storage device attached to the HDD or USB port is currently being recorded on. D-Link DNR-322L User Manual... -
Page 24: Nvr Info
NVR activated on: Displays the time and date that your device was added to mydlink. Advanced Setting: This section takes you to the login page for the NVR’s Web GUI Interface. After you log in, you can adjust advanced settings for the NVR. D-Link DNR-322L User Manual... -
Page 25: Mydlink View - Nvr App
Once the download has been completed, launch the “mydlink View - NVR” app and log in to your mydlink account. (Refer to “mydlink” on page 14 to learn how to add the NVR to your mydlink account.) Select your DNR-322L from the device list to access the live video from the connected cameras. -
Page 26: First Use - Select Your Device
After starting the mydlink View - NVR app, your DNR-322L will be displayed in the My Device list. The app will connect to your DNR-322L, and you can then view live video and playback from your recordings archive via your device. -
Page 27: Live View
Section 3 - mydlink Live View To view your camera feed on a tablet or smart phone, tap on the DNR-322L DNR-322L icon and the mydlink View-NVR will open the Live video panel. iPhone/iPad Touch Grid View DNR-322L On an iPhone or an iPad, mydlink View-NVR can display the Device List of your mydlink account on the main screen. - Page 28 Use a two finger tap on the video stream again to disable the PTZ control panel. Note: The PTZ control function must be enabled on the camera connected to the DNR-322L in order for mydlink View-NVR to control the PTZ function. See “Live Video” on page 29 for more iformation. D-Link DNR-322L User Manual...
- Page 29 Complete the To, Cc/Bcc fields as required and tap Send to send the e-mail with snapshot attached or tap Cancel to cancel the operation. D-Link DNR-322L User Manual...
-
Page 30: Video Playback
) while in single channel mode to bring up the playback selection panel. Use the playback selection panel to scroll through your video recordings archive. Scroll to the date and time you wish to play back, and tap Play. D-Link DNR-322L User Manual... -
Page 31: Video Playback Control
• Step forward for 1 second ( Use the speed panel ( ) to control the speed of video playback from x1 through x32 speed. Note: The quality of display performance will vary according to network bandwidth availability. D-Link DNR-322L User Manual... -
Page 32: Web Utility
LIVE VIDEO - Shows the live video of network cameras and controls PTZ functions. PLAYBACK - Displays recorded video and exports snapshots or video. LOG OUT -Logs out of the NVR. SHUT DOWN - Shuts down the NVR. D-Link DNR-322L User Manual... -
Page 33: Live Video
6. Right-clicking on the video will show the option to Full Screen. Press the ESC button on the keyboard to return to normal display. 7. Swap: Right-click on the video and select Swap to display a different video channel. D-Link DNR-322L User Manual... - Page 34 View as 1 + 12: View 12 cameras with one enlarged view in the top left. View as 4 + 9: View 13 cameras with four enlarged views in the top left. View as 12 + 1: View 13 cameras with one enlarged view in the center. D-Link DNR-322L User Manual...
- Page 35 Actual Size: Switch the video to the actual size or fill the window. OSD: Display the information on the video. Snapshot: Click to take a snapshot and save it to an album Manual record: Click to enable or disable manual recording D-Link DNR-322L User Manual...
- Page 36 PTZ (pan, tilt, and zoom) camera control panel to adjust the camera angle. This function is only available with cameras that support the PTZ function. System Info: Displays Storage Information, such as HDD and USB drive information. Log: Displays the System, NVR, and Event logs. D-Link DNR-322L User Manual...
- Page 37 Scan Camera: Click Scan Camera and the NVR will use Admin as the user name and a blank password to automatically add any network cameras from the same local area network. The device buzzer will sound to indicate scanning has been initiated. D-Link DNR-322L User Manual...
-
Page 38: Playback
Display N feed: Cycle between 2x2, 3x3, and 4x4 channel view. Actual Size: Use this button to display the recording in its original resolution. Display 2 + 8 feed left: View 10 cameras with two enlarged views along the left side. D-Link DNR-322L User Manual... - Page 39 Speed: Click to increase or decrease the playback speed. Cue in/Cue Out: Click the Cue In or Cue Out button to set the period for Save Video. Reverse/Step Forward: Click to pause the playback and move to next frame or last frame. D-Link DNR-322L User Manual...
-
Page 40: Menu Bar
Backup: This will let you back up the recordings stored on the NVR to a USB drive, Samba server, or FTP server. Refer to “Backup” on page 58. Help: This shows more information about using the NVR. Refer to “Help” on page 60. D-Link DNR-322L User Manual... -
Page 41: Setup Wizard
Section 4 - Configuration Setup Wizard The Setup Wizard, helps you set up and configure the basic settings of the NVR. Select the language you want to use, then click the Next button to start the wizard. D-Link DNR-322L User Manual... -
Page 42: Setup
ISP. The connection status will be determined automatically by the system. DHCP Enable or disable the DHCP server. If your network doesn’t have a DHCP server: server, enable this feature for easier local network setup. D-Link DNR-322L User Manual... - Page 43 Enable Enable the Bonjour service to allow users to discover the DNR-322L with Bonjour: Apple devices. Bonjour Enter the name of the device that will be used to identify the DNR-322L Name: when using Apple devices. D-Link DNR-322L User Manual...
- Page 44 DDNS server IP address other than dyndns or dlinkddns. Host Name: Enter your host name. For example: myhost.mydomain.net. Username: Enter the username for your dynamic DNS account. Password: Enter the password for your dynamic DNS account. D-Link DNR-322L User Manual...
- Page 45 Note: Make sure you enter the IP address of the PC you use to access the NVR before enabling this option, or you may not be able to access it afterwards. Enable Enabling this will block all IP addresses in the blocked list from accessing Blocked List: your NVR. D-Link DNR-322L User Manual...
-
Page 46: Camera
Format: Enable Turn the microphone on and off. Microphone: Audio in Select the audio in gain level. Gain Level: Enable Enable audio out on the camera (if supported). Speaker: Audio Out Adjust the volume. Volume Level: D-Link DNR-322L User Manual... - Page 47 Clear all motion detection area selections on this channel. Restore: Restore previous motion detection area selections on this channel. Select All: Click on the check box to select all motion detection area selections on this channel. D-Link DNR-322L User Manual...
-
Page 48: Schedule
Select a camera from the camera list, and click Delete Schedule to delete Schedule: the schedule for the selected camera. Copy Select a camera from the camera list, and click Copy Schedule to create a Schedule: duplicate schedule. D-Link DNR-322L User Manual... - Page 49 • Alternatively, you can drag the time bar to change the recording period. The red bar represents the Continuous Recording feature and the blue bar represents the Record on motion feature. D-Link DNR-322L User Manual...
-
Page 50: Event
Click this button and the system will send a test mail to verify whether your settings are correct. Adding Contacts Step 1: Insert the name of a new contact. Step 2: Insert the e-mail address of this new contact. Step 3: Click Add. D-Link DNR-322L User Manual... - Page 51 20K Bytes in BMP and JPG file format. You can then drag and drop camera icons onto the E-Map indicating camera placement. Edit: Upload your graphic map. Delete: Delete a camera icon from the map. D-Link DNR-322L User Manual...
-
Page 52: Event Settings
An alert will be sent if there is an error with the hard disk. Error: Fan Error: An alert will be sent if there is a fan error. Network An alert will be sent if the network connection is lost. Disconnected: D-Link DNR-322L User Manual... - Page 53 Select this option to update the camera status on the E-Map. E-Mail: Select this option to have e-mail sent to a specified SMTP account after receiving a camera event. Note: alerts will not be sent if network connectivity is lost. D-Link DNR-322L User Manual...
- Page 54 Displays the system log information. NVR Log: Displays the NVR log information such as when recording stops or the NVR system starts. NVR Event Displays the event log information such as motion detection or if a Log: camera is disconnected. D-Link DNR-322L User Manual...
-
Page 55: Maintenance
Displays the date. Bitrate: Displays the bitrate. Size: Displays the size in pixels. Color: Change the color of camera’s OSD. Camera Displays the camera number. Number: Time: Displays the time. Frame Rate: Displays the frame rate. D-Link DNR-322L User Manual... -
Page 56: User Account
If the administrator password is lost, you may hold the reset button on the rear panel of the device to reset the NVR to factory defaults. Note: Resetting the device will erase all previously saved settings. D-Link DNR-322L User Manual... - Page 57 Enable or disable auto plugin. Enabling auto plugin allows the NVR Plugin: to automatically detect any connected cameras on the LAN. NVR will automatically change the secondary video profile of IP cameras once this option is enabled. D-Link DNR-322L User Manual...
-
Page 58: Time And Date
Check the box to enable daylight savings time. You can select enable auto Saving daylight saving, or manual daylight saving to manually set the month, Time: week, day, hour and minute or when daylight saving starts. D-Link DNR-322L User Manual... -
Page 59: Firmware Upgrade
NVR’s USB port. Click Browse to search the USB drive for the firmware update file. Click Load to upgrade. The new version number will be displayed. You can check for firmware updates on the D-Link Support Page. -
Page 60: Hard Drive
Refer to “What is RAID?” on page 74 for more information about hard drive setup options. Note: Do not eject the USB drive without clicking eject first, or the files on the USB drive may become damaged. D-Link DNR-322L User Manual... -
Page 61: Camera Search
Step 4: Click Add to add the selected camera. Step 5: After clicking Add, the updated information will be displayed in the camera list. Repeat steps 2 through 5 to add other cameras to your list. D-Link DNR-322L User Manual... -
Page 62: Backup
You can select whether to back up to a USB drive, a Samba server, or an Type: FTP site. Start/Stop: Click Start to start a manual backup using the settings specified, or click Stop to stop a currently running backup. D-Link DNR-322L User Manual... - Page 63 Enter the folder path for the FTP server that you want to back up your recordings to. User Name: Enter the username for your FTP server account. Password: Enter the password for your FTP server account. D-Link DNR-322L User Manual...
-
Page 64: Help
Section 4 - Configuration Help The NVR Help page provides a list of support topics. D-Link DNR-322L User Manual... -
Page 65: Applications
NVR IP address, you can use the NVR Search Utility provided on the product CD to locate the device on your network and make any needed changes. Network The D-Link NVR Search Utility displays any NVR devices it detects on the Video network. - Page 66 Note: The computer used to access the NVR web-based configuration manager must be on the same subnet as the NVR. If your network is using a DHCP server and the computer receives IP settings from the DHCP server, the NVR will automatically be in the same subnet. D-Link DNR-322L User Manual...
-
Page 67: D-Link Nvr Search Utility - Mac
IP address before logging in or are unable to connect to the NVR IP address, you can use the NVR Search Utility provided on the product CD to locate the device on your network and make any needed changes. Network The D-Link NVR Search Utility displays any NVR devices it detects on the Video network. -
Page 68: Playback Manager
Select the date you would like to find the video records of. Highlight the video records that you would like to review. Click the OK button. Play Stop Select a camera/video and click this button to play/stop/pause a particular channel. Step forward Step backward D-Link DNR-322L User Manual... - Page 69 Section 5 - Applications Fast forward Rewind Set the start point of the export file. Set the end point of the export file. D-Link DNR-322L User Manual...
-
Page 70: Remote Backup
Section 5 - Applications Remote Backup You can run the remote backup application to back up your files. Run the application by going to Start > Programs > D-Link > DNR-322L > Remote Backup. Step 1: Input the IP address of your unit. - Page 71 Section 5 - Applications Step 12: Click OK. D-Link DNR-322L User Manual...
-
Page 72: Verification Tool
Choose a folder with multiple files to list for verification. Remove Remove indicated file(s) from list. File: Select All: Select all files in the list for verification. Note: Choose the file type first before selecting files. D-Link DNR-322L User Manual... - Page 73 RAID 1, it is best then to migrate from Standard Mode to RAID 1. To do this, follow these instructions: Insert a second hard drive into the DNR-322L as per the instructions for the initial installation. The existing hard drive should be the volume which you wish to create a mirror of using the RAID 1 format.
-
Page 74: Hard Drive Installation
Ensure that the bracket is aligned so that when the hard drive is inserted, the arrow on the top will point to the front of the NVR. 2. Remove the top cover from the NVR by pressing the PUSH button on the back and lifting the cover. D-Link DNR-322L User Manual... - Page 75 Some hard drives that are thin or oddly shaped may need to be inserted carefully into position. If a drive is not properly set in place, the hard drive LED will not illuminate after powering on the device. D-Link DNR-322L User Manual...
- Page 76 Section 7 - Knowledge Base 5. Reattach the top cover of the NVR. 6. Connect one end of the Ethernet cable to the NVR’s Ethernet port, and the other end into your router. D-Link DNR-322L User Manual...
- Page 77 7. Next, connect the power cable to the power adapter and connect it to the NVR’s power port and then plug the power cable into your wall outlet or power strip. Press the power button on the front of the device to turn it D-Link DNR-322L User Manual...
-
Page 78: Knowledge Base
RAID, short for Redundant Array of Independent Disks, is a combination of two or more disks with the aim of providing fault tolerance and performance improvement. There are several different levels of RAID, with each one providing a different method of sharing or distributing data amongst the drives. The DNR-322L supports Standard, JBOD, RAID 0, and RAID 1. Standard Standard provides a single volume for each drive. - Page 79 A RAID 1 array can only be as large as it’s smallest member disk. Because the data is stored on multiple disks, RAID 1 provides fault tolerance and protection, in addition to performance advantages. D-Link DNR-322L User Manual...
-
Page 80: Raid Options
Section 7 - Knowledge Base RAID Options Here is a list of the RAID options available on the DNR-322L. Standard RAID - creates a single volume for one drive or more drives. JBOD - Allows you to create a large virtual disk drive by concatenating two or more smaller drives together. - Page 81 RAID 1 set fails. In fact, as long as any single member of the set remains functional, you will continue to operate normally, with complete access to your data. D-Link DNR-322L User Manual...
-
Page 82: Troubleshooting
Step 1: Open Internet Explorer and connect to your NVR. Step 2: The browser will ask whether to install ActiveX. Step 3: Click the upper bar to begin the installation process. Step 4: Click Install to complete the process. D-Link DNR-322L User Manual... -
Page 83: Technical Specifications
Technical Specifications NUMBER OF SUPPORTED CAMERAS: FLASH ROM • • 128 MB SUPPORTED CAMERA TYPES • Supports all D-Link network cameras. Includes support for auto- discovery via UPnP • 512 MB DDRIII • ONVIF Camera DEVICE BUTTONS USER INTERFACE •... -
Page 84: Software Features
D-Link DDNS server support • Synchronized audio & video recording. SYSTEM TIME VIDEO SETTING • Set the system time (D-Link NTP, input time, sync with computer, Daylight Saving Time) • Resolution, quality, frame rate, enable audio, image parameters REMOTE BACKUP RECORDING TYPE •... -
Page 85: Regulatory Information
For product available in the USA/Canada market, only channel 1~11 can be operated. Selection of other channels is not possible. This device and its antenna(s) must not be co-located or operating in conjunction with any other antenna or transmitter except in accordance with FCC multi-transmitter product procedures. D-Link DNR-322L User Manual... - Page 86 (5) Please follow instructions for repairing if any (e.g. battery replacement section); otherwise do not alternate or repair any parts of device except specified. (6) Connection to party line service is subject to state tariffs. Contact the state public utility commission, public service D-Link DNR-322L User Manual...
- Page 87 L'exploitation est autorisée aux deux conditions suivantes : (1) l'appareil ne doit pas produire de brouillage, et (2) l'utilisateur de l'appareil doit accepter tout brouillage radioélectrique subi, même si le brouillage est susceptible d'en compromettre le fonctionnement. D-Link DNR-322L User Manual...
- Page 88 L'exploitation est autorisée aux deux conditions suivantes : (1) l'appareil ne doit pas produire de brouillage, et (2) l'utilisateur de l'appareil doit accepter tout brouillage radioélectrique subi, même si le brouillage est susceptible d'en compromettre le fonctionnement. D-Link DNR-322L User Manual...
- Page 89 CAUTION: Risk of explosion if battery is replaced by an incorrect type. Dispose of used batteries according to the instructions. ATTENTION: Risque d'explosion si la batterie est remplacée par un type incorrect. Jetez les piles usagées selon les instructions. D-Link DNR-322L User Manual...
- Page 90 This is a Class B product based on the standard of the VCCI Council. If this is used near a radio or television receiver in a domestic environment, it may cause radio interference. Install and use the equipment according to the instruction manual. D-Link DNR-322L User Manual...
- Page 91 Appendix B - Regulatory Information CE EMI Class B Warning This is a Class B product. In a domestic environment, this product may cause radio interference, in which case the user may be required to take adequate measures. D-Link DNR-322L User Manual...
- Page 92 D-Link may result in the loss of product warranty. Unless expressly approved by an authorized representative of D-Link in writing, you may not and may not permit others to: • Disassemble or reverse engineer the device or attempt to derive source code (underlying ideas, algorithms, or structure) from the device or from any other information provided by D-Link, except to the extent that this restriction is expressly prohibited by local law.
- Page 93 • Use the device only with approved equipment. • Move products with care; ensure that all casters and/or stabilizers are firmly connected to the system. Avoid sudden stops and uneven surfaces. D-Link DNR-322L User Manual...
- Page 94 ErP Power Usage This device is an Energy Related Product (ErP) designed to be always on. It can be turned off through a power switch to save energy when it is not needed. Switched Off: 0.48 watts” D-Link DNR-322L User Manual...
- Page 95 D-Link recommends that you always switch off or unplug your D-Link products when they are not in use. By doing so you will help to save energy and reduce CO2 emissions.
- Page 96 Chez D-Link, nous sommes conscients de l'impact de nos opérations et produits sur l'environnement et nous engageons à le réduire. Pour limiter cet impact, D-Link conçoit et fabrique ses produits de manière aussi écologique que possible, en utilisant des matériaux recyclables et faiblement toxiques, tant dans ses produits que ses emballages.
- Page 97 D-Link e l'ambiente D-Link cerca da sempre di ridurre l'impatto ambientale dei propri stabilimenti e dei propri prodotti. Allo scopo di ridurre al minimo tale impatto, D-Link progetta e realizza i propri prodotti in modo che rispettino il più possibile l'ambiente, utilizzando materiali riciclabili a basso tasso di tossicità...
- Page 98 D-Link raadt aan om steeds uw D-Link producten uit te schakelen of uit de stekker te halen wanneer u ze niet gebruikt. Door dit te doen bespaart u energie en beperkt u de CO2-emissies.
- Page 99 životní prostředí i lidské zdraví. D-Link a životní prostředí "Ve společnosti D-Link jsme si vědomi vlivu našich provozů a výrobků na životní prostředí a snažíme se o minimalizaci těchto vlivů. Proto své výrobky navrhujeme a vyrábíme tak, aby byly co nejekologičtější, a ve výrobcích i obalech používáme recyklovatelné...
- Page 100 For å minimalisere denne innvirkningen designer og lager D-Link produkter som er så miljøvennlig som mulig, ved å bruke resirkulerbare, lav-toksiske materialer både i produktene og forpakningen. D-Link anbefaler at du alltid slår av eller frakobler D-Link-produkter når de ikke er i bruk. Ved å gjøre dette hjelper du å spare energi og å redusere CO2-utslipp.
- Page 101 På D-Link förstår vi och är fast beslutna att minska den påverkan våra verksamheter och produkter kan ha på miljön. För att minska denna påverkan utformar och bygger D-Link sina produkter för att de ska vara så miljövänliga som möjligt, genom att använda återvinningsbara material med låg gifthalt i både produkter och förpackningar.
- Page 102 Na D-Link compreendemos e comprometemo-nos com a redução do impacto que as nossas operações e produtos possam ter no ambiente. Para minimizar este impacto a D-Link concebe e constrói os seus produtos para que estes sejam o mais inofensivos para o ambiente possível, utilizando meteriais recicláveis e não tóxicos tanto nos produtos como nas embalagens.