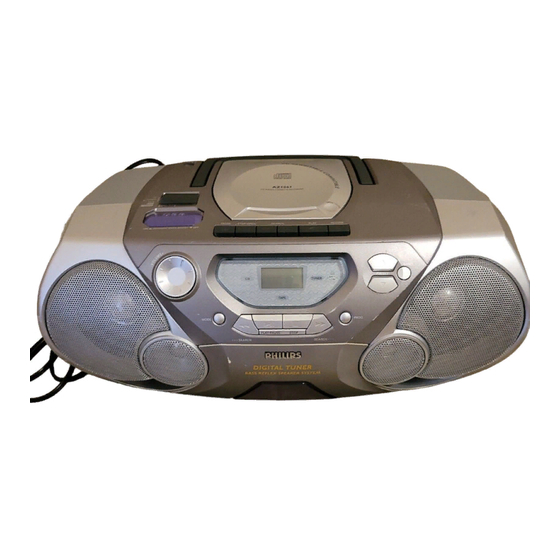
Philips AZ 1060 User Manual
Philips cd radio cassette recorder user manual
Hide thumbs
Also See for AZ 1060:
- User manual (52 pages) ,
- Service manual (37 pages) ,
- Specifications (2 pages)

Related Manuals for Philips AZ 1060


Summary of Contents for Philips AZ 1060
- Page 1 CD Radio Cassette Recorder 1060 1061 Audio Audio Toll Free Help Line Ligne d'assistance en service libre Linea de ayuda telefónica sin cargo 800-531-0039...
- Page 2 Return your Warranty Registration card today to ensure you receive all the benefits you’re entitled to. • Once your Philips purchase is registered, you’re eligible to receive all the privileges of owning a Philips product. Warranty Verification Registering your product...
- Page 3 2 3 4 &...
- Page 4 CAUTION Use of controls or adjustments or performance of procedures other than herein may result in hazardous radiation exposure. ATTENTION L’utilisation des commandes ou réglages ou le non-respect des procédures ci- incluses peuvent se traduire par une exposition dangereuse à l’irradiation. ATENCIÓN El uso de mandos o ajustes o la ejecucción de métodos que no sean los aquí...
-
Page 5: Table Of Contents
...4, 31 + 32 Garantie limitada ...33 Controles ...34 Alimentación ...35 Funciones básicas ...36 Información general ...36 INDEX Digital tuner ...11 CD Player ...12-14 Cassette recorder...14 Recording ...15-16 Maintenance ...16 Troubleshooting...17 Syntoniseur numérique ...24 Lecteur de CD ...25-27 Platine cassette ...27 Enregistrement...28-29... -
Page 6: Important Safety Instructions
IMPORTANT SAFETY INSTRUCTIONS – Read before operating equipment This product was designed and manufactured to meet strict quality and safety standards. There are, however, some installation and operation precautions which you should be particularly aware of. 1. Read these instructions – All the safety and operating instructions should be read before the appliance is operated. -
Page 7: Limited Warranty
Adjustments of the controls discussed there may save you a trip. This warranty gives you specific legal rights.You may have other rights which vary from state/province to state/province. Philips Service Solutions Group, P.O. Box 2976, Longview,Texas 75606, (903) 242-4800 LIMITED WARRANTY PORTABLE AUDIO One Year Free Exchange EXCHANGING A PRODUCT IN U.S.A.,... -
Page 8: Controls
CONTROLS TOP AND FRONT PANELS 1 VOLUME - adjusts the volume level 2 DBB (Dynamic Bass Boost) - enhances the bass 3 POWER slider - selects the sound source for CD/ TUNER/ TAPE/ and also switches the set off 4 Function indicators - lights up if the respective CD, tape or tuner function is in use 5 Display - shows the status of the set 6 p - 3.5 mm stereo headphone jack... -
Page 9: Power Supply
Whenever convenient, use the power supply if you want to conserve battery life. Make sure you remove the plug from the set and wall outlet before inserting batteries. BATTERIES (NOT INCLUDED) 1. Open the battery compartment and insert six batteries, type R-20, UM-1 or D-cells, (preferably alkaline) with the correct polarity as indicated by the "... -
Page 10: Basic Functions
1. Turn VOLUME to the desired level. 2. Adjust the DBB control to select dynamic bass boost on or off. PHILIPS demo mode 1. Press the CD STOP 9 button for 5 seconds. ™ After about 30 seconds, PH..IL ..IPS scrolls across the display. -
Page 11: Digital Tuner
TUNING TO RADIO STATIONS 1. Select RADIO source. ™ The function indication lights up. and then the radio station frequency is shown. 2. Press BAND once or more to select your waveband. 3. Press SEARCH ∞ or § and release when the frequency in the display starts running. -
Page 12: Cd Player
3. Insert a CD or CD-R(W) with the printed side facing up and close the CD door. ™ Display: flashes as the CD player scans the contents of a CD. The total number of tracks and playing time are then shown. - Page 13 4. Press PLAY•PAUSE 2; to start playback of your CD program. Reviewing the program In the stop position, press and hold down PROG for a while until the display shows all your stored track numbers in sequence. CD PLAYER PROGRAM...
-
Page 14: Cassette Recorder
CD player and CD handling • The lens of the CD player should never be touched! • If the CD player cannot read CDs correctly, use a commonly available cleaning CD to clean the lens before taking the set to repair. -
Page 15: Recording
– Playing of the CD program starts automatically from the beginning of the program. It is not necessary to start the CD player separately. To select and record a particular passage • Press and hold down on SEARCH ∞ or §. -
Page 16: Maintenance
RECORDING Recording from the radio 1. Tune to the desired radio station (see Tuning to radio stations). 2. Press STOP•OPEN 9/ to open the cassette door. 3. Insert a suitable cassette into the cassette deck and close the cassette door. 4. -
Page 17: Troubleshooting
If a fault occurs, first check the points listed below before taking the set for repair. If you are unable to remedy a problem by following these hints, consult your dealer or service center. WARNING: Do not open the set as there is a risk of electric shock. Under no circumstances should you try to repair the set yourself, as this will invalidate the warranty. - Page 18 Renvoyez votre carte d’enregistrement de garantie pour vous assurer de recevoir tous les avantages auxquels vous avez droit. • Dès que l’achat de votre appareil Philips est enregistré, vous avez droit à tous les avantages dont bénéficient les possesseurs des produits Philips.
- Page 19 CONSIGNES DE SÉCURITÉ IMPORTANTES – A lire avant toute utilisation du matériel Ce produit a été conçu et fabriqué en accord avec des normes de sécurité et de qualité très strictes. Il existe toutefois des précautions d'installation et de fonctionnement qu'il est important de connaître et de respecter.
-
Page 20: Garantie Limitée
Cette garantie vous donne des droits légaux spécifiques et vous pourriez avoir d’autres droits qui varient d’état en état et de province en province. Philips Service Solutions Group, P.O. Box 2976, Longview,Texas 75606, É.-U., (903) 242-4800 GARANTIE LIMITÉE Échange gratuite pendant un an... -
Page 21: Commandes
COMMANDES PANNEAUX SUPERIEUR ET AVANT 1 VOLUME - règle le niveau du volume 2 DBB (Dynamic Bass Boost) - améliore les graves 3 Coulisse POWER - sélectionne la source son pour CD/ TUNER/ TAPE/ mettre l’équipement hors service 4 Indicateurs de fonction - s’allument lors de l’utilisation de la fonction respective: CD, cassette ou radio 5 Afficheur - indique le mode actuel de... -
Page 22: Alimentation
ALIMENTATION L'emploi de commandes ou de réglages ainsi que la réalisation de procédures de façon autre que décrits dans ce mode d’emploi, peut avoir pour résultat une exposition dangereuse aux radiations ou encore un fonctionnement non conforme aux normes de sécurité. PILES (NON COMPRISES) 1. -
Page 23: Fomctions De Base
2. Appuyez sur la touche DBB pour mettre en/hors circuit le dynamic bass boost. PHILIPS demo mode (Mode de démonstration PHILIPS) 1. Appuyez sur le bouton de CD STOP 9 pendant 5 secondes. ™ Au bout de 30 secondes environ, PH..IL ..IPS défile à... -
Page 24: Syntoniseur Numérique
SYNTONISEUR NUMÉRIQUE SYNTONISATION DES STATIONS RADIO 1. Sélectionnez la source RADIO. ™ L’indicateur de fonction s’allume. ainsi que la fréquence de la station radio. 2. Appuyez une ou plusieurs fois sur BAND pour sélectionner votre longueur d'onde. 3. Appuyez sur SEARCH ∞ ou § (sur la télécommande, TUNING ∞... -
Page 25: Lecteur De Cd
Lecture d’un CD 1. Sélectionnez la source CD. ™ est affiché brièvement. 2. Appuyez sur OPEN•CLOSE pour ouvrir le compartiment CD. ™ Affichage: dès que vous ouvrez le clapet du compartiment CD. 3. Introduisez un CD ou un CD-R(W) avec la face imprimée orientée vers le haut et fermez le compartiment CD. - Page 26 LECTEUR DE CD Divers modes de lecture: SHUFFLE et REPEAT Vous pouvez sélectionner et changer les divers modes de lecture avant ou pendant la lecture. Les modes de lecture peuvent aussi être combinés avec PROGRAM. SHUFFLE - plages du CD/ programme total sont lues en ordre quelconque SHUFFLE et REPEAT ALL - pour répéter le CD/ programme total de façon continue en ordre quelconque...
-
Page 27: Platine Cassette
LECTEUR DE CD Effacement d’un programme Vous pouvez effacer le programme: – en appuyant sur STOP 9 une fois en position d’arrêt; – en appuyant sur STOP deux fois pendant la lecture; – en appuyant sur le clapet du compartiment CD pour l’ouvrir; –... -
Page 28: Enregistrement
ENREGISTREMENT GENERALITES SUR L’ENREGISTREMENT • L’enregistrement n’est autorisé que dans la mesure où les droits d’auteur ni de tiers ne sont pas enfreints. • Cette platine n’est pas appropriée pour l’enregistrement sur cassettes en CHROME (IEC II) ou METAL (IEC IV). Utilisez des cassettes du type NORMAL (IEC I) dont les languettes n’ont pas été... -
Page 29: Entretien
ENREGISTREMENT Enregistrement à partir du syntoniseur 1. Sélectionnez la station radio désirée (voir SYNTONISATION DES STATIONS RADIO). 2. Appuyez sur STOP•OPEN 9/ pour ouvrir le clapet du compartiment cassette. 3. Introduisez une cassette appropriée dans la platine et refermez le clapet. 4. -
Page 30: Dépannage
DÉPANNAGE Si une panne se produit, vérifiez d’abord les points énumérés ci-dessous avant de faire appel à un réparateur. Si les problèmes persistent après avoir effectué les vérifications suivantes, prenez contact avec votre concessionnaire ou un centre de service après-vente. AVERTISSEMENT: PROBLEME –... - Page 31 Envie hoy su Tarjeta de Registro de la Garantía para recibir todas las ventajas correspondientes. • Una vez que se registre la compra de su aparato Philips, Ud. tiene derecho a todas las ventajas correspondientes al dueño de un producto Philips.
-
Page 32: Instrucciones Importantes De Seguridad
INSTRUCCIONES IMPORTANTES DE SEGURIDAD – Léalas antes de poner en marcha el equipo Este producto ha sido diseñado y fabricado para cumplir normativas rigurosas en materia de calidad y seguridad. No obstante, deberán adoptarse ciertas precauciones en cuanto a su instalación y manejo, que Ud. -
Page 33: Garantie Limitada
Esta garantía le otorga derechos legales específicos y usted podría gozar de otros derechos que varían de un estado a otro. Philips Service Solutions Group, P.O. Box 2976, Longview,Texas 75606, USA, (903) 242-4800 GARANTIA LIMITADA Cambio gratis por un año... -
Page 34: Controles
CONTROLES PANELES SUPERIOR Y FRONTAL 1 VOLUME - ajusta el volumen 2 DBB (Dynamic Bass Boost) - mejora el nivel de graves 3 Interruptor POWER - selecciona la fuente de sonido, CD/ TUNER/ TAPE/ equipo 4 Indicadores de funciones - se encienden si la función respectiva de CD, cinta o sintonizador está... -
Page 35: Alimentación
Si desea aumentar la duración de las pilas, utilice el suministro de la red. Antes de introducir las pilas, desconecte el enchufe del aparato y el de la toma mural. PILAS (OPCIONALES) 1. Abra el compartimento e inserte seis pilas, tipo R-20, UM-1 o Células D, (preferiblemente alcalinas) de manera que las polaridades coincidan con los signos "+"... -
Page 36: Funciones Básicas
2. Ajuste el control DBB para activar o desactivar la amplificación dinámica de graves. PHILIPS demo mode (Modo de demostración de PHILIPS) 1. Pulse el botón STOP 9 del CD, en el equipo o en el mando a distancia, durante 5 segundos. -
Page 37: Sintonizador Digital
SINTONIZACIÓN DE EMISORAS DE RADIO 1. Seleccione la fuente RADIO. ™ El indicador de función se enciende. brevemente en la pantalla y, a continuación, se mostrará la frecuencia de la emisora. 2. Pulse BAND una o más veces para seleccionar la banda de frecuencias. -
Page 38: Reproductor De Cd
REPRODUCTOR DE CD Reproducción de un CD 1. Seleccione la fuente CD. ™ Se mostrará brevemente. 2. Pulse OPEN•CLOSE para abrir el compartimento de CD. ™ Pantalla: aparecerá 3. Inserte un CD o un CD-R(W) con la cara impresa hacia arriba y cierre la tapa. - Page 39 Modos de reproducción: SHUFFLE y REPEAT Puede seleccionar y cambiar los diversos modos de reproducción antes de o durante la misma. Dichos modos pueden combinarse también con PROGRAM. SHUFFLE - todas las pistas del CD o del programa se repiten en orden aleatorio SHUFFLE y REPEAT ALL - para repetir el CD o el programa completo de forma continua y en orden...
-
Page 40: Grabadora Del Casete
REPRODUCTOR DE CD Borrado de un programa Puede borrar el programa: – pulsando STOP 9 una vez en la posición de parada; – pulsando STOP 9 dos veces durante la reproducción; – pressing the CD door open; – conmutando a otra fuente: TAPE/TUNER. •... -
Page 41: Grabación
INFORMACIÓN GENERAL SOBRE LA GRABACIÓN • En general, se permiten realizar grabaciones siempre y cuando no se infrinjan los derechos de autor o los derechos a terceros. • La platina de este aparato no es compatible con casetes tipo CHROME (IEC II) o METAL (IEC IV). Utilice únicamente las de tipo NORMAL (IEC I) con las pestañas de protección intactas. -
Page 42: Mantenimiento
GRABACIÓN Grabación de la radio 1. Sintonice la emisora de radio que desee (consulte Sintonización de emisoras de radio). 2. Pulse STOP•OPEN 9/ para abrir la tapa del casete. 3. Inserte una cinta de casete adecuada en la platina y cierre la tapa. -
Page 43: Resolución De Problemas
Si ocurre una avería, siga los consejos que se dan más abajo antes de llevar el aparato a reparar. Si, después de haber seguido estos consejos, no logra solucionar el problema, consulte a su distribuidor o centro de servicio. PRECAUCIÓN: No abra el aparato ya que puede recibir una descarga eléctrica. - Page 44 CD Radio Cassette Recorder PHILIPS CONSUMER ELECTRONICS COMPANY A Division of Philips Electronics North America Corporation Knoxville, Tennessee 37914-1810, U.S.A. Meet Philips at the Internet http://www.philipsusa.com CLASS 1 LASER PRODUCT 3140 115 2805.1 Printed in Hong Kong Cmm/RM/0046...