
Related Manuals for Philips SE155


Summary of Contents for Philips SE155
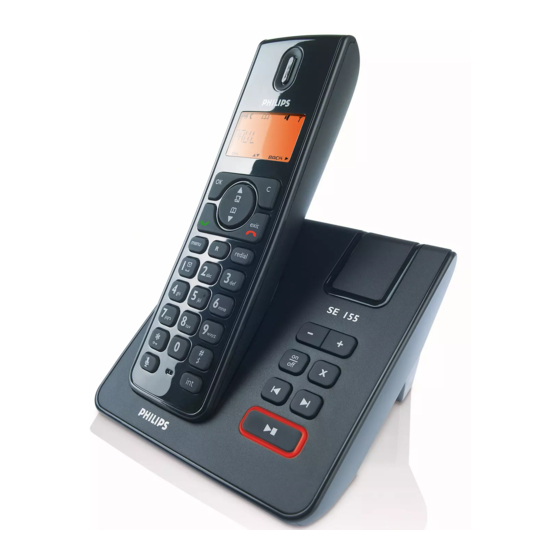
- Page 1 Register your product and get support at www.philips.com/welcome Telephone answering machine Warning Use only rechargeable batteries. Charge the handset for 24 hours before use. CD155 SE 155...
-
Page 3: Table Of Contents
Table of contents Important Power requirements Safety Information Conformity Using GAP standard compliance 4 Recycling and disposal Electric, Magnetic and Electromagnetic Fields ("EMF") 5 Your phone What’s in the box Overview of your phone Display icons Overview of the base station 10 Getting started Connect the base station Wall mounting the base... - Page 4 Change the dial mode Set first ring 8.10 Default settings Telephone answering machine (TAM) Play Delete all messages Switch the answering machine on/off via handset Record your personalised outgoing message (OGM) Set the answer mode Answering machine settings Technical data Frequently asked...
-
Page 5: Important
• Never use any other battery than the one delivered with the product or Important recommended by Philips: risk of explosion. • Always use the cables provided with the product. Safety Information •... -
Page 6: Conformity
Conformity We, Philips declare that the product is in compliance with the essential requirements and other relevant provisions of Directive 1999/5/EC. This product can only be connected to the analogue telephone networks of the countries mentioned on the packaging. You can find the Declaration of Conformity on www.p4c.philips.com. -
Page 7: Electric, Magnetic And Electromagnetic Fields ("Emf")
Important Philips plays an active role in the development of international EMF and safety standards, enabling Philips to anticipate further developments in standardisation for early... -
Page 8: Your Phone
Your phone Congratulations on your purchase and welcome to Philips! To fully benefit from the support that Philips offers, register your product at www.philips.com/welcome. What’s in the box Handset 2 AAA rechargeable NiMH batteries User manual Note *You may find in the box the line adaptor delivered separately from the line cable. In this case, you have to connect the line adaptor to the line cord first before plugging the line cord to the line socket. -
Page 9: Overview Of Your Phone
Overview of your phone Earpiece < OK key In other modes: Select the function displayed on the handset screen directly above it. Back/Clear key In text or number editing mode: Short press to delete one digit/character. In other modes: Select the function displayed on the handset screen directly above it. - Page 10 Mute key During a call: Mute/unmute the handset microphone. Call transfer/Intercom key In idle mode: Initiate an internal call. During a call: Hold the line and page another handset or toggle between an external and internal call. Long press to initiate a conference call.
-
Page 11: Display Icons
Displays when the answering machine is activated. Icon blinks when new answering machine messages are received. Icon blinks rapidly when the answering machine memory is full. Your phone Indicates that the handset is registered and within range of the base station. Icon... -
Page 12: Overview Of The Base Station
Indicates that there are unread new messages. Fast Blinking (0.5 seconds interval): Indicates that the answering machine memory is full. Steady On: Indicates that the answering machine is Indicates an on-going TAM operation. Indicates an on-going remote operation via handset. Your phone... -
Page 13: Getting Started
Getting started Connect the base station Place the base station in a central location near the telephone line socket and electricity socket. Connect the line cord and the power cable to their corresponding connectors at the back of the base station. -
Page 14: Install Your Phone
Turn the bracket upside down and then re-insert the bracket to the back of the base station. Insert screws (not included) into the wall. Align the mounting holes on the back of the base with the screws on the wall. Slide the base down into place. -
Page 15: Welcome Mode
You can still make outgoing calls or receive incoming calls without first defining your country selection. However, you cannot use the answering machine function until you have selected your country. Welcome mode Note <... - Page 16 Sweden English Norway Finland Denmark Russia English Ukraine Romania English Poland Czech Hungary Slovakia Slovenia Croatia Bulgaria Serbia Singapore English Indonesia Malaysia Australia English New Zealand * By default, the outgoing message language 1 is displayed. See section 9.6.3 on how to change the language of the predefined outgoing message Scroll to find your country.
-
Page 17: Menu Structure
Menu structure The table below describes the menu tree of your phone. Press key to display the main menu. Use navigation keys < the menus and press PHONEBOOK NEW ENTRY LIST EDIT DELETE DELETE ALL DIRECT MEM. PERSONAL SET HANDSET NAME HANDSET TONE LANGUAGE AUTO HANG-UP... - Page 18 ANSW MACHINE PLAY DELETE ALL ANSW. ON/OFF RECORD OGM ANSWER MODE SETTINGS During playback REPEAT/PREVIOUS/NEXT/DELETE ANSW.&RECORD PLAY OGM RECORD OGM DELETE ANSWER ONLY PLAY OGM RECORD OGM DELETE ANSW.&RECORD ANSWER ONLY RING DELAY 3/4/5/6/7/8/ECONOMY REMOTE ACC. ACTIVATE/DEACTIVATE LANGUAGE Language list Getting started...
-
Page 19: Using Your Phone
Using your phone Make a call 4.1.1 Predialling Dial the number (maximum 24 digits). Press key. • The call is initiated. You may insert a prefix number to the beginning of your predial number, see “Set prefix” on chapter 8.6 for more information. 4.1.2 Direct dialling Press... -
Page 20: Use More Of Your Phone
Use more of your phone Switch the handset on/off Press and hold key for more than 5 seconds to switch on/off the handset in idle mode. Keypad lock/unlock Press and hold key for 1 second to lock/unlock the keypad in idle mode. Text or number entry When you select a field in which you can enter text, you can enter the letters that... -
Page 21: Using Your Phonebook
to put the current call on hold and answer the second call. Press key to go back to the first caller. Put the current call on hold and answer the second call. Put the current call on hold and answer the first call. The above operations may be different according to your network. -
Page 22: Using The Redial List
Note Press to discard change and the BACK screen returns to phonebook list. 5.5.5 Delete the phonebook list Press key in idle mode, scroll PHONEBOOK < Scroll DELETE ALL < press is displayed on the screen. DELETE? < Press again to confirm deletion. •... -
Page 23: Using The Call Log
entry, the name will be displayed instead. To view the details, press Note To return to idle mode, press 5.6.2 Save a redial number into the phonebook Press key in idle mode to go to the redial list, scroll < entry and press again to enter SAVE NUMBER... -
Page 24: Using The Intercom
To view the details, press display the call log menu. Press < again to enter • The date and time of the call is < displayed. Press view more details. 5.7.2 Consulting the call list The screen can either display : •... - Page 25 calls from one handset to another and use the conference option. 5.8.1 Intercom another handset Note If the handset does not belong to your new phone range, this function may not be available. Press key in idle mode. • Intercom is established immediately if there are only 2 registered handsets.
-
Page 26: Paging
Press key on the called handset to answer the internal call, where both internal callers can talk. • Intercom is established. Press and hold seconds on the first handset to start the three-party conference. • will be displayed on CONFERENCE the screen once the conference call is established. -
Page 27: Personal Settings
, press and press HANDSET TONE again to enter RING VOLUME Personal settings When will be displayed on the screen. PHILIPS 6.2.2 and press There are 10 ring melodies available on HANDSET your handset. < 6.2.3 A single tone is emitted when a key is pressed. -
Page 28: Change The Display Language
However, it will not change the language of the predefined outgoing message of your answering machine. Activate/deactivate auto hang-up This function enables you to end a call automatically by simply placing the handset on the base station. -
Page 29: Clock And Alarm
Clock and Alarm This feature allows you to set the date, time and alarm settings for your phone. The default date and time is respectively. Set date and time Press in idle mode, scroll CLOCK&ALARM < < , press DATE/TIME The last stored date is displayed. -
Page 30: Set Alarm Tone
Scroll < and press DAILY If you select ON ONCE , enter the time (HH-MM) for DAILY the alarm and scroll if the time is in 12 HOURS format. Press confirm. • A validation tone is emitted and the screen returns to previous menu. Note The alarm tone and alarm icon only sound/blink for 1 minute when the... -
Page 31: Advanced Settings
Change Master PIN The Master PIN is used for registration/ unregistration of handsets and for accessing the answering machine remotely. The default Master PIN number is 0000. The maximum length of the Master PIN is 8 digits. This PIN is also used to protect the settings of your handset. -
Page 32: Unregister
If no base is found within a certain period, will be displayed with an error NO BASE tone to indicate failed registration and the handset returns to idle mode. Unregister Press key in idle mode, scroll ADVANCED SET < , scroll <... -
Page 33: Set Prefix
Set prefix This feature allows you to define a prefix number to be added to the beginning of a number during predialling (see “Predialling” on chapter 4.1.1). You may also use this feature to add a detect string to match and replace the first few digits of the number during predialling. -
Page 34: Default Settings
Ringer Volume LEVEL 3 Tones Melody MELODY 1 Earpiece Volume LEVEL 2 Key Tone Language Country dependent Auto Hang Up Handset Name PHILIPS Time/Date 01/01; 00-00 Time format 24 HOURS Date format DD/MM Dialing Mode Country dependent Recall Time Country dependent... -
Page 35: Telephone Answering Machine (Tam)
Telephone answering machine (TAM) Your phone features an answering machine that records unanswered calls when it is activated. The answering machine can store up to 99 messages. The maximum recording time is 10 minutes (including all your personalised outgoing messages). -
Page 36: Delete All Messages
9.1.2 Playback of new messages via handset The last recorded message is played first via the loudspeaker. When all new messages have been played, the answering machine will stop and the Press key in idle mode, scroll < press to enter •... -
Page 37: Switch The Answering Machine On/Off Via Handset
ANSW MACHINE < , scroll < and press Scroll to ANSWER ONLY ANSW.&RECORD to select the following outgoing message options: Telephone answering machine (TAM) Options available for Personalized Play OGM* and press Record ANSW. ON/ Messages** and press Delete... -
Page 38: Answering Machine Settings
This is the number of rings before the answering machine answers and starts playing your greeting message. You can set the answering machine to start playing your greeting message after 3 to 8 rings or Economy. The default ring delay is... - Page 39 Telephone answering machine (TAM) Turn off the answering machine Note If the answering machine is off, the phone will enter into the remote access mode after 10 rings. Enter the remote access PIN (default is 0000) to activate the remote access feature.
-
Page 40: 10 Technical Data
10 Technical data Display • Progressive LCD backlight • The backlight remains on for 15 seconds after each activation such as an incoming call, key presses, lifting the handset off the base station, etc. • The colour of the LCD backlight is Amber. -
Page 41: Frequently Asked Questions
11 Frequently asked questions www.philips.com/support In this chapter, you will find the most frequently asked questions and answers about your phone. Connection The handset does not switch on! • Charge the batteries: Put the handset on the base station to charge. After a few moments, the phone will switch on. - Page 42 • The default master PIN is 0000. • Reset the handset to revert to the default master PIN code if it has been changed before (see “Reset unit” on chapter 8.5). The answering machine does not record messages! • Memory is full: Delete your old messages.
-
Page 43: 12 Index
12 Index Accessories 6 Alarm 27 Alarm tone 28 Answer a call 17 Answer an external call 23 Answering machine mode 35 Auto hang-up 26 Call in progress 18 Call log 17 Charge battery 12 Clock and alarm 27 Conference call 23... - Page 44 Telephone answering machine 33 Text or number entry 18 Tone melody 25 Transfer an external call 23 Unmute 18 Unregister 30 Volume 18 Index...
- Page 46 © 2008 Koninklijke Philips Electronics N.V. All rights reserved Reproduction in whole or in part is prohibited without the written consent of the copyright owner Printed in China Document number: 3111 285 41833...