Table of Contents
Advertisement
Available languages
Available languages
Advertisement
Chapters
Table of Contents

Related Manuals for Honeywell RLV430


Summary of Contents for Honeywell RLV430
- Page 1 Owner’s Guide RLV430 Programmable Thermostat...
-
Page 2: Table Of Contents
Table of contents Overview About your new thermostat ..............1 Controls ....................2 Display....................3 Installation Installation guidelines ................4 Wiring ....................5 Mounting the thermostat................ 6 Setting the clock and day ..............7 Configuration ..................7 Operation Automatic (Auto) mode................8 Economy (Econo) mode.............. -
Page 3: About Your New Thermostat
RLV430 About your new thermostat This thermostat is designed to control an electric heating system such as a baseboard heater, a radiant ceiling, a convector or a fan-forced heater. The thermostat CANNOT be used with: • a resistive load under 1.25 A •... -
Page 4: Controls
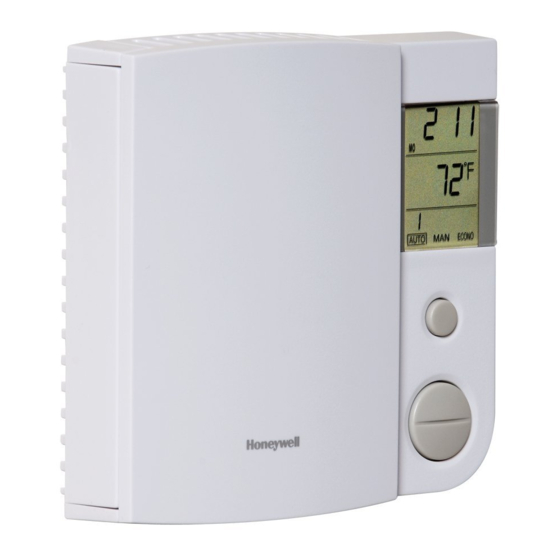
Owner’s Guide Controls Day button Hour button Minute button Program button Backlit screen * Return button Mode button (see pages 8, 10, 12 ) Up and Down buttons * The screen is backlit for 12 seconds when you press any button. -
Page 5: Display
RLV430 Display Time and day Appears when power to Appears when the the thermostat is cut off setpoint temperature (see page 14) is displayed Room temperature Appears if the Heating intensity indicator thermostat is configured for a fan-forced heater Mode indicator (see page 7) (see pages 8, 10 &12 ) -
Page 6: Installation Guidelines
Owner’s Guide Installation guidelines TURN OFF POWER TO THE HEATING SYSTEM AT THE MAIN POWER PANEL TO AVOID ELECTRICAL SHOCK. All cables and connections must comply with local electrical codes. This thermostat has tinned copper wires for line and load connec- tions. -
Page 7: Wiring
RLV430 Wiring Connect the thermostat wires to the power and to the load using solderless connectors for copper wires. 2-wire Installation 4-wire Installation... -
Page 8: Mounting The Thermostat
Owner’s Guide Mounting the thermostat Push the excess wires back inside the electrical box. Secure the thermostat to the electrical box using the provided screws. Insert the screws through either the right or left pair of mounting holes on the thermostat. NOTE: If there is a protective film or sticker on the thermostat’s screen, peel it off. -
Page 9: Setting The Clock And Day
RLV430 Setting the clock and day The clock must be set when the time is incorrect or flashes on the screen. Press the Day button to set the day. Use the Hour and Min buttons to set the clock. Press the button to exit. -
Page 10: Automatic (Auto) Mode
Owner’s Guide Automatic mode In Automatic mode, the thermostat adjusts its temperature set- point according to the period of the day. To place the thermostat in this mode, press the Mode button until Auto appears on the screen. The current period number also appears (unless the ther- mostat has not been programmed with a schedule). - Page 11 RLV430 Automatic mode (cont’d) To modify the schedule: Press the Mode button until Auto appears on the screen. Press the Pgm button. Each time you press the Pgm button, the thermostat displays one of the periods of the schedule in the following order:...
-
Page 12: Economy (Econo) Mode
Owner’s Guide Economy mode To place the thermostat in Economy mode, press the Mode button until Econo appears on the screen. The period number will also appear after you have programmed the periods in the Economy mode. This mode is ideal for weekend residences (cottages) as it can be used to keep the temperature at an economy level during most of your absence and raise the temperature to a comfortable level by your usual arrival time. - Page 13 RLV430 Economy mode (cont’d) The Economy mode can be used as follows: Place the thermostat in Economy mode during your absence. When you arrive, place the thermostat in Automatic mode or in Manual mode before the temperature drops to the economy level.
-
Page 14: Manual (Man) Mode
Owner’s Guide Manual mode (permanent override of schedule) To place the thermostat in Manual mode, press the Mode button until Man appears on the screen. In this mode, any modification to the temperature must be done manually. Press the Up or Down button to set the temperature. -
Page 15: In Case Of Difficulty
RLV430 In case of difficulty PROBLEM SOLUTIONS This condition is normal. Ensure that the heater Thermostat is hot. capacity does not exceed the thermostat’s maximum load. Correct it if any of the following situations exists: Wrong temperature is • The thermostat is exposed to an air draft. -
Page 16: Power Outage
Owner’s Guide Power outage During a power outage, the thermostat display remains lit for the first 2 minutes. During this time, the LP (low power) indicator appears and all buttons are dis- abled. Then the screen turns blank. The settings are stored in memory. When power returns, the thermostat returns to the mode of operation preceding the power outage. -
Page 17: Limited Warranty
RLV430 Limited warranty Honeywell warrants this product, excluding battery, to be free from defects in the workmanship or mate- rials, under normal use and service, for a period of one (1) year from the date of purchase by the con- sumer. - Page 18 Owner’s Guide Automation and Control Systems Honeywell International Inc. 1985 Douglas Drive North Golden Valley, MN 55422 http://yourhome.honeywell.com Honeywell Limited 35 Dynamic Drive Scarborough, Ontario M1V 4Z9 Printed in China 69-1855EF 08-09...
- Page 19 Guide du propriétaire RLV430 Thermostat programmable...
- Page 20 Table des matières Vue d'ensemble À propos de votre nouveau thermostat ..........1 Commandes ..................2 Affichage ....................3 Installation Consignes d'installation................. 4 Câblage ....................5 Installation du thermostat ..............6 Réglage de l'heure et du jour ..............7 Configuration ..................7 Fonctionnement Mode Automatique (Auto) ..............
-
Page 21: À Propos De Votre Nouveau Thermostat
RLV430 À propos de votre nouveau thermostat Ce thermostat est conçu pour commander un système de chauffage électrique comme une plinthe chauffante, un plafond chauffant, un convecteur ou un ventiloconvecteur. Vous NE pouvez PAS utiliser ce thermostat avec : • une charge résistive inférieure à 1,25 A •... -
Page 22: Commandes
Guide du propriétaire Commandes Bouton Day Bouton Hour Bouton Minute Bouton Program Écran rétroéclairé * Bouton Return Bouton Mode (voir pages 8 et 10) Boutons Haut et Bas * L'écran est rétroéclairé pendant 12 secondes lorsque vous appuyez sur un bouton. -
Page 23: Affichage
RLV430 Affichage Heure et jour Apparaît lorsque le Apparaît lorsque la thermostat est hors température de tension (voir page 14) consigne est affichée Température de la pièce Indique l'intensité Apparaît si le thermostat du chauffage est configuré pour un ventiloconvecteur... -
Page 24: Consignes D'installation
Guide du propriétaire Consignes d'installation METTRE LE SYSTÈME DE CHAUFFAGE HORS TENSION AU PANNEAU D'ALIMENTATION AFIN D'ÉVITER LES RISQUES DE CHOC ÉLECTRIQUE. Tous les câbles et toutes les connexions doivent être conformes aux codes de l'électricité locaux. Ce thermostat est muni de fils de cuivre étamés pour la connexion de l’alimentation et de la charge. -
Page 25: Câblage
RLV430 Câblage Connecter les fils du thermostat à l'alimentation et à la charge en utilisant les connecteurs sans soudure pour les fils de cuivre. Installation à quatre fils Installation à deux fils... -
Page 26: Installation Du Thermostat
Guide du propriétaire Installation du thermostat Pousser l'excédent de fils à l'intérieur de la boîte de raccordement. Fixer le thermostat à la boîte de raccor- dement en utilisant les vis fournies. Insérer les vis dans les trous de fixation de droite ou de gauche du thermostat. NOTE: Enlever le film protecteur ou l'autocollant sur l'écran du thermostat, le cas échéant. -
Page 27: Réglage De L'heure Et Du Jour
RLV430 Réglage de l'heure et du jour Régler l'horloge lorsque l'heure n'est pas bonne ou si elle clignote à l'écran. Appuyer sur le bouton Day pour régler le jour. Utiliser les boutons Hour et Min pour régler l'heure. Appuyer sur le bouton pour fermer le menu. -
Page 28: Mode Automatique (Auto)
Guide du propriétaire Mode Automatique (Auto) En mode Automatique, le thermostat ajuste automatiquement sa température de consigne selon la période de la journée. Pour placer le thermostat en ce mode, appuyer sur le bouton Mode jusqu'à ce que Auto apparaisse à l'écran. Le numéro de la période en cours apparaît aussi (à... - Page 29 RLV430 Mode Automatique (suite) Modification de l'horaire : Appuyer sur le bouton Mode jusqu’à ce que Auto apparaisse à l’écran. Appuyer sur le bouton Pgm. Chaque fois que vous appuyez sue le bouton Pgm, le thermostat affiche une des périodes dans l’ordre suivant :...
-
Page 30: Mode Économie (Econo)
Guide du propriétaire Mode Économie Pour placer le thermostat en mode Économie, appuyer sur le bouton Mode jusqu’à ce que Econo apparaisse à l’écran. Le numéro de la période apparaîtrait aussi une fois que vous auriez programmé les périodes du mode Économie. Ce mode est idéal pour les résidences de fin de semaine (chalets), puisqu’il peut être utilisé... - Page 31 RLV430 Mode Économie (suite) Le mode Économie peut être utilisé comme suit : Placer le thermostat en mode Économie durant votre absence. Dès votre arrivée, placer le thermostat en mode Automatique ou Manuel avant qu’il ne revienne au niveau économique.
-
Page 32: Mode Manuel (Man)
Guide du propriétaire Mode Manuel (Man) Pour placer le thermostat en mode Manuel, appuyer sur le bouton Mode jusqu'à ce que Man apparaisse à l'écran. Dans ce mode, toute modification à la température de consigne doit être effectuée manuellement. Régler la température en appuyant sur la flèche du haut ou du bas. -
Page 33: Dépannage
RLV430 Dépannage PROBLÈME SOLUTIONS Ceci est normal. S’assurer que l’appareil de chauffage Le thermostat est chaud. n’excède pas la charge maximale du thermostat. À corriger si l’une des situations suivantes existe : Le thermostat n'affiche pas • Le thermostat est exposé à un courant d'air. -
Page 34: Panne De Courant
Guide du propriétaire Panne de courant Pendant une panne de courant, l'écran du thermostat demeure allumé pendant les deux premières minutes. Pendant ce temps, l'indicateur d'alimentation faible (LP) apparaît et tous les boutons sont désactivés. Ensuite, l'écran devient vide. Les réglages sont stockés dans la mémoire. Lorsque le courant revient, le thermostat fonctionne à... -
Page 35: Garantie Limitée
Garantie limitée Honeywell garantit ce produit, à l'exception des piles, contre tout vice de fabrication ou de matière dans la mesure où il en est fait une utilisation et un entretien convenables, et ce, pour un (1) an à partir de la date d'achat par le consommateur. - Page 36 Guide du propriétaire Solutions de régulation et d’automatisation Honeywell International Inc. 1985 Douglas Drive North Golden Valley, MN 55422 http://yourhome.honeywell.com Honeywell Limitée 35 Dynamic Drive Scarborough, Ontario M1V 4Z9 Imprimé en Chine 69-1855EF 08-09...