Philips AC4012 User Manual
Hide thumbs
Also See for AC4012:
- User manual (116 pages) ,
- Quick start manual (6 pages) ,
- User manual (100 pages)
Table of Contents
Advertisement
Available languages
Available languages
Quick Links
Download this manual
See also:
User Manual
Advertisement
Chapters
Table of Contents

Related Manuals for Philips AC4012


Summary of Contents for Philips AC4012
- Page 1 Always there to help you Register your product and get support at www.philips.com/welcome AC4012 Question? AC4014 Contact Philips User Manual ZH-CN 用户手册 MS-MY Manual Pengguna...
-
Page 3: Table Of Contents
Contents Contents 11 Notices Electomagnetic fields (EMF) Compliance with EMF Recycling 1 Important Safety 2 Your air purifier What’s in the box 3 Get started Install filters 4 Use the air purifier Understand the air quality light Understand the healthy air protect alert Switch on Set the sensitivity of the air quality sensor Change the fan speed... -
Page 4: Safety
• Make sure all filters are properly installed before you switch on the appliance. • Only use the original Philips filters specially Warning intended for this appliance. Do not use any other filters. • Check if the voltage indicated on the bottom •... -
Page 5: Your Air Purifier
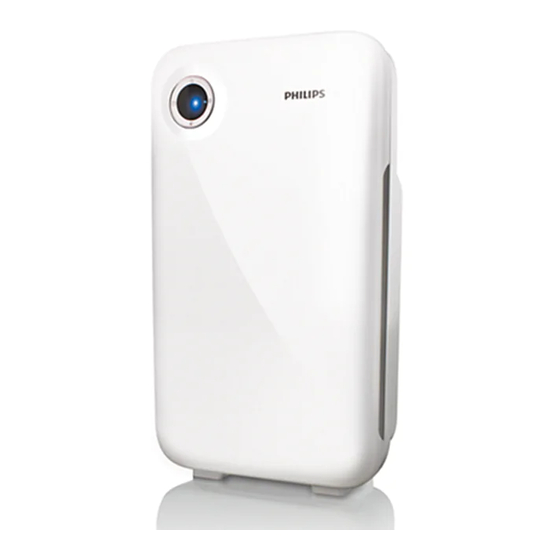
2 Your air purifier Congratulations on your purchase, and welcome to Philips! To fully benefit from the support that Philips offers, register your product at www.Philips.com/welcome. Read this user manual carefully before you install and use the unit. Save it for future reference. -
Page 6: Get Started
3 Get started Remove all the filters from the purifier. Install filters The air purifier comes with all filters fitted inside, but you have to remove the packaging of the filters before you can use it. Remove all filters, unpack them, and place them back into the air purifier as described below. - Page 7 Place the pre-filer in the purifier. Note • Make sure that the side with the two projections is pointing towards you, and that all hooks of the pre-filter are properly attached to the purifier. To reattach the front panel, insert the top hooks into the top of the purifier first (1).
-
Page 8: Use The Air Purifier
Plug the air purifier into the power supply. » All lights go on twice and you hear a The air quality light automatically goes on when beep. Then, the lights go out again. the purifier is switched on. AC4012 Control AC4014 Control Note Panel Panel •... -
Page 9: Set The Sensitivity Of The Air Quality Sensor
Press the button and simultaneously the timer function (see “Set the timer”). In this case, one of the lights (AC4012: put the power plug in the power socket. and the light ( , , or ) are on. Press the button to switch on the purifier. - Page 10 Sleep mode to select the desired fan speed. In sleep mode, the air filter operates very » For AC4012 - , , or ; and quietly while all lights are dimmed for your undisturbed sleep. (AC4012 only)
-
Page 11: Set The Timer
You can use the timer function in the following situations: Situations You will see Choose a fan One of the lights speed (see (AC4012 - , , or ‘Change the fan AC4014 - , or speed’). and one of the lights ( , , or ) are on. -
Page 12: Clean Your Air Purifier
5 Clean your air Clean the air quality sensor inlet and the air quality sensor outlet with a soft brush. purifier Note • Always unplug the purifier before you clean it. • Never immerse the purifier in water or any other liquid. -
Page 13: Clean The Pre-Filter
6 Clean the pre- To remove the pre-filter, grab the two projections and pull the filter towards filter you. Note • The pre-filter is washable. • Clean the pre-filter for every two weeks to ensure optimal functioning of the purifier. Switch off the purifier and unplug it. - Page 14 To reattach the front panel, insert the top hooks into the top of the purifier first (1). Then, push the panel against the body of the purifier (2). Note • Alternatively, you can clean the pre-filter by removing the dust with a vacuum cleaner. •...
-
Page 15: Replace The Filters
7 Replace the Switch off the purifier and unplug it. filters The filter replacement light ( ) indicates the filters have to be replaced. Note • If you remove the front panel for filter changing while the purifier is switched on, all lights on the control panel will be off. - Page 16 Remove all packaging material from the Place the pre-filer in the purifier. new filters. Note Place the new HEPA filter in the purifier first. • Make sure that the side with the two projections is pointing towards you, and that all hooks of the pre-filter are properly attached to the purifier.
-
Page 17: Reset The Filter Lifetime Counter
8 Reset the filter Press and hold the button for 2 seconds. lifetime counter When you replace the filters, it is important that you also reset the filter lifetime counter afterwards. This allows the purifier to be in sync with the filter lifetime. After you have replaced the filters, reset the filter time: Switch off the purifier and unplug it. -
Page 18: Troubleshooting
9 Troubleshooting This chapter summarizes the most common problems you could encounter with the purifier. If you are unable to solve the problem with the information below, contact the Consumer Care Center in your country. Problem Possible solution light has been on The filter is full. -
Page 19: Guarantee And Service
Philips dealer. Order parts or accessories If you have to replace a part or want to purchase an additional part, go to your Philips dealer or visit www.philips.com/support. If you have problems obtaining the parts, please contact the Philips Consumer Care Center in your country (you find its phone number in the worldwide guarantee leaflet). -
Page 20: Notices
One of Philips’ leading Business Principles is to Environmental information take all necessary health and safety measures All unnecessary packaging has been omitted. - Page 21 Daftar kandungan Penting Keselamatan Penulen udara anda Apa dalam kotak ini 3 Mulakan Pasang penapis 4 Gunakan penulen udara Fahami lampu kualiti udara Fahami isyarat perlindungan udara sihat Hidupkan Tetapkan sensitiviti sensor kualiti udara Tukar kelajuan kipas Mod tidur Tetapkan pemasa 5 Bersihkan penulen udara anda Bersihkan penulen udara Bersihkan sensor kualiti udara 6 Bersihkan pra-tapis...
-
Page 22: Penting
Pastikan semua penapis dipasang dengan betul cecair lain atau dengan detergen (mudah bakar) sebelum anda menghidupkan perkakas. untuk mencegah kejutan elektrik dan/atau bahaya • Hanya gunakan penapis asli Philips yang dimaksudkan kebakaran. khusus untuk digunakan perkakas ini. Jangan gunakan sebarang penapis lain. •... -
Page 23: Penulen Udara Anda
2 Penulen udara anda Tahniah atas pembelian anda dan selamat menggunakan Philips! Untuk mendapatkan manfaat sepenuhnya daripada sokongan yang ditawarkan oleh Philips, daftarkan produk anda di www.philips.com/welcome. Baca manual pengguna ini dengan teliti sebelum anda memasang dan menggunakan unit. Simpannya untuk rujukan di masa depan. -
Page 24: Mulakan
3 Mulakan Keluarkan semua penapis daripada penulen. Pasang penapis Penulen udara tersedia dengan semua penapis dipasang di dalam, tetapi anda perlu membuka pembungkusan penapis sebelum anda boleh menggunakannya. Keluarkan semua penapis, buka bungkusannya dan letakkannya kembali dalam penulen udara seperti yang diterangkan Keluarkan semua bahan pembungkusan di bawah. - Page 25 Letakan pra-tapis ke dalam penulen. Catatan • Pastikan sisi dengan dua unjuran menuding ke arah anda dan semua cangkuk pra-tapis dipasang dengan betul pada penulen. Untuk memasang semula panel depan, selitkan cangkuk depan ke dalam bahagian bawah penulen dahulu (1). Kemudian, tolak panel terhadap badan penulen (2).
-
Page 26: Gunakan Penulen Udara
Sensor kualiti udara terbina dalam mengukur kualiti Panel Kawalan Panel Kawalan udara dan memilih warna lampu kualiti udara yang AC4012 AC4014 bersesuaian secara automatik. Apabila kualiti udara bersih, warna lampu kualiti udara menjadi biru. Apabila kualiti udara merosot, warna lampu kualiti udara berubah menjadi ungu atau merah. -
Page 27: Tetapkan Sensitiviti Sensor Kualiti Udara
• Apabila anda memilih kelajuan kipas, anda juga boleh menggunakan fungsi pemasa (lihat "Tetapkan pemasa"). Dalam kes ini, salah satu lampu (AC4012: ) dan lampu ( , , atau bernyala. » Penulen berbunyi bip dua kali dan salah satu lampu... -
Page 28: Mod Tidur
(AC4012 sahaja) Tekan butang untuk menghidupkan penulen. Tekan butang sekali atau lebih untuk memilih kelajuan kipas yang diinginkan. » Untuk AC4012 - , , atau ; dan Tekan butang untuk memilih mod tidur. » Lampu menyala. » Untuk AC4014 - , atau Untuk menukar kelajuan kipas, tekan butang . -
Page 29: Tetapkan Pemasa
) terpadam. dimatikan secara automatik. Anda boleh menggunakan fungsi pemasa dalam situasi berikut: Situasi Anda akan melihat Pilih kelajuan Salah satu lampu kipas (lihat (AC4012 - , , atau 'Tukar AC4014 - , atau kelajuan dan salah satu lampu ( , , kipas'). -
Page 30: Bersihkan Penulen Udara Anda
5 Bersihkan Bersihkan salur masuk sensor kualiti udara dan salur keluar sensor kualiti udara penulen udara dengan berus lembut. anda Catatan • Cabut plag penulen sebelum anda membersihkannya. • Jangan sekali-kali menenggelamkan penulen di dalam air atau sebarang cecair lain. •... -
Page 31: Bersihkan Pra-Tapis
6 Bersihkan pra- Untuk mengeluarkan pra-tapis, pegang dua unjuran tersebut dan tarik penapis ke tapis arah anda. Catatan • Pra-tapis boleh dicuci. • Bersihkan pra-tapis setiap dua minggu untuk memastikan fungsi optimum penulen. Matikan penulen dan cabut plagnya. Cuci pra-tapis di bawah air paip. Jika pra- tapis sangat kotor, gunakan berus lembut untuk mengesat habuk. - Page 32 Untuk memasang semula panel depan, selitkan cangkuk atas ke dalam bahagian atas penulen dahulu (1). Kemudian, tolak panel terhadap badan penulen (2). Catatan • Secara alternatif, anda boleh membersihkan pra-tapis dengan mengeluarkan habuk dengan pembersih vakum. • Pastikan pra-tapis kering sepenuhnya. Jika ia masih basah, bakteria boleh berkembang di dalamnya dan memendekkan hayat pra-tapis.
-
Page 33: Gantikan Penapis
7 Gantikan Catatan penapis • Masukkan penapis dalam kedudukan yang betul. • Pastikan anda memasukkan penapis mengikut urutan penapis HEPA, penapis karbon diaktifkan dan akhir sekali pra-tapis. • Lampu penggantian penapis ( Pastikan bahagian dengan tag menghadap ke arah anda. menunjukkan bahawa penapis perlu digantikan. - Page 34 Keluarkan semua bahan pembungkusan Letakan pra-tapis ke dalam penulen. daripada penapis. Masukkan penapis HEPA baru ke dalam Catatan penulen dahulu. • Pastikan sisi dengan dua unjuran menuding ke arah anda dan semua cangkuk pra-tapis dipasang dengan betul pada penulen. Untuk memasang semula panel depan, selitkan cangkuk atas ke dalam bahagian atas penulen dahulu (1).
-
Page 35: Tetapkan Semula Pembilang Hayat Penapis
8 Tetapkan semula Tekan dan tahan butang selama 2 saat. pembilang hayat penapis Apabila anda menggantikan penapis, ia adalah penting untuk anda turut menetapkan semula pembilang hayat penapis selepas itu. Ini membenarkan penulen disegerakkan dengan hayat penapis. Selepas anda menggantikan penapis, tetapkan Catatan semula masa penapis: •... -
Page 36: 9 Menyelesaikan Masalah
9 Menyelesaikan masalah Bab ini meringkaskan masalah paling lazim yang anda hadapi dengan penulen. Jika anda tidak dapat menyelesaikan masalah dengan maklumat di bawah, hubungi Pusat Penjagaan Pelanggan di negara anda. Masalah Penyelesaian yang mungkin Lampu telah bernyala Penapis penuh. Gantikan penapis dan tetap semula penulen. secara berterusan. -
Page 37: Jaminan Dan Perkhidmatan
Jika anda perlu menggantikan bahagian atau ingin membeli bahagian tambahan, pergi ke penjual anda atau lawati www.philips.com/support. Jika anda menghadapi masalah mendapatkan bahagian, sila hubungi Pusat Penjagaan Pelanggan Philips di negara anda (anda boleh mendapatkan nombor telefonnya dalam buku risalah jaminan seluruh dunia). MS-MY... -
Page 38: 11 Notis
Peralatan ini tidak sepatutnya digunakan untuk tujuan yang sedemikian. Kitar semula Medan elektromagnet (EMF) Perkakas Philips ini mematuhi semua piawai yang Produk anda direka bentuk dan dikilangkan berkaitan dengan medan elektromagnet (EMF). dengan menggunakan bahan dan komponen Jika dikendalikan dengan betul dan menurut... - Page 39 Spesifikasi boleh ditukar tanpa notis. Tanda dagangan adalah harta Koninklijke Philips Electronics N.V. atau pemilik masing-masing. Philips mempunyai hak untuk menukar produk pada bila-bila masa tanpa bertanggungjawab untuk menyesuaikan bekalan awal sewajarnya. MS-MY...
- Page 41 目录 目录 重要信息 安全 您的空气净化器 包装盒内物品: 使用入门 安装过滤网 使用空气净化器 了解空气质量指示灯 了解健康空气滤网更换提醒指示灯 打开 设置空气质量感应器的灵敏度 更改风速 休眠模式 设置定时器 清洁空气净化器 清洁空气净化器 清洁空气质量感应器 请清洁预过滤网 更换过滤网 HEPA 立即更换活性炭过滤网和 过滤 网。 重置过滤网使用寿命计数器 故障种类和处理方法 保修与服务 订购部件或附件 注意事项 (EMF) 电磁场 符合 标准 回收 ZH-CN...
-
Page 42: 重要信息
切勿在产品顶部放置任何物品, 也不要坐在产 品上。 危险 • 切勿将产品直接放在空调下方, 以防冷凝水滴 • 到产品中。 切勿让水或任何其它液体或易燃性清洁剂进入产品, • 打开产品电源之前, 务必确保已经正确安装所有 以免发生触电和 或火灾。 • 过滤网。 切勿用水或任何其它液体或(易燃性)清洁剂来清洁 • Philips 只能使用 专门为本产品设计的原装过滤 产品,以免发生触电和 或火灾。 网。 切勿使用任何其它过滤网。 • 请勿用硬物敲击本产品 (尤其是进风口和出风 口) 。 • 请始终用产品背面的手柄提拉或移动产品。 警告 • 请勿将手指或其它物体插入出风口。 • • 当您使用室内喷雾式驱虫剂或在充满油污、 易燃... -
Page 43: 您的空气净化器
您的空气净化器 Philips 感谢您的惠顾,欢迎光临 ! Philips 为了您能充分享受 提供的支持,请在 www.Philips.com/welcome 上注册您的产品。 在安装和使用产品之前,请仔细阅读本用户手 册。 妥善保管以供日后参考。 包装盒内物品: 检查并识别包装中的物品: 空气质量感应器 4: HEPA 滤网 滤网 滤网 活性炭滤网 滤网 预过滤网 用户手册 快速入门指南 保修 ZH-CN... -
Page 44: 使用入门
使用入门 卸下净化器内部的所有过滤网。 安装过滤网 本空气净化器内部随附了所有过滤网,但是使 用产品之前,务必先除去过滤网的包装。 请按 以下说明卸下所有过滤网并除去其包装,然后 重新放回空气净化器中。 提示 除去过滤网上的所有包装材料。 • 取出或插入过滤网时, 可将净化器按在墙上以增 强稳定性。 注 • 将过滤网插到正确位置。 • HEPA 确保您更换过滤网的顺序是: 过滤网、 活 性炭过滤网和预过滤网。 • 确保带拉片的一面朝向您。 将手指放在侧面板的凹处, 然后面向您的 方向轻轻拉出前面板的上半部分。 轻轻地将面板底部撤走 , 然后前面板的 将过滤网放回净化器。 顶部面朝向您提起 。 ZH-CN... - Page 45 将预过滤网放回净化器。 注 • 确保带两个凸缘的一面朝向您, 并确保预过滤网 的所有挂钩均已正确连接到净化器上。 要装回前面板, 请首先将底部的挂钩插到净 化器底部 。 然后, 朝净化器机身方向推 动面板 。 ZH-CN...
-
Page 46: 使用空气净化器
使用空气净化器 打开 将空气净化器插入电源。 » 所有指示灯都将亮起两次,且您将听 了解空气质量指示灯 到一声蜂鸣声。 之后,指示灯将再 次熄灭。 空气质量光环的颜色 空气质量级别 蓝色 良好 AC4012 AC4014 控制面板 控制面板 紫色 一般 红色 较差 在打开净化器时,空气质量指示灯将自动打 开。 注 • 内置空气质量感应器能够测量空气质量并自动 选择空气质量指示灯的适当颜色。 当空气清洁 时, 空气质量指示灯的颜色为蓝色。 当空气质 按 按钮打开净化器。 量恶化时, 空气质量指示灯的颜色将变为紫色 » 空气质量指示灯会显示当前空气质 或红色。 量。 » 风扇速度指示灯... -
Page 47: 设置空气质量感应器的灵敏度
如果将其设置为较高的灵敏度级别, 则本净化器 您可以选择所需的风速。 开始清洁污染程度较低的空气, 从而使空气前所 未有地清新。 在调整空气质量感应器的灵敏度 注 之前, 请将净化器的插头插上。 • 选择风扇速度时, 您还可以使用定时器功能 ( 请 按 按钮, 同时将电源插头插到插座上。 参阅 “设置定时器” ) 。 在这种情况下, 一个 AC4012 指示灯 ( : 和 ) 和 指示灯 ( 、 或 ) 亮起。 按 按钮打开净化器。 » 净化器会发出两次蜂鸣声,其中一... -
Page 48: 休眠模式
休眠模式 按一下或按几下 按钮, 选择所需的风 速。 在休眠模式下, 空气过滤网会非常安静地运行, AC4012 - » 对于 、 或 ;以及 同时所有指示灯均变暗, 让您的睡眠不受打扰。 AC4012 (仅限于 ) 按 按钮打开净化器。 AC4014 - » 对于 、 或 。 按 按钮选择休眠模式。 » 指示灯亮起。 提示 • 如果空气质量指示灯呈蓝色, 则表示空气质量良 好, 那么您可以选择较低的风扇速度。 要更改为其它风速, 请按... -
Page 49: 设置定时器
设置定时器 使用定时器功能,您可设定净化器运行的小时 数。 到达设定的时间时,净化器将自动关闭。 您可以在以下情况使用定时器功能: 情况 您将会发现 AC4012 选择一个风扇速 一个 指示灯 ( AC4014 度 (请参阅 “更改 、 或 ; 风扇速度” ) 。 、 或 ) 和一个 指示灯 ( 、 或 ) 亮起。 净化器处于休眠 指示灯和一个 指示灯 模式中 (请参阅 “ ( 、... -
Page 50: 清洁空气净化器
清洁空气净化器 使用软刷清洁空气质量感应器进风口 出风 口。 注 • 清洁净化器前, 务必先将电源插头拔掉。 • 切勿将本净化器浸入水中或任何其它液体中。 • 切勿使用研磨性、 腐蚀性或易燃性清洁剂 (例如 漂白剂或酒精) 清洁净化器的任何部件。 • 只有预过滤网可以用水清洗。 其他空气净化器 过滤网不可水洗, 也不可用真空吸尘器清洁。 卸下空气质量感应器的保护盖。 清洁空气净化器 定期清洁净化器机身的内侧和外侧,防止灰尘 积聚。 使用柔软的干布擦去净化器机身上的灰 尘。 使用柔软的干布清洁进风口和出风口。 清洁空气质量感应器 使用稍微浸湿的棉签, 清洁空气质量感应 每 个月清洁一次空气质量感应器,确保净化 器、 进风口和出风口。 器以最佳性能运行。 如果净化器用在多尘的环 境中,请经常进行清洁。 注 • 当室内的湿度非常高时,... -
Page 51: 请清洁预过滤网
请清洁预过滤网 要卸下预过滤网, 请抓住两个凸缘, 然后朝 您自己的方向拉动过滤网。 注 • 只有预过滤网可以用水清洗。 • 每 周清洁一次预过滤网, 确保净化器以最佳 性能运行。 请关闭净化器并拔下电源插头。 在水龙头下冲洗预过滤网。 如果很脏, 请 使用软刷清除上面的灰尘。 晾干预过滤网。 将预过滤网放回净化器内部。 然后将所有 挂钩正确连接到净化器上。 将手指放在侧面板的凹处, 然后朝自己的 方向轻轻拉出前面板的下半部分 。 提 拉面板顶部的挂钩, 将其从净化器顶部拉 出 。 ZH-CN... - Page 52 要装回前面板, 请先将顶部的挂钩插到净化 器顶部 。 然后, 朝净化器机身方向推动 面板 。 注 • 您也可以使用吸尘器来除去上面的灰尘, 从而达 到清洁预过滤网的目的。 • 确保预过滤网完全干燥。 如果仍然是湿的, 细 菌可能会乘虚而入, 因此缩短预过滤网的使用 寿命。 • 确保带两个凸缘的一面朝向您, 并确保预过滤网 的所有挂钩均已正确连接到净化器上。 ZH-CN...
-
Page 53: 更换过滤网
更换过滤网 请关闭净化器并拔下电源插头。 过滤网更换指示灯 表示必须更换过滤 网。 注 • 如果您在净化器打开时卸下前面板来更换过滤 网, 控制面板上的所有指示灯将熄灭。 • 只要将前面板放回净化器, 所有指示灯就都会闪 烁两次。 然后, 净化器关闭。 按 按钮可再次 打开净化器。 将手指放在侧面板的凹处, 然后朝自己的 方向轻轻拉出前面板的下半部分。 立即更换活性炭过滤网和 HEPA 过滤网。 注 • HEPA 活性炭过滤网和 过滤网不可用水洗, 也不 可用真空吸尘器清洁。 当 指示灯亮起时,更换活性炭过滤网和 HEPA 过滤网。 此过程持续大约 周。 从净化器顶部的挂钩提起面板。 在 周的最后一天,净化器每... - Page 54 除去新过滤网上的所有包装材料。 注 HEPA 首先将新的 过滤网放回净化器。 • 确保带两个凸缘的一面朝向您, 并确保预过滤网 的所有挂钩均已正确连接到净化器上。 要装回前面板, 请先将顶部的挂钩插到净化 器顶部 。 然后, 朝净化器机身方向推动 面板 。 然后新的活性炭过滤网放回净化器。 HEPA 重置活性炭过滤网和 过滤网使用 寿命 (请参阅 “重置过滤网使用寿命计数 器” ) 。 将预过滤网放回净化器。 ZH-CN...
-
Page 55: 重置过滤网使用寿命计数器
重置过滤网使用 按住 按钮 秒钟。 寿命计数器 更换过滤网后,请务必也重置过滤网使用寿 命计数器。 这可使净化器与过滤网使用寿命 同步。 在更换过滤网之后,请重置过滤网使用寿命: 请关闭净化器并拔下电源插头。 注 • 插入并打开净化器时, 请重置净化器。 • 仅在看到 指示灯亮起时才更换过滤网。 更换空气净化器过滤网 (请参阅 “更换过滤 网” ) 。 重新将插头插入电源插座并打开净化器。 ZH-CN... -
Page 56: 故障种类和处理方法
故障种类和处理方法 本章归纳了您在使用净化器时最常遇到的问题。 如果您无法根据下面的信息解决问题,请与您所在 国家 地区的客户服务中心联系。 问题 可能的解决方法 指示灯持续亮起。 过滤网已满载。 更换过滤网并重置净化器。 出风口中没有排出空气。 净化器未连接至电源。 请将净化器插入电源并启动产品。 在激活休眠模式后, 风扇 在休眠模式下, 风扇速度将设置为很低的级别。 如果要更改风扇速度, 请 速度没有变化。 按一次或多次 按钮, 以设置所需的风扇速度。 出风口排出的气流比之前 预过滤网很脏。 清洁预过滤网 (请参阅 “清洁预过滤网” ) 。 明显减弱。 您尚未取下过滤网上的所有包装材料。 请确保已除去所有包装材料。 即使净化器已经运行了很 某一过滤网可能没有放在净化器内部。 请确保按以下顺序正确安装所有 1) HEPA 长时间, 空气质量也没有 过滤网,... -
Page 57: 保修与服务
保修与服务 如果您需要了解信息或有任何疑问,请访问 Philips www.philips.com 网站 。 Philips 您也可以与您所在国家 地区的 客户服 Philips 务中心联系(可在全球保修卡中找到 客 户服务中心的电话号码)。 如果您所在的国 Philips 家 地区没有 客户服务中心,请向当地 Philips 的 经销商求助。 订购部件或附件 如果您必须更换部件或需要购买额外的部件, Philips 请转到您的 经销商或访问 www.philips.com/support 。 如果获取部件有问题,请与您所在国家 地区的 Philips 客户服务中心联系(可在全球保修卡中 Philips 找到 客户服务中心的电话号码)。 ZH-CN... -
Page 58: 注意事项
定。 正确弃置旧产品有助于避免对环境和人类 并根据本用户手册中的说明进行操作,则本产 健康造成潜在的负面影响。 品是安全的。 环境信息 为使包装尽量简化, 已省去所有不必要的包装材 符合 标准 料。 包装材料分为三类: 纸板 (盒) 、 泡沫塑料 (缓冲物) 和聚乙烯 (袋、 保护膜) 。 Koninklijke Philips Electronics N.V. 主要面向广 本系统的所有材料均可回收和再利用 (如果由专 大消费者制造和销售各类产品, 包括通常能发 业公司拆卸) 。 请遵守当地有关包装材料、 废电 射和接收电磁信号的各种电子设备。 池和旧设备的处理的规定。 Philips 的主要经营原则之一就是要对我们的 规格如有更改,恕不另行通知。 所有商标均... - Page 59 ZH-CN...
- Page 60 Specifications are subject to change without notice © 2013 Koninklijke Philips Electronics N.V. All rights reserved. 4241 210 72551 AC4012_AC4014_UM_MS-MY_V0.1...