Table of Contents
Advertisement
Advertisement
Table of Contents

Related Manuals for Samsung NZ64H37070K


Summary of Contents for Samsung NZ64H37070K
- Page 1 NZ64H37070K NZ64H37075K ENGLISH 2012-11-20...
- Page 2 WARNING CAUTION CAUTION 2_ using this manual 2012-11-20...
- Page 3 WARNING safety instructions _3 2012-11-20...
- Page 4 WARNING 4_ safety instructions...
- Page 5 WARNING severe warNINg sIgNs for INsTallaTIoN WARNING safety instructions _5 2012-11-20...
- Page 6 6_ safety instructions 2012-11-20...
- Page 7 WARNING safety instructions _7 2012-11-20...
- Page 8 WARNING 8_ safety instructions 2012-11-20...
- Page 9 safety instructions _9 2012-11-20...
- Page 10 over without warning 10_ safety instructions 2012-11-20...
- Page 11 CauTIoN sIgNs for usINg CAUTION safety instructions _11 2012-11-20...
- Page 12 the lid (Model which has lid only). 12_ safety instructions 2012-11-20...
- Page 13 WARNING CauTIoN sIgNs for CleaNINg WARNING safety instructions _13 2012-11-20...
-
Page 14: Correct Disposal Of This Product (Waste Electrical & Electronic Equipment)
WARNING WARNING CorreCT dIsposal of ThIs produCT (wasTe eleCTrICal & eleCTroNIC equIpmeNT) 14_ disposal instructions 2012-11-20... - Page 15 INsTAllING The hOb pARTs ANd feATURes befORe yOU beGIN hOb Use CleANING ANd CARe WARRANTy ANd seRvICe TeChNICAl dATA contents _ 15 2012-11-20...
-
Page 16: Safety Instructions For The Installer
WARNING safeTy INsTruCTIoNs for The INsTaller • • • • • 16_ installing the hob 2012-11-20... - Page 17 casing of the hob. shut off power to circuit before connecting wires to WARNING circuit. WARNING WARNING installing the hob _17 2012-11-20...
- Page 18 WARNING WARNING • 1N ~ • 2N ~ : separate the 2-phase wires (l1 and l2) before connection. 220-240V ~ 220-240V ~ 380-415V ~ Green/Yellow Green/Yellow Blue Brown Blue Brown Gray Black Black Gray L1 L2 1N ~ 2N ~ 2x1N~: Separate the wires before connection.
-
Page 19: Before Installation
before installation. Min. 50 mm Min. 2 mm 560 mm ø 6 90° max. 50 min. 20 Induction Hob min. 2 mm Insulation Panel ventilation gap Oven installing the hob _19 2012-11-20... - Page 20 Install the two brackets Put into the hole 20_ installing the hob 2012-11-20...
-
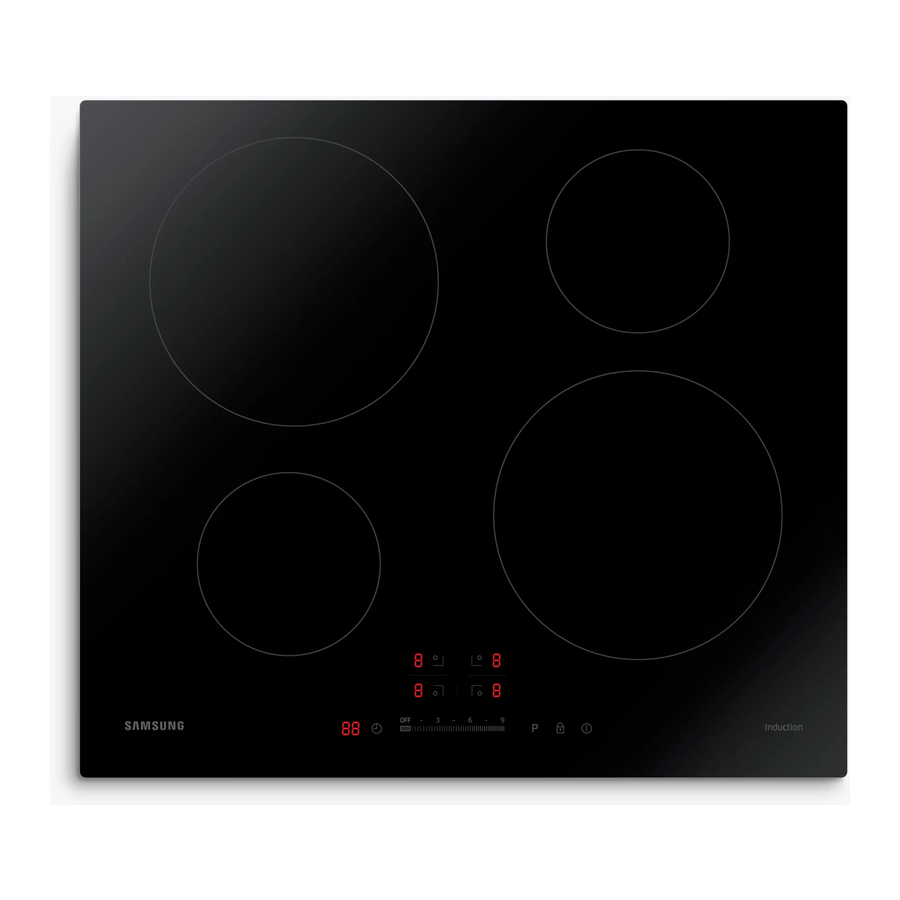
Page 21: Parts And Features
parts and features CooKINg zoNes CoNTrol paNel 2012-11-20... - Page 22 Induction hob Installation brackets Screws • Induced currents Induction coil Electronic circuits • 22_ parts and features 2012-11-20...
- Page 23 • • • • • • • • power boost : Use this function to heat up the contents of the pan faster than maximum power level ‘ ’. (The display will show ‘ ’.) • • parts and features _23 2012-11-20...
- Page 24 cookware) If cookware is unsuitable or too small or no cookware has 24_ parts and features 2012-11-20...
-
Page 25: Residual Heat Indicator
ther reasons why a cooking zone can switch itself off the appliance will need to be switched on again using the main On/Off control sensor after the liquid or the cloth has been removed . resIdual heaT INdICaTor presence of residual heat is shown with an (for “hot”) in the WARNING If the power supply is interrupted, the... -
Page 26: Initial Cleaning
INITIal CleaNINg Wipe the ceramic glass surface with a damp cloth and ceramic hob glass cleaner. Do not use caustic or abrasive cleaners. The surface could be damaged. WARNING CooKware for INduCTIoN CooKINg zoNes The induction hob can only be turned on when a cookware with a magnetic base is placed on one of the cooking zones. - Page 27 diameter of cooking minimum diameter of the bottom zones of the cookware 220 mm 140 mm 120 mm 140 mm If you can hear. • • • • • hob use _27 2012-11-20...
-
Page 28: Energy Saving Tips
• • • • • energy saving tips • Right! • • Wrong! • 28_ hob use 2012-11-20... -
Page 29: Select Cooking Zone And Heat Setting
1. Touch the On/Off sensor for approximately 1 seconds. The digital displays will show After the On/Off control sensor has been actuated to switch on your appliance, a heat setting must be selected within approximately 1 minutes. Otherwise, the appliance will switch itself off for safety reasons. -
Page 30: Switching The Appliance Off
except the slide touch key is pressed If more than one sensor for longer An acoustic signal will sound than 10 seconds, the appliance is switched off. To reset, touch the On/Off sensor. control swITChINg The applIaNCe off To completely switch off the appliance, use the On/Off control sensor. - Page 31 switching the child safety lock on / off 1. Touch the lock control sensor for approx approximately 3 seconds. 3 sec. An acoustic signal will sound as confirmation. will appear in the displays, indicating the child safety lock has been activated. 3.
-
Page 32: Countdown Timer
Touch the sensor, the '10' will show in the timer display,and the '1' flashes. Set the time by touching the slide touch control. (can set 10min, 90min) 20min,,,, Touch the "timer control" sensor again. The "0" will flashes. Set the time by touching the slide touch control. -
Page 33: Power Boost Control
Buzzer will beeps for 30 seconds when the setting timer finished power boosT CoNTrol The power boost function makes additional power available to the each cooking zones. (example : bring a large volume of water to the boil) The power boost function is activated for maximum 5 minutes for each cooking zones. -
Page 34: Suggested Settings For Cooking Specific Foods
suggesTed seTTINgs for CooKINg speCIfIC foods The figures in the table below are guidelines. The heat settings required for various cooking methods depend on a number of variables, including the quality of the cookware being used and the type and amount of food being cooked. Switch Cooking method Examples for Use... -
Page 35: Cleaning And Care
cleaning and care Cleaning agents must not come into contact with a heated WARNING ceramic glass surface: All cleaning agents must be removed with adequate amounts of clean water after cleaning because they can have a caustic effect when the surface becomes hot. -
Page 36: Problem Dirt
problem dirt 1. Remove burnt-on sugar, melted plastic, aluminium foil or other materials with a glass scraper immediately and while still hot. There is a risk of burning yourself when the glass scraper is WARNING used on a hot cooking zone: 2. - Page 37 • If sugar or a preparation containing sugar comes into contact with a hot cooking zone and melts, it should be cleaned off immediately with a kitchen scraper while it is still hot. If allowed to cool, it may damage the surface when removed. • Keep all items and materials that could melt, for example, plastics, aluminium foil and oven foils, away from the ceramic glass surface.
-
Page 38: Warranty And Service
warranty and service faqs aNd TroubleshooTINg A fault may result from a minor error that you can correct yourself with the help of the following instructions. Do not attempt any further repairs if the following instructions do not help in each specific case. - Page 39 What should I do if, after the cooking zones have been switched off, residual warmth is not indicated in the display? Check for the following possibility: • The cooking zone was only briefly used and therefore did not become hot enough. If the cooking zone is hot, please call the customer service centre.
- Page 40 servICe Before calling for assistance or service, please check the section “Troubleshooting.” If you still need help, follow the instructions below. Is it a technical fault? If so, please contact your customer service centre. Always prepare in advance for the discussion. This will ease the process of diagnosing the problem and also make it easier to decide if a customer service visit is necessary.
-
Page 41: Technical Data
NZ64H37070K TeChNICal daTa NZ64H37075 K 590 mm Width appliance dimensions Depth 520 mm Height 57 mm 560 mm Width worktop cut - out dimensions Depth 490 mm 220 - 240 V/400V ~ Connection voltage 50 / 60 Hz 7.2 kW... - Page 42 note 2012-11-20...
- Page 43 note 2012-11-20...
- Page 44 LUXEMBURG 261 03 710 0900-SAMSUNG (0900-7267864) (€ 0,10/Min) NETHERLANDS NORWAY 815-56 480 80820-SAMSUNG(726-7864) PORTUGAL SPAIN 902 - 1 - SAMSUNG (902 172 678) SWEDEN 0771 726 7864 (SAMSUNG) 0330 SAMSUNG (7267864) EIRE 0818 717100 www.samsung.com/ch (German) SWITZERLAND 0848 - SAMSUNG(7267864, CHF 0.08/min) www.samsung.com/ch_fr/(French)