Table of Contents
Advertisement
Advertisement
Table of Contents

Related Manuals for Yamaha PX10


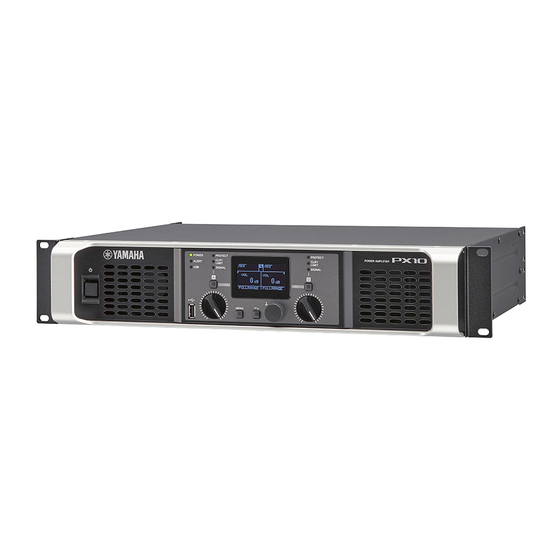
Summary of Contents for Yamaha PX10
- Page 1 Reference Manual...
-
Page 2: Table Of Contents
LPF (low pass filter) .......... 27 Basic mode and Advanced mode ......12 POLARITY (speaker polarity)......28 Screen structure............13 LEVEL (output level) ......... 28 Alert messages ............14 LIMITER ............28 CHANNEL LINK ..........29 Panel lock..............14 CHANNEL COPY..........29 HOME screen............15 PX10/PX8/PX5/PX3 Reference Manual... -
Page 3: Introduction
Introduction Thank you for your purchase of the Yamaha PX10, PX8, PX5 or PX3 power amplifier. Please read through this manual carefully before using for the first time, in order to take full advantage of your PX power amplifier’s superlative features and enjoy trouble-free operation for years to come. -
Page 4: Usage Examples
This conventional application inputs stereo L/R signals to each channel (A/B) for stereo reproduction with two speakers. Use with a full-range speaker and subwoofer The input signal is divided into separate frequency ranges for driving a full-range speaker and subwoofer. PX10/PX8/PX5/PX3 Reference Manual... -
Page 5: Use With A Full-Range Speaker Driven In Bi-Amp Mode
The input signal is divided into separate frequency ranges for driving a two-way full-range speaker in bi-amp mode. Channel A + Channel B Use for driving a subwoofer with a stereo signal Stereo input signals drive a subwoofer in Power Boost mode (PX5 and PX3 only) (PX5) PX10/PX8/PX5/PX3 Reference Manual... -
Page 6: Px Amplifier Available System Configurations
A full-range speaker and a subwoofer A full-range speaker driven in bi-amp mode Full-range speaker Power Boost mode Subwoofer NOTE In Power Boost mode, the two-channel amplifiers are used as one-channel, high-power amplifier (PX5 and PX3 only). PX10/PX8/PX5/PX3 Reference Manual... -
Page 7: Signal Processing In Px Amplifier
Maximum power is constant if the volume is lowered. For example, if the amplifier gain on the PX10 is set to 32 dB, the input sensitivity is +9.3 dBu and the maximum output power is 1,000 W (if speaker impedance is 8Ω). When the volume is not lowered (0 dB), output power of 1,000 W results with +9.3 dBu input. -
Page 8: Controls And Functions
20 minutes. To turn on the display again, simply press any key on the front panel or rotate the main knob. circuit or clips at the amplifier output. PX10/PX8/PX5/PX3 Reference Manual... -
Page 9: Rear Panel
The signal input from an XLR jack can be output from the phone jack and input to another amplifier. Only one of the jacks can be used as an input jack at one time; the sig- nals from the jacks cannot be mixed. PX10/PX8/PX5/PX3 Reference Manual... -
Page 10: Setup
WARNING To ensure that high-volume noise is not output from the speakers, power-on the equipment starting with the audio sources, then the mixer and processors, and finally the amplifiers. Reverse this order when turning the system off. PX10/PX8/PX5/PX3 Reference Manual... -
Page 11: Rack Mounting
Refer to the rack and/or fan unit manual for details. 1– Channel A Channel B Neutrik NL4 PX amplifier Neutrik NL4 PX amplifier 1– A– 1– B– (not connected) 2– B– 2– (not connected) PX10/PX8/PX5/PX3 Reference Manual... -
Page 12: Panel Operation
Example of screens HOME screen (Basic mode) MENU screen (Advanced mode) Rotate the main knob to select the tab of the desired mode, and then press the main knob. • BASIC: Basic mode • ADVANCED: Advanced mode PX10/PX8/PX5/PX3 Reference Manual... -
Page 13: Screen Structure
MENU screen HOME screen HOME screen MENU top screen MENU top screen CONFIG WIZARD screen CONFIG WIZARD screen CONFIG VIEW screen CONFIG VIEW screen TUNING screen TUNING screen AMP PRESET screen AMP PRESET screen UTILITY screen UTILITY screen PX10/PX8/PX5/PX3 Reference Manual... -
Page 14: Alert Messages
If the volume knob is operated when the panel is locked with “ALL,” the following screen appears when the lock is released. Rotate the volume knob to match the actual value. The value of the volume can- not be changed unless the values match. Actual value Value of the volume PX10/PX8/PX5/PX3 Reference Manual... -
Page 15: Home Screen
Rotate the main knob to select the group of D-CONTOUR, delay, polarity and filter indications, and NOTE then press the main knob to call up the TUNING screen. Input and output can be switched from [HOME SCREEN] (page 33) in the UTILITY screen. PX10/PX8/PX5/PX3 Reference Manual... -
Page 16: Config View Screen
!1 LPF cutoff frequency for channel B: pages 21, 27 !2 Polarity: page 28 To return to the HOME screen, press the [ ] (back) key. To call up the CONFIG WIZARD screen, press the main knob when the CONFIG VIEW screen appears. PX10/PX8/PX5/PX3 Reference Manual... -
Page 17: Menu Screen
Press the [MENU] key in the HOME screen. NOTE The layer of the displayed screen is shown at the top of the screen. To return to the HOME screen: Press and hold the [ ] (back) key. PX10/PX8/PX5/PX3 Reference Manual... -
Page 18: Operation Tree
28 LIMITER Sets the limiter. page 28 CHANNEL LINK Links the parameter setting of channels A and B. page 29 CHANNEL COPY Copies settings between channels. page 29 * Only for some functions. PX10/PX8/PX5/PX3 Reference Manual... - Page 19 Displays the condition in the device. page 34 INITIALIZE Displays how to initialize the data in the PX amplifier on the display. page 34 Displays or writes the operating log. page 35 * Only for some functions. PX10/PX8/PX5/PX3 Reference Manual...
-
Page 20: Config Wizard Screen (Basic Mode)
When connecting subwoofers to the [SPEAKERS] terminals of both channels A and B. • FULL + SUB: When connecting a full-range speaker to the [SPEAKER] terminal of channel B and a subwoofer to the [SPEAKER] terminal of channel A. PX10/PX8/PX5/PX3 Reference Manual... -
Page 21: Hpf (High Pass Filter)
] (back) key to return to the screen to be corrected. To cancel the setting, press the [MENU] key or press and hold the [ ] (back) key until a In Basic mode, the filter type is fixed to 24 dB/Oct., Butterworth type. confirmation screen appears. PX10/PX8/PX5/PX3 Reference Manual... -
Page 22: Config Wizard Screen (Advanced Mode)
When connecting a subwoofer driven in Power Boost mode to the [SPEAKERS] terminal • NEW CONFIG: of channel A (PX5 and PX3 only). Making a new setting NOTE Refer to “PX amplifier available system configurations” (page 6) for details on combinations listed “ROUTING” (page 23). PX10/PX8/PX5/PX3 Reference Manual... -
Page 23: Routing
“PX amplifier available system configurations” (page • Regarding input processors and speaker processors, refer to “Signal processing in PX amplifier” (page 7). For setting instructions, refer to “TUNING screen” (page 25). Input Speaker [INPUT] B [SPEAKERS] B processor B processor B PX10/PX8/PX5/PX3 Reference Manual... -
Page 24: Sens./Gain (Input Sensitivity/Amplifier Gain)
When a speaker is selected, filters, speaker impedance, and threshold of the limiter are set auto- confirmation screen appears. matically. If the speaker for connection is not in the menu, select “GENERIC.” SP MODEL (speaker model) Specifies a speaker for connection from the speaker series selected in SP SERIES screen. PX10/PX8/PX5/PX3 Reference Manual... -
Page 25: Tuning Screen
This enables you to hear mid and high frequency ranges clearly when using as a floor monitor. w DEPTH Sets the degree of the effect. The larger the value, the deeper the effect. PX10/PX8/PX5/PX3 Reference Manual... -
Page 26: Delay
TIME [ms] Sets the delay time in milliseconds. Low pass filter Crossover frequency High pass filter e DISTANCE Sets the delay time by distance (in meters or in feet). NOTE Three delay time indications changes in conjunction. Frequency PX10/PX8/PX5/PX3 Reference Manual... -
Page 27: Hpf (High Pass Filter)
(Advanced mode only) (Advanced mode only) Sets the gain at the cutoff frequency if “AdjustGc” (Adjustable Gc) is selected in “HPF Sets the gain at the cutoff frequency if “AdjustGc” (Adjustable Gc) is selected in “LPF TYPE.” TYPE.” PX10/PX8/PX5/PX3 Reference Manual... -
Page 28: Polarity (Speaker Polarity)
Sets the output level to balance the output levels of channels. When a speaker is selected with Configuration Wizard, “THRESHOLD” is automatically set. Channel Input processor Speaker processor Speaker 6 Band D-Contour Delay Polarity Level Limiter Delay q LEVEL Sets the output levels in 0.1 dB increments. PX10/PX8/PX5/PX3 Reference Manual... -
Page 29: Channel Link
(Advanced mode only; when “SP TYPE” is set to “FULL FULL” or “SUB SUB”) Copies settings between channels. q Ach –> Bch Copies the settings of channel A to channel B. w Bch –> Ach Copies the settings of channel B to channel A. PX10/PX8/PX5/PX3 Reference Manual... -
Page 30: Amp Preset Screen
Carry this out with the volume lowered for safety. A protected amplifier preset or the currently selected amplifier preset cannot be cleared. NOTE The PX10/PX8 cannot recall an amplifier preset stored on the PX5/PX3 in the Power Boost mode. PX10/PX8/PX5/PX3 Reference Manual... -
Page 31: Title
The title of a protected amplifier preset cannot be edited. PROTECT Protects a stored amplifier preset against inadvertent changes. If the parameter is on, the amplifier preset cannot be with the TITLE, CLEAR, and overwriting STORE operations. PX10/PX8/PX5/PX3 Reference Manual... -
Page 32: Utility Screen
“Initializing the PX amplifier” (page 35) for instructions on initializing. • In the initialized state, the PIN code is set to “0000.” When the PIN code is set to “0000,” the PIN code input is not needed to release the panel lock. PX10/PX8/PX5/PX3 Reference Manual... -
Page 33: Home Screen (Home Screen)
Loads a speaker preset from a USB flash drive. NOTE Speaker presets can be downloaded from the Yamaha Pro Audio global website. NOTE If the PIN code is changed to “0000,” the PIN code is not set. In this state, PIN code input is not needed to set or release the panel lock. -
Page 34: Device Backup
Restores setting data stored in a USB flash drive. NOTE INITIALIZE The PX10/PX8 cannot recall settings stored on the PX5/PX3 in the Power Boost mode. Indicates how to initialize the internal data of the PX amplifier. NOTE Refer to “Initializing the PX amplifier”... -
Page 35: Log
Current parameters are parameters set in the CONFIG WIZARD, AMP PRESET, and TUNING w SAVE TO USB screens. For details, refer to “Function list” (page 37). Save the latest operation log to a USB flash drive. The function is for user support refer- ence. PX10/PX8/PX5/PX3 Reference Manual... - Page 36 The operation log is not deleted. NOTE • User data are parameters set in the CONFIG WIZARD, AMP PRESET, TUNING, and UTILITY screens. For parameters, refer to “Function list” (page 37). • PIN code is also initialized. PX10/PX8/PX5/PX3 Reference Manual...
-
Page 37: Reference
D-CONTOUR DEPTH 1 – 10 ON/OFF OFF, ON Input processor DELAY TIME (msec) 0 msec (Not configurable) 0 – 74.0 msec DISTANCE (meters) 0 – 25.4 m DISTANCE (feet) 0 ft 0 – 83.4 ft PX10/PX8/PX5/PX3 Reference Manual... - Page 38 PANEL SETUP BLACKOUT (Not configurable) OFF, ON LOCK OFF, ON Utility PANEL LOCK — — PIN CODE 0000 4-digit (“0000” if not set) dB VALUE (Not configurable) VOL, GAIN HOME SCREEN LEVEL METER OUTPUT (Not configurable) INPUT, OUTPUT PX10/PX8/PX5/PX3 Reference Manual...
- Page 39 *1: THRU, 6dB/OCT, 12dB ADJGc, 12dB BUT, 12dB BESSL, 12dB L-R, 18dB ADJGc, 18dB BUT, 18dB BESSL, 24dB ADJGc, 24dB BUT, 24dB BESSL, 24dB L-R, 36dB ADJGc, 36dB BUT, 36dB BESSL, 48dB ADJGc, 48dB BUT, 48dB BESSL, 48dB L-R PX10/PX8/PX5/PX3 Reference Manual...
-
Page 40: Message List
The speaker impedance is excessively low. (*: channel name) low, and inspect the connection of the speaker cables. USB:COMPATIBLE DEVICES NOT Install an appropriate USB flash drive. Refer to Yamaha Pro Audio global website A USB flash drive has not been installed. FOUND (http://www.yamahaproaudio.com/) for tested USB flash drive. - Page 41 Symptom Possible solution Confirm that the USB flash drive you are using works properly with a computer. Use a tested USB flash drive. Refer to Yamaha Pro Audio global website (http:// USB:I/O ERROR Cannot read/write the USB flash drive properly.
-
Page 42: Troubleshooting
The device is broken. nal, or lower the volume completely, turn on the device. If the symptoms do not improve, the device is broken. Contact your Yamaha dealer. Adjust the input sensitivity to match the input level with the CONFIG WIZARD Sound from speakers is distorted. - Page 43 The USB flash drive contains a number of files. The more files that are Delete files the PX amplifier does not need. takes a long time. contained, the longer time is required. * If any specific problem should persist, contact your Yamaha dealer. PX10/PX8/PX5/PX3 Reference Manual...
-
Page 44: General Specifications
Power supply shutdown (NOT restored automatically) Output limiter (Restored automatically) Output mute (Restored automatically) Thermal Over current Output mute (Restored automatically) Amplifier Protection Over voltage Output limiter (Restored automatically) Integrated Power Limit Output limiter (Restored automatically) PX10/PX8/PX5/PX3 Reference Manual... - Page 45 *1 Device operation has been confirmed within ±10% of the rated power supply voltage. * The contents of this manual apply to the latest specifications as of the publishing date. To obtain the latest manual, access the Yamaha website then download the manual file.
-
Page 46: Block Diagram
Delay * PEQ * MONITOR * Can be set only from speaker Limit, preset parameters. B:NEGATIVE Mute FAN x 2 Protection Logic Output Voltage Amplifier Clip AC IN Output Current Shutdown Power Supply Integral Output Temperature Power PX10/PX8/PX5/PX3 Reference Manual... -
Page 47: Dimensions
Reference — Dimensions Dimensions unit: mm PX10/PX8/PX5/PX3 Reference Manual... -
Page 48: Current Draw And Thermal Dissipation
4Ω/ch 8Ω/ch 1/3 out 4Ω/ch Line current (A) Watt (W) Thermal dissipation 220 V-240 V/50 Hz Power consumption Power consumption 230 V Watts dissipated Btu/h kcal/h (In) (Out) Idle 8Ω/ch 1/8 out 4Ω/ch 8Ω/ch 1/3 out 4Ω/ch PX10/PX8/PX5/PX3 Reference Manual... - Page 49 4Ω/ch 8Ω/ch 1/3 out 4Ω/ch Line current (A) Watt (W) Thermal dissipation 220 V-240 V/50 Hz Power consumption Power consumption 230 V Watts dissipated Btu/h kcal/h (In) (Out) Idle 8Ω/ch 1/8 out 4Ω/ch 8Ω/ch 1/3 out 4Ω/ch PX10/PX8/PX5/PX3 Reference Manual...
- Page 50 4Ω/ch 8Ω/ch 1/3 out 4Ω/ch Line current (A) Watt (W) Thermal dissipation 220 V-240 V/50 Hz Power consumption Power consumption 230 V Watts dissipated Btu/h kcal/h (In) (Out) Idle 8Ω/ch 1/8 out 4Ω/ch 8Ω/ch 1/3 out 4Ω/ch PX10/PX8/PX5/PX3 Reference Manual...
- Page 51 4Ω/ch 8Ω/ch 1/3 out 4Ω/ch Line current (A) Watt (W) Thermal dissipation 220 V-240 V/50 Hz Power consumption Power consumption 230 V Watts dissipated Btu/h kcal/h (In) (Out) Idle 8Ω/ch 1/8 out 4Ω/ch 8Ω/ch 1/3 out 4Ω/ch PX10/PX8/PX5/PX3 Reference Manual...
-
Page 52: Index
CONFIG WIZARD screen (Advanced mode) ....22 Message list ..............40 CONFIG WIZARD screen (Basic mode) .......20 Mute indication .............. 15 CONFIRMATION (Advanced mode) ......24 High pass filter .............. 27 CONFIRMATION (Basic mode) ........21 HOME SCREEN ............33 Connecting to [SPEAKERS] terminal ......11 PX10/PX8/PX5/PX3 Reference Manual... - Page 53 Sum mode ..............23 screen structure ............13 Thermal dissipation ............48 SENS./GAIN ..............24 Threshold indication ............15 setup ................10 TITLE ................31 [SIGNAL] indicator ............8 Troubleshooting ............42 SINGLE .................23 TUNING screen ............25 Single mode ..............23 PX10/PX8/PX5/PX3 Reference Manual...
- Page 54 Manual Development Department © 2016 Yamaha Corporation Published 04/2016 PO-A0...