Gabarron ECO158 Installation Manual And User's Manual
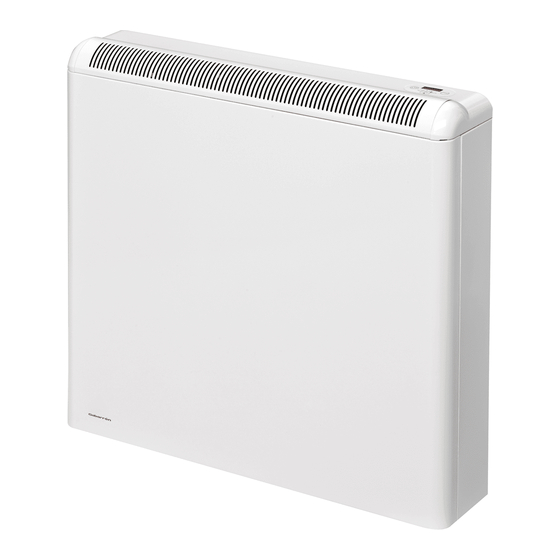
Wall fixed electric storage heater
Hide thumbs
Also See for ECO158:
- Installation instructions and user manual (16 pages) ,
- Installation instructions and user manual (25 pages) ,
- Installation manual (32 pages)
Advertisement
Available languages
Available languages
Quick Links
WAL
RAD
INSTA
MANUEL D
Please rea
ad these instruc
Veuillez lire ce
es instructions A
ECOMB
LL FIXED E
LECTRIC S
DIATEUR À
À ACCUMU
ECO158
ECO208
ECO308
ECO408
8-
-HOURS CH
CHA
ARGE DE 8 H
ALLATION
N MANUAL
D'INSTALL
LATION ET
ctions CAREFU
ULLY before inst
ATTENTIVEMEN
NT avant d'insta
BI
STORAGE H
HEATER
ULATION M
MURAL
8
8
8
8
HARGE
HEURES
AND USE
R GUIDE
T GUIDE D'
UTILISATIO
talling or using t
this appliance fo
aller ou d'utiliser
r cet appareil po
ON
or the first time.
our la première fois.
Advertisement

Related Manuals for Gabarron ECO158


Summary of Contents for Gabarron ECO158
- Page 1 ECOMB LL FIXED E LECTRIC S STORAGE H HEATER DIATEUR À À ACCUMU ULATION M MURAL ECO158 ECO208 ECO308 ECO408 -HOURS CH HARGE ARGE DE 8 H HEURES INSTA ALLATION N MANUAL AND USE R GUIDE MANUEL D D’INSTALL LATION ET T GUIDE D’...
-
Page 2: Important Instructions
1. –IMPORTANT INSTRUCTIONS When using electrical appliances, basic precautions should always be followed to reduce the risk of fire, electric shock, and injury to persons, including the following: • WARNING: Please read all instructions before installing or using this heater for the first time. •... -
Page 3: Installation Instructions
2. - INSTALLATION INSTRUCTIONS The symbols used in the text are explained below: WARNING This indication shows the possibility of causing death from electric shock. WARNING This indication shows the possibility of causing death or serious injury. CAUTION This indication shows the possibility of causing injury or damage to properties only. Symbol for useful information. - Page 4 Turn the carton upside down to allow the heater to stand on its feet and remove the carton. Check that it is the correct model and that it is in good conditions. Check that all parts have been delivered and are intact. 1 Ecombi heater casing.
- Page 5 7. - Disconnect the aluminum heating element by removing the stakon terminal on each end of the element. WARNING Steel edges can cut. Next unscrew the inner panel and remove it. CAUTION In the interior part of this inner panel there is a very delicate thermal insulation MICROTHERM panel.
- Page 6 8. Do not disconnect the electrical heating elements. Remove the packing cardboard. Lift and tilt the elements outwards being careful not to damage the insulation on the bottom of the heater. 9. - Place the storage bricks carefully, with the flat side facing the back of the heater. Arrange two row levels of bricks. 10.
- Page 7 11. Replace the inner front panel. If the bricks have been fitted correctly you will have no difficulty in replacing the panel. Make sure the bottom edge of the inner panel is inside the front lip of the heater. Please see below: RIGHT WRONG POSITION...
- Page 8 . –OPE ERAT ING IN NSTR RUCTI ONS. AUTION: DO O NOT USE T THIS HEATER TO DRY CL LOTHES. Do n not cover this s heater at any y time. ONNECTIO ON / DISCON NNECTION wer switch.Al ll models are equipped with h a switch on ck side panel.
- Page 9 PERATIONM MODES: pressing the key, va arious operati on modes ma ay be selected : FROST PRO OTECTION, A AUTOMATIC C STORAGE EATER, EMITT TER, ECOMB I MANUAL o r ECOMBI AU UTOMATIC. - FROST PR ROTECTION N MODE: o select this m ode press the key s several times u...
- Page 10 3 – –EMITTERM MODE: is operation m mode is used w when it is nec cessary to hea at the room te emporarily an nd there is no need for stor rage heating. ess the key severa al times until t the message is displayed “Е”...
- Page 11 o activate this mode press t key several tim mes until the m message is dis played. А s stands for AU UTOMATIC m mode. ,5 is the set u up temperatur re in ºC. hen the Emitt ter is on, a sm mall red dot at the very righ t of the scree...
- Page 12 ECO INTERVAL PERIOD WITH REDUCED TEMPERATURE It is possible to set up a reduced temperature to a daily time period. During this ECO TEMPERATURE time period the set up temperature will be reduced by 3ºC. Using the PC and PD settings under GENERAL SETTINGS it is possible to program the ECO TEMPERATURE time period. See the “General Settings”...
- Page 13 ENERAL SE TTINGS: COMBI genera al operation se ettings can be e modified. pressing the key at the same tim e as we turn on the heater r with the pow wer switch, lo ocated at the r right side pane el, we n access to th he general sett...
-
Page 14: Maintenance Instructions
Mains switch R1, R2, R3, R4 Storage heater heating elements Emitter heating elements Storage heater limit thermostat Emitter limit thermostat Manual Safety Limit ECO408 Keyboard ECO308 Visual Alarm ECO208 ECO158 (985W) 655W 655W 655W 655W TEMPERATURE GROUND SENSOR 240V~ 60Hz... - Page 15 TECHNICAL FEATURES Modelo ECO158 ECO208 ECO308 ECO408 LENGTH 55cm (21.5”) 66cm (26”) 89cm (35”) 111cm (43.5”) HEIGHT 73cm (28.5”) 73cm (28.5”) 73cm (28.5”) 73cm (28.5”) DEPTH 18cm (7”) 18cm (7”) 18cm (7”) 18cm (7”) WEIGHT 57kg (126 lbs) 76kg (168 lbs)
-
Page 16: Instructions Importantes
1. – INSTRUCTIONS IMPORTANTES Des précautions de base doivent toujours être prises lors de l’utilisation d’appareils électriques afin de réduire le risque d’incendie, de choc électrique et de blessures corporelles, y compris ce qui suit : • AVERTISSEMENT : Veuillez lire l’ensemble des instructions avant d’installer ou d'utiliser ce radiateur pour la première fois. -
Page 17: Instructions D'installation
2. - INSTRUCTIONS D'INSTALLATION Les symboles utilisés dans le texte sont expliqués ci-dessous : AVERTISSEMENT Ce symbole indique la possibilité de danger de mort par électrocution. AVERTISSEMENT Ce symbole indique la possibilité de danger de mort ou de blessure grave. AVERTISSEMENT Ce symbole indique la possibilité... - Page 18 Retournez le carton tête en bas pour permettre au radiateur d'être debout sur ses pieds et retirer le carton. Vérifiez qu'il s'agit du bon modèle et qu'il est en bon état. Vérifiez que toutes les pièces sont fournies et intactes. 1 boîtier de radiateur Ecombi.
- Page 19 7. - Débranchez l'élément de chauffage en aluminium en retirant la borne Sta-Kon de chaque extrémité de l'élément. AVERTISSEMENT Les bords en acier peuvent couper. Dévissez ensuite le panneau intérieur et retirez-le. ATTENTION panneau d'isolation thermique MICROTHERM très sensible se trouve dans la partie intérieure de ce panneau intérieur.
- Page 20 8. Ne débranchez pas les éléments de chauffage électriques. Retirez le carton d'emballage. Soulevez et basculez les éléments vers l'extérieur en prenant garde à ne pas endommager l'isolation en bas du radiateur. 9. - Placez soigneusement les briques d'accumulation avec le côté plat orienté face à l'arrière du radiateur. Disposez deux rangées de briques.
- Page 21 11. Remettez en place le panneau avant intérieur. Si les briques sont correctement installées, vous n'aurez aucune difficulté à remettre en place le panneau. Assurez-vous que le bord inférieur du panneau intérieur se trouve à l'intérieur du rebord avant du radiateur.
- Page 22 . - INS STRUC CTION NS D'U UTILI SATIO TTENTION : N N'UTILISEZ P PAS CE RADIA ATEUR POU R SÉCHER D ES VÊTEMEN NTS. Ne couvr rez jamais ce radiateur. RANCHEME ENT/DÉBRA ANCHEMEN errupteur d'a limentation. T Tous les modè èles sont équi pés d'un inte...
- Page 23 S'il est nécessair re de régler di ifférentes vale eurs pour diffé érents jours d de la semaine, veuillez consu ulter « Réglag ges généraux » » dans manuel et mo odifier le régla age P7 en pos ition « ACTIV VÉ...
- Page 24 - MODE ÉM ETTEUR : e mode de fon nctionnement est utilisé lor rsqu'il faut cha auffer tempora airement la pi èce et qu'il n' est pas néces saire d'accum muler la chaleur. ppuyez plusieu urs fois sur la t touche jusqu'à...
- Page 25 ur activer ce mode, appuye ez plusieurs fo ois sur la touc squ'à ce que l le message oit affiché. « А А » correspon nd au mode A AUTOMATIQ QUE. « 2 21.5 » corresp pond à la temp pérature réglé...
- Page 26 PÉRIODE D'INTERVALLE ÉCO AVEC TEMPÉRATURE RÉDUITE Il est possible de régler une température réduite pour une certaine durée quotidienne. La température de consigne sera réduite de 3 °C pendant cette période TEMPÉRATURE ÉCO. Il est possible de programme la période TEMPÉRATURE ÉCO à l'aide des réglages PC et PD dans RÉGLAGES GÉNÉRAUX. Consultez la section «...
- Page 27 RÉ ÉGLAGES G GÉNÉRAUX s réglages de f fonctionneme ent général d'E ECOMBI peuv vent être mod difiés. menu des rég glages générau ux s'ouvre en appuyant sur la touche en mêm me temps que la mise en ma arche du radia ateur ec l'interrupte eur d'alimentat...
-
Page 28: Instructions De Maintenance
Éléments de chauffage d'émetteur Thermostat limiteur de radiateur à accumulation Thermostat limiteur d'émetteur Limite de sécurité manuelle ECO408 Clavier ECO308 Alarme visuelle ECO208 ECO158 (985 W) 655 W 655 W 655 W 655 W TEMPÉRATURE TERRE CAPTEUR 240 V ~ 60 Hz... - Page 29 CARACTÉRISTIQUES TECHNIQUES Modèle ECO158 ECO208 ECO308 ECO408 LONGUEUR 55 cm (21,5”) 66 cm (26”) 89 cm (35”) 111 cm (43,5”) HAUTEUR 73 cm (28,5”) 73 cm (28,5”) 73 cm (28,5”) 73 cm (28,5”) PROFONDEUR 18 cm (7”) 18 cm (7”) 18 cm (7”)
- Page 30 NOTES / COMMENTARIES...
- Page 31 ARNING: In or rder to avoid ov verheating do not cover the h heater. The symbol o on the product t or in its packa aging indicates t that this produ ct may not be treated as hou sehold waste. I nstead it shall be ha anded over to...
- Page 32 Supplier / Fournisseur Coldbrook Electric Suppl ly Company 73 Coldbroo ok Village Par rk Drive Coldbrook , Nova Scotia Canada B4R R 1B9 Phone: 1-90 02-679-1065 Fax: 1-902-6 679-1940 info@ecom bi-northamer rica.com www.ecomb bi-northameri ica.com Manufactu ured by / Ma nufacturé...