
Related Manuals for NEC AT-35


Summary of Contents for NEC AT-35
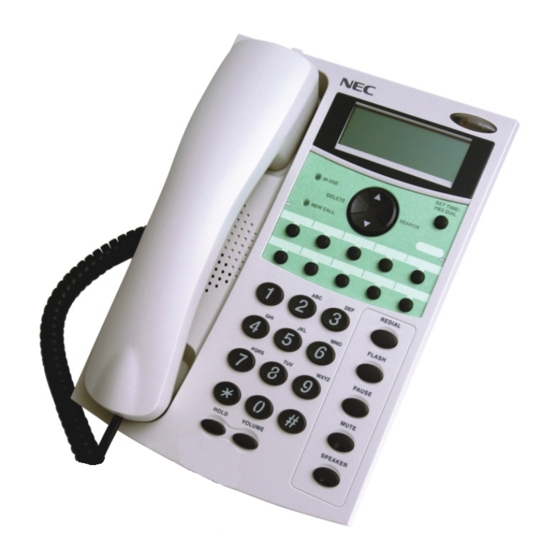
- Page 1 Caller ID Handsfree Business Telephone AT-35 UIDE DISCLAIMER The material contained herein is subject to change without prior notice at the sole discretion of NEC Business Solutions Ltd. NEC Business Solutions Ltd.
-
Page 2: Table Of Contents
TABLE OF CONTENTS IMPORTANT SAFETY INSTRUCTIONS ... 2 LOCATION OF CONTROLS... 3 INSTALLATION ... 5 Package Contents Installing the Batteries Connecting the Telephone Connecting an Additional Device Wall Mounting INITIAL SETUP... 8 Selecting the Dialling Mode Setting the LCD Contrast... -
Page 3: Important Safety Instructions
8. Avoid using a telephone during an electrical storm. There may be a remote risk of electric shock from lightning. 9. Do not use the telephone to report a gas leak in the vicinity of the leak. 10. Please keep this unit away from equipment that uses radio waves or microwaves, (e.g. -
Page 4: Location Of Controls
LOCATION OF CONTROLS... - Page 5 13. VOLUME Key Adjust the volume of the built-in speaker. 14. IN USE LED Used to indicate the telephone is in use. 15. NEW CALL LED Used to indicate the CLI number displayed on the LCD is a new call.
-
Page 6: Installation
INSTALLATION Package Contents Handset Handset Curly Cord Telephone Line Cord Installing the Batteries Install three high quality AA size Alkaline (LR6) or Manganese (R6,UM-3) batteries. We recommend the use of Alkaline batteries. Battery life: - approx. ten (10) months using Alkaline batteries. -
Page 7: Connecting The Telephone
HANDSET socket on the rear of the telephone. 2. Fit one end of the line cord to the LINE socket on the rear of telephone and the other end to your telephone network outlet. -
Page 8: Connecting An Additional Device
Fig.1. 2. Install the screws into the wall. 3. Mount the telephone on the wall so that the screw heads insert into the slots on the underside of the telephone set as shown in Fig.2. -
Page 9: Initial Setup
The selected ringing tone will play for approximately 2 seconds. Setting the Clock This telephone is equipped with a 24 hour clock. The clock is shown on the display while the phone is idle. To set the clock, follow the steps below. -
Page 10: Setting The Flash Time
INITIAL SETUP Setting the Flash Time The correct hookflash timing depends on the requirements of the PBX to which the telephone is connected. 1. Ensure the phone is idle. 2. Dial 3. Dial 00 to 06 to select from the following list of hookflash timings. -
Page 11: Basic Operation
BASIC OPERATION Making a Call using the Handset 1. Pick up the handset and wait for dial tone. 2. Dial the number you require. 3. Replace the handset when you finish the call. Or, to preview the dialled number: 1. Dial the number you require (while on-hook). 2. -
Page 12: Receiving A Call Using The Handset
BASIC OPERATION Receiving a Call using the Handset 1. Pick up the handset when the phone rings. 2. Converse with your caller. 3. Replace the handset when you finish the call. Adjust the volume if needed using the Handset Volume Control Switch. Receiving a Call using Speakerphone 1. -
Page 13: Features
You may press the PAUSE key multiple times for a longer pause. Last Number Redial The last telephone number dialled (up to 32 digits) can be redialled automatically by pressing the REDIAL key. 1. Pick up the handset (or press the SPEAKER key). -
Page 14: Memory Redial
Memory Redial The last 30 telephone numbers dialled (up to 21 digits each) are stored in the Outgoing Call Memory. To dial from the Outgoing Call Memory: 1. Press the SEARCH key until the OUT icon is shown on the display. -
Page 15: Temporarily Switching Pulse To Tone Dialling
3. When you hang up, the phone automatically returns to Pulse dialling. Call Hold A call in progress may be placed on hold at the telephone by pressing the HOLD key. It may also be possible to place the call on hold at the PBX system by pressing the FLASH key. -
Page 16: One-Touch Dialling
This telephone set is equipped with 10 one-touch dial memory keys for programming your most frequently dialled telephone numbers. You can store up to 21 digits in each one-touch key. When using this telephone as a PBX extension, you may need to include a Trunk Access Code followed by a pause to gain an access to an outside line. -
Page 17: Caller Id (Cli)
Caller ID (CLI) This telephone set will display Caller ID (CLI) information received with incoming calls. The last 90 Caller ID numbers received are automatically stored in CLI memory (up to 21 digits each). The numbers stored in CLI memory may be reviewed, deleted, or dialled back if desired. -
Page 18: Troubleshooting
No display on LCD while phone is idle Care and Maintenance To keep your telephone set working well and looking good, follow these few simple guidelines. • Avoid putting the telephone near heating appliances and devices that generate electrical noise. -
Page 19: Specifications
Data port (parallel connection) Battery for memory backup Low battery indication Automatic insertion of trunk access code Adjustable LCD contrast Wall mountable Telephone line interface FSK (type I) or DTMF CLI number with date and time stamp 90 (21 digits) 30 (21 digits) -
Page 20: Quick Reference
Press VOLUME Idle Press VOLUME Off Hook Handsfree Handset Volume Control Switch Press MUTE Off Hook Handsfree Press MUTE Off Hook Handset Press HOLD Off Hook Press SPEAKER On Hold NEC Business Solutions Ltd. Option Code Telephone State NEC-9182 Version 1.0...